|
|
PBP Commentary |
Coming up we have a bantamweight MMA rules bout between Zedicus Jones (ranked 0 p4p, 0 weight class) and Totoy Mola (ranked 0 p4p, 0 weight class). Jones comes to the cage accompanied by Heroes. Mola has chosen Manila by Menudo as his entrance music. Man, I cannot wait for this one!
 |
|
 |
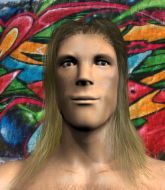
| 168 cm
18
135 lbs
0 - 1 - 0 |
|
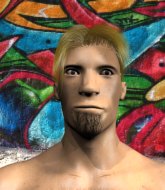
165 cm
18
140 lbs
1 - 2 - 0 |
BJJ Blue Belt
Counter striker
Good chin |
|
BJJ White Belt
Excellent boxer
Very confident |
|
| |
|
Ladies and gentlemen. This fight is 3 rounds, in the bantamweight division.
Introducing the fighter to my left, fighting out of the red corner.
With a record of
0 - 1 - 0, fighting out of Sydney, Zedicus Jones!
And introducing the fighter to my right, fighting out of the blue corner.
With a record of
1 - 2 - 0, fighting out of Sydney, Totoy Mola!
The judges for this bout are Skip Squint, Steve Erwin and Summer Carpenter.

The bell rings for round one and we are underway!
Jones shoots for a takedown but Mola saw that one coming a mile off and avoided it easily.
Jones will have to do better than that with his takedown attempts.
Mola's corner calls for a 1-2. Mola obliges with the 1 part as he scores the single shot and moves back out of range.
Jones fails with a takedown attempt.
That's three failed takedown attempts in the round for Zedicus Jones. That's going to take a lot out of him.
Mola's corner calls for a 1-2. Mola obliges with the 1 part as he scores the single shot and moves back out of range.
Jones takes a punch to the jaw and another one to the bread basket.
Jones looks for a takedown but Mola sprawls well.
Mola throws a nice looking combination but Jones bobs and weaves to avoid any damage.
Jones fails with the takedown.
Jones fails to land the takedown.
Jones is breathing heavily.
Mola swinging wilding here.

That's one minute gone in the round.
Mola throws a right and a left that both miss.
Jones looks for a takedown here. Will he get it? Mola is fending him off so far but Jones persists. Nope, Mola circles away and we're back to standing.
Jones shoots for a takedown but Mola saw that one coming a mile off and avoided it easily.
Totoy Mola is looking to keep the fight on the feet at all costs.
Jones on the wrong end of a vicious looking body shot.
Good standup being displayed there by Mola as he connects with a hook.

Jones looking to shoot here. He's gone for it and he's landed a takedown into mount! Oh, that's bad for Mola!
Jones looking to finish with strikes here!
Jones looking to control but Mola is working nicely, looking to advance position himself.
Mola is desperately trying to improve his position but Jones has a good base and remains in mount.

That's two minutes gone in the round.
Jones sitting in mount, just looking to control for the moment.
The ref warns both fighters not to hold the cage as they work up against the meshing.
Jones mounts Mola! Really nice guard pass there!
The fighters are pressed up against the cage, both looking to find a bit of space to work.
Mola is controlling an arm, preventing Jones from taking his back. Although keeping him in mount is no better to be honest.

Jones looking for a guillotine from mount but Mola is having none of it.
Jones has hold of Mola's left arm, perhaps looking for a submission. The two fighters tussle over control of the isolated limb and Mola manages to get his arm back to his side and away from danger.
Mola is in all sorts of trouble here.

That's three minutes gone in the round.
Jones with a couple of short strikes.
Jones with some aggressive grappling here, looking for the finish.
Jones is in the full mount, landing strikes.
Jones avoids the attempt from Mola to control.
Jones controlling from mount.
Jones wants to control the pace but Mola is squirming around nicely.
Mola wants to control but Jones is having none of it.

That's four minutes gone in the round.
Jones scoring with strikes but Mola is staying in there.
Jones wants to control the pace but Mola is squirming around nicely.
Jones is still in mount, landing shots to his trapped opponent. Mola can't stay in a position like this for much longer.
Jones goes for an armbar but he's not got it
Mola turns into him and now he's in Jones's guard.
Jones has an active guard here but Mola has managed to pass into half guard.
The crowd applaud the fighters efforts here as the round comes to an end.
Mola controlling the action here.
And thats the end of the round the fighters go back to their corners.
A close round but Totoy Mola will probably get the nod.
The minute break is over - no more time for sponges and pep talks - back to the action!

Jones will have to do better than that with his takedown attempts.
Mola gets caught flat footed, as Jones shoots in with a quick takedown into guard.
Jones lands a couple of elbows.
Mola keeping full guard, as Jones tries to pass.
Jones is working hard here to advance position.
Mola looking to sweep using the butterfly guard but Jones puts pay to that idea as he passes nicely into half guard.
Mola wants to control but Jones is keeping busy.
Mola is breathing heavily.
Jones trying to control from half guard but Mola is working away.
Jones scoring with strikes to the body and head.
That's one minute gone in the round.
Jones trying to mount his opponent but Mola defends it.
Jones moves into full mount! Mola won't be happy about that!
Jones looking to control but Mola is working nicely, looking to advance position himself.
Jones is dominating on the ground here - he's now on his opponent's back, looking to sink in the hooks. Mola is in real trouble.
Jones is looking to finish the fight by rear naked choke. Mola knows exactly what he's got planned though, so he's defending well. Maybe a few strikes would soften Mola for a finish.
Jones working for the choke.
Jones is hanging on to Mola's back as he tries to escape.
That's two minutes gone in the round.
Mola trying to control the hands but Jones breaks the grip.
Mola controlling the position well but he knows he's in a bad position.
Mola tries to roll but Jones sticks to his back.
Jones wants to control but Mola manages to buck him off and is now in Jones's guard! Nice work there by Mola!

It looks like we're going to have a standup here. Neither fight is doing enough on the ground.
Nice sprawl there from Mola as Jones shoots in.
That's three minutes gone in the round.
Jones has his head snapped back a nice jab. A little nod from Jones there as he acknowledges the shot.
Mola connects with a looping left hand that seems like it dazed Jones momentarily.
Jones closes the distance and clinches up, looking for a takedown. He shifts his weight and gets a nice trip into half guard.
Jones is looking for a kimura but he's never going to get it from there.
Jones is trying to work for a kimura but Mola is defending well.
Jones thumps the canvas. Not on purpose obviously - he just missed Mola's head.
Jones moves nicely into side control.

Jones decides to take the fight back to the feet.
Jones shoots for a takedown but Mola saw that one coming a mile off and avoided it easily.
That's three failed takedown attempts in the round for Zedicus Jones. That's going to take a lot out of him.
That's four minutes gone in the round.
Mola swinging wilding here.
Jones looks for a takedown but Mola sprawls well.
Jones looks shocked there as he takes a right hand to the temple.
A jab from Mola finds it's way through Jones's defenses.
This has been an exciting period of action!
Mola misses with a jab and misses with a cross straight after too.
Mola misses with a series of wild punches.
Mola misses with a series of wild punches.
The crowd applaud the fighters efforts here as the round comes to an end.
Mola looks to land a combination. Jones sees it coming but can only parry a couple of the shots.
Jones will have to do better than that with his takedown attempts.
Mola throws a combination. Jones tries to block but a couple of punches get through.
And thats the end of the round the fighters go back to their corners.
Zedicus Jones dominated that second round.
OK. That's time! The bell goes and we're back to the action. And we move into the final round!

Jones shoots for a double leg takedown but Mola sprawls well. He's pushed Jones's face into the mat and manages to get back to his feet relatively easily.
Jones tries for a takedown but Mola sees it coming a mile off and avoids it easily.
Mola scores with a one two! Jones had his feet all tangled up there and couldn't avoid the strikes.
Mola moves into range and connects with a jab.
Jones has his head slapped from side to side by a 3 punch combination. That must have hurt him.

Jones is rocked!
Mola lets the fists fly and connects with a left straight followed by a right hook.
Oh Jones is still all over the place! His legs are completely gone! Will he be able to recover?!!
Jones shoots in for a takedown. "I don't think so" says Mola as he avoids it easily.
Jones seems to have got his legs back now.
That's three failed takedown attempts in the round for Zedicus Jones. That's going to take a lot out of him.
Jones shoots in looking for a takedown. Mola tries to sprawl out of it but Jones keeps driving through. The fighters are pinned against the cage. Mola manages to get underhooks and after a bit of a struggle, circles away and we're back to standing.
Jones takes a punch to the jaw and another one to the bread basket.
Jones keeping a good distance there, avoiding the body shot.
Mola throws a right and a left that Jones avoids nicely.
Jones closes this distance looking for a takedown but Mola circles away.
Both fighters are breathing heavily.
Jones fails miserably with a takedown attempt.
That's one minute gone in the round.
Jones takes a body punch that cleary hurt but he's trying not to show any weakness.
Totoy Mola seems to be the more aggressive standup fighter in this bout.
Jones scores with a nice takedown into half guard. Let's see what he's got on the ground.
Mola taking some punishment here, with Jones in his half guard.
Jones frees up his trapped foot and advances to mount.
Jones postures up and cracks his opponent a couple of times before moving back into close ground control. Mola looks a forlorn figure.
Mola is rocked!
Jones is in full mount, looking to secure a guillotine but Mola is surviving well by controlling Jones's body position as best he can.
Mola defends a decent attempt at a guillotine from Jones.
Mola wants to get back to his feet.
That's two minutes gone in the round.
Mola really trying hard to get back to half guard here.
Jones working for a guillotine from mount but Mola is in no mood to give up.
Jones looking to finish with strikes here!
Mola is writhing around trying to get back to his feet.
Jones thuds his fist into the canvas! Oooouch!
Mola can't escape the position.
That's three minutes gone in the round.
Jones looking for an armbar but decides to keep the dominant position instead.
Jones moves into side control, trying to work for a kimura. That looks painful! Will he finish!!?? No, Mola has worked his arm free - good work by Mola!
Jones is trying to land an Americana. He has the arm isolated but Mola is keeping cool and he's avoided the danger for now.
Jones decides to take the fight back to the feet.
Jones shoots for a takedown but Mola saw that one coming a mile off and avoided it easily.
Mola with a hook.
Mola lands a two punch combo.
Jones shoots in but no luck this time.
That's four minutes gone in the round.
Jones takes a shot to the body in his stride.
Mola throws a one two combo.
Totoy Mola seems to be getting the better of the standup.
Jones takes a hook to the side of the head. I wonder if that's got his ears ringing.
Jones shoots for a double leg takedown but Mola sprawls well. He's pushed Jones's face into the mat and manages to get back to his feet relatively easily.
We've seen a great period of action over the last minute or so - credit to both fighters for leaving it all in the cage!
A swing and a miss from Mola.
Jones shoots in with a takedown attempt and he has Mola pinned against the cage. Mola gets the underhooks and manages to circle away.
Mola swings wildly with a hook that is half blocked by Jones.
Mola throws a big shot that misses.
No luck for Jones with that takedown attempt.
The crowd applaud the fighters efforts here as the round comes to an end.
A right-left combo lands from Mola.
Mola misses with a series of wild punches.
Jones shoots in and drives through. Mola sprawls well.
And that's the end of the fight!
Totoy Mola comfortably won the final round on my scorecard.
I think Mola has won this one but let's see whether the judges agree with me. Over to the ring announcer for the scorecards.
Ladies and gentlemen, after 3 rounds of action, we go to the scorecards for a decision.
Judge Skip Squint scores the fight 28:29
Judge Steve Erwin scores the fight 28:29
Judge Summer Carpenter scores the fight 28:29
In favor of your winner, by unanimous decision... Totoy Mola!
|
|
|
|
|
|
|
|
|
|
|
|
|
|
|
|
|
|
|
|
|
|
|
| S |
C
A |
G |
S |
C
B |
G |
|
S |
C |
G |
|
energy
A | B |
|
hype
A | B |
|
pop
A | B |
|
mgr
A | B |
|
FIGHT
RATING
92% |
|
|
|
|
|
|
