|
|
PBP Commentary |
Coming up we have a heavyweight MMA rules bout between ken brawler (ranked 0 p4p, 0 weight class) and Matt Gomes II (ranked 0 p4p, 0 weight class). We have two fighters making their debuts here, so let's see who comes out of this one with their first professional victory.
 |
|
 |
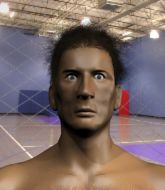
| 175 cm
22
250 lbs
0 - 0 - 0 |
|
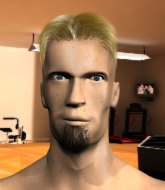
200 cm
25
240 lbs
0 - 0 - 0 |
BJJ White Belt
Brawler
Big right hand |
|
Good wrestler
Basic striking
Very confident |
|
| |
|
Ladies and gentlemen. This fight is 3 rounds, in the heavyweight division.
Introducing the fighter to my left, fighting out of the red corner.
With a record of
0 - 0 - 0, fighting out of Las Vegas, ken brawler!
And introducing the fighter to my right, fighting out of the blue corner.
With a record of
0 - 0 - 0, fighting out of Las Vegas, Matt Gomes II!
The judges for this bout are Tiny Johnson, Frank Dennis and Daniel Franklin.

The bell rings for round one and we are underway!
brawler tries a switch kick but it misses it's target.

Gomes II looking for a takedown here - he's got it.
We could do with one of the fighters taking the initiative a bit more on the ground - they're both waiting to capitalize on a mistake.
Gomes II postures up in brawler's guard and throws a big left but brawler blocks it.
Gomes II trying to control but brawler is working from the bottom.
Gomes II is working brawler over from the guard. He should look to pass the guard and do a little more damage with these strikes.
The ref warns both fighters not to hold the cage as they work up against the meshing.
Gomes II working some ground and pound from guard but it's not doing any damage.
brawler not looking particularly offensive just at the moment.
Gomes II thows a big elbow that misses.
brawler throwing some rather feeble looking strikes off his back.
brawler controls Gomes II momentarily but Gomes II frees himself.
Gomes II throwing shots from guard but he's hitting more mat than opponent.
brawler is trying to control the position from the bottom.
Gomes II loading up with the ground and pound but he's missing more than he's landing in this flurry.

It looks like we're going to have a standup here. Neither fighter is doing enough on the ground.
Gomes II swats away the attempt to clinch by brawler.
Gomes II gets a takedown into half guard.
brawler knows he needs to get back to his feet asap. He's simply no match for Gomes II on the ground.

That's one minute gone in the round.
Gomes II sitting in half guard, looking to land shots. brawler defending well though.
brawler on the receiving end of some nice ground and pound.
Gomes II thumps the canvas. Not on purpose obviously - he just missed brawler's head.
Ground and pound from Gomes II.
Gomes II scoring with strikes to the body and head.
brawler is trying to control but can't.
brawler is refusing to be controlled, as Gomes II sits in half guard.
Gomes II looks to score some points with some ground and pound.
Gomes II throwing punches and elbows but they're not doing any damage.
Gomes II is scoring with some nice ground and pound from the dominant position.
Gomes II looks towards his corner to check for any instructions. The corner give him nothing to work with, so he cracks brawler with a short hammerfist. I guess that's as good as any advice he could get in this position.

That's two minutes gone in the round.
brawler blocking the ground and pound attempt from Gomes II.
Gomes II has the superior BJJ but he's also working some ground strikes into his gameplan.
Gomes II thows a huge punch but brawler dodges it nicely.
Gomes II scoring with strikes to the body and head.
Nice strikes from Gomes II there.
brawler on the receiving end of some nice ground and pound.
Gomes II throwing shots but brawler is blocking nicely.
Gomes II thows a wild elbow that connects with the canvas.
The fighters are pressed up against the cage, both looking to find a bit of space to work.
Gomes II working the head and body with strikes.
brawler trying to control here.
brawler is breathing heavily.
Gomes II landing with strikes to the body and head, softening up his opponent.
The crowd cheering loudly, showing their appreciation for the quality fight we're seeing here.
Gomes II looks to score some points with some ground and pound.
brawler is refusing to be controlled, as Gomes II sits in half guard.
brawler taking some punishment here, with Gomes II in his half guard.

That's three minutes gone in the round.
Gomes II throwing punches and elbows but they're not doing any damage.
Gomes II is trying to control. brawler wants to improve his position but can't escape this time.
Gomes II winds up and cracks brawler with a swinging punch to the side of the head.
Gomes II controlling the pace.
Gomes II scores with a couple of good hammerfists.
brawler misses with some strikes from the bottom.
Gomes II throws a strike but brawler avoids it easily and moves to full guard.
Gomes II thows a big elbow that misses.
Gomes II throwing elbows and punches but not connecting, as brawler works some decent striking defense from the bottom.

That's four minutes gone in the round.
There's not a lot going on here and the crowd are letting the fighters know they're not willing to tolerate a lack of action.
brawler trying to keep a closed guard but Gomes II is proving a slippery customer.
Gomes II working in close now, lands a nice elbow to the side of brawler's head.
Gomes II lands a couple of digs.
Gomes II passes easily into side control. Nice work.
Gomes II working the ground and pound.
Gomes II wants to control but brawler is keeping him busy.
Gomes II working the ground and pound.
brawler tries to get back to half guard but can't.
Gomes II lands an elbow.
brawler takes an elbow right on the bridge of the nose and winces in pain.
And thats the end of the round the fighters go back to their corners.
Matt Gomes II dominated that round.
The fighters' corners scream their final instructions, as the referee calls time. Here we go, back to the action!

Gomes II looks for a takedown. He's got it. We're now in half guard.
The two fighters exchange a few words. I couldn't hear what they were saying but maybe it's more fun if you make it up yourself. Gomes II connects with a nice short shot to brawler's temple.
Gomes II thumps the canvas. Not on purpose obviously - he just missed brawler's head.
brawler wants to get back to full guard.
Gomes II perhaps working for something from half guard, or maybe not. It looks like he's just sitting there.

brawler looking for submissions off his back.
Gomes II lands with an elbow from half guard - that looked like it hurt.
brawler taking some punishment here, with Gomes II in his half guard.
Both fighters are absolutely exhausted here.
That's one minute gone in the round.
Gomes II winds up and cracks brawler with a swinging punch to the side of the head.
Gomes II working the head and body with strikes.
Gomes II working brawler over with strikes.
Gomes II lands with an elbow from half guard - that looked like it hurt.
brawler is looking to escape.
Gomes II works his foot free and advances to mount.
Gomes II dominating with strikes here.
Gomes II lands a couple of nice shots there from mount.
A nice elbow there by Gomes II.
Gomes II landing strikes from the mount.
That's two minutes gone in the round.
Gomes II scoring with some good ground and pound from mount here. Will he manage to finish brawler?
Gomes II looking to finish brawler with some ground and pound. This is bad for brawler!
brawler keeping his composure momentarily, calmly looking to get back to half guard.
Gomes II lands an elbow that was bordering on illegal but the referee lets it go with a warning.
Gomes II lands a nice shot to the head.
Gomes II lands a couple of nice shots there from mount.
Gomes II lands a big shot there that rocks brawler but he's holding on and managing to survive for now.
Gomes II cracks brawler with a nasty head shot there - the crowd let out an audible gasp there, as the noise reverberated around the arena.
Gomes II looking to control but brawler is working nicely, looking to advance position himself.
Gomes II lands with some vicious ground and pound - can brawler hang on?
Gomes II in mount throwing good strikes here, bouncing his opponent's head off the canvas.
That's three minutes gone in the round.
BOOM! Gomes II connects with a massive shot to the dome!
The referee warns brawler that he has to improve his position here as he takes two more clean shots to the head.
Gomes II unloading with bombs!
Gomes II cracks brawler with a nasty head shot there - the crowd let out an audible gasp there, as the noise reverberated around the arena.
Gomes II lands a heavy elbow.
brawler tries to reverse the position but Gomes II maintains control.
brawler taking shots to the head.
Gomes II lands a shot to the body, followed up by a shot to the exposed head of his trapped opponent.
Gomes II lands a shot to the body, followed up by a shot to the exposed head of his trapped opponent.
Gomes II breaks from brawler's wrist control and lands an elbow.
Gomes II wants to control the pace but brawler is squirming around nicely.
Gomes II connects with a couple of good shots from mount.
That's four minutes gone in the round.
The crowd are hurling abuse towards the fighters... You can hardly blame them though because there isn't a lot going on in the fight.
Gomes II postures up and cracks his opponent a couple of times before moving back into close ground control. brawler looks a forlorn figure.
Gomes II unloading with bombs!
Gomes II sitting in mount, just looking to control for the moment.
Gomes II trying to control but brawler is having none of it.
brawler taking shots to the head.
Gomes II looking to control and managing it successfully.
brawler tries to hold on but Gomes II pushes him away.
And thats the end of the round the fighters go back to their corners.
Matt Gomes II showed his class in that round. I'd imagine he'll take it on all the scorecards.
The fighters' corners scream their final instructions, as the referee calls time. Here we go, back to the action! This is the final round!

Gomes II shoots in and gets a takedown into half guard. Gomes II showed some decent athleticism there.
Gomes II throwing punches and elbows but they're not doing any damage.
brawler is trying to get back to full guard.
Gomes II lands a big shot. The thud that echoes around the arena is like music to the fans' ears.
brawler wants to get back to his feet.
Gomes II working some ground and pound from close in. He's looking to maintain this position and strike for a while by the looks of things... although he'll probably advance to full mount in a minute now I've said that.
brawler has hold of Gomes II's hands but Gomes II slips his arm to the side and lands an elbow.
brawler might be looking to lock onto one of his opponent's long limbs for a submission, whilst we're on the ground.
Gomes II seems very keen to just sit and control from half guard but brawler does not like that idea so much and is remaining active off his back.
brawler trying to hold on to Gomes II's head to control him but Gomes II postures up.
Gomes II winds up and cracks brawler with a swinging punch to the side of the head.
Both fighters are breathing heavily.
That's one minute gone in the round.
Gomes II working over brawler with some ground and pound. brawler looks like he wants out of this position, which is understandable.
Gomes II scoring with strikes to the body and head.
Gomes II is scoring with some nice ground and pound from the dominant position.
brawler tries to get to full guard but Gomes II has control of the leg.
Gomes II lands with an elbow from half guard - that looked like it hurt.
Gomes II takes advantage of the dominant position to land a couple of big hammer fists.
Gomes II drops an elbow to the side of brawler's head.
The referee walks around the fighters to get a better view of the action. Gomes II lands a nice short elbow.
Gomes II seems very keen to just sit and control from half guard but brawler does not like that idea so much and is remaining active off his back.
That's two minutes gone in the round.
Gomes II is keeping good posture, landing some ground and pound.
Ground and pound from Gomes II.
Ground and pound from Gomes II.
Gomes II is keeping good posture, landing some ground and pound.
Gomes II sitting in half guard, looking to land shots. brawler defending well though.
brawler slips a foot under and gets full guard. Nice work.
Gomes II scoring with punches to the head and body.
Gomes II in full guard, throwing the ground and pound. No damage this time.
brawler tries to land a sweep but no joy.
brawler trying to keep a closed guard but Gomes II is proving a slippery customer.
Gomes II postures up and lands some nice ground and pound.
That's three minutes gone in the round.
Gomes II working in close now, lands a nice elbow to the side of brawler's head.
brawler working the defensive guard well to avoid strikes from Gomes II.
Gomes II working some strikes from top position.
Well, the referee has seen enough. Neither fighter is active enough on the ground so he's stood them back up.
brawler tries to clinch but is not successful on this occasion.
brawler throws a wild body kick that Gomes II sees coming a mile off.
No luck with that takedown attempt from Gomes II.
Nice takedown defense from brawler. No joy for Gomes II on that attempt.
brawler has his takedown stuffed
and Gomes II counters with a nice shoot takedown that brings the fighters to the ground.
Hammerfist, elbow! yells Gomes II's corner. There ya go! There ya go!
Gomes II tries to free his leg and advance position but brawler is retaining full guard.
That's four minutes gone in the round.
Gomes II working some ground and pound from guard but it's not doing any damage.
Gomes II postures up and scores with a shot to the body and a follow up elbow to the head.
Matt Gomes II has got the better of the ground game so far.
brawler avoiding any damage from the ground and pound.
Gomes II missing there with some ground and pound from the guard.
Gomes II throwing strikes from guard but brawler blocks nicely.
Gomes II pressing down on his opponent's thigh, looking to pass guard. brawler is keeping the position for now.
The referee has ruled that neither fighter is active enough on the ground and has stood them back up.
brawler misses with a takedown
and Gomes II counters with a takedown into side control.
brawler is not content to let Gomes II control the position.
Gomes II cracks brawler with an elbow. That is naaassty.
And that's the end of the fight!
Matt Gomes II comfortably won the final round on my scorecard.
I've got Gomes II winning every round here. Surely the decision will go his way and he'll pick up a well deserved decision victory. Over to the ring announcer for the scorecards.
Ladies and gentlemen, after 3 rounds of action, we go to the scorecards for a decision.
Judge Tiny Johnson scores the fight 27:30
Judge Frank Dennis scores the fight 26:30
Judge Daniel Franklin scores the fight 26:30
In favor of your winner, by unanimous decision... Matt Gomes II!
|
|
|
|
|
|
|
|
|
|
|
|
|
|
|
|
|
|
|
|
|
|
|
| S |
C
A |
G |
S |
C
B |
G |
|
S |
C |
G |
|
energy
A | B |
|
hype
A | B |
|
pop
A | B |
|
mgr
A | B |
|
FIGHT
RATING
58% |
|
|
|
|
|
|

