|
|
PBP Commentary |
Coming up we have a heavyweight MMA rules bout between James Tames (ranked 0 p4p, 0 weight class) and Robert Boldin (ranked 0 p4p, 0 weight class). Tames's ring entrance music is that housewives' favourite, "The Distance" by Cake. Buckle up people - heeeeeeeeeere we go!
 |
|
 |
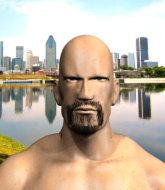
| 200 cm
21
275 lbs
5 - 2 - 0 |
|
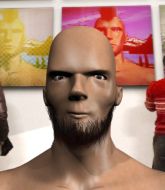
200 cm
20
275 lbs
0 - 0 - 0 |
BJJ Purple Belt
Solid boxing
KO power |
|
BJJ Blue Belt
Excellent MT
Powerful |
|
| |
|
Ladies and gentlemen. This fight is 3 rounds, in the heavyweight division.
Introducing the fighter to my left, fighting out of the red corner.
With a record of
5 - 2 - 0, fighting out of New York, James Tames!
And introducing the fighter to my right, fighting out of the blue corner.
With a record of
0 - 0 - 0, fighting out of New York, Robert Boldin!
The judges for this bout are Bruno Lombardi, Lou da Vinci and Alyssa Summers.

The bell rings for round one and we are underway!
Boldin throws a leg kick which misses Tames's front leg but catches the back leg as Tames tries to avoid it.
Boldin gets cracked with a nice right hand there by Tames.
Boldin tries to close the distance and clinch but Tames swats him to one side with an open hand palm strike and circles away.
Tames throws a series of punches but Boldin avoids them all with ease.
Boldin misses with a jab, cross combination.
A thudding body kick lands there by Boldin!
Boldin tries to clinch but Tames moves out of range.
Tames takes a thudding leg kick, right into the meat of the thigh.
Crunch! Boldin slams his shin into Tames's torso.
Tames is breathing heavily.
This is a great period of action - very entertaining stuff!
Boldin moves into range and lands a nice leg kick.
Boldin throws a quick head kick that skims the top of Tames's head.
Boldin works the jab nicely.
Tames takes a hook to the side of the head. I wonder if that's got his ears ringing.

It looks like James Tames has been cut.
Tames gets cracked there but stands up to it.
Boldin pulls out of a head kick attempt.
Nice body kick there by Boldin.
Boldin lands a head kick!
Boldin lands with a straight right. Tames didn't see that one coming.
Boldin lands with a nice low kick. That'll leave a bruise.

Boldin lands a big head kick that sends Tames tumbling to the mat! Boldin takes a step backwards and waves Tames back to his feet - he wants the finish!

Tames is rocked!
Boldin throws a body kick that digs right into the meat.
Boldin scores with a leg kick.

Boldin moves into the clinch.
Boldin misses with a knee strike.

That's one minute gone in the round.

Boldin breaks the clinch and we're back to striking at distance.
Boldin clinches up with Tames and pushes him back against the cage.
Tames blocks a knee to the body. He'll have a nicely bruised forearm in the morning.
Boldin breaks from the clinch.
James Tames seems to be the more aggressive standup fighter in this bout.
Boldin stuffs a takedown. It's all about dictating where the fight takes place and Boldin wants it to stay on the feet.
Boldin has taken the fight to the clinch.
Boldin pushes off and circles away, back to the middle of the mat.
Tames throws a right and a left that Boldin avoids nicely.
Boldin moves into the clinch successfully.
Boldin breaks the clinch and we're back to striking at distance.
Tames darts in trying to clinch
and Boldin counters by moving into the clinch.
Boldin slows down the pace here.
Tames is looking to control Boldin's arms but Boldin gets an underhook and turns him. Now Tames has his back to the cage.
Boldin stalling.
Boldin throws an elbow but it misses.
Boldin breaks the clinch.
Boldin dances in quickly and lands a nice inside leg kick on Tames. That did some damage!

That's two minutes gone in the round.
Boldin goes for a high kick. It partially lands.
This has been an exciting period of action!
A really sloppy takedown attempt there from Tames.
Tames tries to clinch there but Boldin circles away.
Boldin darts in and clinches Tames up against the cage.
Tames blocks an elbow strike.
Boldin lands a left hand that snaps the head of Tames backwards.
Boldin pressing his opponent against the cage.
Boldin's corner calls for him to break the clinch, which he does.
Tames misses with a two punch combination.
Tames missing with a left hand there. Boldin was out of range so wasted energy throwing that one.
Tames bobs and weaves and unloads with a good uppercut.
Tames misses with an uppercut. Boldin saw that one coming.
Boldin chopping away at his opponent's legs.
Tames stumbles momentarily as he takes a strong leg kick from Boldin.
A punch lands to the side of Tames 's head but he takes it in his stride.
Boldin turns his hip over beautifully as he lands a nice leg kick.
Boldin clinches up with Tames and pushes him back against the cage.
Tames on the defensive, avoiding the knees to the body.

That's three minutes gone in the round.
Boldin looks to throw an elbow but misses.
Boldin pushes off and circles away, back to the middle of the mat.
Boldin scoring well with a low kick there.
Boldin connects with a high kick.
Boldin throws a front kick that sends Tames stumbling back into the cage.
Nice body kick there by Boldin.
This has been an exciting period of action!
Boldin scores with a sloppy punch to the body. Not much technique there but it did the business.
Boldin tries to clinch there but Tames circles away.
Tames is hobbling a little on that front leg after taking quite a few leg kicks so far in this fight.
Boldin is looking to take this fight into the clinch.
Boldin clinches up against the cage.
Boldin escapes the clinch and we're back to striking.
A head kick from Boldin lands but Tames takes it in his stride.
A jab from Boldin does it's job there.
Tames takes a punch right to his stomach. That took the wind out of him momentarily.
Boldin tries to clinch up but Tames circles away and keeps his distance.
Boldin rushes Tames and pushes him back against the cage in a clinch.
Boldin displaying some good clinch control by pressing Tames up against the cage.
Boldin breaks the clinch.

That's four minutes gone in the round.
Tames swings for the body but Boldin moves out of range.
Boldin feints with a shoulder and throws a nice leg kick to Tames's calf.
Nice shot lands for Boldin.
Boldin fakes with an overhand right and moves in to clinch with Tames, pushing him back against the cage.
Boldin with the Thai clinch. He's looking to land a big knee but he's not managed it this time.
Boldin dictating the pace here, as the fighters clinch against the cage.
Both guys are working to get underhooks.
Boldin working on landing some head shots here - that one got through nicely.
Boldin doesn't land with the attempted body shot.
Boldin content to slow the pace in the clinch.
Tames blocking some punches.
Tames wants to break free but Boldin has control.
Boldin with an attempt at a knee that misses.
Boldin holding his opponent close, against the cage.
The crowd are going absolutely nuts as the round comes to an end - what a fantastic round of action!
Boldin creates a bit of distance and throws an elbow that only just misses.
Tames wants to break free but Boldin has control.
Tames wants to break the clinch but can't.
And thats the end of the round the fighters go back to their corners.
Robert Boldin dominated that round.
The cut man is working on James Tames's cut.
The minute break is over - no more time for sponges and pep talks - back to the action!

Tames moves his head to the side to avoid a jab but walks straight into a cross.
Boldin misses with a body shot. Nice footwork from Tames.
Boldin rushes Tames and pushes him back against the cage in a clinch.
Boldin is looking to break free of the clinch but Tames has double underhooks.
Boldin looks like he'd prefer to be striking at range right now.
Boldin taking a breather.
Boldin has been the more effective fighter overall so far.
Boldin wants to push off and get back to the center of the mat but Tames has him pressed against the cage.
Tames wants to break free. God knows he wants to breaaaak freeee.
Boldin manages to break the clinch.
Boldin pushes Tames up against the cage in a clinch.
Tames will be looking to protect his midsection after taking some solid kicks to the body.
Boldin working hard to break the clinch.
Tames prevents a body shot from Boldin.
Boldin wants to break free but Tames has control.
Tames looks like he'd prefer to be striking at range right now.
Boldin breaks the clinch and we return to the middle of the mat.
Tames keeps the fight on the outside.
Boldin tries to close the distance and clinch up against the cage but Tames paws at him with a jab and circles away.
James Tames is looking to throw some combinations by the looks of things.
Tames moves out of range as Boldin strikes.
Robert Boldin seems to be getting the better of the standup.
Boldin throws a head kick that half lands.
Crunch! Boldin slams his shin into Tames's torso.
Both fighters are absolutely exhausted here.
That's one minute gone in the round.
Boldin thumps Tames with a low kick.
Robert Boldin is looking to keep the fight on the feet at all costs.
Boldin turns his hip over beautifully as he lands a nice leg kick.
Boldin gets to the clinch - let's see what his plan is here.
A battle for position here, against the cage.
Boldin manages to break the clinch.
Boldin scoring well with a low kick there.
Boldin lands a head kick!
Boldin moves into the clinch.
Boldin pushes off and circles away, back to the middle of the mat.
Boldin gets to the clinch - let's see what his plan is here.
Boldin throws a nice elbow but it doesn't land.
Boldin pushes off and circles away, back to the middle of the mat.
A punch combination from Tames misses.
Boldin connects with a single shot there.
The fans in attendance giving it up for the two fighters, who have really let it all hang out in the last minute or so!
Boldin wants to clinch up but Tames keeps it at a distance.
Tames gets cracked there but stands up to it.
Boldin is looking to clinch.
Boldin tries to clinch but is not successful on this occasion.
That's two minutes gone in the round.
Boldin displays good takedown defense there as he swats away a double leg from Tames.
Boldin connects with a solid leg kick.
Boldin throws a quick head kick that skims the top of Tames's head.
Boldin chopping away at his opponent's legs.
Tames avoids the clinch attempt nicely.
Tames closes the distance and takes a jab right on the nose as he does so.
Boldin moves into the clinch successfully.
Boldin pushes off and circles away, back to the middle of the mat.
Boldin feints and then cracks Tames's leading leg with a nice low kick. He's obviously looking to slow Tames down.
Boldin closes the distance and pushes Tames back into the cage.
Boldin is struggling to control the position.
Boldin lands a right uppercut that snaps the head of Tames backwards.
With the fighters up against the cage, Boldin throws an elbow but misses.
Boldin looking to stall.
Boldin breaks the clinch and we're back to striking at distance.
Tames tries to grapple but his opponent circles
and Boldin counters with a leg kick that reverborates around the arena.
That's three minutes gone in the round.
Boldin connects with a lovely right hand, straight down the pipe.
Tames fails with a takedown attempt from distance.
Boldin connects with a solid leg kick.
Boldin connects with a good right hand that stumbles Tames. Tames circles away out of range and recomposes himself.
Boldin looking to take his opponent's legs away with the low kicks.
A nice inside leg kick there by Boldin. That's going to slow Tames down.
Boldin doesn't manage to clinch there - Tames circles away.
Tames tries to close the distance and clinch but Boldin swats him to one side with an open hand palm strike and circles away.
A slapping leg kick lands for Boldin.
The fans in attendance giving it up for the two fighters, who have really let it all hang out in the last minute or so!
Boldin takes the fight into the clinch.
Boldin escapes the clinch and we're back to striking.
Tames throws a lazy right hand but Boldin sees it coming a mile off and sidesteps it easily.
A decent looking body kick lands there for Boldin.
Boldin throws a sloppy head kick and Tames moves out of range easily.
Tames on the wrong end of a nice hook.
Boldin lands a kick to the ribs of his opponent. Nice work there - in and out in a flash.
Boldin cracks the inside of Tames's front leg.
Boldin tries to clinch up but Tames circles away and keeps his distance.
That's four minutes gone in the round.
Boldin lands with a slapping head kick.
Boldin forces Tames back against the cage and clinches.
Boldin breaks from the clinch.
Boldin tries to clinch but Tames moves out of range.
Boldin scores with a push kick.
The fight moves into the clinch position.
Boldin breaks the clinch.
Boldin displaying good standup as he scores with a three punch combination.
Boldin gets to the clinch - let's see what his plan is here.
Boldin using the Thai plumb to throw knees but Tames has his back arched nicely, preventing the strike.
Boldin's corner calls for him to break the clinch, which he does.
Boldin throws a head kick but Tames moves out of range.
Boldin throws a head kick that misses.
The crowd are going absolutely nuts as the round comes to an end - what a fantastic round of action!
Boldin defends well against a solid takedown attempt from Tames.
That's three failed takedown attempts in the round for James Tames. That's going to take a lot out of him.
Tames misses with a double jab
and Boldin counters with a leg kick.
Boldin buckles his opponent's knee momentarily with a nice leg kick.
Boldin pushes Tames up against the cage in a clinch.
And thats the end of the round the fighters go back to their corners.
Robert Boldin showed his class in that round. I'd imagine he'll take it on all the scorecards.
The cut man is working on James Tames's cut.
The minute break is over - no more time for sponges and pep talks - back to the action! This is the final round!

Boldin plants his feet and lands a nice head kick!
Tames shoots and misses
and Boldin makes him pay by landing a thudding low kick.
A head kick misses from Boldin.
Boldin swinging wildly here.
Boldin throws a head kick that misses.
An inside leg kick lands from Boldin.
Boldin has Tames up against the cage in a clinch.
With the two fighters working up against the cage, Boldin just misses with a elbow thrown towards Tames's brow.
Tames tries to stall but Boldin uses the opportunity to gain a better position.
Boldin breaks the clinch and we return to the middle of the mat.
Boldin throws a head kick but Tames moves out of range.
A slapping leg kick lands for Boldin.
A combination from Boldin does no damage.
Boldin explodes with a nice body kick and back out of range. Nice work.
The fans in attendance giving it up for the two fighters, who have really let it all hang out in the last minute or so!
Boldin gets to the clinch - let's see what his plan is here.
Boldin breaks the clinch and we return to the middle of the mat.
Boldin feints and then cracks Tames's leading leg with a nice low kick. He's obviously looking to slow Tames down.
Tames takes a push kick to the midsection and stumbles backwards.
Both fighters are breathing heavily.
That's one minute gone in the round.
Boldin fakes with a right hand and throws a good leg kick, right into the thigh. That had to hurt Tames.
Boldin tries to clinch there but Tames circles away.
Boldin closes the distance and pushes Tames back into the cage.
Boldin breaks from the clinch.
Boldin clinches with his opponent.
Boldin manages to break the clinch.
Boldin throws a right high kick that is partially blocked by Tames.
Boldin throws a mid kick that lands with a slap.
Boldin tries to clinch there but Tames circles away.
Tames will have to do better than that with his takedown attempts.
Boldin clinches with his opponent.
Boldin is working hard here but doesn't seem to be able to control effectively, up against the cage.
Robert Boldin seems to be working more effectively in the clinch in the fight so far.
Boldin breaks the clinch.
Boldin lands with a nice body kick.
The fight stays on the outside here - Boldin looks like he's thinking about clinching though.
A shot to de liver by Boldin. Beautiful body shot.
The crowd are loving this. Great action here.
Tames on the receiving end of a decent leg kick there by Boldin. Boldin obviously looking to wear him down.
That's two minutes gone in the round.
Jab, cross, leg kick. Nice combination by Boldin!
Boldin lands a kick to the ribs of his opponent. Nice work there - in and out in a flash.
A chopping leg kick lands by Boldin.
Boldin darts in and clinches Tames up against the cage.
Boldin lands a left hand.
Boldin lands a left hand.
Boldin pushes off and fires off an elbow that misses, before clinching up again, against the cage.
Boldin tries to stall but Tames uses the opportunity to gain a better position.
Boldin breaks from the clinch.
Boldin lands a head kick!
Boldin throws a nice outside leg kick.
Tames takes a nice looking leg kick right on the meat of his thigh there.
Some wild striking there from Boldin.
Jab by Boldin.
Boldin moves into range and lands a nice body kick.
Tames blocks a head kick by Boldin.
Boldin throws a feint and then finishes with a kick to the body.
That's three minutes gone in the round.
Tames tries to keep at a distance but Boldin has taken the fight into the clinch.
Boldin breaks the clinch and we return to the middle of the mat.
Boldin closes the distance and lands a one-two.
Boldin throws a nice head kick!
Boldin fakes with an overhand right and moves in to clinch with Tames, pushing him back against the cage.
Tames lands on the inside with an uppercut.
A battle for position here, against the cage.
Boldin's corner calls for him to break the clinch, which he does.
Tames shoots in but doesn't get the takedown
and Boldin counters into the clinch. Nicely done.
That's three failed takedown attempts in the round for James Tames. That's going to take a lot out of him.
Boldin's corner calls for him to break the clinch, which he does.
Boldin tries to clinch up but Tames circles away and keeps his distance.
Tames avoids the clinch attempt nicely.
Boldin misses with a jab, cross combination.
Tames takes a kick to the side of the head.
Boldin connects with a solid leg kick.
Boldin with a jab.
Robert Boldin is fighting for a decision here - he's started to take the cautious approach.
That's four minutes gone in the round.

Tames feints and as Boldin raises his hands in defense, Tames changes levels and drives through with a takedown into guard.
The ref warns both fighters not to hold the cage as they work up against the meshing.
The crowd cheering loudly, showing their appreciation for the quality fight we're seeing here.
Tames prevents Boldin from getting back to his feet.

Tames drops back for a leg but he's not going to get it - he lets go and Boldin dives on top into guard.
Tames keeping moving, preventing Boldin from controlling successfully.

Boldin stands up and waves to Tames to follow him.
Tames has a takedown stuffed.
James Tames has stepped it up - he knows he needs a finish here!
The crowd are going absolutely nuts as the round comes to an end - what a fantastic round of action!
Tames swings and misses with a hook to the body.
Tames throws a right and a left that Boldin avoids nicely.
Tames takes one on the button.
Boldin doesn't manage to clinch there - Tames circles away.
And that's the end of the fight!
Robert Boldin comfortably won the final round on my scorecard.
I've got Boldin winning every round here. Surely the decision will go his way and he'll pick up a well deserved decision victory. Over to the ring announcer for the scorecards.
Ladies and gentlemen, after 3 rounds of action, we go to the scorecards for a decision.
Judge Bruno Lombardi scores the fight 24:30
Judge Lou da Vinci scores the fight 24:30
Judge Alyssa Summers scores the fight 24:30
In favor of your winner, by unanimous decision... Robert Boldin!
|
|
|
|
|
|
|
|
|
|
|
|
|
|
|
|
|
|
|
|
|
|
|
| S |
C
A |
G |
S |
C
B |
G |
|
S |
C |
G |
|
energy
A | B |
|
hype
A | B |
|
pop
A | B |
|
mgr
A | B |
|
FIGHT
RATING
100% |
|
|
|
|
|
|
