|
|
PBP Commentary |
Coming up we have a middleweight MMA rules bout between Stump Morbid (ranked 0 p4p, 0 weight class) and Donald Drysdale (ranked 0 p4p, 0 weight class). Morbid comes to the cage accompanied by Hells Bells. Stump Morbid could well score a knockout today. He has the power to get to Donald Drysdale's chin.
 |
|
 |
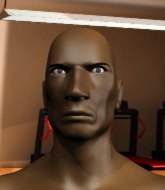
| 170 cm
21
185 lbs
0 - 1 - 0 |
|
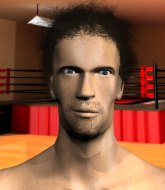
188 cm
19
183 lbs
0 - 1 - 0 |
BJJ Blue Belt
Brawler
Good chin |
|
BJJ White Belt
Good kicks
Intelligent |
|
| |
|
Ladies and gentlemen. This fight is 3 rounds, in the middleweight division.
Introducing the fighter to my left, fighting out of the red corner.
With a record of
0 - 1 - 0, fighting out of Las Vegas, Stump Morbid!
And introducing the fighter to my right, fighting out of the blue corner.
With a record of
0 - 1 - 0, fighting out of Las Vegas, Donald Drysdale!
The judges for this bout are Stewart Dunkirk, George Francis and Tiny Johnson.

The bell rings for round one and we are underway!
Morbid fails with an attempt to clinch.
Morbid shoots in but Drysdale avoids the takedown attempt easily.
Drysdale slips under a jab.
Drysdale darts in trying to clinch

and Morbid counters with a nice single leg takedown and he's in Drysdale's guard now.
Morbid is working Drysdale over from the guard. He should look to pass the guard and do a little more damage with these strikes.
Morbid stopping the sweep attempt from Drysdale.
Morbid might be looking to lock onto one of his opponent's long limbs for a submission, whilst we're on the ground.
Morbid working in close now, lands a nice elbow to the side of Drysdale's head.
Drysdale trying to keep a closed guard but Morbid is proving a slippery customer.
Morbid passes easily into side control. Nice work.
This is a great period of action - very entertaining stuff!
Morbid wants to control but Drysdale is keeping him busy.

That's one minute gone in the round.
Morbid looks up at the clock and then as Drysdale takes his cue and looks up at the clock too, Morbid smacks him right in the chops with a big elbow! How rude!

Drysdale is rocked!
Morbid has knee on belly and now moves to full mount! Trouble for Drysdale!
Drysdale is still in real trouble! Can Morbid finish him?
A nice elbow there by Morbid.
Drysdale taking shots to the head.
Morbid dominating with strikes here.
Drysdale looks gassed!
Fantastic stuff here - a very entertaining period of action, which has drawn cheers from the crowd.
Drysdale in a bad spot here, taking shots to the head.
Morbid lands a big elbow.
The referee warns Drysdale that he has to improve his position here as he takes two more clean shots to the head.
Morbid working away from the top, dropping strikes.
Morbid raining down shots from the mount!
Morbid punishing his opponent with strikes.
Morbid lands a heavy elbow.
The crowd growing excited in anticipation of a finish here! Right on cue, Morbid cracks his opponent with a massive right hand that draws loud cheers!
Morbid lands with some strikes.
Drysdale taking shots to the head.

That's two minutes gone in the round.
Morbid working away from the top, dropping strikes.
Morbid has been looking to land a fair amount of strikes on the ground. He might be looking to soften his opponent up in order to work for a submission.
Drysdale trying desperately to get to his feet.
The ref warns both fighters not to hold the cage as they work up against the meshing.
Morbid avoids the attempt from Drysdale to control.
Drysdale might have to switch it up a bit here because his efforts to control Morbid kaven't been going to plan, at least at the current moment in time.
Drysdale is trying to get to the cage to help him get back to his feet.
Morbid raining down shots from the mount!
The fighters are starting to get a bit slippery now, which will make submissions a bit more difficult.
BOOM! Morbid connects with a massive shot to the dome!
A nice elbow there by Morbid.
Drysdale manages to regain half guard. Good work.
Drysdale is looking to regain full guard. Not this time though.

Drysdale looking for submissions from an awkward position here.
The referee walks around the fighters to get a better view of the action. Morbid lands a nice short elbow.

That's three minutes gone in the round.
Morbid trying to control the action but Drysdale is working from the bottom.
Drysdale looking to work for a kimura from the bottom.
Morbid scores with a couple of good hammerfists.
Drysdale is staying active underneath Morbid, who seems content to just control the action from this position.
Morbid landing with strikes to the body and head, softening up his opponent.
Morbid winds up and cracks Drysdale with a swinging punch to the side of the head.
Morbid is nestled in close to Drysdale, controlling him well. He's worked in a nice elbow to the side of the head as well, for good measure.
Morbid is nestled in close to Drysdale, controlling him well. He's worked in a nice elbow to the side of the head as well, for good measure.
The fighters are pressed up against the cage, both looking to find a bit of space to work.
We've seen a great period of action over the last minute or so - credit to both fighters for leaving it all in the cage!
Morbid lands strikes from half guard.
Morbid frees up his trapped foot and advances to mount.
Morbid with the ground and pound from mount.

That's four minutes gone in the round.
A nice elbow there by Morbid.
Morbid landing strikes from the mount.
Morbid avoids the attempt from Drysdale to control.
Morbid lands a couple of nice shots there from mount.
Morbid working Drysdale over with strikes here.
Morbid looking to ground and pound his opponent to a finish here.
Drysdale takes a big shot to the head but keeps on trying to improve his position.
Morbid landing strikes from the mount and Drysdale is in trouble!
Morbid lands a big shot there that rocks Drysdale but he's holding on and managing to survive for now.
Morbid putting on the heat here with some good ground and pound!
Drysdale is desperately trying to improve his position but Morbid has a good base and remains in mount.
The crowd are going absolutely nuts as the round comes to an end - what a fantastic round of action!
Morbid landing strikes from the mount and Drysdale is in trouble!
The crowd growing excited in anticipation of a finish here! Right on cue, Morbid cracks his opponent with a massive right hand that draws loud cheers!
And thats the end of the round the fighters go back to their corners.
Stump Morbid dominated that round.
That's the end of the interval. I'm sure that seemed a lot quicker than a minute for our two fighters! Back to the action.

Morbid shoots in and drives through. Drysdale sprawls well.
Morbid shoots for a double leg takedown but Drysdale sprawls well. He's pushed Morbid's face into the mat and manages to get back to his feet relatively easily.
Morbid shoots in for a takedown. "Ole!" shouts Drysdale as he jumps to the side.
That's three failed takedown attempts in the round for Stump Morbid. That's going to take a lot out of him.
Drysdale stuffs the takedown attempt from Morbid. Morbid gets slowly back to his feet.
Drysdale stuffs the takedown.
Morbid tries for a takedown but Drysdale sees it coming a mile off and avoids it easily.
Drysdale stuffs the takedown attempt from Morbid. Morbid gets slowly back to his feet.
Morbid closes the distance and clinches up with Drysdale, looking for a takedown. Morbid pushes Drysdale against the cage but Drysdale circles to the side and manages to break the clinch.
Morbid shoots in for a takedown - he's clinched up with Drysdale but Drysdale pushes him off and we're back to square one.
Morbid shoots in for a takedown but Drysdale shows good takedown defense.
Morbid shoots in for a takedown but doesn't get it.
Both fighters are absolutely exhausted here.
Morbid fails with a rather predictable takedown attempt.
That's one minute gone in the round.
Nice sprawl there from Drysdale as Morbid shoots in.
No luck for Morbid with that takedown attempt.
Morbid shoots in but no luck this time.
Morbid will have to do better than that with his takedown attempts.
Morbid looks frustrated there after his takedown attempt is stuffed easily.
Morbid shoots in with a takedown attempt and he has Drysdale pinned against the cage. Drysdale gets the underhooks and manages to circle away.
A really sloppy takedown attempt there from Morbid.
Morbid throws a looping left and ducks down for a takedown. He's got his arms around Drysdale's waist but Drysdale gets an underhook and avoids the takedown by throwing Morbid off to one side.
Morbid closes this distance looking for a takedown but Drysdale circles away.
Horrible takedown by Morbid or perhaps it was just good defense by Drysdale which made him look bad.
Stump Morbid is looking to throw some combinations by the looks of things.
That's two minutes gone in the round.
Morbid fails miserably with a takedown attempt.
Drysdale keeps the fight standing with a nice sprawl.
Morbid shoots for a double leg takedown but Drysdale sprawls well. He's pushed Morbid's face into the mat and manages to get back to his feet relatively easily.
Donald Drysdale is looking to keep the fight on the feet at all costs.
Morbid has a takedown stuffed.
Drysdale seems to have recovered his senses.
Morbid connects with a jab and follows up with a big overhand right! Oh that's hurt Drysdale! He's out on his feet! Morbid rushes in and drops Drysdale with another big right hand, forcing the referee to stop the fight!
Ladies and gentlemen, after 2:35 of round 2, we have a winner by way of TKO (Punches). Stump Morbid!
|
|
|
|
|
|
|
|
|
|
|
|
|
|
|
|
|
|
|
|
|
|
|
| S |
C
A |
G |
S |
C
B |
G |
|
S |
C |
G |
|
energy
A | B |
|
hype
A | B |
|
pop
A | B |
|
mgr
A | B |
|
FIGHT
RATING
100% |
|
|
|
|
|
|
