|
|
PBP Commentary |
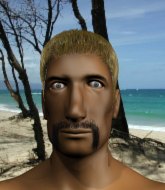
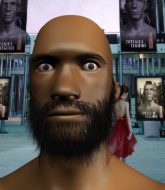
Coming up we have a light heavyweight MMA rules bout between James Killroy (ranked 0 p4p, 0 weight class) and Steissi Mave (ranked 0 p4p, 0 weight class). Steissi Mave acknowledges the crowd's support as he enters the cage.
 |
|
 |
| 190 cm
20
210 lbs
1 - 0 - 0 |
|
175 cm
18
199 lbs
1 - 3 - 0 |
BJJ White Belt
Brawler
Good chin |
|
Good wrestler
Basic striking
Granite chin |
|
| |
|
Ladies and gentlemen. This fight is 3 rounds, in the light heavyweight division.
Introducing the fighter to my left, fighting out of the red corner.
With a record of
1 - 0 - 0, fighting out of Tokyo, James Killroy!
And introducing the fighter to my right, fighting out of the blue corner.
With a record of
1 - 3 - 0, fighting out of Tokyo, Steissi Mave!
The judges for this bout are Ren Mimura, Tatsuya Matsuyama and Shigeki Sano.

The bell rings for round one and we are underway!
Killroy connects with the punch.
Mave misses the jab.
Mave tries for a takedown but Killroy sees it coming a mile off and avoids it easily.
Mave misses with a hook. Killroy ducked under it nicely.
Mave is looking to clinch.
Killroy is looking to take this fight into the clinch.
Mave drops his hands and takes a jab to the jaw for his troubles.
Killroy throws a series of punches but Mave avoids them all with ease.
Mave fails with an attempt to clinch.
Killroy shoots in with a takedown attempt and he has Mave pinned against the cage. Mave gets the underhooks and manages to circle away.
Mave should think about turning a few of those tyres round his middle into muscle if he wants people to take him seriously as an athlete.

Mave shoots in for a takedown and gets it. Let's see what he's got on the mat.
Mave won't allow Killroy to get back to his feet.
Mave working in close now, lands a nice elbow to the side of Killroy's head.
Mave must be cautious of submissions here, given that his opponent has the superior Jiu Jitsu.
Mave postures up to throw the ground and pound strikes but they don't connect.
Both fighters really going for it on the ground here!
Killroy throwing some rather feeble looking strikes off his back.
Mave scoring with punches to the head and body.

Mave avoids a guillotine attempt easily.
Killroy will need to keep those long limbs tucked in whilst he's on the ground, to prevent any submissions.

That's one minute gone in the round.
Mave trying to pass the guard but can't manage it just yet.

Well, the referee has seen enough. Neither fighter is active enough on the ground so he's stood them back up.
Killroy wants to clinch.
Killroy throws a series of punches but Mave avoids them all with ease.
Mave avoids a punch combination nicely.
Killroy tries for a takedown but Mave circles away easily
and Mave counters with a shoot takedown. Killroy fights it but they end up in guard.
Killroy is breathing heavily.
Killroy looking to hit a scissor sweep but Mave is one step ahead there.
Mave working some strikes from top position.
Mave is sitting in guard, working some ground and pound.
Killroy is trying to keep Mave in close.
Mave trying to control but Killroy is working from the bottom.
Mave scoring with some ground and pound.
The ref warns both fighters not to hold the cage as they work up against the meshing.

That's two minutes gone in the round.
Mave landing some decent shots from guard.
Mave stands up and looks to throw the legs aside to pass to side control. Killroy swivels though and keeps the full guard.
Mave controlling from the guard. I say controlling but really, he's stalling.
Killroy working a defensive guard here.
Mave tries to free his leg and advance position but Killroy is retaining full guard.
Killroy trying to punch from his back but it's not doing any damage.
Mave postures up.
The referee has ruled that neither fighter is active enough on the ground and has stood them back up.
Killroy lands a high kick!
Mave throws a body punch but Killroy moves out of range.
Killroy throws a wild combination but nothing lands.
Mave feints and as Killroy raises his hands in defense, Mave changes levels and drives through with a takedown into guard.
Killroy isolates an arm and boxes in a triangle. Mave stacks Killroy on his neck as he steps over and passes to the side. He's now in a much more dominant position where he can look to do some serious damage. Nice move by Mave!
Killroy takes a couple of big shots there - the referee warns him that he has to defend himself better.

That's three minutes gone in the round.
Mave working away.
Killroy gets one leg under and gets the fight to half guard.
Killroy makes his way to full guard. A much better position for Killroy.
Killroy throwing his legs up looking for a triangle.
Killroy wants to sweep but no luck.
Mave is looking to work some ground and pound but Killroy has wrist control.
Mave stops Killroy from standing up.
Killroy keeping moving, preventing Mave from controlling successfully.
Killroy manages to sweep nicely, so he's now on top. Mave manages to get himself to full guard.
Killroy postures up as if he's going to throw some strikes but drops back for an ankle! Mave is in big trouble! He looks ready to tap! But no, he's escaped and dives on top of Killroy, into his guard.
Mave trying to control but Killroy is working from the bottom.

That's four minutes gone in the round.
Killroy looking to sweep here. No luck so far.
Killroy striking off his back but it's not causing Mave any problems.
Mave trying to control but Killroy is working from the bottom.
Killroy trying to control the position.
Mave trying to land body shots but he keeps hitting the mat.
Mave trying to control the position from guard on top but Killroy is wriggling around, looking for whatever he can.
Killroy looking to control.
Neither fighter is doing enough for the referee's liking and he's decided to stand them back up.
Killroy looks to score with a combo but nothing lands.
The crowd applaud the fighters efforts here as the round comes to an end.
A choreographed right hand from Mave misses the target.
Mave throws an off balance right hand
and Killroy counters with a right hand to the body.
Killroy throws a sloppy head kick and Mave moves out of range easily.
Killroy gets taken down but at least he's managed to land in guard.
Mave postures up and scores with a shot to the body and a follow up elbow to the head.
And thats the end of the round the fighters go back to their corners.
A close round but Steissi Mave will probably get the nod.
The referee calls time. The cornermen exit stage left and we're back to business.

Mave shoots for a double leg takedown but Killroy sprawls well. He's pushed Mave's face into the mat and manages to get back to his feet relatively easily.
Killroy misses with a jab, cross combination.
Killroy throws a series of punches but Mave avoids them all with ease.
Killroy works over Mave's head and body with a nice combination.

It looks like Steissi Mave has been cut.
Mave takes one to the side of the head.
Killroy uses some good footwork to avoid the body shot by Mave.
Killroy moves in looking to clinch but Mave pushes him off.
Killroy keeping a good distance there, avoiding the body shot.
James Killroy is looking to throw some combinations by the looks of things.
Mave feints and as Killroy raises his hands in defense, Mave changes levels and drives through with a takedown into guard.
Mave trying to control the position from guard on top but Killroy is wriggling around, looking for whatever he can.
Killroy throws some sloppy strikes off his back.
Mave looking to pass the guard.
Both fighters are absolutely exhausted here.
Killroy looking to sweep here. No luck so far.
The fighters are pressed up against the cage, both looking to find a bit of space to work.
Mave trying to control but Killroy is working from the bottom.

Killroy kicks Mave off and gets to his feet.
Mave showing good head movement there, avoiding the strikes from Killroy.
That's one minute gone in the round.
Killroy keeps the fight on the outside.
Mave changes levels and drives through with a really nice takedown into side control. Killroy looks really pissed at himself for not defending that better.
Mave working the ground and pound.
Mave lands a knee to the body and a forearm to the face.
Killroy is trying to get back to half guard. He's pushing on Mave's leg. He's managed it. Nice work.
Killroy is looking to escape.
Mave is looking to take a break and control but Killroy is keeping him honest, looking to work from the bottom.
Killroy manages to get to full guard.
Killroy working from the bottom, still in full guard. He's managed to get a loose triangle. Mave doesn't seem to be doing much to defend here, obviously he feels comfortable in the position. Mave manages to throw the legs off his shoulder and he's back into guard - no problem.
There's a bit of a scramble here and now Killroy is on top in guard.
Killroy throwing elbows and punches but not connecting, as Mave works some decent striking defense from the bottom.
That's two minutes gone in the round.
Killroy postures up in Mave's guard and throws a big left but Mave blocks it.
Killroy drops back for a leg! It's a sloppy attempt though and Killroy jumps back into guard quickly, to retain the dominant position.
Killroy gets to his feet and steps away from his opponent.
Mave avoids a punch combination nicely.
Mave shoots in for a takedown but doesn't get it.
Killroy goes to the watering hole and comes back with a big thumbs up from the judges as he scores a three punch combo.
Mave takes a head kick and keeps coming.
This has been an exciting period of action!
Killroy slips in close and lands a nice hook before moving back out of range.
Killroy throws a nice looking combination but Mave bobs and weaves to avoid any damage.
Mave avoids a punch combination nicely.

Killroy clinches with his opponent.

Killroy breaks the clinch and we're back to striking at distance.
Killroy throws a wild combination but nothing lands.
Mave closes the distance and clinches up, looking for a takedown. He shifts his weight and gets a nice trip into half guard.
The fighters are battling for position here. Killroy manages to regain full guard. Nice work.
Killroy scrambles and gets back to his feet.
Killroy throws a combination but comes up with nothing but fresh air.
That's three minutes gone in the round.
Mave tries to close the distance and clinch up but Killroy swats him away and circles back towards the center.
Mave ducks down and throws a hook to the body but Killroy moves away.
Killroy misses with a two punch combination.
Mave moves forwards but Killroy connects with a nice, crisp jab.
Killroy moves out of range of the strikes.
Mave feints and as Killroy raises his hands in defense, Mave changes levels and drives through with a takedown into guard.
Killroy manages to land a sweep and now he's in mount on top!
Mave is desperately trying to get back to half guard.
Mave is persisting with the attempt to improve his position.
BOOM! Killroy connects with a massive shot to the dome!
Mave is wriggling around trying to escape.
Mave throwing punches from his back but nothing is landing.
Mave is trying desperately to improve position.
Mave is in a horrible position here, under a barrage of strikes, he's managing to avoid any damage.
That's four minutes gone in the round.
Killroy throwing sloppy strikes, which aren't doing any damage.
Mave wriggling around on the bottom manages to avoid the strikes thrown by Killroy.
Mave tries to reverse the position but Killroy maintains control.
Killroy scoring with some good ground and pound from mount here. Will he manage to finish Mave?
Mave is trying desperately to improve position.
Killroy landing strikes from the mount.
Mave keeping his composure momentarily, calmly looking to get back to half guard.
Killroy trying to control but Mave is having none of it.
Steissi Mave has got the better of the ground game so far.
Killroy lands a big elbow.
Mave is desperately trying to get back to half guard.
We get told so often about how wrestlers don't like to be on their backs. Let's see if Mave can do anything to dispel that myth.
As the round comes to an end the crowd are showing their appreciation for a great round of action.
Killroy landing strikes from the mount and Mave is in trouble!
Fantastic stuff here - a very entertaining period of action, which has drawn cheers from the crowd.
A nice elbow there by Killroy.
Killroy putting on the heat here with some good ground and pound!
And thats the end of the round the fighters go back to their corners.
James Killroy dominated that second round.
The cut man is working on Steissi Mave's cut.
The minute break is over - no more time for sponges and pep talks - back to the action! This is the final round!

Mave dodges the punch combination from Killroy.
Killroy is the aggressor but that punch slipped nicely by Mave.
Killroy doesn't manage to clinch there - Mave circles away.
Killroy with a hook.
Mave showing good head movement there, avoiding the strikes from Killroy.
Mave tries to close the distance and clinch up against the cage but Killroy paws at him with a jab and circles away.
Mave misses the shot to the body.
Mave misses with a body shot
and Killroy counters by moving into the clinch.
Killroy breaks the clinch.
Killroy is looking to clinch.
Killroy lands with a straight right. Mave didn't see that one coming.
Mave fakes high and swings low for a body shot but Killroy manages to avoid it.
James Killroy is winning the standup battle so far.
Nice defenses there by Mave.
Mave fails to land the takedown.
Killroy's corner calls for a 1-2. Killroy obliges with the 1 part as he scores the single shot and moves back out of range.
Mave dodges the punch combination from Killroy.
Mave drives through with a really nice takedown into side control.
Killroy tries to work a leg under to get back to half guard but Mave wriggles his own leg back out and remains in side control.
Both fighters are breathing heavily.
That's one minute gone in the round.
Killroy manages to get one leg in to regain half guard.
Killroy has been looking to land a fair amount of strikes on the ground. He might be looking to soften his opponent up in order to work for a submission.
Killroy looking for submissions off his back.
Mave is thwarting Killroy's attempts to control the position.
Mave missing with the ground and pound from half guard.
Killroy wants to get back to his feet.
The referee has ruled that neither fighter is active enough on the ground and has stood them back up.
Killroy throws a right hand that Mave ducks under and follows up with a left that Mave also avoids with ease.
Killroy slips a straight right by Mave.
Killroy moves in looking to clinch but Mave pushes him off.
Killroy throws a sloppy head kick and Mave moves out of range easily.
Mave just misses with a punch to the body.
Killroy gets a clinch.
That's two minutes gone in the round.
The crowd are starting to boo a lack of action.
Mave is looking to break free of the clinch but Killroy has double underhooks.
Killroy is using his reach advantage well here, landing the more effective single shots from range.
Killroy keeps control of Mave as he tries to wriggle out of the double underhooks.
Killroy pulls guard effortlessly.
Mave won't allow Killroy to sweep him here.
Killroy manages to sweep nicely, so he's now on top. Mave manages to get himself to full guard.
Mave seems keen to control rather than go for a submission, at least for now.
Killroy stopping the sweep attempt from Mave.
Killroy wants to pass the guard but Mave is keeping the position.
Killroy drops back for a leg! It's a sloppy attempt though and Killroy jumps back into guard quickly, to retain the dominant position.
Mave tries to strike from the bottom.
Mave wants to control but Killroy passes easily into half guard.
Killroy moves into full mount! Mave won't be happy about that!
Killroy scoring with strikes but Mave is staying in there.

Mave is rocked!
That's three minutes gone in the round.
Killroy throwing sloppy strikes here. Perhaps if he tightened up his striking from such a dominant position, he'd be able to finish easier.
Mave is still in real trouble! Can Killroy finish him?
Killroy looking to control and managing it successfully.
Killroy scores with a couple of good head shots there.
That has opened up Steissi Mave's cut even more.
Killroy with a couple of short strikes.
Steissi Mave's cut is absolute horrible now. This looks like something out of a horror film with blood covering both fighters.
The referee calls the doctor in to look at Steissi Mave's cut. Oh no, the doctor has called an end to the bout!
Ladies and gentlemen, after 3:41 of round 3, we have a winner by way of TKO (Cut). James Killroy!
|
|
|
|
|
|
|
|
|
|
|
|
|
|
|
|
|
|
|
|
|
|
|
| S |
C
A |
G |
S |
C
B |
G |
|
S |
C |
G |
|
energy
A | B |
|
hype
A | B |
|
pop
A | B |
|
mgr
A | B |
|
FIGHT
RATING
100% |
|
|
|
|
|
|
