|
|
PBP Commentary |
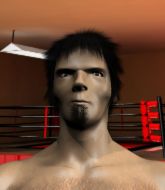
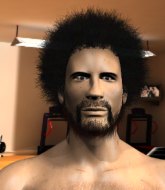
Coming up we have a welterweight MMA rules bout between Utah Jones (ranked 0 p4p, 0 weight class) and Dye Tryin (ranked 0 p4p, 0 weight class). Tryin has chosen On the way home as his entrance music. Utah Jones could well score a knockout today. He has the power to get to Dye Tryin's chin.
 |
|
 |
| 181 cm
19
170 lbs
2 - 4 - 0 |
|
175 cm
22
179 lbs
4 - 6 - 1 |
BJJ Purple Belt
Brawler
KO power |
|
BJJ Blue Belt
Basic striking
Knockout power |
|
| |
|
Ladies and gentlemen. This fight is 3 rounds, in the welterweight division.
Introducing the fighter to my left, fighting out of the red corner.
With a record of
2 - 4 - 0, fighting out of Sydney, Utah Jones!
And introducing the fighter to my right, fighting out of the blue corner.
With a record of
4 - 6 - 1, fighting out of Sydney, Dye Tryin!
The judges for this bout are Eliza Hachem, John Mangel and Donatello Bradman.

The bell rings for round one and we are underway!
Jones throws a combination but it was largely blocked by Tryin.
Jones digs a good hook to Tryin's body.
Jones swings and misses with a hook to the body.
Jones gets cracked with a nice right hand there by Tryin.
Jones swats away the attempt to clinch by Tryin.

Tryin drives through and clinches with Jones against the cage.
Tryin misses the knee to the body. Nice hip positioning from Jones.
Jones avoiding damage as Tryin throws knees to the body.
Tryin trying to land knees to the body.
A right handed body shot lands from Jones.
Tryin misses the knee to the body. Nice hip positioning from Jones.
Jones avoids the elbow strike from Tryin, against the cage.
Jones pressing his opponent against the cage.

Jones has double underhooks and is working for a body lock takedown. He's got it. The fighters land in half guard but Tryin regains guard immediately.
Tryin looking to sweep here. No luck so far.
Jones in full guard, throwing the ground and pound. No damage this time.
Jones throwing shots from guard but he's hitting more mat than opponent.

That's one minute gone in the round.

Jones gets to his feet and steps away from his opponent.
Tryin tries to close the distance and clinch up against the cage but Jones paws at him with a jab and circles away.
Tryin takes a swing at Jones's ribcage but misses.
Tryin throws a couple of head shots and lands with the final one - a decent hook, which struck Jones on the side of the head.
Jones shoots for a double leg takedown but Tryin sprawls well. He's pushed Jones's face into the mat and manages to get back to his feet relatively easily.
Jones shoots in for a takedown but Tryin shows good takedown defense.
A decent looking body kick lands there for Tryin.
Jones uses good head movement to avoid the hook from Tryin.
Dye Tryin seems to be the more aggressive standup fighter in this bout.
Tryin swats away the attempt to clinch by Jones.
Jones shoots in looking for a takedown. Tryin tries to sprawl out of it but Jones keeps driving through. The fighters are pinned against the cage. Tryin manages to get underhooks and after a bit of a struggle, circles away and we're back to standing.
That's three failed takedown attempts in the round for Utah Jones. That's going to take a lot out of him.
The fighters circling - Jones throws out the jab but it was never going to land.
Jones misses with a takedown attempt - Tryin sprawls well and throws a nice strike on the way out which just misses.
Tryin lands a jab-cross combination.

That's two minutes gone in the round.
Jones looks frustrated there after his takedown attempt is stuffed easily.
Tryin tries to clinch up.
Tryin clinches.
Tryin tries to land a knee to the body but he is off balance and Jones avoids it.
Tryin tries to land knees in the clinch but Jones avoids the damage to the body.
Tryin misses the knee to the body. Nice hip positioning from Jones.
Jones on the defensive, avoiding the knees to the body.
A nice glancing elbow lands by Tryin.
Tryin tries to land knees in the clinch but Jones avoids the damage to the body.
Jones drops to a knee looking for a takedown but Tryin gets the underhooks and prevents it.
Jones missing with knees to the body.
Jones avoiding damage as Tryin throws knees to the body.
Jones is working for a takedown up against the cage. He can't get it on this occasion though.
Tryin misses with an elbow strike.
Jones looks like he'd prefer to be striking at range right now.
Tryin trying to land knees to the body.

That's three minutes gone in the round.
Tryin tries to land a knee to the body but he is off balance and Jones avoids it.
Tryin tries to land a knee to the body but he is off balance and Jones avoids it.
Tryin trying to land knees to the body.
With the fighters up against the cage, Tryin throws an elbow but misses.
Jones avoiding damage as Tryin throws knees to the body.
Tryin looks gassed!
Tryin gets double underhooks to prevent a takedown attempt from Jones.
Tryin missing with knees to the body.
Jones managing to block the knees to the body from Tryin.
Jones wants a takedown.
Jones blocks a knee to the body. He'll have a nicely bruised forearm in the morning.
Tryin misses with an elbow over the top.
Tryin missing with knees to the body.
Jones avoiding damage as Tryin throws knees to the body.
Jones has double underhooks and is working for a body lock takedown. He's got it. The fighters land in half guard but Tryin regains guard immediately.
Tryin bucks up whilst keeping hold of a body lock, managing to reverse the position. Now he's in top in Jones's guard.
Jones has control of Tryin's left arm, preventing Tryin from doing any damage.

That's four minutes gone in the round.
Jones wants to sweep but no luck.
And thats the end of the round the fighters go back to their corners.
A close round but Dye Tryin will probably get the nod.
Well, the break between rounds is over. Let's get back to the scrappin!

Jones has a takedown stuffed.
Tryin clinches but Jones breaks the clinch
and Jones counters with a good right hand that lands right on the jaw.
Jones shoots for a double leg takedown but Tryin sprawls well. He's pushed Jones's face into the mat and manages to get back to his feet relatively easily.
Jones instigates a clinch.
Jones on the defensive, avoiding the knees to the body.
Jones turns his hips and lands a very nice judo throw into side control!
Tryin parries the strikes from Jones easily there. Jones is wary of posturing up too much because it might enable Tryin to escape.

Jones is trying to get an arm triangle but Tryin is defending well.
Jones is working Tryin over with some ground and pound from side control.
Jones misses with the ground and pound.
Jones tries to score with some ground and pound. Tryin controls his posture well this time though and the shots don't do any damage.
Jones goes for an armbar here - this could be all over! But no, Tryin has escaped beautifully and is now on top in side control! Oh, that's unlucky for Jones but great work by Tryin.
That's one minute gone in the round.
Jones is not content to let Tryin control the position.
A lull in the action here as Tryin stalls from top position.
Tryin landing a few strikes.
Jones takes an elbow right on the bridge of the nose and winces in pain.
That's two minutes gone in the round.
The crowd are starting to boo a lack of action.
Jones manages to get back to half guard.
Tryin prevents Jones from improving his position.
Tryin is pressing down on Jones's thigh, looking to free his foot. Jones is holding on for now.
Tryin prevents Jones from improving his position.
That's three minutes gone in the round.
Tryin wants to lay and pray for a moment but Jones keeps working.
Jones trying to get back to full guard but Tryin takes advantage of the position and moves to full mount!
Jones is desperately trying to improve his position but Tryin has a good base and remains in mount.
That's four minutes gone in the round.
Neither fighter has done anything of merit for a good minute or two here and the crowd are not happy about it.
Jones holding onto his opponent's waist for dear life, as Tryin tries to land some strikes to get him to release his grip.
Tryin wants to control the pace but Jones is squirming around nicely.
Jones can't escape the position.
The crowd thankful this round is nearly over.
And thats the end of the round the fighters go back to their corners.
Utah Jones dominated that second round.
The minute break is over - no more time for sponges and pep talks - back to the action! This is the final round!

A swing and a miss from Tryin.
Jones uses good footwork to avoid the strikes from Tryin.
Tryin misses with a double jab.
Jones tries to clinch but Tryin moves out of range.
Jones fails with a takedown attempt from distance.
Jones closes this distance looking for a takedown but Tryin circles away.
Tryin bobs and weaves and throws out a fast jab that snaps Jones's head backwards.
Tryin misses with the combination.
Jones wants to clinch.
We've had a slow start to the round here - hopefully the action picks up.
Tryin with a nice cross.
Tryin tries to clinch but is not successful on this occasion.
Jones avoids a low kick by using good footwork.
A combination from Tryin does no damage.
That's one minute gone in the round.
Tryin tries to clinch but fails miserably
and Jones counters with a shoot takedown into half guard.
Tryin is not content to let Jones control the position.
Jones content to sit in half guard and control for a moment.
Tryin trying to control but Jones postures up.
Jones not throwing his punches with enough precision this time.
Jones is trying to control the action in half guard but Tryin is working away on the bottom, looking perhaps to get back to full guard.
Tryin has no desire to be mounted, so is trying to control. Jones is working away from the top position though.
Tryin is trying to avoid being dragged into an even worse position than he's already in but Jones is staying active.
The fighters are pressed up against the cage, both looking to find a bit of space to work.
That's two minutes gone in the round.
Tryin is working for an escape here. He's hooked one of Jones's legs and he's managed to sneak out and take Jones's back!
Jones rolls, trying to escape but Tryin keeps control of the position.
Tryin controls the action.
Jones trying to control but not successfully.
That's three minutes gone in the round.
Tryin struggling to land strikes to the head as Jones covers up.
Jones avoids the strikes from Tryin.
Tryin biding his time, controlling Jones.
Jones can't escape the position.
That's four minutes gone in the round.
There's not a lot going on here and the crowd are letting the fighters know they're not willing to tolerate a lack of action.
Jones just trying to survive but Tryin is wriggling into a better position, looking to finish.
Jones manages to reverse the position and now he's in Tryin's guard. Nice work there by Jones.
Jones looking to pass the guard.

Well, the referee has seen enough. Neither fighter is active enough on the ground so he's stood them back up.
Tryin wants to clinch but Jones slips to the side
and Jones counters with a nice double leg into half guard.
Tryin is trying to maintain the position but Jones is very close to passing his half guard.
Jones uses his free foot to push down on Tryin's thigh. Eventually he works his other foot free and he's advanced to mount - this is trouble for Tryin.
Jones cracks Tryin with a nasty head shot there - the crowd let out an audible gasp there, as the noise reverberated around the arena.
And that's the end of the fight!
Utah Jones showed his dominance in that final round.
I think Jones has won this one but let's see what the judges have to say. Over to the ring announcer for the scorecards.
Ladies and gentlemen, after 3 rounds of action, we go to the scorecards for a decision.
Judge Eliza Hachem scores the fight 29:28
Judge John Mangel scores the fight 29:28
Judge Donatello Bradman scores the fight 29:28
In favor of your winner, by unanimous decision... Utah Jones!
|
|
|
|
|
|
|
|
|
|
|
|
|
|
|
|
|
|
|
|
|
|
|
| S |
C
A |
G |
S |
C
B |
G |
|
S |
C |
G |
|
energy
A | B |
|
hype
A | B |
|
pop
A | B |
|
mgr
A | B |
|
FIGHT
RATING
43% |
|
|
|
|
|
|

