|
|
PBP Commentary |
Coming up we have a welterweight MMA rules bout between David Launston (ranked 0 p4p, 0 weight class) and Drunk Monkey (ranked 0 p4p, 0 weight class). We have two fighters making their debuts here, so let's see who comes out of this one with their first professional victory.
 |
|
 |
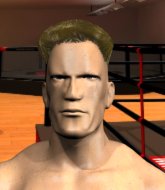
| 185 cm
25
170 lbs
0 - 0 - 0 |
|
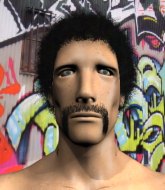
180 cm
18
185 lbs
0 - 0 - 0 |
BJJ Purple Belt
Counter striker
Good chin |
|
Good wrestler
Basic striking
Granite chin |
|
| |
|
Ladies and gentlemen. This fight is 3 rounds, in the welterweight division.
Introducing the fighter to my left, fighting out of the red corner.
With a record of
0 - 0 - 0, fighting out of Sydney, David Launston!
And introducing the fighter to my right, fighting out of the blue corner.
With a record of
0 - 0 - 0, fighting out of Sydney, Drunk Monkey!
The judges for this bout are Skip Squint, Summer Carpenter and Damien Edna.

The bell rings for round one and we are underway!
Launston moves in looking to clinch but Monkey pushes him off.
Monkey leaves Launston with his face pressed against the mat as he sprawls beautifully, defending against a solid takedown attempt.
Launston moves in looking to clinch but Monkey pushes him off.
Launston tries to score with an inside leg kick but telegraphs it and Monkey is able to avoid easily.

Monkey changes levels and drives through with a really nice takedown into side control. Launston looks really pissed at himself for not defending that better.
Launston sneaks back into half guard.
Launston trying to control from the bottom.

Monkey is looking for a kimura. It's going to be difficult to finish that from half guard though and Launston defends it well.
Launston is trying to maintain the position but Monkey is very close to passing his half guard.

That's one minute gone in the round.
Launston looking for submissions off his back.
Monkey looking for a kimura but he'll have to free his other leg if he wants to finish that. Perhaps he's just using it as a distraction technique.
Launston is working for an escape here. He's hooked one of Monkey's legs and he's managed to sneak out and take Monkey's back!

That's two minutes gone in the round.
The crowd are getting on the fighters' backs, as the pace has dropped off in the last minute or so.
Monkey tries to escape the position.
Launston controls the position.
Launston working for a RNC but it's not happening just yet.
Monkey can't escape the position.
Launston lands a couple of good shots to his opponent's body and a final shot to the head. Good little attack there by Launston.

That's three minutes gone in the round.
Launston lands a shot to the head.
Launston keeps control of the position as Monkey tries to break free.
Monkey is persisting with the attempt to improve his position.
Monkey just trying to survive but Launston is wriggling into a better position, looking to finish.
The fighters are pressed up against the cage, both looking to find a bit of space to work.
Launston scores with some strikes to the side of the head there. Good, points scoring shots.
Launston working for a RNC but it's not happening just yet.
Launston working for a choke but Monkey is defending well.

That's four minutes gone in the round.
Monkey fending off the submission attempt from Launston.
Launston is breathing heavily.
I really don't envy Monkey right now.
Monkey takes a big shot to the side of the head.
Monkey tries to escape the position.
And thats the end of the round the fighters go back to their corners.
David Launston dominated that round.
Well, the break between rounds is over. Let's get back to the scrappin!

Launston misses with an uppercut. Monkey saw that one coming.
Monkey staying out of range there.
Monkey fails with the takedown

and Launston counters into the clinch. Nicely done.
Monkey stops a takedown attempt from Launston.
Launston goes for a takedown in the clinch but Monkey prevents it.
Launston wants a takedown but no success here.
That's three failed takedown attempts in the round for David Launston. That's going to take a lot out of him.
Monkey has clasped his hands together around Launston's back... aaand, he's got a takedown into side control. Nicely done.
Launston is sneaking out the side here. He's bucked Monkey off and has taken his back!
Monkey is trying to get back to his feet but he's not managed it yet.
Launston is throwing strikes from the back here. Oh that last one was to the back of the head. Launston gets a warning from the referee. He throws another strike to the back of the head straight away though and the referee has seen enough. He breaks up the two fighters and stands them back up. Launston gets a real talking to here and is lucky not to get a point deducted. Launston apologises and we restart here on the feet.
Launston misses with a takedown attempt - Monkey sprawls well and throws a nice strike on the way out which just misses.
David Launston is looking to throw some combinations by the looks of things.
Monkey scores a trip takedown into side control. Nice.
That's one minute gone in the round.
Launston manages to land a sweep and he's now on top! Lovely Jiu Jitsu!
Both fighters are absolutely exhausted here.
Launston missing with the ground and pound from half guard.
Launston thumps the canvas. Not on purpose obviously - he just missed Monkey's head.
We get told so often about how wrestlers don't like to be on their backs. Let's see if Monkey can do anything to dispel that myth.
Monkey is looking to control Launston's leg but it's slowly edging free. Can Monkey avoid being mounted?
Monkey wants to get back to full guard but Launston has mounted him!
Monkey takes a big shot to the head but keeps on trying to improve his position.
Monkey tries to hold on but Launston postures up.
Launston lands with some strikes.
Launston looking to ground and pound but Monkey is blocking nicely.
Monkey is wriggling around trying to escape.
That's two minutes gone in the round.
Monkey wants to control but Launston is having none of it.
Monkey is desperately trying to improve his position but Launston has a good base and remains in mount.
Monkey is squirming around, avoiding Launston's attempts to control the action.
Launston has been looking to land a fair amount of strikes on the ground. He might be looking to soften his opponent up in order to work for a submission.
Launston is really struggling to control Monkey but he's trying to hold on to the position.
Monkey is trying to escape the mount.
Launston with a couple of short strikes.
Launston trying to control but he's not successful this time.
That's three minutes gone in the round.
Poor strikes thrown by Launston there. More accuracy and less frantic strikes would help!
Launston unloads with some shots from mount but Monkey bucks and avoids them well.
Launston lands a shot to the body, followed up by a shot to the exposed head of his trapped opponent.
Monkey is trying to reverse the position but instead Launston has taken his back - oops!
The ref warns both fighters not to hold the cage as they work up against the meshing.
Monkey wants to control his opponent's hands but Launston gets his hands free.
Launston loading up with punches from the back mount - how long can Monkey hold on?
Monkey is keeping busy.
Launston lands a punch that was close to the back of the head but the ref thinks it's OK.
Monkey tries to escape but Launston has the hooks in and won't let him break free.
A lull in the action here.
Monkey really doesn't want to stay on the ground with Launston. If he can't get it back to his feet, it's only a matter of time before he'll be tapping out.
You can see the frustration on Monkey's face
He knows he is in trouble unless he improves his position sooner rather than later.
That's four minutes gone in the round.
Launston lands a shot to the head.
Monkey can't escape the position.
Monkey covering up well and avoiding damage.
I really don't envy Monkey right now.
Monkey is keeping busy.
I really don't envy Monkey right now.
Monkey is trapped and Launston is scoring with shots to the head and body.
Launston struggling to keep hold of the position.
And thats the end of the round the fighters go back to their corners.
David Launston dominated that second round.
The fighters' corners scream their final instructions, as the referee calls time. Here we go, back to the action! This is the final round!

Monkey shoots in for a takedown from distance. He catches Launston napping and manages to drive through into side control!
Launston can't do much from the bottom here.
Monkey tries to move to mount but Launston blocks the move with his legs.
We've had a slow start to the round here - hopefully the action picks up.
Launston striking from the bottom but nothing landed.
Monkey takes a big intake of breath there - he's definitely tired.
Monkey trying to control the action but Launston is working from the bottom.
That's one minute gone in the round.
Monkey wants to control for a moment but Launston uses the opportunity to move back to half guard.

Launston kicks off Monkey and gets to his feet.

Launston drops Monkey with a left right combo! Launston follows him down to the ground into side control.

It looks like Drunk Monkey has been cut.
Launston working away.
Monkey is looking to reverse the position.
That's two minutes gone in the round.
Launston tries to land with some ground and pound but misses.
Monkey tries to improve position but can't.
Launston controlling the position from side mount.
Monkey is looking for a sweep.
Launston lands a nice forearm strike.
This has been an exciting period of action!
Monkey is looking to reverse the position.
Launston decides to stand up, so the ref orders Monkey to his feet.
Launston closes the distance and clinches.
Monkey wants a takedown but no success here.
Launston pulls Monkey into guard.
Launston keeping full guard, as Monkey tries to pass.
That's three minutes gone in the round.
Launston bucks up whilst keeping hold of a body lock, managing to reverse the position. Now he's in top in Monkey's guard.
Launston drops back for a leg! It's a sloppy attempt though and Launston jumps back into guard quickly, to retain the dominant position.
Launston works a leg free and moves into half guard.
Monkey is looking to improve his position.
David Launston is fighting for a decision here - he's started to take the cautious approach.
Launston is keen to just control but Monkey is a slippery customer.
Monkey wants to get back to full guard.
Launston is working for submissions here but there's nothing on.
That's four minutes gone in the round.
Well. There's a bit of a lull in the action here and the crowd are starting to get restless.
Monkey trying to control here.
Launston wants to stand up but Monkey is controlling the position.
Monkey is trying to maintain the position but Launston is very close to passing his half guard.
Drunk Monkey has stepped it up - he knows he needs a finish here!
Launston is trying to get back to his feet now but his leg is trapped.

Neither fighter is doing enough for the referee's liking and he's decided to stand them back up.
Monkey gets the takedown into side control.
Monkey tries to move to mount but Launston blocks the move with his legs.
Monkey throwing shots but missing, from side control.
And that's the end of the fight!
David Launston showed his dominance in that final round.
Well Launston has outscored his opponent in every aspect of the fight today. Only a scarily incompetent judge or two will keep him from a well deserved win... Over to the ring announcer for the scorecards.
Ladies and gentlemen, after 3 rounds of action, we go to the scorecards for a decision.
Judge Skip Squint scores the fight 30:27
Judge Summer Carpenter scores the fight 30:27
Judge Damien Edna scores the fight 30:27
In favor of your winner, by unanimous decision... David Launston!
|
|
|
|
|
|
|
|
|
|
|
|
|
|
|
|
|
|
|
|
|
|
|
| S |
C
A |
G |
S |
C
B |
G |
|
S |
C |
G |
|
energy
A | B |
|
hype
A | B |
|
pop
A | B |
|
mgr
A | B |
|
FIGHT
RATING
42% |
|
|
|
|
|
|
