|
|
PBP Commentary |
Coming up we have a lightweight MMA rules bout between Buhawi Jack (ranked 0 p4p, 0 weight class) and Sub Zero (ranked 0 p4p, 0 weight class). Jack comes to the cage accompanied by enter sandman. I can't wait for this one - let's get the fighter introductions out of the way and get this one started!
 |
|
 |
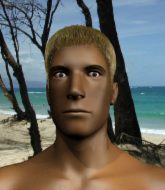
| 176 cm
21
155 lbs
4 - 3 - 0 |
|
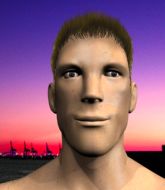
180 cm
19
150 lbs
4 - 1 - 0 |
BJJ Purple Belt
Counter striker
Very strong |
|
BJJ Brown Belt
Counter striker
Enjoys gardening |
|
| |
|
Ladies and gentlemen. This fight is 3 rounds, in the lightweight division.
Introducing the fighter to my left, fighting out of the red corner.
With a record of
4 - 3 - 0, fighting out of Tokyo, Buhawi Jack!
And introducing the fighter to my right, fighting out of the blue corner.
With a record of
4 - 1 - 0, fighting out of Tokyo, Sub Zero!
The judges for this bout are Tatsuya Matsuyama, Yasuomi Hirokawa and Yuuki Gou.

The bell rings for round one and we are underway!
Jack jabbing away but nothing is landing.

Jack moves into the clinch.

Jack successfully pulls guard.

Zero drops back for a leg! It's a sloppy attempt though and Zero jumps back into guard quickly, to retain the dominant position.

Jack pushes Zero off and scrambles back to his feet.
No joy there for Jack, who threw a few shots but didn't land.
Jack misses with a low kick.
Jack stalks Zero and leaps in with a furious combination of punches. Uppercuts and crosses smash into Zero's face. Zero staggers backwards, shaken.
Zero looks for a takedown here. Will he get it? Jack is fending him off so far but Zero persists. Nope, Jack circles away and we're back to standing.
Zero will have to do better than that with his takedown attempts.

That's one minute gone in the round.
No joy there for Jack, who threw a few shots but didn't land.
Zero on the wrong end of a nice jab.
Jack throws a feint and then finishes with a kick to the body.
Zero fails with a takedown attempt.
Buhawi Jack has stuffed three takedown attempts in the round now. That's going to take a lot out of Sub Zero.
Jack throws a head kick but Zero moves out of range.
Buhawi Jack is looking to keep the fight on the feet at all costs.
Jack swinging wildly here.
Jack throws a hook but Zero avoids it easily.

That's two minutes gone in the round.
A punch combination from Jack misses.
No luck with that takedown attempt from Zero.
Jack buckles his opponent's knee momentarily with a nice leg kick.
Zero slips a jab and a cross from Jack.
Zero ducks under an overhand right and circles away with a smile on his face.
Jack lets the fists fly and connects with a left straight followed by a right hook.
Jack walks forward and throws out a flicking leg kick. Zero checks it nicely though, as he moves to the side.
Danga de danga de dang - Jack scores with a four punch combination!

That's three minutes gone in the round.
Jack swings and misses with a hook to the body.
Zero swats away the attempt to clinch by Jack.
Jack goes to the watering hole and comes back with a big thumbs up from the judges as he scores a three punch combo.
Zero blocks the body kick.
Zero dodges the punch combination from Jack.
Jack pivots as if he's going to throw a leg kick but stops half way.

That's four minutes gone in the round.
Zero takes a thudding leg kick, right into the meat of the thigh.
Zero shoots in for a takedown. "I don't think so" says Jack as he avoids it easily.
Jack misses with a head kick.
Zero shoots in with a takedown attempt and he has Jack pinned against the cage. Jack gets the underhooks and manages to circle away.
Jack loads up on a big right hand but Zero slips the punch.
Jack misses with a jab, cross combination.
Zero takes a shot right to the bread basket.
And thats the end of the round the fighters go back to their corners.
Buhawi Jack dominated that round.
The fighters' corners scream their final instructions, as the referee calls time. Here we go, back to the action!

Zero walks into a jab.
Jack throws a right and a left that both miss.
Jack fails to land with the punch combination there - jab, cross, hook, miss, miss, miss.
Jack tries to clinch there but Zero circles away.
No luck for Zero with that takedown attempt.
Zero tries to keep at a distance but Jack has taken the fight into the clinch.
We've had a slow start to the round here - hopefully the action picks up.
Jack pulls guard effortlessly.
The ref warns both fighters not to hold the cage as they work up against the meshing.
That's one minute gone in the round.
Zero got a little sloppy there for a moment and Jack has worked his way into a loose triangle - can he finish it?! No, Zero has managed to get both his arms back between Jack's legs - danger averted.
Jack had isolated an arm as going for a kimura. Zero defends it easily.
Zero drops back for a leg! It's a sloppy attempt though and Zero jumps back into guard quickly, to retain the dominant position.
Jack working for a triangle but Zero defends it easily.
Jack escapes his hips to the side and looks to be working for an armbar. Zero gives him a little smile and shakes his head. No chance.
Zero pressing down on his opponent's thigh, looking to pass guard. Jack is keeping the position for now.
Jack has his foot on Zero's thigh. He's trying to push off and get in position for a triangle, I think. Zero works his way back into a safe position though.
Jack is working actively off his back, looking to secure an arm or perhaps work for a triangle.
The fighters are pressed up against the cage, both looking to find a bit of space to work.
Both fighters are absolutely exhausted here.
Zero thinks about going for a leg but decides against it, in order to maintain the position.
That's two minutes gone in the round.
Zero drops back for a leg! It's a sloppy attempt though and Zero jumps back into guard quickly, to retain the dominant position.
Jack working from the bottom, still in full guard. He's managed to get a loose triangle. Zero doesn't seem to be doing much to defend here, obviously he feels comfortable in the position. Zero manages to throw the legs off his shoulder and he's back into guard - no problem.
Jack working from the bottom, still in full guard. He's managed to get a loose triangle. Zero doesn't seem to be doing much to defend here, obviously he feels comfortable in the position. Zero manages to throw the legs off his shoulder and he's back into guard - no problem.
Zero thinks about going for a leg but decides against it, in order to maintain the position.
Zero drops back for a leg! It's a sloppy attempt though and Zero jumps back into guard quickly, to retain the dominant position.
Jack looking for submissions from the bottom here. Moving his hips around, possibly looking for an armbar.
Zero is trying to work a guillotine from the top, or something like that? Don't know how he thinks he's going to get a finish from there.
That's three minutes gone in the round.
Jack looking to try and escape his hips here, looking for a submission. It looks like he's going for a triangle but Zero is defending well. Jack quickly switches to an armbar and extends the arm! Zero has no choice but to tap, to a very quick submission! Wow, that was lightning fast! Jack celebrates on the cage, with the crowd.
Ladies and gentlemen, after 3:23 of round 2, we have a winner by way of Submission (Armbar). Buhawi Jack!
|
|
|
|
|
|
|
|
|
|
|
|
|
|
|
|
|
|
|
|
|
|
|
| S |
C
A |
G |
S |
C
B |
G |
|
S |
C |
G |
|
energy
A | B |
|
hype
A | B |
|
pop
A | B |
|
mgr
A | B |
|
FIGHT
RATING
32% |
|
|
|
|
|
|
