|
|
PBP Commentary |
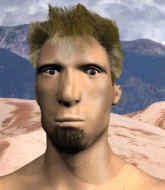
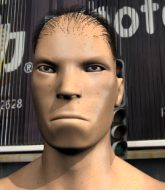
Coming up we have a light heavyweight MMA rules bout between Jason Hardwick (ranked 0 p4p, 0 weight class) and Kazuma Yoshiro (ranked 0 p4p, 0 weight class). Hardwick comes to the cage accompanied by ZZ Top - Sharp Dressed Man. Yoshiro is bouncing up and down as he enters the arena, backed by Girugamesh - Arrow. This should be a great matchup!
 |
|
 |
| 193 cm
20
220 lbs
4 - 2 - 0 |
|
183 cm
24
205 lbs
5 - 5 - 0 |
Good wrestling
Solid boxing
Very quick |
|
BJJ White Belt
Excellent MT
Powerful |
|
| |
|
Ladies and gentlemen. This fight is 3 rounds, in the light heavyweight division.
Introducing the fighter to my left, fighting out of the red corner.
With a record of
4 - 2 - 0, fighting out of Rio de Janeiro, Jason Hardwick!
And introducing the fighter to my right, fighting out of the blue corner.
With a record of
5 - 5 - 0, fighting out of Rio de Janeiro, Kazuma Yoshiro!
The judges for this bout are Felipe Paraventi, Leandro Rodrigues and Alexandre Firmino.

The bell rings for round one and we are underway!
Yoshiro pulls out of a head kick attempt.

Hardwick feints and as Yoshiro raises his hands in defense, Hardwick changes levels and drives through with a takedown into guard.
Hardwick working from the guard for now, landing some ground and pound.
Hardwick is taking a break and basically stalling. The referee will not allow him to do that for long.
Yoshiro wants to stand but Hardwick is controlling the position.
Hardwick has been looking to land a fair amount of strikes on the ground. He might be looking to soften his opponent up in order to work for a submission.
Hardwick with a couple of shots to the head there. Not particularly brutal.
Hardwick's corner is telling him to maintain position.

That's one minute gone in the round.
Hardwick passes into half guard.

Yoshiro manages to escape and get back to his feet!
Hardwick throws a nice looking combination but Yoshiro bobs and weaves to avoid any damage.
Yoshiro misses with the combination.
Hardwick blocks a head kick by Yoshiro.
Hardwick shoots in for a takedown. "I don't think so" says Yoshiro as he avoids it easily.
Hardwick missing with a left hand there. Yoshiro was out of range so wasted energy throwing that one.
Yoshiro takes a big uppercut there. He seems a bit wobbly but no, he's OK.
Hardwick is looking for a takedown here. He's shot in and has managed to get it, finishing up in Yoshiro's half guard.
Hardwick controlling the action here.
Yoshiro is trying to stand back up but Hardwick is controlling him

That's two minutes gone in the round.
Hardwick controlling the pace.
Hardwick is trying to control. Yoshiro wants to improve his position but can't escape this time.
Hardwick takes a deep breath and rests his weight momentarily on top of his opponent, to control the position.

The referee decides to stand the fighters back up, due to lack of activity on the part of Jason Hardwick.
A head kick from Yoshiro lands but Hardwick takes it in his stride.
Yoshiro moves out of range as Hardwick throws a body kick.
Hardwick is the aggressor but that punch slipped nicely by Yoshiro.
Yoshiro throws a series of punches but Hardwick moves out of range.
Hardwick takes a body punch that cleary hurt but he's trying not to show any weakness.
Yoshiro throws a combination but it was largely blocked by Hardwick.
Yoshiro gets caught flat footed, as Hardwick shoots in with a quick takedown into guard.
The crowd cheering loudly, showing their appreciation for the quality fight we're seeing here.
Hardwick stops Yoshiro from standing up.

That's three minutes gone in the round.
Yoshiro utilising some decent striking defenses from the guard, preventing the ground and pound.
Hardwick stops Yoshiro from standing up.
Yoshiro really doesn't want to stay on the ground with Hardwick. If he can't get it back to his feet, it's only a matter of time before he'll be tapping out.
Hardwick in full guard, throwing the ground and pound. No damage this time.
The fighters are starting to get a bit slippery now, which will make submissions a bit more difficult.
Hardwick is in close to Yoshiro's body, working some short punches and elbows.
Yoshiro is looking to get back to his feet but can't, whilst Hardwick is controlling him.
A big thud reverberates around the arena there as Hardwick accidentally thumps the mat. Hopefully he's not broken his hand.
Hardwick is working Yoshiro over from the guard. He should look to pass the guard and do a little more damage with these strikes.
The referee has ruled that neither fighter is active enough on the ground and has stood them back up.
Yoshiro takes one to the side of the head.
Yoshiro misses with a wild combination.
Yoshiro lands three nice shots there - that looked like it hurt!
Hardwick fails with the takedown.
A head kick misses from Yoshiro.

That's four minutes gone in the round.
Hardwick swings wildly with a hook that is half blocked by Yoshiro.
Yoshiro misses with a half-hearted attempt at a head kick.
Hardwick fails with a takedown attempt.
That's three failed takedown attempts in the round for Jason Hardwick. That's going to take a lot out of him.
Yoshiro throws a left and a right that both miss
and Hardwick counters with a driving takedown into guard. Nice work there by Hardwick.
Hardwick is breathing heavily.
Yoshiro is looking to get back to his feet but can't, whilst Hardwick is controlling him.
Hardwick tries to free his leg and advance position but Yoshiro is retaining full guard.
Hardwick content to stall in guard here.
Hardwick stops Yoshiro from standing up.
The crowd applaud the fighters efforts here as the round comes to an end.
Yoshiro wants to get back to his feet but he's too absorbed in his own little project and Hardwick manages to pass to side control.
Hardwick performing his best blanket impression for a moment.
And thats the end of the round the fighters go back to their corners.
Jason Hardwick dominated that round.
That's time! Hardwick's corner gives him a slap on the ass as he gets ready to fight.

Hardwick shoots in for a takedown and gets it. Let's see what he's got on the mat.
Hardwick throws a big right hand that misses.
Hardwick throws a big right hand that misses.
Yoshiro wants to stand and escape but Hardwick is having none of it.
Hardwick working some ground and pound from guard but it's not doing any damage.
Hardwick trying to pass the guard but can't manage it just yet.
Yoshiro wants to stand but Hardwick is controlling the position.
It looks like we're going to have a standup here. Neither fighter is doing enough on the ground.
Yoshiro misses with a body shot. Nice footwork from Hardwick.
Yoshiro throws a head kick that half lands.
That's one minute gone in the round.
Hardwick dodges the punch combination from Yoshiro.
No joy there for Yoshiro, who threw a few shots but didn't land.
Kazuma Yoshiro is looking to keep the fight on the feet at all costs.
Yoshiro moves away from the strike by Hardwick.
Yoshiro keeps the fight standing with a nice sprawl.
Yoshiro lands with a kick to the temple. Hardwick shrugs as if to say "is that all you've got?"
Yoshiro lets the fists fly and connects with a left straight followed by a right hook.
Hardwick swings and misses with a hook to the body.
Hardwick bobbing and weaving, closes the distance and lands a hook to the side of Yoshiro's head.
Yoshiro throws a head kick but Hardwick moves out of range.
Hardwick misses with a wild body shot.
Hardwick throws a looping overhand right but Yoshiro ducks down to avoid it.
Hardwick scores with a jab.
Hardwick takes a shot right to the bread basket.
Yoshiro leaves Hardwick with his face pressed against the mat as he sprawls beautifully, defending against a solid takedown attempt.
Both fighters are absolutely exhausted here.
Hardwick throws out a powerful jab.
That's two minutes gone in the round.
A telegraphed right hand from Hardwick misses the target.
Yoshiro displaying good standup as he scores with a three punch combination.
Kazuma Yoshiro seems to be the more aggressive standup fighter in this bout.
Hardwick takes a step towards his opponent and connects with a left hand, before circling away.
Hardwick takes a head kick and keeps coming.
Hardwick lets the fists fly and connects with a left straight followed by a right hook.
Hardwick misses with an uppercut. Yoshiro saw that one coming.
Yoshiro goes for a high kick. It partially lands.
This has been an exciting period of action!
Hardwick slips a jab and a cross from Yoshiro.
Kazuma Yoshiro is looking to throw some combinations by the looks of things.
Yoshiro connects with a solid leg kick.
Hardwick lands with a shot to the body.
Hardwick blocks a head kick by Yoshiro.
Yoshiro lands a jab. Then a cross. Then finally a nice hook to the body. Good work there by Yoshiro.
Hardwick blocks a head kick by Yoshiro.
Hardwick throws a looping left and ducks down for a takedown. He's got his arms around Yoshiro's waist but Yoshiro gets an underhook and avoids the takedown by throwing Hardwick off to one side.
That's three failed takedown attempts in the round for Jason Hardwick. That's going to take a lot out of him.
Hardwick slips a straight right by Yoshiro.
Yoshiro scores with a nice looking left hook and follows it up with an uppercut!
Yoshiro misses with a head kick.
That's three minutes gone in the round.
Hardwick takes a punch right to his stomach. That took the wind out of him momentarily.
Yoshiro lands with a thumping leg kick.
Yoshiro misses with a two punch combination.
Yoshiro throws a head kick that Hardwick semi-blocks.
Yoshiro tries a switch kick but it misses it's target.
Hardwick fails miserably with a takedown attempt.
Hardwick needs to keep his hands up - Yoshiro had a free shot at his head there.
Yoshiro slips under a jab.
A really sloppy takedown attempt there from Hardwick.
Yoshiro throws a quick head kick that skims the top of Hardwick's head.

Hardwick is rocked!
Yoshiro falls off balance throwing a combination
and Hardwick decides to take the opportunity to score a takedown. He's landed in Yoshiro's guard.
We've seen a great period of action over the last minute or so - credit to both fighters for going all out!
Hardwick won't allow Yoshiro to get back to his feet.
That's four minutes gone in the round.
Yoshiro is using up a lot of energy trying to get back to his feet. Perhaps he should improve his position first.
Hardwick postures up and scores with a shot to the body and a follow up elbow to the head.
Hardwick prevents Yoshiro from getting back to his feet.
As the round comes to an end the crowd are showing their appreciation for a great round of action.
The referee decides to stand the fighters back up.
Hardwick is the aggressor but that punch slipped nicely by Yoshiro.
No luck for Hardwick with that takedown attempt.
Hardwick lands a vicious shot with the stealth of a sniper and the strength of a viper. Are vipers that strong? I can think of lots of things that are stronger than a viper - not many rhyme with sniper though.
And thats the end of the round the fighters go back to their corners.
Kazuma Yoshiro showed his class in that round. I'd imagine he'll take it on all the scorecards.
The fighters get back to their feet, the hooter sounds and we're back to the action! This is the final round!

Yoshiro tries a head kick but it misses.
Hardwick lands a jab.
Hardwick is using his height advantage well here, landing a good percentage of his punches.
Yoshiro slips under a jab.
Yoshiro with a nice looking leg kick. You could hear that one land in a back row.
Donk. Hardwick catches Yoshiro right on the button with a cross.
Hardwick showing good head movement there, avoiding the strikes from Yoshiro.
Hardwick lands a nice hook to Yoshiro's body. Yoshiro takes it in his stride and looks to land his own strikes.
Yoshiro throws a head kick that misses.
Hardwick scores with a decent looking hook.
Kazuma Yoshiro seems to be getting the better of the standup.
Hardwick blocks a head kick by Yoshiro.
Yoshiro throws a nice looking combination but Hardwick bobs and weaves to avoid any damage.
Yoshiro defending well as Hardwick loads up on a big left hand.
Yoshiro misses with the combination.
Hardwick is really head hunting here, hardly looking to strike to the body at all.
Hardwick scores a trip takedown into side control. Nice.
Both fighters are breathing heavily.
Hardwick throws an elbow but Yoshiro slips to the side and avoids it well.
That's one minute gone in the round.
Yoshiro is trying to escape and get back to his feet.
Hardwick works a knee to the body and follows up with a nice elbow to the head.
Hardwick landing a few strikes.
The ref warns both fighters not to hold the cage as they work up against the meshing.
Yoshiro prevents Hardwick from improving position.
Yoshiro is trying to escape and get back to his feet.
Hardwick trying to control the position but Yoshiro is working away.
Yoshiro tries to get back to his feet but has found himself mounted instead. Damn, that's gotta suck.
That's two minutes gone in the round.
The crowd are starting to boo a lack of action.
Hardwick raining down shots from the mount!
Jason Hardwick overall seems to be getting the better of the ground position in the fight so far.
Hardwick is in the full mount, landing strikes.
Yoshiro is bucking up trying to escape but Hardwick cracks him with another couple of good strikes.
Hardwick lands a heavy elbow.
Yoshiro is trying to escape but when you're mounted that's not too easy.
Hardwick tucks in and makes sure he doesn't lose the dominant position.
Yoshiro is trying to escape but when you're mounted that's not too easy.
That's three minutes gone in the round.
Hardwick content just to control the position here.
Hardwick connects with a couple of good shots from mount.
Hardwick won't let Yoshiro get back to his feet... He wants to keep the fight where it is for now.
Hardwick with the ground and pound from mount.
Hardwick controlling the pace for now.
Hardwick connects with a couple of good shots from mount.
That's four minutes gone in the round.
Yoshiro in a bad spot here, taking shots to the head.
Hardwick putting on the heat here with some good ground and pound!
Hardwick fakes a shot to the body and cracks his opponent in the head. Nice ground and pound there!
Yoshiro is looking to get back to his feet - it's going to be hard from this position.
Hardwick lands a couple of nice shots there from mount.
The referee warns Yoshiro that he has to improve his position here as he takes two more clean shots to the head.
Yoshiro in a bad spot here, taking shots to the head.
Hardwick tucks in and makes sure he doesn't lose the dominant position.
And that's the end of the fight!
Jason Hardwick showed his dominance in that final round.
I think Hardwick has won this one but let's see what the judges have to say. Over to the ring announcer for the scorecards.
Ladies and gentlemen, after 3 rounds of action, we go to the scorecards for a decision.
Judge Felipe Paraventi scores the fight 29:28
Judge Leandro Rodrigues scores the fight 29:28
Judge Alexandre Firmino scores the fight 29:28
In favor of your winner, by unanimous decision... Jason Hardwick!
|
|
|
|
|
|
|
|
|
|
|
|
|
|
|
|
|
|
|
|
|
|
|
| S |
C
A |
G |
S |
C
B |
G |
|
S |
C |
G |
|
energy
A | B |
|
hype
A | B |
|
pop
A | B |
|
mgr
A | B |
|
FIGHT
RATING
85% |
|
|
|
|
|
|
