|
|
PBP Commentary |
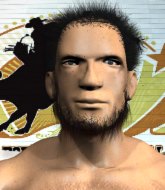
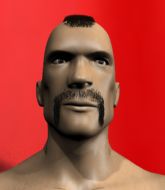
Coming up we have a featherweight MMA rules bout between Douglas Quaid (ranked 0 p4p, 0 weight class) and Ken Hansen (ranked 0 p4p, 0 weight class). Quaid comes into the arena with Metallica - For Whom the Bell Tolls blaring out of the sound system. Both these fighters are unbeaten, so somebody's 0 has got to go!These two fighters really are very evenly matched on the feet - it will be fascinating to see who can assert themselves in that aspect of the fight.
 |
|
 |
| 170 cm
21
153 lbs
7 - 0 - 0 |
|
172 cm
21
155 lbs
7 - 0 - 1 |
Good wrestling
Excellent boxer
KO power |
|
Good wrestler
Good low kicks
Powerful |
|
| |
|
Ladies and gentlemen. This fight is 3 rounds, in the featherweight division.
Introducing the fighter to my left, fighting out of the red corner.
With a record of
7 - 0 - 0, fighting out of Tokyo, Douglas Quaid!
And introducing the fighter to my right, fighting out of the blue corner.
With a record of
7 - 0 - 1, fighting out of Tokyo, Ken Hansen!
The judges for this bout are Hirohito Nitta, Yuuki Gou and Tatsuya Matsuyama.

The bell rings for round one and we are underway!
Quaid blocks a head kick by Hansen.
Hansen is the aggressor but that punch slipped nicely by Quaid.
Hansen's corner calls for a 1-2. Hansen obliges with the 1 part as he scores the single shot and moves back out of range.
Hansen scores with a leg kick.
Quaid throws a hook but Hansen avoids it easily.
Nice straight punches there by Quaid. You know Roy Jones Jr respects the hands of Quaid.
Hansen tries to clinch but is not successful on this occasion.
Quaid fakes high and swings low for a body shot but Hansen manages to avoid it.
Quaid on the wrong end of a vicious looking body shot.
Hansen has his head slapped from side to side by a 3 punch combination. That must have hurt him.
Hansen works his jab well there, keeping his opponent at a distance.
Hansen swings wildly with a couple of big hooks
enabling Quaid to counter with a crisp jab.
The crowd cheers as Hansen lands an impressive looking overhand right. Quaid doesn't seem phased though.
Hansen is looking to slow Quaid down with leg kicks.
Quaid throws a shot from downtown. Hansen moves away and avoids it.
Hansen fails in his attempt to clinch.
Quaid loads up on a big right hand but Hansen slips the punch.
Quaid stuns Hansen with a nice body shot, before stepping back out of range.

That's one minute gone in the round.
Hansen ducks under an overhand right and circles away with a smile on his face.
Quaid shakes his hands off, looking to compose himself, but takes a jab to the jaw whilst he does it.
Hansen connects with a slap. Keep your fist closed son.
A telegraphed right hand from Quaid misses the target.
Hansen tries to clinch but Quaid is having none of it.

Quaid scores a trip takedown into side control. Nice.
Hansen is trying to get back to half guard.
Hansen is trying to control Quaid's posture but Quaid avoids it.
Hansen manages to get one leg in to regain half guard.
Hansen gets back to full guard.
Hansen is trying to control the position from the bottom.
Hansen bucks up whilst keeping hold of a body lock, managing to reverse the position. Now he's in top in Quaid's guard.

That's two minutes gone in the round.

Hansen gets to his feet - Quaid follows without any prompting.
Quaid checks a low kick. Bone on bone - not my idea of a good time.
Quaid goes to the watering hole and comes back with a big thumbs up from the judges as he scores a three punch combo.

It looks like Ken Hansen has been cut.
This has been an exciting period of action!
Hansen misses with a jab to the body
and Quaid counters with a nice body shot.
Hansen looks gassed!
Hansen tries a head kick but it misses.
Ken Hansen seems to be the more aggressive standup fighter in this bout.
Hansen tries to clinch up but Quaid circles away and keeps his distance.
Quaid throws a shot from downtown. Hansen moves away and avoids it.
Quaid shoots in and gets a takedown into half guard. Quaid showed some decent athleticism there.
The ref warns both fighters not to hold the cage as they work up against the meshing.
Hansen is trying to stand up here but Quaid is controlling him well.
Hansen is doing well to control the position and prevent Quaid from advancing to side control.

That's three minutes gone in the round.
Quaid content to sit in half guard and control for a moment.
Quaid working Hansen over with strikes.
Hansen has no desire to be mounted, so is trying to control. Quaid is working away from the top position though.
Hansen blocking the ground and pound attempt from Quaid.
The fighters are pressed up against the cage, both looking to find a bit of space to work.
Quaid slips a nice elbow through Hansen's hands, connecting with Hansen's forehead.
Quaid missing with the ground and pound from half guard.
Hansen is trying to stand up here but Quaid is controlling him well.
Hansen has no desire to be mounted, so is trying to control. Quaid is working away from the top position though.
Hansen is doing well to control the position and prevent Quaid from advancing to side control.
Quaid tries to pass to full mount but Hansen defends it.

That's four minutes gone in the round.
Hansen tries to get to full guard but Quaid has control of the leg.
Quaid is trying to control the action in half guard but Hansen is working away on the bottom, looking perhaps to get back to full guard.
Quaid stops Hansen from getting back to his feet.

The referee has ruled that neither fighter is active enough on the ground and has stood them back up.
Hansen throws a nice hook to the body that draws an oooh from the crowd.
Hansen misses with the combination.
The crowd cheers as Quaid lands an impressive looking overhand right. Hansen doesn't seem phased though.
Quaid swings for the body but Hansen moves out of range.
Quaid scores a takedown into full mount!
As the round comes to an end the crowd are showing their appreciation for a great round of action.
Hansen takes a big shot to the head but keeps on trying to improve his position.
Hansen tries to lock up and control but Quaid gives him a forearm to the face and pushes him away.
And thats the end of the round the fighters go back to their corners.
Douglas Quaid dominated that round.
The cut man is working on Ken Hansen's cut.
The fighters' corners scream their final instructions, as the referee calls time. Here we go, back to the action!


Hansen moves into the clinch.
Hansen misses with a short punch on the inside.
Hansen missing with knees to the body.
Quaid wants a takedown but no success here.
Nice body punch from Hansen - that landed with a thud.
Hansen has a couple of punches blocked by Quaid.
Hansen looking to throw knees to the head but Quaid is blocking nicely.
Hansen lands a body punch.
Hansen scores with a shot to the side of Quaid's head.
Hansen tries to throw a body punch but Quaid avoids it by throwing Hansen back against the cage.
Hansen is stalling here. The referee will be looking to step in if he doesn't pick up the pace.
Quaid lands a body punch.
Hansen tries a knee to the head but Quaid blocks it.
Quaid throws a head punch that misses.
Hansen misses with the head strike.
Quaid lands with a short punch from the clinch.
With the fighters clinched against the cage, Quaid creates a bit of distance for himself and scores with a nice uppercut.
A head punch blocked on the inside by Quaid.
That's one minute gone in the round.
With the fighters clinched against the cage, Hansen creates a bit of distance for himself and scores with a nice uppercut.
Hansen lands a body shot in the clinch.
Hansen can't find room to land a body shot as Quaid controls the action.
An uppercut to the body lands inside from Hansen.
Quaid digs a right hand into Hansen's ribs. Those have got to be taking their toll on Hansen's gas tank.
Hansen working aggressively here.
Quaid wants to stall.
Quaid is working Hansen over against the cage.
Hansen is breathing heavily.
Quaid stalling in the clinch but Hansen improves position.
Hansen lands a good knee to the midsection. Quaid won't want to take too many of those.
Hansen blocks a couple of punches on the inside.
Hansen can't find room to land a body shot as Quaid controls the action.
An uppercut on the inside fails to land for Hansen.
Hansen prevents a takedown attempt there.
Hansen swings wildly with an uppercut but Quaid uses good head movement to avoid it.
That's two minutes gone in the round.
Hansen displaying some good clinch control by pressing Quaid up against the cage.
Hansen prevents a takedown attempt there.
That's three failed takedown attempts in the round for Douglas Quaid. That's going to take a lot out of him.
A left hand lands to the body for Hansen.
Hansen cracks Quaid with a nice body shot.
Hansen missing with knees to the body.
Quaid displaying some good clinch control by pressing Hansen up against the cage.
Hansen lands a nice looking hook to the body, against the cage.
Hansen tries to work over Quaid's body with a swooping hook but it only glances the target.
Hansen is looking to control Quaid's arms but Quaid gets an underhook and turns him. Now Hansen has his back to the cage.
We are yet to see a takedown attempt from Hansen in the fight. On paper you would think he is the more dominant ground fighter so let's see if these unusual tactics pay off.
Hansen blocks a punch to the side of the head.
Quaid letting Hansen take a breather here.
Hansen doesn't land with the attempted body shot.
That's three minutes gone in the round.
Hansen scores with a shoulder strike.
Hansen throws a hook to the body. More of an arm punch but it's all scoring with the judges.
Hansen with the Thai clinch. He's looking to land a big knee but he's not managed it this time.
A left hand lands to the body for Hansen.
Hansen tries a shoulder strike but it doesn't do any damage.
Hansen throws a head punch that misses.
Hansen misses the knee to the body. Nice hip positioning from Quaid.
Hansen lands with a quick shot inside that doesn't really do much damage.
Hansen works on Quaid's body with a couple of short punches.
Quaid tries to land a shot to the body but it's blocked.
A left hand lands to the body for Hansen.
Quaid managing to block the knees to the body from Hansen.
Hansen lands a body punch in the clinch.
Hansen misses with a knee to the head.
Hansen can't find room to land a body shot as Quaid controls the action.
Hansen lands a shoulder strike.
Hansen struggles to land a body shot inside as Quaid controls his hands.
That's four minutes gone in the round.

Quaid breaks from the clinch.
Quaid digs a good hook to Hansen's body.
Hansen misses with a hook to the body
and Quaid connects with a straight left hand counter down the middle.
Douglas Quaid is winning the standup battle so far.
Quaid fakes high and swings low for a body shot but Hansen manages to avoid it.
Quaid shoots in but Hansen avoids the takedown attempt easily.
Quaid scores a trip takedown into side control. Nice.
Hansen defending against the ground and pound.
Hansen wants to control but Quaid postures up.
Hansen is working to avoid the ground and pound but Quaid connects with a decent elbow.
Hansen stuck in half guard on the bottom here.
Hansen is looking to reverse the position.
Hansen defending against the ground and pound.
And thats the end of the round the fighters go back to their corners.
Ken Hansen showed his class in that round. I'd imagine he'll take it on all the scorecards.
The cut man is working on Ken Hansen's cut.
That's the end of the interval. I'm sure that seemed a lot quicker than a minute for our two fighters! Back to the action. This is the final round!

Quaid looks to score with a jab to the body but Hansen is just out of range.
Hansen lands a jab. Then a cross. Then finally a nice hook to the body. Good work there by Hansen.
A nice leg kick lands there from Hansen.
Quaid is looking for a takedown here. He's shot in and has managed to get it, finishing up in Hansen's half guard.
Hansen keeping hold of Quaid's head, controlling as best he can.
Hansen wants to get back to his feet.
Hansen takes a big intake of breath there - he's definitely tired.
Hansen is trying to control but can't.
Hansen is staying active underneath Quaid, who seems content to just control the action from this position.

Quaid is looking for a kimura. It's going to be difficult to finish that from half guard though and Hansen defends it well.
Hansen is working for an escape here. He's hooked one of Quaid's legs and he's managed to sneak out and take Quaid's back!
That's one minute gone in the round.
You can see the frustration on Quaid's face
He knows he is in trouble unless he improves his position sooner rather than later.
Good control from Hansen.
Hansen not allowing Quaid to control his hands.
Hansen keeps control of the position easily here as Quaid tries to buck him off.
That's two minutes gone in the round.
The crowd are starting to boo a lack of action.
Quaid manages to reverse the position and now he's in Hansen's guard. Nice work there by Quaid.
The ref stands the fighters back up, due to lack of action by Ken Hansen.
Quaid fakes a head punch and goes low to the body. Nicely done.
Ken Hansen is looking to keep the fight on the feet at all costs.
Hansen misses with a series of wild punches.
Quaid throws a nice looking combination but Hansen bobs and weaves to avoid any damage.
That's three minutes gone in the round.
Quaid closes the distance, clinches up and gets a nice trip takedown into side control. Very smooth.
Quaid slows the pace down.
Hansen wants to escape from the position here - easier said than done!
Hansen tries to slip a leg under to move to half guard but Quaid presses down on the leg and jumps into full mount!
Hansen is desperately trying to improve his position but Quaid has a good base and remains in mount.
Hansen tries to hold on but Quaid postures up.
Hansen keeping his composure momentarily, calmly looking to get back to half guard.
Quaid landing strikes from the mount and Hansen is in trouble!
Quaid lands a nice shot to the head.
That's four minutes gone in the round.
Quaid pausing momentarily but resumes with a couple of decent strikes that do a bit of damage.
Hansen holds on for dear life, controlling Quaid's posture momentarily.
Hansen tries to lock up and control but Quaid gives him a forearm to the face and pushes him away.
Hansen is looking to improve his position but Quaid isn't that keen on the idea.
Hansen defends a decent attempt at a guillotine from Quaid.
Quaid takes a little breather and maintains the position. The referee will be looking for him to stay active from such a dominant position though.
Hansen bucks up and manages to get a nice reversal! He's in guard on the top - nicely done!
And that's the end of the fight!
Douglas Quaid showed his dominance in that final round.
I think Quaid has won this one but let's see what the judges have to say. Over to the ring announcer for the scorecards.
Ladies and gentlemen, after 3 rounds of action, we go to the scorecards for a decision.
Judge Hirohito Nitta scores the fight 29:28
Judge Yuuki Gou scores the fight 29:28
Judge Tatsuya Matsuyama scores the fight 29:28
In favor of your winner, by unanimous decision... Douglas Quaid!
|
|
|
|
|
|
|
|
|
|
|
|
|
|
|
|
|
|
|
|
|
|
|
| S |
C
A |
G |
S |
C
B |
G |
|
S |
C |
G |
|
energy
A | B |
|
hype
A | B |
|
pop
A | B |
|
mgr
A | B |
|
FIGHT
RATING
66% |
|
|
|
|
|
|
