|
|
PBP Commentary |
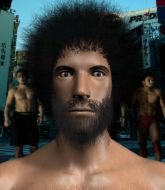
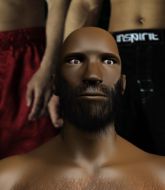
Coming up we have a featherweight MMA rules bout between Peter Compton (ranked 0 p4p, 0 weight class) and Kaz Hayabusa (ranked 0 p4p, 0 weight class). We have two fighters making their debuts here, so let's see who comes out of this one with their first professional victory.
 |
|
 |
| 168 cm
18
155 lbs
0 - 0 - 0 |
|
180 cm
22
155 lbs
0 - 0 - 0 |
BJJ Blue Belt
Brawler
Self confident |
|
BJJ Brown Belt
Brawler
Determined |
|
| |
|
Ladies and gentlemen. This fight is 3 rounds, in the featherweight division.
Introducing the fighter to my left, fighting out of the red corner.
With a record of
0 - 0 - 0, fighting out of Tokyo, Peter Compton!
And introducing the fighter to my right, fighting out of the blue corner.
With a record of
0 - 0 - 0, fighting out of Tokyo, Kaz Hayabusa!
The judges for this bout are Sosuke Kotani, Kenichi Hosakawa and Shirou Masuda.

The bell rings for round one and we are underway!
Compton stuffs the takedown.
Compton misses with a jab and misses with a cross straight after too.
Compton shoots in but doesn't get the takedown

and Hayabusa counters with a nice double leg into side control. Compton won't be happy with that.
Compton misses with a strike from the bottom.
Compton wants to escape from the position here - easier said than done!
Hayabusa in side control lands a nice looking series of punches and elbows.
Compton is trying to get back to half guard.
Hayabusa controls the position.
Compton is looking to reverse the position.

Hayabusa has had enough of the ground for now and decides to stand.
Compton throws a head kick that looked like it stung.
Hayabusa shoots in with a takedown attempt and he has Compton pinned against the cage. Compton gets the underhooks and manages to circle away.
Compton throws a combination but comes up with nothing but fresh air.

That's one minute gone in the round.

Compton closes the distance and clinches.
Hayabusa goes for a takedown in the clinch but Compton prevents it.
Peter Compton has stuffed three takedown attempts in the round now. That's going to take a lot out of Kaz Hayabusa.
Compton prevents a takedown attempt there.
Hayabusa looks gassed!

Compton escapes the clinch and we're back to striking.
Compton gets the takedown into side control.
Compton wants to stand but Hayabusa has his arm trapped.
An elbow from Compton crashes against the mat.
Compton working away.
Hayabusa is trying to buck Compton off.
Hayabusa prevents Compton from moving into mount.
Compton decides to take the fight back to the feet.
Compton shoots in but doesn't get the takedown
so Hayabusa counters with a double leg into guard. Good agility.
Hayabusa stays in close to Compton's body and controls the position.

That's two minutes gone in the round.
Hayabusa passes Compton's left leg - he's now in half guard.
This has been an exciting period of action!
Hayabusa sitting in half guard, looking to land shots. Compton defending well though.
Hayabusa trying to control from half guard but Compton is working away.
Compton moves into full guard.
Hayabusa postures up in Compton's guard and throws a big left but Compton blocks it.
The fighters are pressed up against the cage, both looking to find a bit of space to work.
Compton keeping moving, preventing Hayabusa from controlling successfully.
Compton knows he needs to get back to his feet asap. He's simply no match for Hayabusa on the ground.
Compton trying to keep a closed guard but Hayabusa is proving a slippery customer.

Compton is looking for a triangle here but Hayabusa uses the submission attempt to pass into side control.
The fighters are going at a pretty good pace and they're both starting to sweat now.
Hayabusa has had enough of the ground for now and decides to stand.

That's three minutes gone in the round.
Compton shoots in from a long way out. He's driving through with the takedown attempt and he eventually gets it, landing in Hayabusa's guard.
Hayabusa is avoiding any damage by keeping wrist control.
Hayabusa working the defensive guard well to avoid strikes from Compton.
Compton might be looking to lock onto one of his opponent's long limbs for a submission, whilst we're on the ground.
Hayabusa throwing strikes off his back to little effect.
Hayabusa seems keen to control Compton's posture.
Compton has to be careful here, sitting in the guard of a superior BJJ player.
Hayabusa is working the butterfly guard. He manages to land a nice scissor sweep and is now in half guard on the top. Nice move.
Compton is looking to regain full guard. Not this time though.
Hayabusa trying to control the pace.

That's four minutes gone in the round.
Compton is staying active underneath Hayabusa, who seems content to just control the action from this position.
Compton tries to strike from the bottom but it doesn't land.
Compton wants to get back to full guard.
Compton taking some punishment here, with Hayabusa in his half guard.
Hayabusa slips a nice elbow through Compton's hands, connecting with Compton's forehead.

It looks like we're going to have a standup here. Neither fight is doing enough on the ground.
Compton throws a head kick that half lands.

It looks like Kaz Hayabusa has been cut.
Hayabusa tries to keep at a distance but Compton has taken the fight into the clinch.
Compton has hold of a leg and is looking for a trip takedown. Hayabusa avoids it nicely though and we remain in the clinch.
As the round comes to an end the crowd are showing their appreciation for a great round of action.
Compton manages to break the clinch.
Compton wants to clinch.
Hayabusa takes a punch right to his stomach. That took the wind out of him momentarily.
Hayabusa thows a left - swing and a miss!
And thats the end of the round the fighters go back to their corners.
A close round but Kaz Hayabusa will probably get the nod.
The cut man is working on Kaz Hayabusa's cut.
Well, the break between rounds is over. Let's get back to the scrappin!

Compton shoots in for a takedown and gets it.
Compton wants to stand up but Hayabusa has a hold of him and won't allow it.
Compton working Hayabusa over with strikes.
Hayabusa pushes Compton off looking to stand but Compton dives back in and keeps control.
Compton trying to mount his opponent but Hayabusa defends it.
Hayabusa is refusing to be controlled, as Compton sits in half guard.
Hayabusa controlling the position well.
Compton working over Hayabusa with some ground and pound. Hayabusa looks like he wants out of this position, which is understandable.
Compton trying to mount his opponent but Hayabusa defends it.
That's one minute gone in the round.
Neither fighter is doing enough for the referee's liking and he's decided to stand them back up.
Compton on the wrong end of a decent looking cross there.
Both fighters are absolutely exhausted here.
Hayabusa moves into the clinch successfully.
Compton tries a knee to the head but Hayabusa blocks it.
Hayabusa prevents the takedown attempt.
Compton breaks the clinch and we return to the middle of the mat.
Peter Compton seems to be the more aggressive standup fighter in this bout.
Compton has a takedown stuffed.
Compton shoots in but doesn't get the takedown
and Hayabusa counters with a nice double leg into guard.
That's three failed takedown attempts in the round for Peter Compton. That's going to take a lot out of him.
Hayabusa preventing the sweep.
Compton wants to stand and escape but Hayabusa is having none of it.
Hayabusa passes Compton's left leg - he's now in half guard.
Hayabusa has the superior BJJ but he's also working some ground strikes into his gameplan.
Hayabusa is scoring with some nice ground and pound from the dominant position.
Compton looks like he's trying to stand up.
Hayabusa prevents Compton from improving his position.
That's two minutes gone in the round.
Hayabusa is taking a breather. Compton says something to him but it's hard to make out. Perhaps he's telling him to get on with it and actually do something.
Hayabusa seems to be working for a kimura but Compton defends the submission attempt.
Hayabusa uses his free foot to push down on Compton's thigh. Eventually he works his other foot free and he's advanced to mount - this is trouble for Compton.
Hayabusa cracks Compton with a nasty head shot there - the crowd let out an audible gasp there, as the noise reverberated around the arena.
Compton tries to lock up and control but Hayabusa gives him a forearm to the face and pushes him away.
Hayabusa sitting in mount, just looking to control for the moment.
Compton is in all sorts of trouble here.
That's three minutes gone in the round.
Compton has given up his back - I dont know if this is a deliberate ploy to try and escape or if he is just struggling down there.
Compton trying to control the position but Hayabusa manages to sink in the hooks.
Hayabusa is riding his opponent, not letting Compton buck him off.
Compton just trying to survive but Hayabusa is wriggling into a better position, looking to finish.
The ref warns both fighters not to hold the cage as they work up against the meshing.
Hayabusa throwing lazy shots from the back mount that aren't doing any damage.
Compton is trying to break free.
The crowd hopeful of a finish here - Hayabusa's supporters are on their feet, screaming for him to go for the rear naked choke.
I really don't envy Compton right now.
Hayabusa not allowing Compton to control his hands.
Compton tries to roll but Hayabusa sticks to his back.
That's four minutes gone in the round.
The crowd are starting to boo a lack of action.
Compton controlling the position well but he knows he's in a bad position.
Hayabusa is hanging on to Compton's back as he tries to escape.
Compton is working hard here to advance position.
Compton is trying to get back to his feet but he's not managed it yet.
Compton is trying to defend against the choke here but Hayabusa has an arm under his chin. This one might not last much longer. Hayabusa Tightens the hold and Compton taps out furiously! Hayabusa displays superior BJJ to win the fight.
Ladies and gentlemen, after 4:52 of round 2, we have a winner by way of Submission (RNC). Kaz Hayabusa!
|
|
|
|
|
|
|
|
|
|
|
|
|
|
|
|
|
|
|
|
|
|
|
| S |
C
A |
G |
S |
C
B |
G |
|
S |
C |
G |
|
energy
A | B |
|
hype
A | B |
|
pop
A | B |
|
mgr
A | B |
|
FIGHT
RATING
52% |
|
|
|
|
|
|

