|
|
PBP Commentary |
Coming up we have a heavyweight MMA rules bout between Lotus Hawkins (ranked 0 p4p, 0 weight class) and Jack Morris (ranked 0 p4p, 0 weight class). Well, the cameraman is lingering on a pretty young lady for a bit too long there. Keep your eyes on the fighters buddy or you'll miss the fighter intros!
 |
|
 |
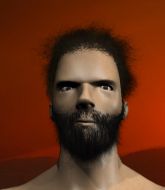
| 195 cm
18
235 lbs
1 - 0 - 0 |
|
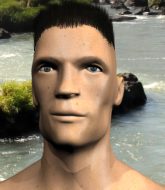
194 cm
18
265 lbs
2 - 0 - 0 |
BJJ White Belt
Basic striking
Good chin |
|
BJJ Blue Belt
Brawler
Very confident |
|
| |
|
Ladies and gentlemen. This fight is 3 rounds, in the heavyweight division.
Introducing the fighter to my left, fighting out of the red corner.
With a record of
1 - 0 - 0, fighting out of Los Angeles, Lotus Hawkins!
And introducing the fighter to my right, fighting out of the blue corner.
With a record of
2 - 0 - 0, fighting out of Los Angeles, Jack Morris!
The judges for this bout are , and Timothy Bukovac.

The bell rings for round one and we are underway!
Morris fails to land with a series of punches.

Morris fakes with an overhand right and moves in to clinch with Hawkins, pushing him back against the cage.

Hawkins breaks the clinch.
Hawkins scores with a nice one two combo and darts back out of range to avoid anything coming in the opposite direction.
Morris throws an overhand right that lands on Hawkins's shoulder, as Hawkins tries to avoid the shot.
Lotus Hawkins seems to be the more aggressive standup fighter in this bout.
Hawkins lands with a two punch combination before moving back out of range.
Hawkins misses with a jab, cross combination.
Hawkins misses with a double jab
and Morris counters with a lovely shot to the body.
Morris throws the kick towards the body but Hawkins avoids it.
Hawkins displays some good footwork, moving neatly out of range as Morris throws out the jab.
A solid body kick from Morris.
The fans in attendance giving it up for the two fighters, who have really let it all hang out in the last minute or so!
Morris lands a jab, followed by a cross and another cross, as Hawkins backs up against the cage.

It looks like Lotus Hawkins has been cut.
No joy there for Hawkins, who threw a few shots but didn't land.
Morris misses with a body kick.
Morris misses with a series of wild punches.
Hawkins tries to grapple but his opponent circles
and Morris counters with a good low kick that Hawkins was not able to check.
Hawkins on the wrong end of an overhand right that came out of nowhere.
Hawkins has managed to clinch.
Hawkins breaks from the clinch.
Oooh a lovely combination from Morris sends Hawkins down but not out. Morris dives into side control looking to finish.

Hawkins is rocked!
Hawkins is breathing heavily.

Morris tries for a kimura. Not really close to a finish though.

That's one minute gone in the round.
Morris thinks about going for a far side armbar but bails out and retains the dominant position instead.
Morris looking for an arm triangle but it's way too loose to do anything.
Morris wants to control but Hawkins is keeping him busy.
Hawkins knows he needs to get back to his feet asap. He's simply no match for Morris on the ground.
Hawkins avoids any damage from the ground and pound of Morris.
Hawkins managing to avoid any damage from the strikes thrown by Morris.

That's two minutes gone in the round.
Neither fighter has done anything of merit for a good minute or two here and the crowd are not happy about it.
Hawkins is putting a lot of effort into getting back to his feet here.
Hawkins dodges the ground and pound from Morris.
Morris working away.
An elbow from Morris crashes against the mat.

The referee has ruled that neither fighter is active enough on the ground and has stood them back up.
Morris circles away from the clinch attempt.
Morris throws a lazy right hand but Hawkins sees it coming a mile off and sidesteps it easily.
Hawkins throws a jab, cross combination which is slipped
and Morris counters with a lovely shot to the body.
Hawkins avoids a low kick by using good footwork.
A slapping body kick lands there for Morris.
Morris should think about turning a few of those tyres round his middle into muscle if he wants people to take him seriously as an athlete.
Morris fails with an attempt to clinch.
Morris throws a two punch combo that lands nicely.
Hawkins shoots for a double leg takedown but Morris sprawls well. He's pushed Hawkins's face into the mat and manages to get back to his feet relatively easily.
Morris misses with a series of wild punches.
Hawkins wants to clinch
and Morris counters with a solid body kick.
Hawkins throws a series of punches but Morris avoids them all with ease.
Some wild striking there from Morris.
Horrible takedown by Morris or perhaps it was just good defense by Hawkins which made him look bad.

That's three minutes gone in the round.
Morris shoots in but no luck this time.
Hawkins tries to clinch up
and Morris counters with a two punch combo.
Lotus Hawkins's cut is getting worse.
A nice combination there by Hawkins.
Hawkins fails with an attempt to clinch.
Hawkins closes the distance and presses his opponent up against the cage.
Hawkins blocks a punch to the side of the head.
Hawkins breaks from the clinch.
Morris stuffs the takedown.
Hawkins tries to clinch but Morris is having none of it.
Morris throws a combination but it was largely blocked by Hawkins.
Morris tries to bum rush Hawkins with a series of wild strikes but Hawkins uses good footwork to avoid the assault.
Hawkins avoids a punch combination nicely.
Morris throws a hook but Hawkins blocks it.
A clash of legs there as Morris blocks the low kick.

Hawkins shoots in and bounces Morris off the cage to secure the takedown into guard.
Hawkins slips nicely into half guard.

That's four minutes gone in the round.
Morris wants to get back to full guard.
Hawkins not throwing his punches with enough precision this time.
Morris makes his way to full guard. A much better position for Morris.
Morris is working actively off his back, looking to secure an arm or perhaps work for a triangle.
Morris looking for submissions off his back, moving his hips, looking for an opening.
The crowd cheering loudly, showing their appreciation for the quality fight we're seeing here.
Hawkins postures up.
The crowd are going absolutely nuts as the round comes to an end - what a fantastic round of action!
Morris working for a triangle but Hawkins defends it easily.
Morris throwing his legs up looking for a triangle.
And thats the end of the round the fighters go back to their corners.
Jack Morris dominated that round.
The cut man is working on Lotus Hawkins's cut.
Well, the break between rounds is over. Let's get back to the scrappin!

The fight stays on the outside here - Morris looks like he's thinking about clinching though.
Hawkins ducks under a wild hook from Morris.
Morris goes for a spinning back kick but it misses.
Morris keeps the fight on the outside.
Morris misses with a double jab.
Morris shoots for a takedown but Hawkins saw that one coming a mile off and avoided it easily.
Hawkins wants to clinch.
Hawkins scores with a shot to the body.
Hawkins scores with a decent looking hook.
Hawkins moves into range and throws a lovely three punch combination.
Hawkins scores with a sloppy punch to the body. Not much technique there but it did the business.
Morris is breathing heavily.
Hawkins throws a head kick that half lands.
Hawkins lands a right hook to the body.
Hawkins shoots in and bounces Morris off the cage to secure the takedown into guard.
Morris has a loose triangle. He'll be looking to tighten that up but Hawkins can see exactly what he's planning and manages to posture up and free himself.
That's one minute gone in the round.
Morris has a loose triangle. He'll be looking to tighten that up but Hawkins can see exactly what he's planning and manages to posture up and free himself.
Morris working for a triangle but Hawkins defends it easily.
Morris throwing strikes off his back to little effect.
Hawkins stopping the sweep attempt from Morris.
Morris escapes his hips to the side and looks to be working for an armbar. Hawkins gives him a little smile and shakes his head. No chance.
That's two minutes gone in the round.
Hawkins trying to control the position from guard on top but Morris is wriggling around, looking for whatever he can.
Morris looking for a guillotine here but Hawkins defends easily.
Morris is looking for a triangle but Hawkins pushes his legs off easily.
Morris working from the bottom, still in full guard. He's managed to get a loose triangle. Hawkins doesn't seem to be doing much to defend here, obviously he feels comfortable in the position. Hawkins manages to throw the legs off his shoulder and he's back into guard - no problem.
Jack Morris has got the better of the ground game so far.
Morris throws some sloppy strikes off his back.
The ref warns both fighters not to hold the cage as they work up against the meshing.
That's three minutes gone in the round.
Morris is actively looking for submissions from his back. He's worked himself a little space on the bottom and seems to be going for a triangle. No, he's switched into an armbar! That was slick! Hawkins rolls with it to try and escape but Morris cranks on the arm and Hawkins is forced to tap out! This one is aaaaaaaaall over!
Ladies and gentlemen, after 3:20 of round 2, we have a winner by way of Submission (Armbar). Jack Morris!
|
|
|
|
|
|
|
|
|
|
|
|
|
|
|
|
|
|
|
|
|
|
|
| S |
C
A |
G |
S |
C
B |
G |
|
S |
C |
G |
|
energy
A | B |
|
hype
A | B |
|
pop
A | B |
|
mgr
A | B |
|
FIGHT
RATING
100% |
|
|
|
|
|
|

