|
|
PBP Commentary |
Coming up we have a welterweight MMA rules bout between Douglas Qwasnatmetaker (ranked 0 p4p, 0 weight class) and Carl Wellington (ranked 0 p4p, 0 weight class). Qwasnatmetaker's entrance music is Prodigy - Smack my bitch up. A fine choice. The crowd giving both fighters a great reception on their way into the arena. That's good to see.
 |
|
 |
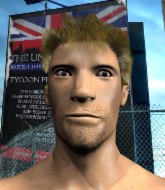
| 175 cm
20
185 lbs
5 - 0 - 0 |
|
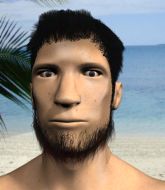
180 cm
23
170 lbs
4 - 2 - 0 |
Decent wrestler
Excellent boxer
KO power |
|
Good wrestler
Basic striking
Determined |
|
| |
|
Ladies and gentlemen. This fight is 3 rounds, in the welterweight division.
Introducing the fighter to my left, fighting out of the red corner.
With a record of
5 - 0 - 0, fighting out of Sydney, Douglas Qwasnatmetaker!
And introducing the fighter to my right, fighting out of the blue corner.
With a record of
4 - 2 - 0, fighting out of Sydney, Carl Wellington!
The judges for this bout are Steve Erwin, Summer Carpenter and Winston Howard.

The bell rings for round one and we are underway!
Wellington shoots in but no luck this time.
Carl Wellington seems to be the more aggressive standup fighter in this bout.
Qwasnatmetaker misses with a straight right.
Qwasnatmetaker throws a jab to the body, straight down the pipe. Boom. That sent Wellington stumbling backwards but he manages to regain his composure quickly.
Wellington tries to score a power double leg takedown but Qwasnatmetaker sees that one coming and sprawls well. That will dishearten Wellington somewhat.
Qwasnatmetaker stuffs the takedown.
Douglas Qwasnatmetaker has stuffed three takedown attempts in the round now. That's going to take a lot out of Carl Wellington.
Wellington defending well as Qwasnatmetaker loads up on a big left hand.
Wellington shoots in looking for a takedown. Qwasnatmetaker tries to sprawl out of it but Wellington keeps driving through. The fighters are pinned against the cage. Qwasnatmetaker manages to get underhooks and after a bit of a struggle, circles away and we're back to standing.
Qwasnatmetaker lands a jab to the nose.
Wellington will have to do better than that with his takedown attempts.
Wellington uses decent footwork to sidestep a right hand from Qwasnatmetaker.
Wellington has a takedown stuffed.
Qwasnatmetaker leaves Wellington with his face pressed against the mat as he sprawls beautifully, defending against a solid takedown attempt.
Qwasnatmetaker tests Wellington's chin there with a solid looking shot.

It looks like Carl Wellington has been cut.
Wellington looks gassed!
The crowd are loving this. Great action here.
Qwasnatmetaker moves into range and connects with a jab.
Qwasnatmetaker changes levels and scores with a jab to the body.
Wellington is trying desperately to land a takedown but Qwasnatmetaker is having absolutely none of it. This is turning into a bit of a nightmare for Wellington.
Wellington shoots in for a takedown. "I don't think so" says Qwasnatmetaker as he avoids it easily.
Qwasnatmetaker wings a very wild body shot but it does the job and lands to the midsection.
Qwasnatmetaker lands a body shot.
Qwasnatmetaker sizes up Wellington with a pawing jab and scores with a straight right down the middle.

That's one minute gone in the round.
Qwasnatmetaker lands with a good body shot.
Qwasnatmetaker throws a combination but comes up with nothing but fresh air.
Wellington takes a shot right to the liver - Bas would have been proud of that punch.
Good standup being displayed there by Qwasnatmetaker as he connects with a hook.
That has opened up Carl Wellington's cut even more.
Qwasnatmetaker wings a very wild body shot but it does the job and lands to the midsection.
The crowd cheering loudly, showing their appreciation for the quality fight we're seeing here.
Wellington takes a shot to the nose. Hopefully that hasn't broken it.
A shot to the liver by Qwasnatmetaker. Beautiful body shot.
Qwasnatmetaker throws a series of punches but Wellington avoids them all with ease.
Qwasnatmetaker misses with a jab, cross combination.
Qwasnatmetaker throws a good cross that connects.
Wellington fails miserably with a takedown attempt.
Qwasnatmetaker tests Wellington's chin there with a solid looking shot.
Qwasnatmetaker misses with a two punch combination.
Wellington misses with a takedown attempt - Qwasnatmetaker sprawls well and throws a nice strike on the way out which just misses.
Qwasnatmetaker lands an overhand left. A wild punch that just about connected.
Jab, cross, leg kick. Nice combination by Qwasnatmetaker!
Wellington uses decent footwork to sidestep a right hand from Qwasnatmetaker.

That's two minutes gone in the round.
Wellington shoots in for a takedown. "Ole!" shouts Qwasnatmetaker as he jumps to the side.
Qwasnatmetaker scores with a shot to the body.
Qwasnatmetaker thows a left - swing and a miss!
Qwasnatmetaker paws at his opponent with the jab and then lunges in with a straight, right on the button.
Qwasnatmetaker is the aggressor but that punch slipped nicely by Wellington.
Wellington throws a looping left and ducks down for a takedown. He's got his arms around Qwasnatmetaker's waist but Qwasnatmetaker gets an underhook and avoids the takedown by throwing Wellington off to one side.
Qwasnatmetaker throws a nice hook to the body that draws an oooh from the crowd.
Qwasnatmetaker just misses with a punch to the body.

Wellington looking to shoot here. He's gone for it and he's landed a takedown into mount! Oh, that's bad for Qwasnatmetaker!
The fighters are pressed up against the cage, both looking to find a bit of space to work.
Wellington thowing strikes but they're hitting the gloves, not doing any damage.
Qwasnatmetaker is looking to improve his position but Wellington isn't that keen on the idea.
Wellington dominating with strikes here.

That's three minutes gone in the round.
Wellington scoring with some good ground and pound from mount here. Will he manage to finish Qwasnatmetaker?
Wellington throwing sloppy strikes here. Perhaps if he tightened up his striking from such a dominant position, he'd be able to finish easier.
Wellington punching from mount but Qwasnatmetaker doing a good job of avoiding damage.
Wellington throws some wild stikes that Qwasnatmetaker manages to avoid easily.
Qwasnatmetaker on his back here. We all know that wrestlers don't like being on their back so let's see if Qwasnatmetaker tries to get out of the position.
Wellington looking to ground and pound but Qwasnatmetaker is blocking nicely.
Wellington misses with a head shot.
Wellington dominating with strikes here.
The fighters are going at a pretty good pace and they're both starting to sweat now.
Wellington looking to ground and pound his opponent to a finish here.
Wellington with the ground and pound from mount.
Wellington throws an elbow from mount that misses. Lucky escape for Qwasnatmetaker because Wellington loaded up on that one.

That's four minutes gone in the round.
The crowd are starting to boo a lack of action.
Wellington looking to finish with strikes here!
Wellington postures up and cracks his opponent a couple of times before moving back into close ground control. Qwasnatmetaker looks a forlorn figure.
Wellington misses with a series of strikes from mount. He'll no doubt be working on his ground and pound when he gets back to the gym.
Qwasnatmetaker tries to lock up and control but Wellington gives him a forearm to the face and pushes him away.
Wellington looking to finish with strikes here!
Wellington lands with some vicious ground and pound - can Qwasnatmetaker hang on?
The crowd are going absolutely nuts as the round comes to an end - what a fantastic round of action!
Wellington throwing strikes here but Qwasnatmetaker is writhing around nicely and avoiding any serious damage.
Wellington looking to finish with strikes here!
And thats the end of the round the fighters go back to their corners.
Douglas Qwasnatmetaker dominated that round.
The cut man is working on Carl Wellington's cut.
Well, the break between rounds is over. Let's get back to the scrappin!

Qwasnatmetaker displaying good standup as he scores with a three punch combination.
Qwasnatmetaker leaves Wellington with his face pressed against the mat as he sprawls beautifully, defending against a solid takedown attempt.
Qwasnatmetaker connects with a looping left hand that seems like it dazed Wellington momentarily.
Wellington shoots for a takedown but Qwasnatmetaker saw that one coming a mile off and avoided it easily.
Qwasnatmetaker stooping low to avoid any incoming strikes and then lunges in with an uppercut come cross that lands flush.
Some wild striking there from Qwasnatmetaker.
Wellington looks for a takedown here. Will he get it? Qwasnatmetaker is fending him off so far but Wellington persists. Nope, Qwasnatmetaker circles away and we're back to standing.
Douglas Qwasnatmetaker has stuffed three takedown attempts in the round now. That's going to take a lot out of Carl Wellington.
A combination from Qwasnatmetaker does no damage.
Qwasnatmetaker displays good takedown defense there as he swats away a double leg from Wellington.
Wellington is trying hard to land a takedown here. Qwasnatmetaker sprawls well and keeps this one on the feet.
Wellington takes a punch to the jaw and another one to the bread basket.
A decent looking cross lands there for Qwasnatmetaker.
Qwasnatmetaker misses with a body shot.
Wellington changes levels and drives through with a really nice takedown into side control. Qwasnatmetaker looks really pissed at himself for not defending that better.
Wellington looking to punish the body of his opponent here but Qwasnatmetaker is avoiding damage well.
Both fighters are absolutely exhausted here.
Qwasnatmetaker takes a couple of big shots there - the referee warns him that he has to defend himself better.
That's one minute gone in the round.
Wellington throws a strike aimed at the side of Qwasnatmetaker's head but Qwasnatmetaker avoids it well.
Wellington with the ground and pound but Qwasnatmetaker regains half guard under the barage of strikes.
Qwasnatmetaker is trying to control but can't.
Wellington missing with some ground and pound from the half guard.
Wellington throws a strike but Qwasnatmetaker avoids it easily and moves to full guard.
The ref warns both fighters not to hold the cage as they work up against the meshing.
A big thud reverberates around the arena there as Wellington accidentally thumps the mat. Hopefully he's not broken his hand.
Qwasnatmetaker working the defensive guard well to avoid strikes from Wellington.
Qwasnatmetaker wants to control here, rather than go for any submissions from the bottom. At least for now.
Qwasnatmetaker keeping full guard, as Wellington tries to pass.
That's two minutes gone in the round.
The crowd are hurling abuse towards the fighters... You can hardly blame them though because there isn't a lot going on in the fight.
Qwasnatmetaker has a closed guard, preventing anything of note from happening. Perhaps he's looking to stall.
Wellington throwing strikes but missing.
Qwasnatmetaker working the defensive guard well to avoid strikes from Wellington.
Wellington postures up in Qwasnatmetaker's guard and throws a big left but Qwasnatmetaker blocks it.

The referee has ruled that neither fighter is active enough on the ground and has stood them back up.
Nice sprawl there from Qwasnatmetaker as Wellington shoots in.
That's three minutes gone in the round.
Wellington keeping a good distance there, avoiding the body shot.
Qwasnatmetaker scores with the left hand. Wellington knows he should have avoided that one.
Wellington takes a jab right on the kisser.
Wellington takes a shot to the body in his stride.
Qwasnatmetaker misses with a few strikes there.
Qwasnatmetaker lands with a cross.
Qwasnatmetaker fails to land with a series of punches.
Wellington shoots in for a takedown. "I don't think so" says Qwasnatmetaker as he avoids it easily.
Qwasnatmetaker fakes a head punch and goes low to the body. Nicely done.
Douglas Qwasnatmetaker is winning the standup battle so far.
No luck for Wellington with that takedown attempt.
Nice straight punches there by Qwasnatmetaker. You know Roy Jones Jr respects the hands of Qwasnatmetaker.
Wellington shoots for a takedown but Qwasnatmetaker saw that one coming a mile off and avoided it easily.
Qwasnatmetaker lands a body shot.
A nice combination there by Qwasnatmetaker.
Wellington shoots in for a takedown but doesn't get it.
Wellington shoots in for a takedown but Qwasnatmetaker shows good takedown defense there and keeps this one on the feet.
Qwasnatmetaker connects with a single shot there.
Douglas Qwasnatmetaker is looking to throw some combinations by the looks of things.
Qwasnatmetaker dips down and scores with a jab to the body.
Qwasnatmetaker misses with an uppercut.
That's four minutes gone in the round.
Qwasnatmetaker stuffs the takedown.
Qwasnatmetaker thows a body shot but no joy.
No joy there for Qwasnatmetaker, who threw a few shots but didn't land.
Wellington shoots in and drives through. Qwasnatmetaker sprawls well.
Wellington walks straight into a jab right on the nose. That one stung - he's blinking and trying to clear his head.
Qwasnatmetaker throws the left hand but Wellington avoids the punch easily.
Wellington changes levels and looks for a double leg takedown. Qwasnatmetaker tries to avoid it but Wellington manages to keep hold of a leg and drag Qwasnatmetaker to the ground. Qwasnatmetaker escapes though and pops straight back up to his feet.
A decent looking cross lands there for Qwasnatmetaker.
Qwasnatmetaker misses with a body shot. Nice footwork from Wellington.
Qwasnatmetaker stuffs a takedown. It's all about dictating where the fight takes place and Qwasnatmetaker wants it to stay on the feet.
Wellington slips a jab and a cross from Qwasnatmetaker.
Wellington shoots in and drives through. Qwasnatmetaker sprawls well.
Qwasnatmetaker lands a jab-cross combination.
Nice defenses there by Wellington.
Wow, both these guys are really going for it!
Wellington displays some good footwork, moving neatly out of range as Qwasnatmetaker throws out the jab.
Wellington has a pretty nasty looking mouse under his right eye.
Qwasnatmetaker leaves Wellington with his face pressed against the mat as he sprawls beautifully, defending against a solid takedown attempt.
Qwasnatmetaker scores with a hook to the body. Wellington takes a step back and tries to catch his breath.
Qwasnatmetaker throws a right and a left that Wellington avoids nicely.
Wellington shoots in looking for a takedown. Qwasnatmetaker tries to sprawl out of it but Wellington keeps driving through. The fighters are pinned against the cage. Qwasnatmetaker manages to get underhooks and after a bit of a struggle, circles away and we're back to standing.
And thats the end of the round the fighters go back to their corners.
Douglas Qwasnatmetaker dominated that second round.
The cut man is working on Carl Wellington's cut.
The fighters' corners scream their final instructions, as the referee calls time. Here we go, back to the action! This is the final round!

Qwasnatmetaker lands with a two punch combination before moving back out of range.
Qwasnatmetaker ducks down and throws a hook to the body but Wellington moves away.
Wellington throws a looping left and ducks down for a takedown. He's got his arms around Qwasnatmetaker's waist but Qwasnatmetaker gets an underhook and avoids the takedown by throwing Wellington off to one side.
Wellington avoids a lazy jab quite easily.
Qwasnatmetaker misses with a body shot.
Wellington shoots in for a takedown but Qwasnatmetaker shows good takedown defense.
Wellington takes a really solid shot there but just smiles back and shrugs his shoulders.
Wellington fails with a rather predictable takedown attempt.
Douglas Qwasnatmetaker has stuffed three takedown attempts in the round now. That's going to take a lot out of Carl Wellington.
Qwasnatmetaker throws a series of strikes that have Wellington backpedaling.
Wellington tries to shoot in for a takedown. He's got hold of a leg but Qwasnatmetaker swivels and escapes.
Qwasnatmetaker slips in close and lands a nice hook before moving back out of range.
Wellington takes a body punch but keeps moving.
Qwasnatmetaker tests Wellington's chin there with a solid looking shot.
Wellington shoots in for a takedown - he's clinched up with Qwasnatmetaker but Qwasnatmetaker pushes him off and we're back to square one.
Both fighters are breathing heavily.
Qwasnatmetaker listening to his corner there, landing a nice uppercut.
Qwasnatmetaker keeps the fight standing with a nice sprawl.
That's one minute gone in the round.
Qwasnatmetaker lands the left hand.
Left hook, right uppercut from Qwasnatmetaker.
Qwasnatmetaker leaves Wellington with his face pressed against the mat as he sprawls beautifully, defending against a solid takedown attempt.
A right-left combo lands from Qwasnatmetaker.
Wellington closes this distance looking for a takedown but Qwasnatmetaker circles away.
Nice body punch from Qwasnatmetaker.
Qwasnatmetaker lands a nice hook to Wellington's body. Wellington takes it in his stride and looks to land his own strikes.
Qwasnatmetaker slaps away a takedown attempt from Wellington, before circling back to the center of the mat.
Qwasnatmetaker scores with a hook to the body. Wellington takes a step back and tries to catch his breath.
Qwasnatmetaker looks to land a combination but Wellington avoids it well.
Qwasnatmetaker misses with a body shot. Nice footwork from Wellington.
Qwasnatmetaker stuffs a takedown. It's all about dictating where the fight takes place and Qwasnatmetaker wants it to stay on the feet.
Nice sprawl there from Qwasnatmetaker as Wellington shoots in.
Qwasnatmetaker ducks low and lands a nice hook to the body of his opponent.
Wellington dodges the punch combination from Qwasnatmetaker.
Qwasnatmetaker throws a jab when Wellington was well out of range.
That's two minutes gone in the round.
Wellington uses good head movement to avoid the hook from Qwasnatmetaker.
Wellington fails miserably with a takedown attempt.
Wellington avoids a punch combination nicely.
Qwasnatmetaker misses with a straight left.
Qwasnatmetaker stuffs the takedown.
A lazy left from Qwasnatmetaker finds it's target.
Qwasnatmetaker cracks Wellington with a right hand to the side of the head.
Douglas Qwasnatmetaker is looking to keep the fight on the feet at all costs.
Qwasnatmetaker thows a left - swing and a miss!
Wellington throws the overhand right but ducks down into a quick takedown attempt. Qwasnatmetaker was covering up waiting for the punch and Wellington finishes the takedown easily into guard.
Wellington is sitting in guard, working some ground and pound.
Wellington throws a strike but Qwasnatmetaker rolls with it and manages to sweep. Now he's in guard on top.
Qwasnatmetaker showing good wrestling skills to control the position.
We could do with one of the fighters taking the initiative a bit more on the ground - they're both waiting to capitalize on a mistake.
That's three minutes gone in the round.
Wellington looking to sweep here. No luck so far.
And that's the end of the fight!
Douglas Qwasnatmetaker showed his dominance in that final round.
Well I reckon that's a shut out for Qwasnatmetaker, winning every round. Will the judges agree? They are the ones who matter, even if they are often depressingly incompetent. Over to the ring announcer for the scorecards.
Ladies and gentlemen, after 3 rounds of action, we go to the scorecards for a decision.
Judge Steve Erwin scores the fight 30:27
Judge Summer Carpenter scores the fight 30:27
Judge Winston Howard scores the fight 30:27
In favor of your winner, by unanimous decision... Douglas Qwasnatmetaker!
|
|
|
|
|
|
|
|
|
|
|
|
|
|
|
|
|
|
|
|
|
|
|
| S |
C
A |
G |
S |
C
B |
G |
|
S |
C |
G |
|
energy
A | B |
|
hype
A | B |
|
pop
A | B |
|
mgr
A | B |
|
FIGHT
RATING
59% |
|
|
|
|
|
|

