|
|
PBP Commentary |
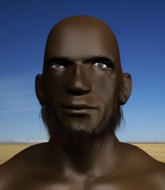
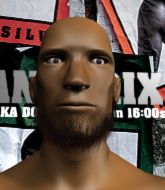
Coming up we have a lightweight MMA rules bout between Monkey D Luffy (ranked 0 p4p, 0 weight class) and willey star (ranked 0 p4p, 0 weight class). Both fighters look pumped up here. Let's hope this is a good fight!
 |
|
 |
| 183 cm
19
162 lbs
0 - 2 - 0 |
|
175 cm
23
155 lbs
0 - 1 - 0 |
BJJ White Belt
Basic striking
Good in bed |
|
BJJ Blue Belt
Brawler
Solid chin |
|
| |
|
Ladies and gentlemen. This fight is 3 rounds, in the lightweight division.
Introducing the fighter to my left, fighting out of the red corner.
With a record of
0 - 2 - 0, fighting out of New York, Monkey D Luffy!
And introducing the fighter to my right, fighting out of the blue corner.
With a record of
0 - 1 - 0, fighting out of New York, willey star!
The judges for this bout are Anthony Taglia, Joseph Jones and Reed Andrews.

The bell rings for round one and we are underway!
Some wild striking there from star.
Ouch! a nice leg kick from D Luffy, right into the meat.
star misses with a two punch combination.
D Luffy lands with a slapping head kick.
star shoots in for a takedown but doesn't get it.
star tries to shoot in for a takedown. He's got hold of a leg but D Luffy swivels and escapes.
star throws a series of punches but D Luffy avoids them all with ease.
star looks gassed!
D Luffy lands with a two punch combination before moving back out of range.

D Luffy clinches up with star and pushes him back against the cage.

D Luffy breaks the clinch and we're back to striking at distance.
D Luffy misses with a wild combination.
star misses with a combination
and D Luffy counters with a nice leg kick.
D Luffy slips a jab and a cross from star.
D Luffy lands a jab followed by a nice looking cross.

D Luffy decides to change it up a bit and drives through with a nice takedown into half guard.
D Luffy lands with a punch from half guard.
D Luffy is looking to advance position but star won't allow it.

That's one minute gone in the round.
D Luffy wants to stand up but star has a hold of him and won't allow it.
D Luffy lands with an elbow from half guard - that looked like it hurt.
D Luffy lands strikes from half guard.
We get told so often about how wrestlers don't like to be on their backs. Let's see if star can do anything to dispel that myth.
D Luffy is nestled in close to star, controlling him well. He's worked in a nice elbow to the side of the head as well, for good measure.
D Luffy tries to stand but his hand is stuck under star.

D Luffy is working for a submission of some sort.
D Luffy wants to control but star is keeping him busy.
The ref warns both fighters not to hold the cage as they work up against the meshing.

That's two minutes gone in the round.
My god... these two guys really need to pick up the pace or everyone will leave to go get a beer.
D Luffy trying to mount his opponent but star defends it.
star is looking to improve his position.
D Luffy trying to mount his opponent but star defends it.

Well, the referee has seen enough. Neither fighter is active enough on the ground so he's stood them back up.
star tries to clinch up but D Luffy circles away and keeps his distance.
D Luffy fails in his attempt to clinch.
star misses with a takedown attempt
and D Luffy counters with a low kick, right behind star 's knee.
Monkey D Luffy has stuffed three takedown attempts in the round now. That's going to take a lot out of willey star.
D Luffy wants to clinch.
D Luffy clinches up against the cage.
D Luffy wants to push off and get back to the center of the mat but star has him pressed against the cage.
star is working for takedown but D Luffy is calmly controlling the position for now.

That's three minutes gone in the round.
D Luffy pushes off and circles away, back to the middle of the mat.
D Luffy displaying good standup as he scores with a three punch combination.
D Luffy looks to score with a combo but nothing lands.
star shoots in for a takedown - he's clinched up with D Luffy but D Luffy pushes him off and we're back to square one.
D Luffy ducks down and throws a hook to the body.
star attempts a low kick but it misses it's target.
D Luffy lands a nice looking kick to the body. star takes a step back to recover.
D Luffy lands a nice shot that snaps star's head back.
D Luffy throws a head kick that misses.
D Luffy tries to close the distance and clinch up against the cage but star paws at him with a jab and circles away.
star throws a jab, cross combination which is slipped
and D Luffy counters with a good right hand that lands right on the jaw.
D Luffy throws a good cross that connects.
D Luffy shoots in for a takedown! He's got it and he's managed to land in full mount! That's better than D Luffy was expecting from the takedown attempt, I'm sure!

That's four minutes gone in the round.
star is trying to stand up.
D Luffy looking to control but star is working nicely, looking to advance position himself.
star tries to hold on but D Luffy postures up.
star wants to use the cage to get back to his feet here.
star tries to hold on but D Luffy postures up.
star really trying hard to get back to half guard here.
And thats the end of the round the fighters go back to their corners.
Monkey D Luffy dominated that round.
Well, the break between rounds is over. Let's get back to the scrappin!

D Luffy throws a right and a left that star avoids nicely.
D Luffy dips to his left and cracks star with an uppercut!
star is on the wrong end of a nice combination from D Luffy.
star misses with an uppercut.
willey star seems to be the more aggressive standup fighter in this bout.
star misses with a combination
and D Luffy counters nicely by changing levels and landing a hook to the body.
D Luffy keeps star at a distance using the push kick.
star changes levels and looks for a double leg takedown. D Luffy tries to avoid it but star manages to keep hold of a leg and drag D Luffy to the ground. D Luffy escapes though and pops straight back up to his feet.
star takes an uppercut right on the button but keeps his composure.
We've had a slow start to the round here - hopefully the action picks up.
star thows a left - swing and a miss!
Monkey D Luffy is looking to throw some combinations by the looks of things.
star doesn't react quick enough there as he takes a shot to the body.
D Luffy lands a lovely overhand right.
Left hook, right uppercut from D Luffy.
star takes one to the side of the head.
Both fighters are absolutely exhausted here.
That's one minute gone in the round.
Some wild striking there from star.
An inside leg kick lands from D Luffy.
D Luffy tries to bum rush star with a series of wild strikes but star uses good footwork to avoid the assault.
D Luffy keeps the fight standing with a nice sprawl.
D Luffy fakes the leg kick and cracks star in the body.
D Luffy lands a slapping body shot.
star drops his hands momentarily and D Luffy takes advantage with a crisp shot to the head.
D Luffy misses with a wild combination.
star throws a combination that misses
and D Luffy counters with a straight punch to the midsection.
D Luffy shoots in for a takedown and gets it.
star won't allow D Luffy to pass to mount.
That's two minutes gone in the round.
star wants to improve his position but D Luffy is controlling well.
The fighters are pressed up against the cage, both looking to find a bit of space to work.
star is trying to stand up here but D Luffy is controlling him well.

star manages to escape and get back to his feet!
star lunges in with swinging rights and lefts but D Luffy circles away quickly and effectively.
D Luffy changes levels and looks for a double leg takedown. star tries to avoid it but D Luffy manages to keep hold of a leg and drag star to the ground. star escapes though and pops straight back up to his feet.
star connects with a single shot there.
D Luffy looks to land a combination. star sees it coming but can only parry a couple of the shots.
D Luffy takes a punch to the jaw and another one to the bread basket.
star misses with a body shot.
star throws a nice looking combination but D Luffy bobs and weaves to avoid any damage.
star throws a right and a left that D Luffy avoids nicely.
star throws a front kick aimed at D Luffy's knee but D Luffy avoids it well.
A head kick from D Luffy lands but star takes it in his stride.
That's three minutes gone in the round.
star misses with a combination
and D Luffy finishes the little exchange by landing a big kick to the body.
D Luffy is using his height advantage well here, landing a good percentage of his punches.
star misses with a wild combination.
star takes a punch to the jaw and another one to the bread basket.
The fight stays on the outside here - star looks like he's thinking about clinching though.
D Luffy moves into the clinch.
star blocks an elbow strike from D Luffy.
star wants a takedown.
Monkey D Luffy has stuffed three takedown attempts in the round now. That's going to take a lot out of willey star.
D Luffy pulls guard.
D Luffy tries to land a sweep but no joy.
D Luffy controls star momentarily but star frees himself.
D Luffy wants to sweep here but star controlling him for the moment.
That's four minutes gone in the round.
The crowd are showing their displeasure at the lack of action as loud boos ring out around the arena.
star trying to control the position from guard on top but D Luffy is wriggling around, looking for whatever he can.
The referee decides to stand the fighters back up.
D Luffy lands with a good body shot.
D Luffy lands with a two punch combination before moving back out of range.
And thats the end of the round the fighters go back to their corners.
Monkey D Luffy dominated that second round.
Well, the break between rounds is over. Let's get back to the scrappin! This is the final round!

D Luffy gets taken down but at least he's managed to land in guard.
D Luffy is trying to control the position from the bottom.
star with a flurry of punches that miss.
D Luffy wants to get back to his feet but star is in a dominant position and won't allow it.
star chips away with some ground and pound.
star with a flurry of punches that miss.
D Luffy wants to sweep but no luck.
star postures up to throw the ground and pound strikes but they don't connect.
Both fighters are breathing heavily.
star is in close to D Luffy's body, working some short punches and elbows.
That's one minute gone in the round.
The referee has ruled that neither fighter is active enough on the ground and has stood them back up.
Nice uppercut lands for D Luffy. That snapped star's head back.
star rushes forward with a series of wild hooks but D Luffy moves out of range and avoids them all easily.
Monkey D Luffy is looking to keep the fight on the feet at all costs.
A nice combination there by star.
D Luffy slips a straight right by star.
star lunges in with swinging rights and lefts but D Luffy circles away quickly and effectively.
D Luffy misses with a wild combination.
star misses with a double jab
and D Luffy counters with a thumping low kick.
star swinging wildly here.
D Luffy keeping his hands up high there, blocking the jab from star.
star throws a series of punches but D Luffy moves out of range.
D Luffy moves out of range as star strikes.
D Luffy scores with a head kick.
That's two minutes gone in the round.
Well. There's a bit of a lull in the action here and the crowd are starting to get restless.
D Luffy looks to score with a combo but nothing lands.
star lands a jab to the nose.
star tries to clinch there but D Luffy circles away.
star throws out a powerful jab.
star swings wildly with a couple of big hooks
and D Luffy counters with a two punch combo.
star throws a left and a right that both miss
and D Luffy counters with a head kick.
star just misses with a punch to the body.
star darts in and lands a nice takedown into half guard.
D Luffy is trying to maintain the position but star is very close to passing his half guard.
D Luffy makes his way to full guard. A much better position for D Luffy.
That's three minutes gone in the round.
star is sitting in guard, working some ground and pound.
star passes easily into side control. Nice work.
star working the head with strikes.
Monkey D Luffy is fighting for a decision here - he's started to take the cautious approach.
A lull in the action here as star stalls from top position.
star working the ground and pound but he's contacting the mat, not the fighter.
D Luffy on the wrong end of some ground and pound.
D Luffy wants to control but star postures up.
That's four minutes gone in the round.
Neither fighter has done anything of merit for a good minute or two here and the crowd are not happy about it.
star tries to advance to mount but D Luffy denies him.
star stands up and beckons D Luffy to his feet.
Some wild striking there from star.
D Luffy moves into range and throws a combination. A nice jab followed by a hook to the body.
D Luffy fails with an attempt to clinch.
willey star has stepped it up - he knows he needs a finish here!
star misses with a double jab
and D Luffy counters nicely by changing levels and landing a hook to the body.
star connects with a jab.
The fight moves into the clinch position.
D Luffy content to slow the pace in the clinch.
And that's the end of the fight!
willey star comfortably won the final round on my scorecard.
I think D Luffy has won this one but let's see what the judges have to say. Over to the ring announcer for the scorecards.
Ladies and gentlemen, after 3 rounds of action, we go to the scorecards for a decision.
Judge Anthony Taglia scores the fight 29:28
Judge Joseph Jones scores the fight 29:28
Judge Reed Andrews scores the fight 29:27
In favor of your winner, by unanimous decision... Monkey D Luffy!
|
|
|
|
|
|
|
|
|
|
|
|
|
|
|
|
|
|
|
|
|
|
|
| S |
C
A |
G |
S |
C
B |
G |
|
S |
C |
G |
|
energy
A | B |
|
hype
A | B |
|
pop
A | B |
|
mgr
A | B |
|
FIGHT
RATING
37% |
|
|
|
|
|
|

