|
|
PBP Commentary |
Coming up we have a welterweight MMA rules bout between Anton Wasa (ranked 0 p4p, 0 weight class) and Kane Yamada (ranked 0 p4p, 0 weight class). Wasa comes to the cage accompanied by UK Subs - Warhead. Kane Yamada told me before the fight that he's been watching a lot of DVDs so let's see if that helps him in this one! I can't wait to find out!
 |
|
 |
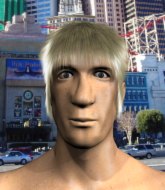
| 180 cm
26
165 lbs
9 - 1 - 0 |
|
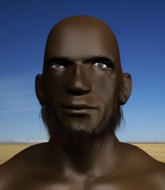
190 cm
21
183 lbs
9 - 1 - 0 |
Good wrestling
Solid boxing
Very quick |
|
BJJ Purple Belt
World class boxer
Granite chin |
|
| |
|
Ladies and gentlemen. This fight is 5 rounds, for the welterweight championship of the world!
Introducing the champion to my left, fighting out of the red corner.
With a record of
9 - 1 - 0, fighting out of St Petersburg, Anton Wasa!
And introducing the challenger to my right, fighting out of the blue corner.
With a record of
9 - 1 - 0, fighting out of Las Vegas, Kane Yamada!
The judges for this bout are Robert Twigg, Cecil Peabody and Frank Dennis.

The bell rings for round one and we are underway!
Wasa has a takedown stuffed.

Wasa shoots in and scores a nice double leg takedown into half guard.
Wasa with a momentary lay and pray from half guard.
Yamada is trying to stand back up but Wasa is controlling him
Well, if Wasa is going to just lie there, perhaps we should talk about what we're having for dinner tonight
I'm having a ham and pineapple pizza
Yum. Can't wait.
Yamada is looking to escape.
The fighters are pressed up against the cage, both looking to find a bit of space to work.

That's one minute gone in the round.
Yamada tries to kick Wasa off in order to stand up. Wasa Avoids the leg push though and dives into side control.
Yamada is trying to get back to his feet.
The ref warns both fighters not to hold the cage as they work up against the meshing.
Yamada is looking for a sweep.
Wasa wants to control but Yamada is keeping him busy.
Yamada tries to escape but Wasa is in control.

It looks like we're going to have a standup here. Neither fighter is doing enough on the ground.
Wasa swats away the attempt to clinch by Yamada.
Yamada misses the shot to the body.
Wasa gets the takedown into side control.
Yamada is pushing Wasa's head away, looking to escape. Wasa manages to hold on to the position though.
Yamada is looking to reverse the position.

That's two minutes gone in the round.
Wasa wants to control but Yamada is keeping him busy.
Wasa takes a little break here. Yamada wants to take advantage but he is being controlled well.
Yamada tries to bench press Wasa off him but Wasa keeps the position.
Yamada is working hard to escape and get back to his feet. After a battle for position, Wasa asserts his dominance and retains side control.
Wasa throws an elbow but Yamada slips to the side and avoids it well.
The referee has ruled that neither fighter is active enough on the ground and has stood them back up.
Wasa moves away from the strike by Yamada.

That's three minutes gone in the round.
Wasa slips a jab from Yamada.
Yamada stuffs the takedown.
Yamada just misses with a punch to the body.
Wasa shoots in for a takedown - he's clinched up with Yamada but Yamada pushes him off and we're back to square one.
That's three failed takedown attempts in the round for Anton Wasa. That's going to take a lot out of him.
The fighters are starting to perspire pretty heavily.
Yamada throws a series of punches but Wasa avoids them all with ease.
Wasa misses with a takedown attempt - Yamada sprawls well and throws a nice strike on the way out which just misses.
Yamada doesn't manage to clinch there - Wasa circles away.
Wasa looking to shoot here. He's gone for it and he's landed a takedown into mount! Oh, that's bad for Yamada!
Yamada regains half guard.
Yamada is looking to escape.

That's four minutes gone in the round.

Yamada kicks off Wasa and gets to his feet.
Wasa shoots in for a takedown from distance. He catches Yamada napping and manages to drive through into side control!
Wasa prevents Yamada from escaping the position.
Wasa trying to control the position but Yamada is working away.
Yamada tries to get back to half guard but can't.
Yamada is trying to escape and get back to his feet.
Yamada looks gassed!
You can see the frustration on Yamada's face as Wasa controls the position.
Wasa's ground tactics aren't going to win him many fans. Let's hope he's got fireworks for us if he gets back to his feet because he's not doing much on the ground.
Yamada is not content to let Wasa control the position.
And thats the end of the round the fighters go back to their corners.
Anton Wasa dominated that round.
That's the end of the round. The referee orders the cornermen out of the cage so we can get back down to business.

Wasa bobs and weaves into range and then changes levels and scores with a nice takedown into side control.
Yamada is not content to let Wasa control the position.
Wasa controls the position.
Yamada is working hard to escape and get back to his feet. After a battle for position, Wasa asserts his dominance and retains side control.
Yamada tries to get back to half guard but can't.
That's one minute gone in the round.
Wasa trying to control the action but Yamada is working from the bottom.
Yamada is working hard to escape and get back to his feet. After a battle for position, Wasa asserts his dominance and retains side control.
Yamada defending against the ground and pound.
The referee has ruled that neither fighter is active enough on the ground and has stood them back up.
A punch combination from Yamada misses.
Yamada with a nice cross.
Wasa will have to do better than that with his takedown attempts.
Kane Yamada seems to be the more aggressive standup fighter in this bout.
Yamada wants to clinch.
That's two minutes gone in the round.
The crowd are hurling abuse towards the fighters... You can hardly blame them though because there isn't a lot going on in the fight.
Yamada throws a jab to the body, straight down the pipe. Boom. That sent Wasa stumbling backwards but he manages to regain his composure quickly.
Wasa throws the overhand right but ducks down into a quick takedown attempt. Yamada was covering up waiting for the punch and Wasa finishes the takedown easily into guard.
Wasa wants to control from the top but Yamada keeps moving.
Yamada is looking to stand up but Wasa isn't so interested in that idea.
Yamada keeping moving, preventing Wasa from controlling successfully.
Wasa is standing up over Yamada. Yamada looks to escape but Wasa dives into side control.
That's three minutes gone in the round.
Wasa is looking to take a break and control but Yamada is keeping him honest, looking to work from the bottom.
Wasa scores with a couple of short elbows.
Yamada sneaks back into half guard.
Yamada is trying to stand.
Wasa takes a deep breath and rests his weight momentarily on top of his opponent, to control the position.
Wasa throwing shots but Yamada is blocking nicely.
That's four minutes gone in the round.
There's not a lot going on here and the crowd are letting the fighters know they're not willing to tolerate a lack of action.
Wasa is looking to pass the guard... He's managed it - he's now in full mount!
Wasa controlling his opponent.
Yamada is really trying hard to get back to his feet.
Wasa controlling from the full mount.
The crowd thankful this round is nearly over.
Yamada tries to get back to half guard but can't.
And thats the end of the round the fighters go back to their corners.
Anton Wasa dominated that second round.
The referee calls time. The cornermen exit stage left and we're back to business.

Yamada misses with a body shot. Nice footwork from Wasa.
Wasa fails with a rather predictable takedown attempt.
Yamada moves in looking to clinch but Wasa pushes him off.

Yamada takes the fight into the clinch.
A right hand to the body from Yamada.
Yamada softening up his opponent with strikes, against the cage.
Yamada lands with a good tight uppercut to the head.
Wasa presses Yamada against the cage and delivers a mid-strength body shot.
Wasa misses with a punch on the inside.
Yamada throws a head punch that misses.
Wasa throws a punch but it's blocked by Yamada.
Yamada misses with some punches.
Yamada misses with a punch on the inside.
Yamada throws a punch but it's blocked by Wasa.
Wasa blocks a body shot from Yamada.
Yamada lands with a short punch from the clinch.
Yamada throws a punch but it's blocked by Wasa.
Wasa prevents a body shot from Yamada.
That's one minute gone in the round.
Wasa is trying to break the clinch but Yamada is controlling him.
Wasa wants to push off and get back to the center of the mat but Yamada has him pressed against the cage.
Wasa blocks a punch to the side of the head.
Yamada struggles to land a body shot inside as Wasa controls his hands.
Wasa has Yamada pressed up against the cage and is working for takedown. Yamada manages to improve position though and keeps the fight standing.
Yamada stays in close to his opponent and throws a right hand to the body.
Wasa blocks an uppercut.
An uppercut to the body lands inside from Yamada.
A head punch on the inside from Yamada fails to land.
Yamada softening up his opponent with strikes, against the cage.
Yamada tries a shoulder strike but it doesn't do any damage.
Yamada misses with the head strike.
An uppercut on the inside fails to land for Yamada.
Yamada working aggressively here.
Wasa tries a body shot but Yamada blocks it.
A hook to the body from Yamada.
Yamada misses with a hook to the ribs.
Still in the clinch, Yamada scores with a nice short uppercut.
Yamada takes a big intake of breath there - he's definitely tired.
Yamada throws a blind hook that connects with the side of Wasas head.
A body shot lands from Yamada.
A head punch on the inside from Yamada fails to land.
Wasa tries to throw a body punch but Yamada avoids it by throwing Wasa back against the cage.
That's two minutes gone in the round.
Yamada misses with a shot to the kidneys.
Yamada misses with a punch on the inside.
Wasa can't get the takedown.
That's three failed takedown attempts in the round for Anton Wasa. That's going to take a lot out of him.
Yamada works on Wasa's body with a couple of short punches.
A hook to the body from Yamada.
Yamada lands a right hand.
Nice body punch from Yamada.
Yamada pushes Wasa back against the cage and unloads with a body punch.
Yamada lands a shoulder strike that jolts his opponent's head backwards.
Yamada softening up his opponent with strikes, against the cage.
Wasa blocks a couple of punches on the inside.
A short left from Yamada.
We've seen a great period of action over the last minute or so - credit to both fighters for going all out!
Wasa wants a takedown.
Yamada lands with a short punch from the clinch.
Yamada lands a hook to the body. It's hard to tell if that hurt Wasa or not.
Yamada throws a head punch that misses.
Yamada digs a right hand underneath Wasa's ribcage. Wasa let out a lung full of air as it connected.
Nice body punch from Yamada.
Yamada lands a hook to the body. It's hard to tell if that hurt Wasa or not.
Yamada works on Wasa's body with a couple of short punches.
Yamada lands with a light punch inside.
That's three minutes gone in the round.
Yamada misses with some punches.
A right hand to the body from Yamada.
Yamada lands a body shot.
Kane Yamada seems to be working more effectively in the clinch in the fight so far.
Yamada lands a nice uppercut.
Yamada misses with a body punch.
Yamada lands a right uppercut that snaps the head of Wasa backwards.
Nice body punch from Yamada.
An uppercut to the body lands inside from Yamada.
Yamada misses with the head strike.
Wasa goes for a body shot but it's blocked.
Nice body punch from Yamada.
Yamada is working Wasa over against the cage.
Yamada digs a right hand into Wasa's ribs. Those have got to be taking their toll on Wasa's gas tank.
Yamada lands punches inside but they're not really causing much damage.
Wasa prevents a body shot from Yamada.
Yamada lands with a left to the head.
Wasa has hold of a leg and is looking for a trip takedown. Yamada avoids it nicely though and we remain in the clinch.
Wasa misses with a shot to the kidneys.
Yamada presses Wasa against the cage and delivers a mid-strength body shot.
Yamada swings wildly with an uppercut but Wasa uses good head movement to avoid it.
That's four minutes gone in the round.
Yamada stays in close to his opponent and throws a right hand to the body.
Yamada scores with a hook to the body.
A right handed body shot lands from Yamada.
An uppercut to the body lands inside from Yamada.
A nice left hand lands by Yamada.
Yamada throws a punch but it's blocked by Wasa.
An uppercut to the body lands inside from Yamada.
Wasa has Yamada pressed up against the cage and is working for takedown. Yamada manages to improve position though and keeps the fight standing.
Yamada lands a hook to the body. It's hard to tell if that hurt Wasa or not.
Yamada lands a body punch - he's looking to wear down Wasa.
Yamada scores with a nice hook to the head.
A short body shot lands from Yamada as the two fighters clinch.
Yamada lands a right hand that snaps the head of Wasa backwards.
Wooooo! Give it up for these two warriors! They are putting on a show!
Yamada throws a head punch that misses.
As the round comes to an end the crowd are showing their appreciation for a great round of action.
Yamada tries a shoulder strike but it doesn't do any damage.
Yamada lands a right hand.
Yamada lands a shoulder strike.
Wasa tries to work over Yamada's body with a swooping hook but it only glances the target.
A head punch blocked on the inside by Wasa.
And thats the end of the round the fighters go back to their corners.
Kane Yamada really dominated that round.
The fighters' corners scream their final instructions, as the referee calls time. Here we go, back to the action!

Yamada looks to score with a jab to the body but Wasa is just out of range.
Wasa circles away from the clinch attempt.
Yamada tries to clinch up.
Wasa jabs away that one connects to the head of his opponent.
Wasa swats away the attempt to clinch by Yamada.
Yamada ducks down and throws a hook to the body but Wasa moves away.
Wasa uses good head movement to avoid the hook from Yamada.
Nice jab there from Wasa.
We've had a slow start to the round here - hopefully the action picks up.
Wasa ducks low and lands a nice hook to the body of his opponent.
Wasa fails to land the takedown.
Wasa looks for a takedown here. Will he get it? Yamada is fending him off so far but Wasa persists. Nope, Yamada circles away and we're back to standing.
Yamada lands a head shot.
That's one minute gone in the round.
Wasa tries to score a power double leg takedown but Yamada sees that one coming and sprawls well. That will dishearten Wasa somewhat.
That's three failed takedown attempts in the round for Anton Wasa. That's going to take a lot out of him.
Yamada displays good takedown defense there as he swats away a double leg from Wasa.
It's got to the stage where if one of these guys blows hard enough, the other might fall over.
Wasa gets a takedown into half guard.
Yamada wants to get back to his feet.
Yamada desperately trying to maintain half guard.
Yamada is looking to escape.
That's two minutes gone in the round.
Well, if Wasa is going to just lie there, perhaps we should talk about what we're having for dinner tonight
I'm having a ham and pineapple pizza
Yum. Can't wait.
Yamada is looking to escape.
That's three minutes gone in the round.
Well, the referee has seen enough. Neither fighter is active enough on the ground so he's stood them back up.
Wasa wings a very wild body shot but it does the job and lands to the midsection.
Wasa throws a jab to the body, straight down the pipe. Boom. That sent Yamada stumbling backwards but he manages to regain his composure quickly.
Yamada fails in his attempt to clinch.
Wasa changes levels and drives through with a really nice takedown into side control. Yamada looks really pissed at himself for not defending that better.
Yamada is not content to let Wasa control the position.
Yamada being controlled for a moment.
Yamada is pushing Wasa's head away, looking to escape. Wasa manages to hold on to the position though.
Anton Wasa overall seems to be getting the better of the ground position in the fight so far.
That's four minutes gone in the round.
Wasa just content to control the position.
Yamada is putting a lot of effort into getting back to his feet here.
Wasa is maintaining the dominant position - no doubt Yamada will start to get frustrated soon if he's not already.
Yamada bucks up and manages to escape back to his feet!
The crowd thankful this round is nearly over.
Yamada looks to score with a jab to the body but Wasa is just out of range.
And thats the end of the round the fighters go back to their corners.
Anton Wasa had his way with Kane Yamada in that round.
That's the end of the round. The referee orders the cornermen out of the cage so we can get back down to business. This is the final round!

Wasa shoots in looking for a single leg takedown. Yamada is trying to defend but Wasa finishes it well and ends up in half guard. Let's see if he can advance position further.
Yamada is trying to stand.
Yamada is looking to regain full guard. Not this time though.
Wasa trying to control the pace.

Yamada is looking to sinch up a guillotine here but Wasa pulls his head out easily.
Yamada is wobbling all over the place through exhaustion. Will he make it to the final bell?
That's one minute gone in the round.
Yamada looks like he's trying to stand up.
Yamada pushes Wasa off but Wasa dives into side control.
Yamada is trying to buck Wasa off.
The referee has ruled that neither fighter is active enough on the ground and has stood them back up.
Wasa scores with a nice head shot.
Wasa pivots as if he's going to throw a leg kick but stops half way.
Wasa waving his hands out in front of him, looking to distract Yamada.
Kane Yamada is looking to keep the fight on the feet at all costs.
Wasa scores with a body shot.
Yamada is throwing a lot of body shots here, looking to wear down Wasa rather than just go for the knockout.
Yamada takes a really solid shot there but just smiles back and shrugs his shoulders.
Wasa slips a jab from Yamada.
Kane Yamada has stepped it up - he knows he needs a finish here!
Anton Wasa is fighting for a decision here - he's started to take the cautious approach.
That's two minutes gone in the round.
There's not a lot going on here and the crowd are letting the fighters know they're not willing to tolerate a lack of action.
Wasa shoots in and drives through. Yamada sprawls well.
Wasa shoots in with a takedown attempt and he has Yamada pinned against the cage. Yamada gets the underhooks and manages to circle away.
Yamada misses with a telegraphed body shot
and Wasa counters with a nice double leg into side control. Yamada won't be happy with that.
Yamada trying to remain calm as Wasa controls from the top position.
Yamada is pushing Wasa's head away, looking to escape. Wasa manages to hold on to the position though.
That's three minutes gone in the round.
Wasa content to control the pace. The referee will try and keep them active though.
Yamada is looking to reverse the position.
Yamada is trying to escape the position but Wasa is controlling the position.
Wasa seems to have a rather negative gameplan on the ground. He seems keen to just score the takedown and hold down Yamada for as long as he can get away with.
That's four minutes gone in the round.
The crowd are starting to boo a lack of action.
The referee decides to stand the fighters back up, due to lack of activity on the part of Anton Wasa.
Yamada takes a swing at Wasa's ribcage but misses.
Yamada looks to land a right hand but Wasa moved out of range.
Yamada moves into the clinch.
Yamada misses with a body punch.
Yamada lands a short shot on the inside that snaps the head of Wasa backwards.
Yamada pushes Wasa back against the cage and lands a hook to the side of the head.
Yamada has a couple of punches blocked by Wasa.
Yamada has a couple of punches blocked by Wasa.
Wasa has a couple of punches blocked by Yamada.
Yamada digs a right hand into Wasa's ribs. Those have got to be taking their toll on Wasa's gas tank.
Yamada lands a hook to the body. It's hard to tell if that hurt Wasa or not.
Yamada working aggressively here.
Yamada lands a nice looking hook to the body, against the cage.
And that's the end of the fight!
Anton Wasa showed his dominance in that final round.
I think Wasa has won this one but let's see what the judges have to say. Over to the ring announcer for the scorecards.
Ladies and gentlemen, after 5 rounds of action, we go to the scorecards for a decision.
Judge Robert Twigg scores the fight 48:46
Judge Cecil Peabody scores the fight 48:46
Judge Frank Dennis scores the fight 48:46
In favor of your winner, by unanimous decision... Anton Wasa!
Anton Wasa retains his welterweight title!
|
|
|
|
|
|
|
|
|
|
|
|
|
|
|
|
|
|
|
|
|
|
|
| S |
C
A |
G |
S |
C
B |
G |
|
S |
C |
G |
|
energy
A | B |
|
hype
A | B |
|
pop
A | B |
|
mgr
A | B |
|
FIGHT
RATING
77% |
|
|
|
|
|
|
