|
|
PBP Commentary |
Coming up we have a middleweight MMA rules bout between Henry Tudor (ranked 0 p4p, 0 weight class) and Colton Red (ranked 0 p4p, 0 weight class). Colton Red has the better chin. Will he look to stand and bang today?
 |
|
 |
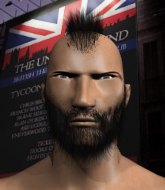
| 189 cm
22
185 lbs
3 - 1 - 0 |
|
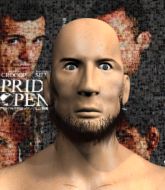
185 cm
22
190 lbs
4 - 4 - 0 |
BJJ Blue Belt
Brawler
Self confident |
|
BJJ White Belt
Excellent boxer
Solid chin |
|
| |
|
Ladies and gentlemen. This fight is 3 rounds, in the middleweight division.
Introducing the fighter to my left, fighting out of the red corner.
With a record of
3 - 1 - 0, fighting out of Montreal, Henry Tudor!
And introducing the fighter to my right, fighting out of the blue corner.
With a record of
4 - 4 - 0, fighting out of Montreal, Colton Red!
The judges for this bout are Gregory Folan, Robert Douchet and William Peck.

The bell rings for round one and we are underway!
Tudor fails to land the takedown.
Nice takedown defense from Red. No joy for Tudor on that attempt.
A combination from Red does no damage.
Red keeps the fight standing with a nice sprawl.
That's three failed takedown attempts in the round for Henry Tudor. That's going to take a lot out of him.
Red throws a series of punches but Tudor avoids them all with ease.
Tudor doesn't manage to clinch there - Red circles away.
Red scores with a big left there. The judges will like that one.
Red displays good takedown defense there as he swats away a double leg from Tudor.
Tudor shoots in for a takedown - he's clinched up with Red but Red pushes him off and we're back to square one.
We've had a slow start to the round here - hopefully the action picks up.
Tudor misses with a double jab
and Tudor takes a counter punch right on the button for his troubles.
Tudor throws a combination that misses
and Red counters with a quick right hand to the jaw.

That's one minute gone in the round.
Red tries a head kick but it misses.
Red punishes Tudor's body with a nice straight punch.
Tudor misses with a takedown attempt. He shot from a bit too far out.
Tudor throws a combination that misses
and Red counters with a nice jab to the body that keeps Tudor thinking.
Red tries a switch kick but it misses it's target.
No luck for Tudor with that takedown attempt.
Tudor closes the distance looking to clinch
and Red counters with a three punch combination, finished off with a leg kick. Nice work.
Red lands a beauty of a right hand that gets the crowd cheering.
Tudor misses with a hook.
Colton Red is looking to keep the fight on the feet at all costs.
Red stuffs a takedown. It's all about dictating where the fight takes place and Red wants it to stay on the feet.

That's two minutes gone in the round.
Tudor misses with a takedown attempt. He shot from a bit too far out.
Tudor wants to clinch
and Red connects with a straight left hand counter down the middle.
Tudor closes the distance but Red moves to the side
and Red counters with a crisp hook to the side of the head.
Tudor tries to grapple but his opponent circles
and Red counters with a three punch combo that has Tudor backing up. Tudor nods at Red to acknowledge the strikes.
Red lands a jab, followed by a cross and another cross, as Tudor backs up against the cage.
Tudor shoots in but Red avoids the takedown attempt easily.
Red throws a nice looking combination but Tudor bobs and weaves to avoid any damage.

That's three minutes gone in the round.

Tudor looking to shoot here. He's gone for it and he's landed a takedown into mount! Oh, that's bad for Red!
Tudor wants to take his opponent's back but he's not managed it.
Tudor content just to control the position here.

Tudor working for a submission but Red is keeping him at bay.
Tudor is breathing heavily.
Tudor misses with a head shot.
The ref warns both fighters not to hold the cage as they work up against the meshing.
Tudor jumps to side control looking for an arm triangle but Red manages to avoid the submission attempt.
We get told so often about how wrestlers don't like to be on their backs. Let's see if Red can do anything to dispel that myth.

That's four minutes gone in the round.
Tudor trying to control the action but Red is working from the bottom.
Red tries to work a leg under to get back to half guard but Tudor wriggles his own leg back out and remains in side control.
Red gives up the full mount - oops, sloppy defensive grappling there!
Tudor lands a big elbow.
Tudor with a couple of short strikes.
Tudor with shots to the head and body - Red looks very uncomfortable down there.
And thats the end of the round the fighters go back to their corners.
Colton Red dominated that round.
That's the end of the round. The referee orders the cornermen out of the cage so we can get back down to business.

Nice sprawl there from Red as Tudor shoots in.
Henry Tudor seems to be the more aggressive standup fighter in this bout.
Tudor gets his takedown attempt stuffed easily
and Red counters with a straight right hand.
Tudor wants to clinch but Red slips to the side
and Red counters with a lovely straight right hand!
Tudor throws a predictable looking body shot
and Red counters with a two punch combo.
Red connects with a hook to the side of his opponent's head.
Red stuffs the takedown.
That's three failed takedown attempts in the round for Henry Tudor. That's going to take a lot out of him.
Tudor shoots in looking for a double leg takedown. Red defends it nicely.
Henry Tudor is looking to throw some combinations by the looks of things.
A jab lands there for Red.
A nice leg kick lands there from Tudor.
Red is breathing heavily.
That's one minute gone in the round.
Red swats away the attempt to clinch by Tudor.
Tudor takes a jab on the nose there. A little bit of blood seems to be coming out. Hopefully that won't affect his breathing.
Red slips a jab from Tudor.
Tudor closes the distance looking to clinch
and Red counters with a good right hand that lands right on the jaw.
Tudor fakes high and shoots in for a takedown but Red avoids it really well and circles away.
Tudor misses with a body punch
and Red cracks him with a counter punch right on the button.
Tudor throws a jab, cross combination which is slipped
and Red counters with a stiff right hand.
A really sloppy takedown attempt there from Tudor.
Red pulls out of a head kick attempt.
That's two minutes gone in the round.
The crowd are hurling abuse towards the fighters... You can hardly blame them though because there isn't a lot going on in the fight.
Red throws a series of strikes that have Tudor backpedaling.
Red tries a switch kick but it misses it's target.
Red lands a two punch combo.
Tudor throws a leg kick
and Red counters nicely by changing levels and landing a hook to the body.
Red uses some good footwork to avoid the body shot by Tudor.

Tudor closes the distance and presses his opponent up against the cage.
Tudor lands with a right to the head.
Tudor fails to pull the fight into his guard.
Tudor tries to score a body lock takedown but Red shows good agility there to stay on his feet.
Red wants to get back to striking at distance but Tudor won't allow it.
Tudor has Red pressed up against the cage and is working for takedown. Red manages to improve position though and keeps the fight standing.
Tudor drops down for a takedown but doesn't get it.
That's three minutes gone in the round.
Tudor wants a takedown.
A real battle for position is taking place between these two warriors.
Red wants to break free. God knows he wants to breaaaak freeee.
Tudor is trying to work for a single leg takedown but Red pulls him back up using the underhooks.
Tudor tries to pull guard but can't drag his opponent to the mat. Red just stands there and leans against the cage.
Tudor tries for a takedown but Red manages to get underhooks.
Come on Tudor - let's have some action - none of this stalling nonsense.
Tudor wants a takedown but no success here.
Tudor drops down for a takedown but doesn't get it.
Tudor tries a shoulder strike but it doesn't do any damage.
That's four minutes gone in the round.
A few boos can be heard. I'm sure they will multiply if the fighters don't pick up the pace.
Red tries to break the clinch but Tudor is controlling the position.
Red is looking to break free of the clinch but Tudor has double underhooks.
A shot in the inside from Tudor.
Tudor goes for a takedown in the clinch but Red prevents it.
Tudor stalling against the cage.
Red tries to break free but Tudor pushes him back against the cage.

Red's corner calls for him to break the clinch, which he does.
Tudor takes a shot to the body in his stride.
Red's corner calls for a 1,2 combination and Red duly obliges.
Red scores with a nice right hand.
And thats the end of the round the fighters go back to their corners.
Colton Red showed his class in that round. I'd imagine he'll take it on all the scorecards.
The fighters get back to their feet, the hooter sounds and we're back to the action! This is the final round!

Tudor tries to clinch but Red moves out of range.
Tudor is looking to clinch but Red is avoiding it.
Tudor tries for a takedown but Red circles away easily
and Red counters with a quick right hand to the jaw.
Tudor throws a left and a right that both miss
and Red cracks him with a counter punch right on the button.
Tudor is looking to clinch but Red is avoiding it.
Tudor swinging wildly here.
Tudor closes the distance and clinches up with Red, looking for a takedown. Tudor pushes Red against the cage but Red circles to the side and manages to break the clinch.
We've had a slow start to the round here - hopefully the action picks up.
Red misses with a head kick.
Red throws a head kick that misses and slips in the process. He scrambles back to his feet and the fighters circle.
Tudor tries to clinch but Red moves away
and Red counters with a right hand to the body.
Tudor changes levels and drives through with a really nice takedown into side control. Red looks really pissed at himself for not defending that better.
That's one minute gone in the round.
Tudor advances nicely into full mount.
Tudor has been looking to land a fair amount of strikes on the ground. He might be looking to soften his opponent up in order to work for a submission.
Red takes a big intake of breath there - he's definitely tired.
Red is trying to control the position here but Tudor swings around for an armbar and he's got it! This one is all over, courtesy of a slick submission by Tudor!
Ladies and gentlemen, after 1:29 of round 3, we have a winner by way of Submission (Armbar). Henry Tudor!
|
|
|
|
|
|
|
|
|
|
|
|
|
|
|
|
|
|
|
|
|
|
|
| S |
C
A |
G |
S |
C
B |
G |
|
S |
C |
G |
|
energy
A | B |
|
hype
A | B |
|
pop
A | B |
|
mgr
A | B |
|
FIGHT
RATING
88% |
|
|
|
|
|
|

