|
|
PBP Commentary |
Coming up we have a featherweight MMA rules bout between Tom Fu II (ranked 0 p4p, 0 weight class) and Shinto Rage (ranked 0 p4p, 0 weight class). Fu II comes into the arena with Everything in it's right place blaring out of the sound system. Both fighters look fresh as a daisy as they make their way towards the ring.
 |
|
 |
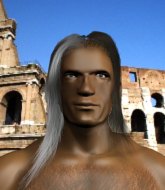
| 165 cm
24
150 lbs
6 - 4 - 0 |
|
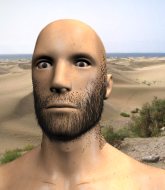
175 cm
25
155 lbs
3 - 1 - 0 |
BJJ Purple Belt
Solid boxing
Cuts easily |
|
ADCC Champion
Decent boxing
Powerful |
|
| |
|
Ladies and gentlemen. This fight is 3 rounds, in the featherweight division.
Introducing the fighter to my left, fighting out of the red corner.
With a record of
6 - 4 - 0, fighting out of Hilo, Tom Fu II!
And introducing the fighter to my right, fighting out of the blue corner.
With a record of
3 - 1 - 0, fighting out of Hilo, Shinto Rage!
The judges for this bout are , and .

The bell rings for round one and we are underway!
Fu II misses with a hook. Rage ducked under it nicely.
Rage looks for a takedown here. Will he get it? Fu II is fending him off so far but Rage persists. Nope, Fu II circles away and we're back to standing.
A slow jab from Fu II misses its intended target.
Fu II keeps the fight standing with a nice sprawl.
Fu II jabbing away but nothing is landing.
Fu II with a jab.
Fu II jabs away that one connects to the head of his opponent.

Fu II gets caught on his heels momentarily as he allows Rage to score an easy takedown into full guard.
Rage looking to pass the guard.
Fu II looking to control.

Rage is trying to work a guillotine from the top, or something like that? Don't know how he thinks he's going to get a finish from there.
Fu II is trying to keep Rage in close.
Fu II is going to have to think about doing something other than just controlling because Rage is managing to avoid having the position dictated to him.
Rage won't allow Fu II to sweep him here.
Rage looking to pass the guard.

That's one minute gone in the round.

Well, the referee has seen enough. Neither fighter is active enough on the ground so he's stood them back up.
A really sloppy takedown attempt there from Rage.
Tom Fu II has stuffed three takedown attempts in the round now. That's going to take a lot out of Shinto Rage.
Horrible takedown by Rage or perhaps it was just good defense by Fu II which made him look bad.
Fu II looks to land a right hand but Rage moved out of range.
Fu II lands an overhand left. A wild punch that just about connected.
Rage uses good footwork to avoid the strikes from Fu II.
Fu II thows a left - swing and a miss!
No joy there for Rage, who threw a few shots but didn't land.
Fu II misses with a combination
and Rage counters with a takedown into full mount! That could mean trouble for Fu II!
Rage landing strikes from the mount and Fu II is in trouble!
Rage lands a couple of nice shots there from mount.
Fu II is in all sorts of trouble here.
Rage punishing his opponent with strikes.
Fu II defends a decent attempt at a guillotine from Rage.
Fu II is in all sorts of trouble here.

That's two minutes gone in the round.
Rage punishing his opponent with strikes.
This is a great period of action - very entertaining stuff!
Fu II wants to hold on but Rage pushes him away.
Rage has his opponent pinned against the ropes, landing some nasty ground and pound that is really making a bit of a mess out of Fu II's face.
Rage has control of Fu II's right arm, working for a kimura. It's a bit of a token attempt though and Fu II regains control of the situation pretty easily.
Rage looks gassed!
Fu II is bucking up trying to escape but Rage cracks him with another couple of good strikes.
The fighters are trapped in the ropes so we're going to have a reposition here. The ref calls for a break and repositions the fighters in the center of the ring.
Fu II wants to control but Rage is having none of it.
Fu II tries to get back to half guard but can't.
Rage punching from mount but Fu II doing a good job of avoiding damage.
The fighters are tangled up in the ropes here. We might need a restart if the fighters can't break free themselves.
Rage landing strikes from the mount.
BOOM! Rage connects with a massive shot to the dome!
Fu II working to try and regain half guard.

That's three minutes gone in the round.
Rage is working on an americana here. Ooh, that looks pretty nasty! Nope, Fu II has managed to escape the submission attempt.
Rage with some aggressive grappling here. He's looking for submissions here, rather than waiting for the opportunity to counter.
Fu II wants to hold on but Rage pushes him away.
Rage scoring with some good ground and pound from mount here. Will he manage to finish Fu II?
Rage throws some wild stikes that Fu II manages to avoid easily.
Both fighters really going for it on the ground here!
Fu II is trying desperately to improve position.
Fu II tries to hold on but Rage postures up.
Fu II is trying to escape the mount.
Rage unloading with bombs!

That's four minutes gone in the round.
Fu II is trying to escape the mount.
Rage lands a shot to the body, followed up by a shot to the exposed head of his trapped opponent.
Fu II is trying to get back to his feet but can't.
Rage lands a big shot there that rocks Fu II but he's holding on and managing to survive for now.
Rage punishing his opponent with strikes.
Rage has hold of Fu II's left arm, perhaps looking for a submission. The two fighters tussle over control of the isolated limb and Fu II manages to get his arm back to his side and away from danger.
Fu II takes a big shot to the head but keeps on trying to improve his position.
Fu II slips a leg in and gets back to half guard.
Rage is trying to work for a kimura. This could be trouble! No, Fu II has managed to free his arm - good work.

Fu II has one foot on Rage's thigh - he pushes off and manages to get back to his feet.
This is a great period of action - very entertaining stuff!
As the round comes to an end the crowd are showing their appreciation for a great round of action.
Nice sprawl there from Fu II as Rage shoots in.
Jab from Fu II.
And thats the end of the round the fighters go back to their corners.
Shinto Rage dominated that round.
Well, the break between rounds is over. Let's get back to the scrappin!

Fu II missing with a left hand there. Rage was out of range so wasted energy throwing that one.
Rage shoots in for a takedown. "Ole!" shouts Fu II as he jumps to the side.
Rage on the wrong end of an overhand right that came out of nowhere.
Fu II misses the shot to the body.
Rage fakes high and shoots in for a takedown but Fu II avoids it really well and circles away.
Tom Fu II seems to be the more aggressive standup fighter in this bout.
A combination from Fu II does no damage.
Rage on the wrong end of a decent looking cross there.
Rage shoots in but Fu II avoids the takedown attempt easily.
Tom Fu II has stuffed three takedown attempts in the round now. That's going to take a lot out of Shinto Rage.
Fu II fails to land with the punch combination there - jab, cross, hook, miss, miss, miss.
We've had a slow start to the round here - hopefully the action picks up.
Fu II thows a left - swing and a miss!
Fu II missing with a left hand there. Rage was out of range so wasted energy throwing that one.
Rage throws a one two combo.
Rage ducks under a wild hook from Fu II.
Fu II stuffs the takedown.
Rage is breathing heavily.
That's one minute gone in the round.
Rage on the wrong end of a nice hook.
A cross from Fu II lands.
Rage shoots in with a takedown attempt and he has Fu II pinned against the cage. Fu II gets the underhooks and manages to circle away.
Fu II throws an uppercut from half a mile away. Rage sees it coming and avoids it easily.
No joy there for Fu II, who threw a few shots but didn't land.
Fu II misses with a hook.
Rage moves out of range of the strikes.
Rage tries to move into range but Fu II moves to the side and lands with a nice right hand.
Rage bobs and weaves well there to avoid the strikes.
Shinto Rage is looking to throw some combinations by the looks of things.
Nice defenses there by Rage.
Fu II moves into range and connects with a jab.
Rage bobs and weaves well there to avoid the strikes.
Rage misses with a jab, cross combination.
Rage has his head snapped back a nice jab. A little nod from Rage there as he acknowledges the shot.
Rage changes levels and looks for a double leg takedown. Fu II tries to avoid it but Rage manages to keep hold of a leg and drag Fu II to the ground. Fu II escapes though and pops straight back up to his feet.
Rage keeping his hands up high there, blocking the jab from Fu II.
That's two minutes gone in the round.
Rage takes a shot to the eye socket. That's gotta hurt.
Fu II looks to land a combination but Rage avoids it well.
Rage shoots in for a takedown but Fu II shows good takedown defense.
Rage gets cracked there but stands up to it.
Rage throws a wild combination but nothing lands.
Fu II looks to land a right hand but Rage moved out of range.
Fu II throws a combination that misses
and Rage counters with a takedown into full mount! That could mean trouble for Fu II!
Rage is going oldschool here, as he tries to force Fu II to tap using a forearm choke. This isn't 1993 though, so Fu II shrugs it off.
Fu II is looking to get to half guard.
Fu II tries to buck Rage off but he can't manage it.
Rage avoids the attempt from Fu II to control.
Rage landing strikes from the mount and Fu II is in trouble!
Fu II can't escape the position.
Fu II tries to hold on but Rage postures up.
Fu II sneaks a leg back under and regains half guard and is working straight away to try and get back to guard. He hasn't managed just yet though.
That's three minutes gone in the round.
Fu II moves his hips nicely and gets into full guard.
Rage scoring with punches to the head and body.
Fu II is throwing his legs up, looking for submissions. Rage is aware though and is defending well.
Rage pressing down on his opponent's thigh, looking to pass guard. Fu II is keeping the position for now.
Rage stands and throws Fu II's legs to the side, diving into side control.
Rage working the ground and pound from side control.
Rage throwing strikes but missing, from side control.
Rage has the superior BJJ but he's also working some ground strikes into his gameplan.
Fu II tries to improve position but can't.
Fu II wants to control but Rage postures up.
Fu II is working to avoid the ground and pound but Rage connects with a decent elbow.
Rage is chipping away with strikes.
Rage tries to advance to mount but Fu II denies him.
Fu II gets back to half guard.
That's four minutes gone in the round.
Fu II manages to escape and get back to his feet!
Rage fails with the takedown.
Fu II is really head hunting here, hardly looking to strike to the body at all.
Rage tries a head kick but it misses.
Fu II looks to land a right hand but Rage moved out of range.
Fu II throws a hook to the side of Rage's head but Rage sees it coming and ducks under it beautifully.
Fu II swings and misses with a hook to the body.
The crowd cheers as Fu II lands an impressive looking overhand right. Rage doesn't seem phased though.
Nice takedown defense from Fu II. No joy for Rage on that attempt.
Nice sprawl there from Fu II as Rage shoots in.
Fu II lands the left hand.
Fu II misses with a few strikes there.
Fu II rushes forward with a series of wild hooks but Rage moves out of range and avoids them all easily.
Tom Fu II is looking to keep the fight on the feet at all costs.
Rage throws a jab, cross combination which is slipped
and Fu II counters with a crisp hook to the side of the head.
Fu II misses with a hook. Rage ducked under it nicely.
And thats the end of the round the fighters go back to their corners.
Tom Fu II dominated that second round.
The referee calls time. The cornermen exit stage left and we're back to business. This is the final round!

Fu II throws a hook to the body but it doesn't connect.
Rage shoots in for a takedown but doesn't get it.
Rage staying out of range there.
Fu II throws a shot from downtown. Rage moves away and avoids it.
Fu II throws a hook to the side of Rage's head but Rage sees it coming and ducks under it beautifully.
Fu II scores with a nice right hand.
A slow jab from Fu II misses its intended target.
Rage closes the distance and clinches up, looking for a takedown. He shifts his weight and gets a nice trip into half guard.
Fu II tries to kick Rage off but Rage keeps his base steady and stays in half guard.
Fu II trying to control from the bottom.
Rage working the head and body with strikes.
Rage is trying a forearm choke
I don't think that's going to do much at this level of the game.
Fu II wants to control but Rage is keeping busy.
Both fighters are breathing heavily.
Fu II wants to get back to his feet.
That's one minute gone in the round.
Rage working Fu II over with strikes.
Fu II is trying to control but can't.
The referee has ruled that neither fighter is active enough on the ground and has stood them back up.
Rage shoots in looking for a double leg takedown. Fu II defends it nicely.
Fu II scores with the left hand. Rage knows he should have avoided that one.
Fu II throws a hook but Rage avoids it easily.
Fu II slips a jab and a cross from Rage.
Fu II throws a series of punches but Rage moves out of range.
Rage avoids a lazy jab quite easily.
Fu II misses with a wild body shot.
Rage fails with a rather predictable takedown attempt.
Tom Fu II has stuffed three takedown attempts in the round now. That's going to take a lot out of Shinto Rage.
Rage will have to do better than that with his takedown attempts.
A punch lands to the side of Rage 's head but he takes it in his stride.
Rage has his head snapped back a nice jab. A little nod from Rage there as he acknowledges the shot.
Rage avoids a lazy jab quite easily.
That's two minutes gone in the round.
Fu II misses with a hook. Rage ducked under it nicely.
A jab from Fu II misses.
Fu II scores with a jab. Rage acknowledges it with a nod of the head.
Rage displays some good footwork, moving neatly out of range as Fu II throws out the jab.
Rage lands a jab to Fu II's midsection.
Rage ducks under a wild hook from Fu II.
Fu II connects with a good right hand that stumbles Rage. Rage circles away out of range and recomposes himself.
Fu II throws a hook to the side of Rage's head but Rage sees it coming and ducks under it beautifully.
Fu II cracks Rage with a right hand to the side of the head.
Fu II misses with an uppercut. Rage saw that one coming.
Rage walks straight into an uppercut. Luckily it didn't land flush.
Rage takes one on the chin but keeps coming.
Fu II throws a hook to the side of Rage's head but Rage sees it coming and ducks under it beautifully.
Rage fails with a takedown attempt from distance.
Fu II misses with a hook.
Rage looking to land some kicks to the body here.
Rage keeping his hands up high there, blocking the jab from Fu II.
That's three minutes gone in the round.
Rage moves out of range of the strikes.
Fu II gets taken down but at least he's managed to land in guard.
Rage trying to pass the guard but can't manage it just yet.
Fu II pulls Rage in close to prevent any damage.
Fu II working a defensive guard here.
Rage tries to free his leg and advance position but Fu II is retaining full guard.
Fu II pulls Rage in close to prevent any damage.
Fu II looking to hit a scissor sweep but Rage is one step ahead there.
Fu II working a defensive guard here.
That's four minutes gone in the round.
Neither fighter is doing enough for the referee's liking and he's decided to stand them back up.
Fu II throws an uppercut from half a mile away. Rage sees it coming and avoids it easily.
Rage looks to land a combination but Fu II avoids it well.
Fu II throws a combination but comes up with nothing but fresh air.
Rage has a takedown stuffed.
Fu II waving his hands out in front of him, looking to distract Rage.
Rage will have to do better than that with his takedown attempts.
Fu II throws the left hand but Rage avoids the punch easily.
Fu II loads up on a big right hand but Rage slips the punch.
Fu II with a jab.
Fu II misses with a two punch combination.
Rage bobs and weaves well there to avoid the strikes.
Rage shoots in for a takedown but Fu II shows good takedown defense there and keeps this one on the feet.
Rage looks for a takedown but Fu II sprawls well.
Fu II throws out a loose jab but Rage uses good head movement to avoid it.
And that's the end of the fight!
That was a close round. You could make an argument for either fighter but I would give it to Tom Fu II.
I think Fu II has won this one but let's see what the judges have to say. Over to the ring announcer for the scorecards.
Ladies and gentlemen, after 3 rounds of action, we go to the scorecards for a decision.
Judge Andi Peters scores the fight 29:28
Judge Gordon Ramsey scores the fight 29:28
Judge Frank Skinner scores the fight 29:28
In favor of your winner, by unanimous decision... Tom Fu II!
|
|
|
|
|
|
|
|
|
|
|
|
|
|
|
|
|
|
|
|
|
|
|
| S |
C
A |
G |
S |
C
B |
G |
|
S |
C |
G |
|
energy
A | B |
|
hype
A | B |
|
pop
A | B |
|
mgr
A | B |
|
FIGHT
RATING
73% |
|
|
|
|
|
|

