|
|
PBP Commentary |
Coming up we have a heavyweight MMA rules bout between Michael Peterwhacker (ranked 0 p4p, 0 weight class) and Mike Bidwell (ranked 0 p4p, 0 weight class). The crowd giving both fighters a great reception on their way into the arena. That's good to see.
 |
|
 |
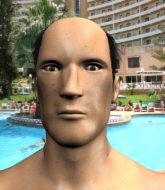
| 190 cm
22
259 lbs
2 - 0 - 0 |
|
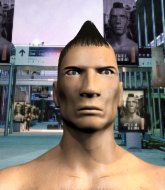
190 cm
20
265 lbs
1 - 0 - 0 |
BJJ Blue Belt
Basic striking
Big right hand |
|
BJJ Blue Belt
Brawler
Inexperienced |
|
| |
|
Ladies and gentlemen. This fight is 3 rounds, in the heavyweight division.
Introducing the fighter to my left, fighting out of the red corner.
With a record of
2 - 0 - 0, fighting out of Las Vegas, Michael Peterwhacker!
And introducing the fighter to my right, fighting out of the blue corner.
With a record of
1 - 0 - 0, fighting out of Las Vegas, Mike Bidwell!
The judges for this bout are Stewart Dunkirk, Chris Downing and Tiny Johnson.

The bell rings for round one and we are underway!

Peterwhacker rushes Bidwell and presses him up against the cage.
Bidwell wants to break free but Peterwhacker has control.

Bidwell escapes the clinch and we're back to striking.

Peterwhacker closes the distance and gets a double leg, slamming Bidwell to the mat! Bidwell manages to get full guard.
Peterwhacker wants to stand but Bidwell is controlling his posture from full guard.
Peterwhacker with a nice head shot there.
Bidwell trying to strike off his back.
Bidwell keeping moving, preventing Peterwhacker from controlling successfully.
Peterwhacker landing with the ground and pound.
Bidwell can't keep his opponent in guard - Peterwhacker advances to half guard, no doubt looking to mount.
Peterwhacker tries to stand and escape but Bidwell is controlling the position.
Bidwell is trying to get back to full guard.

That's one minute gone in the round.
The referee walks around the fighters to get a better view of the action. Peterwhacker lands a nice short elbow.
Bidwell wants to control but Peterwhacker is keeping busy and won't allow it.
Peterwhacker wants to take a breather but Bidwell is having none of it.
Peterwhacker wants to free his trapped foot but Bidwell is holding on for dear life with his legs.
The fighters are pressed up against the cage, both looking to find a bit of space to work.
Peterwhacker is just sitting in half guard, waiting for something to happen.
Bidwell looks gassed!
Peterwhacker tries to stand but his hand is stuck under Bidwell.
Peterwhacker has been looking to land a fair amount of strikes on the ground. He might be looking to soften his opponent up in order to work for a submission.
Peterwhacker wants to take a breather but Bidwell is having none of it.
Bidwell wants to improve his position but Peterwhacker is controlling well.
Bidwell is trying to control but can't.

Neither fighter is doing enough for the referee's liking and he's decided to stand them back up.
Peterwhacker gets to the clinch - let's see what his plan is here.
Peterwhacker fails to pull the fight into his guard.
Bidwell tries to break the clinch but Peterwhacker is controlling the position.

That's two minutes gone in the round.
Peterwhacker pulls guard.

Peterwhacker looking for a guillotine here but Bidwell defends easily.
Peterwhacker keeping full guard, as Bidwell tries to pass.
Peterwhacker trying to strike off his back.
Peterwhacker punching from the bottom.
Peterwhacker keeping moving, preventing Bidwell from controlling successfully.
Peterwhacker bucks up whilst keeping hold of a body lock, managing to reverse the position. Now he's in top in Bidwell's guard.
Peterwhacker passes Bidwell's right leg, so he's now in half guard.
Bidwell is in trouble now - Peterwhacker has advanced to mount!
Peterwhacker looking to control but Bidwell is working nicely, looking to advance position himself.
Bidwell is trying to escape the mount.

That's three minutes gone in the round.
Peterwhacker breaks from Bidwell's wrist control and lands an elbow.
Bidwell is working to get back to half guard.
Peterwhacker trying to control but he's not successful this time.
Bidwell is working to get back to half guard.
Peterwhacker scoring with some good ground and pound from mount here. Will he manage to finish Bidwell?

Bidwell is rocked!
Peterwhacker with good strikes from the mount here!
Bidwell is still in real trouble! Can Peterwhacker finish him?
Bidwell is looking to get to half guard.
A nice elbow there by Peterwhacker.
Peterwhacker postures up and cracks his opponent a couple of times before moving back into close ground control. Bidwell looks a forlorn figure.
Peterwhacker landing shots from mount.

That's four minutes gone in the round.
Peterwhacker wants to finish this one by submission but Bidwell is holding onto his waist, trying to prevent any attacks from Peterwhacker.
The crowd cheering loudly, showing their appreciation for the quality fight we're seeing here.
Peterwhacker lands a shot to the body, followed up by a shot to the exposed head of his trapped opponent.
Peterwhacker fakes a shot to the body and cracks his opponent in the head. Nice ground and pound there!
Peterwhacker postures up and cracks his opponent a couple of times before moving back into close ground control. Bidwell looks a forlorn figure.
Peterwhacker pausing momentarily but resumes with a couple of decent strikes that do a bit of damage.
Peterwhacker looking to finish Bidwell with some ground and pound. This is bad for Bidwell!
Bidwell is looking to improve his position but Peterwhacker isn't that keen on the idea.
Peterwhacker is still in mount, landing shots to his trapped opponent. Bidwell can't stay in a position like this for much longer.
As the round comes to an end the crowd are showing their appreciation for a great round of action.
Peterwhacker landing strikes, looking to finish!
Peterwhacker working for a submission but Bidwell is keeping him at bay.
Peterwhacker fakes a shot to the body and cracks his opponent in the head. Nice ground and pound there!
And thats the end of the round the fighters go back to their corners.
Michael Peterwhacker dominated that round.
That's time! Peterwhacker's corner gives him a slap on the ass as he gets ready to fight.

Peterwhacker shoots in for a takedown but Bidwell shows good takedown defense.
Peterwhacker misses with a takedown attempt. He shot from a bit too far out.
Peterwhacker shoots in but Bidwell avoids the takedown attempt easily.
That's three failed takedown attempts in the round for Michael Peterwhacker. That's going to take a lot out of him.
Peterwhacker fails miserably with a takedown attempt.
Peterwhacker shoots in with a takedown attempt and he has Bidwell pinned against the cage. Bidwell gets the underhooks and manages to circle away.
Peterwhacker will have to do better than that with his takedown attempts.
Peterwhacker shoots for a double leg takedown but Bidwell sprawls well. He's pushed Peterwhacker's face into the mat and manages to get back to his feet relatively easily.
Peterwhacker shoots in and drives through. Bidwell sprawls well.
Peterwhacker tries to shoot in for a takedown. He's got hold of a leg but Bidwell swivels and escapes.
Peterwhacker tries for a takedown but Bidwell sees it coming a mile off and avoids it easily.
Peterwhacker shoots in but Bidwell avoids the takedown attempt easily.
Peterwhacker shoots for a double leg takedown but Bidwell sprawls well. He's pushed Peterwhacker's face into the mat and manages to get back to his feet relatively easily.
Bidwell is breathing heavily.
Peterwhacker misses with a takedown attempt. He shot from a bit too far out.
Peterwhacker closes the distance and clinches up with Bidwell, looking for a takedown. Peterwhacker pushes Bidwell against the cage but Bidwell circles to the side and manages to break the clinch.
Peterwhacker tries to shoot in for a takedown. He's got hold of a leg but Bidwell swivels and escapes.
Peterwhacker will have to do better than that with his takedown attempts.
Peterwhacker shoots in for a takedown - he's clinched up with Bidwell but Bidwell pushes him off and we're back to square one.
Bidwell seems to have recovered his senses.
Bidwell walks straight into an uppercut. Luckily it didn't land flush.
That's one minute gone in the round.
Bidwell misses with a left hand
and Peterwhacker counters with a three punch combo that has Bidwell backing up. Bidwell nods at Peterwhacker to acknowledge the strikes.
Peterwhacker uses good head movement to avoid the hook from Bidwell.
Bidwell fails with the takedown
and Peterwhacker counters with a driving takedown into guard. Nice work there by Peterwhacker.
Peterwhacker landing some decent shots from guard.
Peterwhacker stopping the sweep attempt from Bidwell.
Peterwhacker content to stall in guard here.
Peterwhacker wants to control from the top but Bidwell keeps moving.
Peterwhacker makes a bit of distance and scores with some ground and pound, still in guard.
Bidwell working from the bottom, still in full guard. He's managed to get a loose triangle. Peterwhacker doesn't seem to be doing much to defend here, obviously he feels comfortable in the position. Peterwhacker manages to throw the legs off his shoulder and he's back into guard - no problem.
Peterwhacker trying to control the position from guard on top but Bidwell is wriggling around, looking for whatever he can.
That's two minutes gone in the round.
Bidwell is working the butterfly guard. He manages to land a nice scissor sweep and is now in half guard on the top. Nice move.
Bidwell trying to control from Peterwhacker's half guard. Peterwhacker has other ideas though and has regained full guard.
Peterwhacker wants to stand and escape but Bidwell is having none of it.
Bidwell trying to control the position from guard on top but Peterwhacker is wriggling around, looking for whatever he can.
Bidwell postures up as if he's going to throw some strikes but drops back for an ankle! Peterwhacker is in big trouble! He looks ready to tap! But no, he's escaped and dives on top of Bidwell, into his guard.

Peterwhacker gets to his feet - Bidwell follows without any prompting.
Peterwhacker changes levels and drives through with a really nice takedown into side control. Bidwell looks really pissed at himself for not defending that better.
We've seen a great period of action over the last minute or so - credit to both fighters for leaving it all in the cage!
Bidwell is looking to reverse the position.
Bidwell is trying to escape the position but Peterwhacker is controlling the position.
Peterwhacker tries for an arm triangle. That looks pretty tight to me. Is this one over!?! Possibly, maybe, no Peterwhacker has let go of the choke. Obviously it wasn't as tight as we thought!
Bidwell is trying to get back to half guard. He's pushing on Peterwhacker's leg. He's managed it. Nice work.
That's three minutes gone in the round.
Peterwhacker is trying to work for a kimura. He's got his hands clasped together - this could be trouble! No, Bidwell has managed to free his arm - good work.
Bidwell is looking to get back to full guard here but Peterwhacker has managed to pass to side control instead.
Bidwell takes a big shot to the head but keeps on trying to improve his position.

It looks like Mike Bidwell has been cut.
Peterwhacker pausing momentarily but resumes with a couple of decent strikes that do a bit of damage.
The fans in attendance giving it up for the two fighters, who have really let it all hang out in the last minute or so!
Peterwhacker landing strikes, looking to finish!
Peterwhacker working for a guillotine from mount but Bidwell is in no mood to give up.
A nice elbow there by Peterwhacker.
Peterwhacker looking to control but Bidwell is working nicely, looking to advance position himself.
That's four minutes gone in the round.
Bidwell tries to get back to half guard but can't.
Bidwell is bucking up trying to escape but Peterwhacker cracks him with another couple of good strikes.
Bidwell is in a horrible position here. Peterwhacker smacks him with another shot as he tries to escape the position.
Peterwhacker looking to control but Bidwell is working nicely, looking to advance position himself.
Peterwhacker looking to secure an arm triangle but Bidwell defends it well.
Bidwell wants to hold on but Peterwhacker pushes him away.
Bidwell is in all sorts of trouble here.
As the round comes to an end the crowd are showing their appreciation for a great round of action.
Peterwhacker with shots to the head and body - Bidwell looks very uncomfortable down there.
Bidwell tries to buck Peterwhacker off but he can't manage it.
Peterwhacker working for a submission but Bidwell is keeping him at bay.
Bidwell is in all sorts of trouble here.
And thats the end of the round the fighters go back to their corners.
Michael Peterwhacker dominated that second round.
The cut man is working on Mike Bidwell's cut.
That's the end of the round. The referee orders the cornermen out of the cage so we can get back down to business. Let's get this one finished - here comes the final round!

Peterwhacker shoots in but no luck this time.
Horrible takedown by Peterwhacker or perhaps it was just good defense by Bidwell which made him look bad.
No luck for Peterwhacker with that takedown attempt.
That's three failed takedown attempts in the round for Michael Peterwhacker. That's going to take a lot out of him.
Peterwhacker shoots in but Bidwell avoids the takedown attempt easily.
Peterwhacker misses with a takedown attempt. He shot from a bit too far out.
Michael Peterwhacker is looking to throw some combinations by the looks of things.
Bidwell stuffs the takedown attempt from Peterwhacker. Peterwhacker gets slowly back to his feet.
Peterwhacker shoots in for a takedown but doesn't get it.
Peterwhacker shoots in but no luck this time.
Peterwhacker fails with a takedown attempt.
Peterwhacker fails to land the takedown.
Peterwhacker shoots in for a takedown - he's clinched up with Bidwell but Bidwell pushes him off and we're back to square one.
Bidwell takes a big intake of breath there - he's definitely tired.
Peterwhacker closes the distance and clinches up with Bidwell, looking for a takedown. Peterwhacker pushes Bidwell against the cage but Bidwell circles to the side and manages to break the clinch.
Peterwhacker closes the distance and clinches up with Bidwell, looking for a takedown. Peterwhacker pushes Bidwell against the cage but Bidwell circles to the side and manages to break the clinch.
Peterwhacker fails with a takedown attempt.
Peterwhacker fails with a rather predictable takedown attempt.
That's one minute gone in the round.
Horrible takedown by Peterwhacker or perhaps it was just good defense by Bidwell which made him look bad.
Peterwhacker misses with a takedown attempt - Bidwell sprawls well and throws a nice strike on the way out which just misses.
Peterwhacker is really dominating this fight. Is there anything that Bidwell can do to turn this around?
Peterwhacker looks for a takedown here. Will he get it? Bidwell is fending him off so far but Peterwhacker persists. Nope, Bidwell circles away and we're back to standing.
Peterwhacker tries for a takedown but Bidwell circles away easily
letting Bidwell counter with a right hand.
Peterwhacker shoots in for a takedown. "Ole!" shouts Bidwell as he jumps to the side.
Peterwhacker fails miserably with a takedown attempt.
Peterwhacker fails to land the takedown.
Peterwhacker shoots in for a takedown. "I don't think so" says Bidwell as he avoids it easily.
Peterwhacker shoots in but no luck this time.
Peterwhacker shoots in with a takedown attempt and he has Bidwell pinned against the cage. Bidwell gets the underhooks and manages to circle away.
No luck for Peterwhacker with that takedown attempt.
Nice sprawl there from Bidwell as Peterwhacker shoots in.
Bidwell stuffs the takedown.
No luck for Peterwhacker with that takedown attempt.
Peterwhacker changes levels and looks for a double leg takedown. Bidwell tries to avoid it but Peterwhacker manages to keep hold of a leg and drag Bidwell to the ground. Bidwell escapes though and pops straight back up to his feet.
That's two minutes gone in the round.
Peterwhacker will have to do better than that with his takedown attempts.
Nice sprawl there from Bidwell as Peterwhacker shoots in.
Peterwhacker fails with a rather predictable takedown attempt.
Nice takedown defense from Bidwell. No joy for Peterwhacker on that attempt.
Peterwhacker closes the distance and clinches up with Bidwell, looking for a takedown. Peterwhacker pushes Bidwell against the cage but Bidwell circles to the side and manages to break the clinch.
Peterwhacker fails with a takedown attempt.
Wow, both these guys are really going for it!
Peterwhacker fails to land the takedown.
Peterwhacker shoots in but Bidwell avoids the takedown attempt easily.
Peterwhacker closes this distance looking for a takedown but Bidwell circles away.
Peterwhacker shoots in but no luck this time.
Peterwhacker shoots in and drives through. Bidwell sprawls well.
Peterwhacker shoots for a double leg takedown but Bidwell sprawls well. He's pushed Peterwhacker's face into the mat and manages to get back to his feet relatively easily.
Peterwhacker tries to shoot in for a takedown. He's got hold of a leg but Bidwell swivels and escapes.
Horrible takedown by Peterwhacker or perhaps it was just good defense by Bidwell which made him look bad.
Peterwhacker fails with a rather predictable takedown attempt.
Peterwhacker shoots in for a takedown. "I don't think so" says Bidwell as he avoids it easily.
Peterwhacker fails with the takedown.
Peterwhacker looks for a takedown but Bidwell sprawls well.
That's three minutes gone in the round.
Peterwhacker tries for a takedown but Bidwell sees it coming a mile off and avoids it easily.
Peterwhacker shoots in with a takedown attempt and he has Bidwell pinned against the cage. Bidwell gets the underhooks and manages to circle away.
Peterwhacker shoots in but Bidwell avoids the takedown attempt easily.
Bidwell keeps the fight standing with a nice sprawl.
Peterwhacker rushes Bidwell and presses him up against the cage.
Bidwell wants to strike at distance but he can't break free of the clinch.
Bidwell wants to break the clinch but can't.
Bidwell has hold of one of Peterwhacker's legs. Peterwhacker is fighting the takedown attempt but Bidwell gets the trip and lands the takedown into guard.
Bidwell won't allow Peterwhacker to sweep him here.
Peterwhacker trying to control the position.
Bidwell wants to control from the top but Peterwhacker keeps moving.
Bidwell drops back looking for a heel hook - he quickly realises he's not going to get it but Peterwhacker manages to dive on top of him before he can escape and now Bidwell has Peterwhacker in his guard.
Bidwell is working an open guard so Peterwhacker takes the opportunity to get back to his feet.
That's four minutes gone in the round.
Bidwell pushes Peterwhacker up against the cage in a clinch.
Bidwell breaks the clinch and we're back to striking at distance.
A combination from Bidwell does no damage.
Peterwhacker tries to clinch but Bidwell moves away
and Bidwell counters with a three punch combination, finished off with a leg kick. Nice work.
A punch combination from Peterwhacker misses.
Bidwell showing good head movement there, avoiding the strikes from Peterwhacker.
Peterwhacker misses with a double jab.
Bidwell shoots in with a takedown attempt and he has Peterwhacker pinned against the cage. Peterwhacker gets the underhooks and manages to circle away.
Peterwhacker lands with a nice combination. Bidwell backs away looking to recover.
Bidwell misses with a body shot.
Horrible takedown by Bidwell or perhaps it was just good defense by Peterwhacker which made him look bad.
This has been an exciting period of action!
The crowd applaud the fighters efforts here as the round comes to an end.
Bidwell doesn't manage to clinch there - Peterwhacker circles away.
Mike Bidwell has stepped it up - he knows he needs a finish here!
Bidwell wants to clinch up but Peterwhacker keeps it at a distance.
Peterwhacker lands a jab. Then a cross. Then finally a nice hook to the body. Good work there by Peterwhacker.
No luck for Bidwell with that takedown attempt.
Peterwhacker fakes an overhand right and shoots for a takedown. Bidwell sprawls well initially but Peterwhacker persists and gets the takedown into half guard.
And that's the end of the fight!
Mike Bidwell comfortably won the final round on my scorecard.
I think Peterwhacker has won this one but let's see what the judges have to say. Over to the ring announcer for the scorecards.
Ladies and gentlemen, after 3 rounds of action, we go to the scorecards for a decision.
Judge Stewart Dunkirk scores the fight 29:27
Judge Chris Downing scores the fight 29:27
Judge Tiny Johnson scores the fight 29:27
In favor of your winner, by unanimous decision... Michael Peterwhacker!
|
|
|
|
|
|
|
|
|
|
|
|
|
|
|
|
|
|
|
|
|
|
|
| S |
C
A |
G |
S |
C
B |
G |
|
S |
C |
G |
|
energy
A | B |
|
hype
A | B |
|
pop
A | B |
|
mgr
A | B |
|
FIGHT
RATING
100% |
|
|
|
|
|
|
