|
|
PBP Commentary |
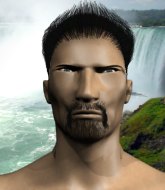
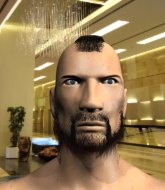
Coming up we have a lightweight MMA rules bout between Ken Block (ranked 0 p4p, 0 weight class) and Aruneru Hero (ranked 0 p4p, 0 weight class). Fingers crossed for an exciting fight - I'm sure both fighters are looking for a nice under the table bonus!
 |
|
 |
| 176 cm
18
160 lbs
0 - 0 - 0 |
|
180 cm
24
152 lbs
3 - 3 - 0 |
BJJ White Belt
Solid Muay Thai
Cuts easily |
|
BJJ Blue Belt
Basic striking
Solid chin |
|
| |
|
Ladies and gentlemen. This fight is 3 rounds, in the lightweight division.
Introducing the fighter to my left, fighting out of the red corner.
With a record of
0 - 0 - 0, fighting out of Tokyo, Ken Block!
And introducing the fighter to my right, fighting out of the blue corner.
With a record of
3 - 3 - 0, fighting out of Tokyo, Aruneru Hero!
The judges for this bout are Yukihiro Shimada, Ren Mimura and Shigeki Sano.

The bell rings for round one and we are underway!

Block moves into the clinch.
Hero keeps control of Block as he tries to wriggle out of the double underhooks.
Block misses with a shot to the kidneys.
Hero with an attempt at a knee that misses.
Block wants to strike at distance but he can't break free of the clinch.
A hook to the body from Hero.
Hero fails to land with a short punch on the inside.
Hero using the Thai plumb to throw knees but Block has his back arched nicely, preventing the strike.
Block tries to pull guard but Hero holds him up against the cage and eventually Block drops back down to his feet.
A nice glancing elbow lands by Block.
Hero looking to throw knees to the head but Block is blocking nicely.

Block breaks from the clinch.
Hero throws a head kick but Block moves out of range.
Hero looks gassed!

Block shoots in and gets a takedown into half guard. Block showed some decent athleticism there.
Hero blocking the ground and pound attempt from Block.
Block is keen to just control but Hero is a slippery customer.
Block throwing shots but they're hitting the canvas more than the man.
Block not landing any meaningful shots this time.
Block missing with some ground and pound from the half guard.
Hero keeping control of the leg, stopping his opponent passing to mount.

That's one minute gone in the round.
Block not throwing his punches with enough precision this time.
Block throwing shots but they're hitting the canvas more than the man.

It looks like we're going to have a standup here. Neither fighter is doing enough on the ground.
Block closes the distance and clinches.
Block is trying to slow down the pace in the clinch, to catch his breath.
Hero looking to throw knees to the head but Block is blocking nicely.
Kneeeeees! The crowd are calling for knees to the body. Block obliges.
Block has had enough of the clinch but Hero keeps him there for the moment.
Block breaks the clinch and we return to the middle of the mat.
Block has managed to clinch.
Block is looking to score with knees to the body. Maybe he'll change it up and go body then head. Hero is defending well for now.
Hero prevents the takedown attempt.
Block fails to pull guard.
That's three failed takedown attempts in the round for Ken Block. That's going to take a lot out of him.
Hero on the defensive, avoiding the knees to the body.
Hero throws a vicious knee straight up the middle but Block blocks it with crossed arms.
A short left from Block.
Block lands an elbow that stopped Hero in his tracks for a moment.
Hero misses with an elbow over the top.
With the fighters up against the cage, Hero throws an elbow but misses.

That's two minutes gone in the round.
Hero looking to throw knees to the head but Block is blocking nicely.
Block jumps guard but his hands slip and he falls flat on his back. Well, he's made himself look a right mug there, as Hero walks away with a smile on his face. Block gets slowly back to his feet and shakes his head.
Aruneru Hero seems to be the more aggressive standup fighter in this bout.
No luck with that takedown attempt from Block.
Block gets a clinch.
Block lands a nice elbow from the clinch.
Block lands a nice elbow.
Block tries for a takedown but Hero manages to get underhooks.
Hero blocks a knee to the body. He'll have a nicely bruised forearm in the morning.
Block tries to break free but Hero pushes him back against the cage.
Block tries to land a knee to the body but he is off balance and Hero avoids it.
Block breaks the clinch and we return to the middle of the mat.
Hero avoids the clinch attempt nicely.
No luck for Block with that takedown attempt.
Hero shoots in looking for a takedown. Block tries to sprawl out of it but Hero keeps driving through. The fighters are pinned against the cage. Block manages to get underhooks and after a bit of a struggle, circles away and we're back to standing.
Hero closes this distance looking for a takedown but Block circles away.

That's three minutes gone in the round.
Block is looking to clinch.
Hero shoots in looking for a takedown. Block tries to sprawl out of it but Hero keeps driving through. The fighters are pinned against the cage. Block manages to get underhooks and after a bit of a struggle, circles away and we're back to standing.
Like a baseball bat into the meat of his leg there - nice leg kick by Block.
Block lands a head shot.
Block circles away from the clinch attempt
and Block decides to take the opportunity to score a takedown. He's landed in Hero's guard.

Hero is throwing his legs up, looking for submissions. Block is aware though and is defending well.
Block throwing strikes from guard but Hero blocks nicely.
Hero trying to keep a closed guard but Block is proving a slippery customer.

Hero pushes Block off and scrambles back to his feet.

That's four minutes gone in the round.
Block closes the distance and clinches.
Hero scores a nice knee to the body.
Hero looking to throw knees to the head but Block is blocking nicely.
Block scores with a knee to the head.
Hero misses with an elbow strike.
Hero tries a knee to the head but Block blocks it.
Block is trying to stall.
Block wants to break the clinch but can't.
Block missing with knees to the body.
Hero blocks an elbow strike from Block.
Good anti-grappling being displayed by Hero as Block tries to tie him up.
Hero tries a knee to the head but he's missed.
Block is struggling to control the position.
Block tries to land a knee to the head but misses.
Hero lands a nice elbow.
Block putting his Muay Thai to good use. He has Hero in a tight clinch and is doing some damage with knees to the body.
Hero with the Thai clinch. He's looking to land a big knee but he's not managed it this time.
And thats the end of the round the fighters go back to their corners.
Ken Block dominated that round.
That's time! Back to the action!

Hero changes levels and looks for a double leg takedown. Block tries to avoid it but Hero manages to keep hold of a leg and drag Block to the ground. Block escapes though and pops straight back up to his feet.
Block fails with an attempt to clinch.
Block fakes with an overhand right and moves in to clinch with Hero, pushing him back against the cage.
Block is trying to wear down his opponent with knees to the body.
Block tries to land knees in the clinch but Hero avoids the damage to the body.
The pace slowing considerably in the clinch, as Block takes a break from that fighting nonsense to think about the finer things in life.
Hero creates a bit of distance and throws an elbow that only just misses.
Block changes levels and goes for a takedown here. Hero fights it off and pushes away nicely.
Block drives through and clinches with Hero against the cage.
Block scores with an uppercut up the middle.
Block pushes off and circles away, back to the middle of the mat.
Block connects with a high kick.
Block tries a head kick but it misses.
Hero tries for a takedown but Block sees it coming a mile off and avoids it easily.
Block moves into the clinch.
Block has hold of a leg and is looking for a trip takedown. Hero avoids it nicely though and we remain in the clinch.
Block landing knees to the body. They look like they could hurt.
Both fighters are absolutely exhausted here.
That's one minute gone in the round.
Block misses with a hook to the ribs.
Block looks to throw an elbow but misses.
Block tries to land knees in the clinch but Hero avoids the damage to the body.
Hero tries to land a knee to the body but he is off balance and Block avoids it.
Block gets an overhook and lands an elbow to the side of the head.
Hero looking to throw knees to the head but Block is blocking nicely.
A short uppercut from Hero.
Hero throws a vicious knee straight up the middle but Block blocks it with crossed arms.
Hero tries a knee to the head but he's missed.
Block gets an overhook and lands an elbow to the side of the head.
Hero misses with a knee strike.
Block missing with knees to the body.
Hero lands a good knee to the midsection. Block won't want to take too many of those.
Block connects with a nasty looking knee right to Hero's face.
Block is trying to slow down the pace of the fight but Hero is keeping busy.
Block using the Thai clinch to land knees to the body.
Hero lands on the inside with an uppercut.
Hero misses with a knee strike.
Hero swings away with an uppercut that misses.
Hero with the Thai clinch. He's looking to land a big knee but he's not managed it this time.
Hero has Block pressed against the cage, preventing Block from circling away and getting back to striking at range.
That's two minutes gone in the round.
The crowd are getting on the fighters' backs, as the pace has dropped off in the last minute or so.
Hero escapes the clinch and we're back to striking.
Block is looking to take this fight into the clinch.
Block works Hero's body with a nice hook.
Block is looking to clinch but Hero is avoiding it.
Hero looks for a takedown but Block sprawls well.
Ken Block has stuffed three takedown attempts in the round now. That's going to take a lot out of Aruneru Hero.
Block swats away the attempt to clinch by Hero.
Block shoots in but doesn't get the takedown
and Hero counters with a leg kick.
Block tries to clinch up.
Block has closed the distance and engaged Hero in a clinch.
Hero keeps the fight in the clinch, despite Block's efforts to push away.
Hero blocks a knee to the body. He'll have a nicely bruised forearm in the morning.
Hero comes over the top with an elbow. That landed flush.
Block tries to pull guard but Hero holds him up against the cage and eventually Block drops back down to his feet.
Block takes a knee right on the jaw!
That's three minutes gone in the round.
Hero avoiding damage as Block throws knees to the body.
Hero using the Thai plumb to throw knees but Block has his back arched nicely, preventing the strike.
Block throws an elbow that misses.
Still in the clinch, Hero scores with a nice short uppercut.
Hero with an attempt at a knee that misses.
Hero throws a vicious knee straight up the middle but Block blocks it with crossed arms.
Hero gets underhooks to prevent Block's takedown attempt.
Block is trying to slow down the pace in the clinch, to catch his breath.
Hero gets through Block's defenses to land a nice punch to the side of the head.
Hero blocks the elbow strike.
Hero on the defensive, avoiding the knees to the body.
Kneeeeees! The crowd are calling for knees to the body. Block obliges.
With the two fighters working up against the cage, Block just misses with a elbow thrown towards Hero's brow.
Block takes a knee to the side of the body.
Block dictating the pace here, as the fighters clinch against the cage.
Hero tries to land a knee to the body but he is off balance and Block avoids it.
Block tries to take the fight to the ground by pulling guard but can't manage it.
Block is looking for a takedown up against the cage. Hero gets underhooks though and prevents the takedown attempt.
Hero with the Thai clinch. He's looking to land a big knee but he's not managed it this time.
That's four minutes gone in the round.
A few boos can be heard. I'm sure they will multiply if the fighters don't pick up the pace.
Block lands an elbow inside that Hero shrugs off.
Block lands a glancing elbow in the clinch.
Hero misses the knee to the body. Nice hip positioning from Block.
Block misses the knee to the body. Nice hip positioning from Hero.
Block drops down looking for an ankle pick but Hero pulls his leg out and moves away.
Hero will have to do better than that with his takedown attempts.
No joy there for Block, who threw a few shots but didn't land.
Block moves in looking to clinch but Hero pushes him off.
Block leaves Hero with his face pressed against the mat as he sprawls beautifully, defending against a solid takedown attempt.
Hero shoots in for a takedown and gets it. Oh and he's advanced to full mount straight away.
Block blocking the ground and pound.
Block is squirming around, avoiding Hero's attempts to control the action.
And thats the end of the round the fighters go back to their corners.
That was a close second round but I would say that Ken Block will probably get the nod.
That's the end of the round. The referee orders the cornermen out of the cage so we can get back down to business. This is the final round!

No luck for Hero with that takedown attempt.
Hero takes a punch to the jaw and another one to the bread basket.
Block cracks the inside of Hero's front leg.
Hero shoots in looking for a double leg takedown. Block defends it nicely.
Block misses with a jab and misses with a cross straight after too.
Ken Block is looking to throw some combinations by the looks of things.
Block lands a jab to Hero's midsection.
Block gets to the clinch - let's see what his plan is here.
Block looking to slow down the pace here.
Block has Hero pressed against the cage.
Both fighters are breathing heavily.
Block lands a knee to the body.
That's one minute gone in the round.
Hero tries to land a knee to the head but Block blocks with his arms.
Block escapes the clinch and we're back to striking.
Hero fails with the takedown
and Block counters with a flying knee. Nice.
Ken Block has stuffed three takedown attempts in the round now. That's going to take a lot out of Aruneru Hero.
Block tries to close the distance and clinch up against the cage but Hero paws at him with a jab and circles away.
Block tries to score a power double leg takedown but Hero sees that one coming and sprawls well. That will dishearten Block somewhat.
Hero swats away the attempt to clinch by Block.
Hero will have to do better than that with his takedown attempts.
Hero tries to keep at a distance but Block has taken the fight into the clinch.
Hero tries a knee to the head but Block blocks it.
Block missing with knees to the body.
Block tries to land knees in the clinch but Hero avoids the damage to the body.
Block slows down the pace here.
Block goes for a takedown attempt but Hero pushes him away and we're back to fighting at a distance.
That's two minutes gone in the round.
Nice takedown defense from Block. No joy for Hero on that attempt.
A head kick misses from Hero.
Hero throws a lazy head kick
and Block counters by clinching up.
Block tries to land a knee to the body but he is off balance and Hero avoids it.
Hero lands a hook to the side of the head.
A frustrated look appears on Block's face as he tries to break the clinch.
Block tries to land knees in the clinch but Hero avoids the damage to the body.
Hero scores a nice knee to the body.
Block lands a damaging elbow.
Block tries to pull guard but can't drag his opponent to the mat. Hero just stands there and leans against the cage.
Block tries to jump guard but he falls flat on his backside. Hero smiles and moves away.
Block throws a leg kick which misses Hero's front leg but catches the back leg as Hero tries to avoid it.
Hero chopped to the floor by a nice leg kick but he springs right back up before Block can pounce on him.
Block fails in his attempt to clinch.
That's three minutes gone in the round.
Block wants to land a leg kick but Hero is out of range.
Block clinches up with Hero and pushes him back against the cage.
Hero misses with a knee to the head.
Hero lands a left hand that snaps the head of Block backwards.
Hero with the Thai clinch. He's looking to land a big knee but he's not managed it this time.
Block is looking to score with knees to the body. Maybe he'll change it up and go body then head. Hero is defending well for now.
Block tries to score a body lock takedown but Hero shows good agility there to stay on his feet.
Hero blocks the elbow strike.
Block tries to stall but Hero uses the opportunity to gain a better position.
Hero throws a vicious knee straight up the middle but Block blocks it with crossed arms.
Hero tries to land a knee to the head but misses.
Hero throws a vicious knee straight up the middle but Block blocks it with crossed arms.
Hero pushes Block back against the cage and lands a hook to the side of the head.
Block wants to push off and get back to the center of the mat but Hero has him pressed against the cage.
Block taking a breather.
Knees to the body from Hero.
Block is trying to slow down the pace in the clinch, to catch his breath.
Hero misses with a knee to the head.
Hero lands a knee to the head.
Block tries to pull guard but Hero won't allow it.
That's four minutes gone in the round.
There's not a lot going on here and the crowd are letting the fighters know they're not willing to tolerate a lack of action.
Hero tries to land a knee to the head but misses.
Hero takes a knee to the side of the body.
Block has had enough of the clinch but Hero keeps him there for the moment.
Block is working for takedown but Hero is calmly controlling the position for now.
Block escapes the clinch and we're back to striking.
Hero fails with an attempt to clinch.
Hero wants to clinch up but Block keeps it at a distance.
Block tries for a takedown but Hero sees it coming a mile off and avoids it easily.
No luck with that takedown attempt from Hero.
Hero throws a sloppy head kick and Block moves out of range easily.
Aruneru Hero has stepped it up - he knows he needs a finish here!
Block displays some good footwork, moving neatly out of range as Hero throws out the jab.
Ken Block is fighting for a decision here - he's started to take the cautious approach.
Block slips a straight right by Hero.
Block closes this distance looking for a takedown but Hero circles away.
The crowd thankful this round is nearly over.
Block closes the distance and clinches up with Hero, looking for a takedown. Block pushes Hero against the cage but Hero circles to the side and manages to break the clinch.
Block moves out of range of the strikes.
Block fails with a takedown attempt.
Block closes the distance and pushes Hero back into the cage.
And that's the end of the fight!
Ken Block showed his dominance in that final round.
Well Block has outscored his opponent in every aspect of the fight today. Only a scarily incompetent judge or two will keep him from a well deserved win... Over to the ring announcer for the scorecards.
Ladies and gentlemen, after 3 rounds of action, we go to the scorecards for a decision.
Judge Yukihiro Shimada scores the fight 30:27
Judge Ren Mimura scores the fight 30:27
Judge Shigeki Sano scores the fight 30:27
In favor of your winner, by unanimous decision... Ken Block!
|
|
|
|
|
|
|
|
|
|
|
|
|
|
|
|
|
|
|
|
|
|
|
| S |
C
A |
G |
S |
C
B |
G |
|
S |
C |
G |
|
energy
A | B |
|
hype
A | B |
|
pop
A | B |
|
mgr
A | B |
|
FIGHT
RATING
43% |
|
|
|
|
|
|
