|
|
PBP Commentary |
Coming up we have a welterweight MMA rules bout between Bhang Bhang (ranked 0 p4p, 0 weight class) and Kenny Dowling (ranked 0 p4p, 0 weight class). Dowling comes into a darkened arena with his song building. Ozzy Osbourne: Bark At The Moon kicks in, the lights come on and the crowd goes wild! What a showman! Bhang Bhang has the edge in experience - let's see if he can make that count tonight.
 |
|
 |
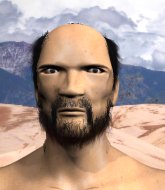
| 176 cm
21
184 lbs
4 - 1 - 0 |
|
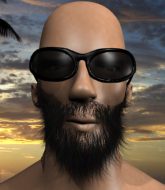
180 cm
22
179 lbs
2 - 0 - 0 |
Good wrestling
Solid boxing
Very strong |
|
BJJ Purple Belt
Good elbows
Powerful |
|
| |
|
Ladies and gentlemen. This fight is 3 rounds, in the welterweight division.
Introducing the fighter to my left, fighting out of the red corner.
With a record of
4 - 1 - 0, fighting out of Hilo, Bhang Bhang!
And introducing the fighter to my right, fighting out of the blue corner.
With a record of
2 - 0 - 0, fighting out of Hilo, Kenny Dowling!
The judges for this bout are , and .

The bell rings for round one and we are underway!
Bhang misses with a low kick.
Dowling fails with an attempt to clinch.
Dowling ducks under a wild hook from Bhang.
Dowling is looking to clinch but Bhang is avoiding it.
Dowling tries to close the distance and clinch but Bhang swats him to one side with an open hand palm strike and circles away.
Bhang misses with a jab and misses with a cross straight after too.

Bhang looking for a takedown here - he's got it.
Bhang won't allow Dowling to sweep him here.
The ref warns both fighters not to hold the cage as they work up against the meshing.
Dowling is persisting with the attempt to improve his position.
Both fighters really going for it on the ground here!
Dowling throws a couple of weedy looking strikes off his back.
Bhang trying to control but Dowling is working from the bottom.
Bhang scoring with punches to the head and body.
Dowling controls Bhang momentarily but Bhang frees himself.
Bhang with a couple of shots to the head there. Not particularly brutal.
Bhang postures up.
Bhang distracts Dowling with his right hand and drops a big elbow with his other arm.
Bhang scores with a decent looking elbow strike.
Bhang wants to control from the top but Dowling keeps moving.

That's one minute gone in the round.
Dowling looking to sweep here. No luck so far.
Bhang wants to control from the top but Dowling keeps moving.
Bhang missing there with some ground and pound from the guard.
Bhang in full guard, throwing the ground and pound. No damage this time.
The fighters are pressed up against the cage, both looking to find a bit of space to work.
Dowling pulls Bhang in to control the position.
Bhang with a flurry of punches that miss.

The referee has ruled that neither fighter is active enough on the ground and has stood them back up.
Dowling fails with an attempt to clinch.
Dowling ducks down and throws a hook to the body but Bhang moves away.

The fight moves into the clinch position.
Dowling using the Thai plumb to throw knees but Bhang has his back arched nicely, preventing the strike.
Dowling throws a head punch that misses.
Bhang lands a short shot on the inside that snaps the head of Dowling backwards.
Bhang lands a body shot.
Dowling looking to slow down the pace here.
Bhang lands with a short head shot on the inside.
A nice glancing elbow lands by Bhang.
Dowling tries a shoulder strike but it doesn't do any damage.

That's two minutes gone in the round.
Knees to the body from Dowling.
Bhang has Dowling pressed against the cage.
A short left from Dowling.
Dowling tries to land knees in the clinch but Bhang avoids the damage to the body.
Bhang digs a right hand underneath Dowling's ribcage. Dowling let out a lung full of air as it connected.
Dowling blocks the elbow strike.
Dowling avoids the elbow strike from Bhang, against the cage.
Bhang tries for a takedown but Dowling manages to get underhooks.
Bhang creates a bit of space for himself and sneaks an elbow through Dowling's defenses.
Dowling trying to control the position but instead, Bhang has worked for underhooks and has pushed Dowling into the cage.
Dowling scores with a nice hook to the head.
Bhang misses with a short punch on the inside.
Bhang throws a punch but it's blocked by Dowling.
Dowling with the Thai clinch. He's looking to land a big knee but he's not managed it this time.
Dowling creates a bit of space for himself and sneaks an elbow through Bhang's defenses.
Dowling misses the knee to the body. Nice hip positioning from Bhang.
With the two fighters working up against the cage, Dowling just misses with a elbow thrown towards Bhang's brow.
Both fighters working to control the clinch.
Bhang misses with a hook from the clinch.
Dowling lands a left hand that snaps the head of Bhang backwards.
A short right from Bhang.
A head punch on the inside from Bhang fails to land.
Dowling lands an elbow inside that Bhang shrugs off.
Bhang looking for a takedown.
Bhang is breathing heavily.
Dowling's corner are urging him to control the action in the clinch for a moment, rather than mount any serious offense. I'm sure the crowd appreciate those instructions... not.
Dowling missing with knees to the body.

That's three minutes gone in the round.
Knees to the body from Dowling.
A nice right hand lands inside from Bhang.
A nice glancing elbow lands by Bhang.
Bhang lands a right hand that snaps the head of Dowling backwards.
The pace really dropping off here, momentarily.
Dowling blocking some punches.
Bhang misses with a hook from the clinch.
Dowling blocking some punches.
Both fighters working to control the clinch.
A knee to the head by Dowling.
Dowling scores with a shoulder strike.
Dowling using the Thai plumb to throw knees but Bhang has his back arched nicely, preventing the strike.
Dowling tries to land knees in the clinch but Bhang avoids the damage to the body.
Bhang takes a knee right on the jaw!
Dowling lands a left hand that snaps the head of Bhang backwards.
Dowling misses with an elbow strike.
Bhang lands a body punch in the clinch.
Bhang works for the underhooks and manages to get a trip takedown into guard.
Dowling avoiding any damage from the ground and pound.
Dowling trying to keep a closed guard but Bhang is proving a slippery customer.
Dowling is working an open guard here, looking to improve his position. No doubt that will leave him open to counters but at least he's being more offensive.

That's four minutes gone in the round.
Bhang lands a couple of elbows.
Bhang won't allow Dowling to sweep him here.
Dowling is working from a closed guard but he's struggling to control his opponent.
Neither fighter is doing enough for the referee's liking and he's decided to stand them back up.
Bhang misses with a low kick.
Dowling fails with an attempt to clinch.
Bhang connects with a hook to the side of his opponent's head.
Dowling ducks low and lands a nice hook to the body of his opponent.
Dowling fails in his attempt to clinch.
Dowling tries to close the distance and clinch but Bhang swats him to one side with an open hand palm strike and circles away.
Dowling uses good footwork to avoid the strikes from Bhang.
Dowling takes one on the button.
Dowling lands with a thumping leg kick.
The crowd applaud the fighters efforts here as the round comes to an end.
Dowling slips under a jab from Bhang.
A nice leg kick lands there from Dowling.
And thats the end of the round the fighters go back to their corners.
A close round but Kenny Dowling will probably get the nod.
The fighters get back to their feet, the hooter sounds and we're back to the action!

Dowling is looking to take this fight into the clinch.
Bhang throws a wild combination but nothing lands.
A chopping leg kick lands by Bhang.
Dowling tries to clinch but is not successful on this occasion.
Dowling wants to clinch up but Bhang keeps it at a distance.
Bhang swats away the attempt to clinch by Dowling.
Bhang misses with a hook. Dowling ducked under it nicely.
Dowling scores with a decent looking hook.
Bhang throws a hook but Dowling avoids it easily.
Bhang swings and misses with a hook to the body.
Dowling tries to close the distance and clinch up but Bhang swats him away and circles back towards the center.
We've had a slow start to the round here - hopefully the action picks up.
Bhang lands a nice looking body shot.
Dowling fails in his attempt to clinch.
Bhang feints and then cracks Dowling's leading leg with a nice low kick. He's obviously looking to slow Dowling down.
Dowling tries to close the distance and clinch up but Bhang swats him away and circles back towards the center.
Bhang fakes a jab and then connects with a hook.
Dowling tries to clinch up.
Dowling shoots in and bounces Bhang off the cage to secure the takedown into guard.
That's one minute gone in the round.
Dowling is looking to work some ground and pound but Bhang has wrist control.
Dowling trying to control but Bhang is working from the bottom.
A big thud reverberates around the arena there as Dowling accidentally thumps the mat. Hopefully he's not broken his hand.
Dowling with a flurry of punches that miss.
Bhang tries to land a sweep but no joy.
Dowling working some ground and pound from guard but it's not doing any damage.
Dowling trying to control the position from guard on top but Bhang is wriggling around, looking for whatever he can.
Well, the referee has seen enough. Neither fighter is active enough on the ground so he's stood them back up.
Bhang tries a low kick but Dowling avoids it.
Dowling tests Bhang's chin there with a solid looking shot.
That's two minutes gone in the round.
My god... these two guys really need to pick up the pace or everyone will leave to go get a beer.
Bhang scores with a decent looking hook.
Dowling throws a head kick but Bhang moves out of range.
Bhang swats away the attempt to clinch by Dowling.
Dowling tries to clinch up.
Dowling doesn't manage to clinch there - Bhang circles away.
Dowling wants to clinch.
Some wild striking there from Bhang.
Dowling tries to clinch but is not successful on this occasion.
Dowling fails with an attempt to clinch.
Bhang drives through with a really nice takedown into side control.
Dowling is trying to get back to half guard.
Dowling takes a big shot right to the temple there but he's taken it well.
That's three minutes gone in the round.
Dowling on the wrong end of some ground and pound.
Bhang throws an elbow but Dowling slips to the side and avoids it well.
Dowling sneaks a leg under to get back to half guard.
Dowling tries to roll over but Bhang keeps him under control.
Dowling regains full guard. Nicely done.
Dowling has the superior BJJ but he's also working some ground strikes into his gameplan.
Both fighters are absolutely exhausted here.
Bhang works over Dowling with some ground and pound from guard.
Dowling controlling the position.
Bhang connects with a couple of short punches.
Bhang thows a big elbow that misses.
Bhang throws a big right hand that misses.
Dowling is looking to stand up but Bhang isn't so interested in that idea.
Bhang throwing elbows and punches but not connecting, as Dowling works some decent striking defense from the bottom.
Bhang trying to control the position from guard on top but Dowling is wriggling around, looking for whatever he can.
That's four minutes gone in the round.
Bhang is really struggling to control Dowling but he's trying to hold on to the position.
Well, the referee has seen enough. Neither fighter is active enough on the ground so he's stood them back up.
Dowling tries to clinch but Bhang moves out of range.
Bhang tries a switch kick but it misses it's target.
Dowling throws a nice inside leg kick.
Dowling tries to clinch there but Bhang circles away.
Dowling tries to close the distance and clinch up against the cage but Bhang paws at him with a jab and circles away.
A swing and a miss from Bhang.
Dowling blocks a jab.
Dowling tries to clinch but Bhang is having none of it.
Nice uppercut there from Bhang.
Bhang circles away from the clinch attempt.
Dowling tries to close the distance and clinch but Bhang swats him to one side with an open hand palm strike and circles away.
Dowling fails in his attempt to clinch.
Bhang lands with a straight right. Dowling didn't see that one coming.
Bhang throws a nice looking combination but Dowling bobs and weaves to avoid any damage.
Decent striking displayed by Bhang there.
And thats the end of the round the fighters go back to their corners.
A close second round but Kenny Dowling will probably get the nod - 10:9.
That's time! Back to the action! This is the final round!

A shot to the liver by Dowling. Beautiful body shot.
Jab by Dowling.
Dowling punishes Bhang's body with a nice straight punch.
Dowling wants to clinch.
Bhang moves out of range as Dowling strikes.
Nice shot by Dowling.
Dowling tries to clinch but Bhang is having none of it.
Dowling fails in his attempt to clinch.
Bhang circles away from the clinch attempt.
Dowling is looking to clinch but Bhang is avoiding it.
Dowling throws a combination but it was largely blocked by Bhang.
Dowling closes the distance and clinches.
Dowling scores with an uppercut up the middle.
Dowling lands a nice elbow.
Dowling taking a breather.
Dowling misses the knee to the body. Nice hip positioning from Bhang.
Both fighters are breathing heavily.
Bhang working on landing some head shots here - that one got through nicely.
Fantastic stuff here - a very entertaining period of action, which has drawn cheers from the crowd.
Dowling tries to land a knee to the body but he is off balance and Bhang avoids it.
Bhang is leaning against Dowling and scores with a nice uppercut to the body.
Dowling creates a bit of distance and throws an elbow that only just misses.
That's one minute gone in the round.
Dowling cracks Bhang with a nice body shot.
Bhang gets through Dowling's defenses to land a nice punch to the side of the head.
Bhang lands a damaging elbow.
Dowling tries a knee to the head but Bhang blocks it.
Dowling makes some space for himself and lands an uppercut.
Nice body punch from Dowling - that landed with a thud.
Bhang comes over the top with an elbow. That landed flush.
Bhang doesn't land with the attempted body shot.
Dowling tries to land a knee to the head but misses.
Bhang dictating the pace here, as the fighters clinch against the cage.
Bhang doesn't land with the attempted body shot.
Dowling throws a knee to the head but misses.
Dowling is leaning against Bhang and scores with a nice uppercut to the body.
Bhang swings away with an uppercut that misses.
Dowling pushes Bhang back against the cage and lands a hook to the side of the head.
Both guys are working to get underhooks.
Bhang blocks a couple of punches on the inside.
Dowling blocks a couple of punches on the inside.
Dowling gets through Bhang's defenses to land a nice punch to the side of the head.
Dowling lands a knee to the head there! That was nasty!
Bhang lands with a short punch from the clinch.
Bhang scores with a shot to the side of Dowling's head.
Dowling misses with some punches.
Bhang drops down looking for an ankle pick but Dowling pulls his leg out and moves away.
Bhang misses with a double jab
and Dowling makes the exchange count by landing a cracking kick to the body. Bhang really felt that one!
That's two minutes gone in the round.
A left and a right from Dowling both land. Nice combination.
Dowling wants to clinch up but Bhang keeps it at a distance.
Bhang avoids the clinch attempt nicely.
Bhang keeps the fight on the outside.
Bhang ducks under a wild hook from Dowling.
Bhang Bhang has stepped it up - he knows he needs a finish here!
The fight stays on the outside here - Dowling looks like he's thinking about clinching though.
Dowling takes a body punch but keeps moving.
Kenny Dowling seems to be getting the better of the standup.
Bhang closes the distance and takes a jab right on the nose as he does so.
Dowling throws a combination but it was largely blocked by Bhang.
Dowling tries to close the distance and clinch but Bhang swats him to one side with an open hand palm strike and circles away.
Bhang connects with a solid leg kick.
Bhang lunges in with an uppercut that skims his opponent's chin.
Bhang connects with a right hand. Dowling shakes it off.
Bhang shoots for a takedown but Dowling saw that one coming a mile off and avoided it easily.
The fight stays on the outside here - Dowling looks like he's thinking about clinching though.
Dowling forces Bhang back against the cage and clinches.
That's three minutes gone in the round.
Dowling throws a blind hook that connects with the side of Bhangs head.
Bhang changes levels and goes for a takedown here. Dowling fights it off and pushes away nicely.
That's three failed takedown attempts in the round for Bhang Bhang. That's going to take a lot out of him.
Dowling tries to clinch but is not successful on this occasion.
Dowling tries to clinch but Bhang is having none of it.
Dowling tries to clinch up.
Dowling is looking to clinch but Bhang is avoiding it.
Bhang circles away from the clinch attempt.
Bhang swats away the attempt to clinch by Dowling.
Bhang scores with a nice head shot.
Wow, both these guys are really going for it!
Bhang staying out of range there.
A lazy left from Dowling finds it's target.
Dowling on the wrong end of an overhand right that came out of nowhere.
Bhang bobs and weaves and unloads with a good uppercut.
Dowling tries to close the distance and clinch but Bhang swats him to one side with an open hand palm strike and circles away.
Kenny Dowling is fighting for a decision here - he's started to take the cautious approach.
That's four minutes gone in the round.
Neither fighter has done anything of merit for a good minute or two here and the crowd are not happy about it.
Bhang closes this distance looking for a takedown but Dowling circles away.
Bhang tries for a takedown but Dowling sees it coming a mile off and avoids it easily.
Dowling tries to clinch but is not successful on this occasion.
Dowling is looking to clinch but Bhang is avoiding it.
Dowling tries to close the distance and clinch but Bhang swats him to one side with an open hand palm strike and circles away.
Dowling defending well as Bhang loads up on a big left hand.
Bhang avoids the clinch attempt nicely.
Dowling scores with a slapping inside leg kick.
Dowling keeping a good distance there, avoiding the body shot.
Bhang avoids the clinch attempt nicely.
Dowling tries to close the distance and clinch up but Bhang swats him away and circles back towards the center.
Kenny Dowling seems to be the more aggressive standup fighter in this bout.
Bhang has his takedown stuffed
and Dowling counters with a straight right hand.
Bhang fakes high and swings low for a body shot but Dowling manages to avoid it.
The crowd applaud the fighters efforts here as the round comes to an end.
Dowling is looking to clinch.
Dowling forces Bhang back against the cage and clinches.
Bhang drops down looking for an ankle pick but Dowling pulls his leg out and moves away.
Dowling wants to clinch up but Bhang keeps it at a distance.
And that's the end of the fight!
Kenny Dowling comfortably won the final round on my scorecard.
I've got Dowling winning every round here. Surely the decision will go his way and he'll pick up a well deserved decision victory. Over to the ring announcer for the scorecards.
Ladies and gentlemen, after 3 rounds of action, we go to the scorecards for a decision.
Judge Andi Peters scores the fight 27:30
Judge Gordon Ramsey scores the fight 27:30
Judge Frank Skinner scores the fight 28:29
In favor of your winner, by unanimous decision... Kenny Dowling!
|
|
|
|
|
|
|
|
|
|
|
|
|
|
|
|
|
|
|
|
|
|
|
| S |
C
A |
G |
S |
C
B |
G |
|
S |
C |
G |
|
energy
A | B |
|
hype
A | B |
|
pop
A | B |
|
mgr
A | B |
|
FIGHT
RATING
68% |
|
|
|
|
|
|

