|
|
PBP Commentary |
Coming up we have a lightweight MMA rules bout between Zari Yasuda (ranked 0 p4p, 0 weight class) and Heihachi Hayashida (ranked 0 p4p, 0 weight class). Yasuda's ring entrance music is that housewives' favourite, Volbeat- A Warrior's Call. Heihachi Hayashida has the eye of the tiger tonight.
 |
|
 |
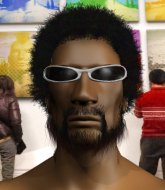
| 182 cm
26
142 lbs
8 - 1 - 0 |
|
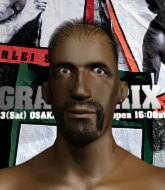
177 cm
22
164 lbs
5 - 3 - 0 |
Decent wrestler
Great low kicks
Granite chin |
|
BJJ Brown Belt
Solid Muay Thai
Powerful |
|
| |
|
Ladies and gentlemen. This fight is 3 rounds, in the lightweight division.
Introducing the fighter to my left, fighting out of the red corner.
With a record of
8 - 1 - 0, fighting out of Tokyo, Zari Yasuda!
And introducing the fighter to my right, fighting out of the blue corner.
With a record of
5 - 3 - 0, fighting out of Tokyo, Heihachi Hayashida!
The judges for this bout are Ren Mimura, Tatsuya Matsuyama and Yukihiro Yamamoto.

The bell rings for round one and we are underway!
A jab lands there for Hayashida.
Yasuda on the receiving end of a decent leg kick there by Hayashida. Hayashida obviously looking to wear him down.
Yasuda is the aggressor but that punch slipped nicely by Hayashida.
Hayashida with a hook.
Hayashida blocks a head kick by Yasuda.
Yasuda looking to throw a kick but he's pulled out of it.
A combination from Yasuda does no damage.
Yasuda lands a body shot.
Yasuda loads up on a big right hand but Hayashida slips the punch.
Yasuda misses with a straight right.
Hayashida uses some good footwork to avoid the body shot by Yasuda.
Yasuda scores with a push kick.
Yasuda thumps Hayashida with a low kick.
Hayashida closes this distance looking for a takedown but Yasuda circles away.
Yasuda misses with a half-hearted attempt at a head kick.
Yasuda blocks the body kick.
Yasuda throws a one two combo.

It looks like Heihachi Hayashida has been cut.
Hayashida keeping a good distance there, avoiding the body shot.
Yasuda swinging wildly here.
Hayashida motions for Yasuda to come forward. Hayashida throws a leg kick but it misses it's target.
Zari Yasuda seems to be the more aggressive standup fighter in this bout.

That's one minute gone in the round.
Yasuda tries a switch kick but it misses it's target.
Good work by Yasuda as he checks the leg kick.
Yasuda throws a leg kick that is checked

and Hayashida counters with a single leg into guard. Yasuda didn't expect that.
Hayashida trying to control the position from guard on top but Yasuda is wriggling around, looking for whatever he can.
Hayashida being controlled here momentarily.
Hayashida trying to control but Yasuda is working from the bottom.
Hayashida throws a big right hand that misses.
Yasuda preventing the ground and pound from doing any damage.
Yasuda is trying to control the position but Hayashida postures up.
Hayashida controls the pace of the fight for a moment.
The fighters are pressed up against the cage, both looking to find a bit of space to work.

That's two minutes gone in the round.

The referee has ruled that neither fighter is active enough on the ground and has stood them back up.
Yasuda throws a head kick that misses
and Hayashida counters nicely by changing levels and landing a hook to the body.
Hayashida misses with a leg kick
and Yasuda counters with a leg kick.
Ouch! a nice leg kick from Yasuda, right into the meat.
Hayashida is looking to chop away at Yasuda's legs.
Yasuda really does look like a pencil wearing a pair of gloves. Let's hope he has a gameplan to suit that ridiculous body shape.
Yasuda throws the left hand but Hayashida avoids the punch easily.
Yasuda throws a couple of head shots and lands with the final one - a decent hook, which struck Hayashida on the side of the head.
Yasuda misses with a half-hearted attempt at a head kick.
Hayashida shoots in for a takedown but doesn't get it.
Yasuda throws a head kick that misses.
Yasuda throws a low kick but Hayashida avoids it.
Yasuda throws a body kick but he was well out of range there.
Hayashida drives through with a takedown into guard.
Hayashida is looking to work some ground and pound but Yasuda has wrist control.
Yasuda pulls Hayashida in close to prevent any damage.

That's three minutes gone in the round.
Yasuda wants to stand up but Hayashida is controlling him.
Hayashida loading up with the ground and pound but he's missing more than he's landing in this flurry.
Hayashida advances position into side control!
Hayashida has the superior BJJ but he's also working some ground strikes into his gameplan.
Hayashida throws a knee to the body but it doesn't do much damage.

Hayashida working hard here to secure a kimura but he's not really in the right position for it.
Yasuda on his back here. We all know that wrestlers don't like being on their back so let's see if Yasuda tries to get out of the position.
This fight is sponsored by Chainsaw 7. More blood and guts and stuff like that, in cinemas everywhere now!
Yasuda is working hard to escape and get back to his feet. After a battle for position, Hayashida asserts his dominance and retains side control.

That's four minutes gone in the round.
The crowd are starting to boo a lack of action.
Yasuda parries the strikes from Hayashida easily there. Hayashida is wary of posturing up too much because it might enable Yasuda to escape.
Hayashida fails to land a wild elbow strike.
Yasuda tries to bench press Hayashida off him but Hayashida keeps the position.
Hayashida working hard here to secure a kimura but he's not really in the right position for it.
Hayashida wants to control but Yasuda is keeping him busy.
Hayashida thinks about going for a far side armbar but bails out and retains the dominant position instead.
Yasuda wants to get back to his feet but Hayashida drags him back down.
And thats the end of the round the fighters go back to their corners.
A close round but Heihachi Hayashida will probably get the nod.
The cut man is working on Heihachi Hayashida's cut.
The corners get their ten second warning. Both fighters stand from their stools and stare eachother down, ready to get back to the action.

Yasuda throws a lazy body kick
and Yasuda takes a counter punch right on the button for his troubles.
Yasuda scores with a punch to the gut of his opponent.
Yasuda throws a leg kick but Hayashida sees it coming and checks it nicely.
Yasuda throws a sloppy head kick and Hayashida moves out of range easily.
Hayashida pivots as if he's going to throw a leg kick but stops half way.
A shot to the body from Yasuda misses
and Hayashida counters with a low kick, right behind Yasuda 's knee.
Yasuda throws a half hearted mid kick.
Hayashida shoots in for a takedown and gets it.
Yasuda keeping his head moving to avoid the ground and pound.
Hayashida winds up and cracks Yasuda with a swinging punch to the side of the head.
Yasuda is controlling Hayashida's trapped leg to prevent Hayashida from advancing to side control.
Hayashida trying to pass the guard but Yasuda defending well.
Hayashida missing with the ground and pound from half guard.
That's one minute gone in the round.
Hayashida thows a huge punch but Yasuda dodges it nicely.
Hayashida is looking for a kimura but he's never going to get it from there.
Yasuda wants to get back to his feet.
Yasuda wants to improve his position but Hayashida is controlling well.
The referee has ruled that neither fighter is active enough on the ground and has stood them back up.
Yasuda turns his hip over beautifully as he lands a nice leg kick.
Yasuda takes a nasty kick to the mid section... That should keep him thinking. Does he try and block and risk a head kick landing?
Yasuda throws a leg kick which misses Hayashida's front leg but catches the back leg as Hayashida tries to avoid it.
Yasuda throws a sloppy head kick
and Hayashida makes him pay by landing a thudding low kick.
Hayashida waving his hands out in front of him, looking to distract Yasuda.
Hayashida wants to clinch up but Yasuda keeps it at a distance.
That's two minutes gone in the round.
Hayashida throws a hard body shot but it just misses.
Yasuda avoids the body shot from Hayashida.
Zari Yasuda is looking to keep the fight on the feet at all costs.
Yasuda swings for the body but Hayashida moves out of range.
Hayashida swings for the body but Yasuda moves out of range.
Yasuda is looking to wear down Hayashida with body shots, infact he's throwing more body shots than head shots at the moment.
Hayashida attempts a low kick but it misses it's target.
Yasuda misses with a leg kick
and Hayashida counters with a good right hand that lands right on the jaw.
Hayashida fails in his attempt to clinch.
Yasuda keeps Hayashida at a distance using the push kick.
Hayashida takes a body punch but keeps moving.
Nice body punch from Yasuda.
Yasuda misses with a double jab.
A head kick by Yasuda misses
and Hayashida counters with a big head kick but Yasuda shrugs it off.
Hayashida is trying hard to land a takedown here. Yasuda sprawls well and keeps this one on the feet.
Hayashida is breathing heavily.
Yasuda throws out a loose jab but Hayashida uses good head movement to avoid it.
Hayashida throws a head kick but Yasuda moves out of range.
Ouch! a nice leg kick from Yasuda, right into the meat.
That's three minutes gone in the round.
Yasuda misses with a body shot. Nice footwork from Hayashida.

Hayashida has closed the distance and engaged Yasuda in a clinch.
Yasuda keeps control of Hayashida as he tries to wriggle out of the double underhooks.
Yasuda pushes Hayashida back against the cage and unloads with a body punch.
Yasuda presses Hayashida against the cage and delivers a mid-strength body shot.
Hayashida tries to circle away but Yasuda has him pinned against the cage.
Hayashida holding his opponent close, against the cage.
A short right from Yasuda on the inside.
A short right hand to the side of the head by Yasuda.
A short uppercut from Hayashida.
Hayashida missing with knees to the body.
Hayashida can't find room to land a body shot as Yasuda controls the action.
Yasuda trying to land knees to the body.
Hayashida tries to land a knee to the body but he is off balance and Yasuda avoids it.
Hayashida tries to land knees in the clinch but Yasuda avoids the damage to the body.
Yasuda keeps control of Hayashida as he tries to wriggle out of the double underhooks.
Hayashida tried to land a shot to the body but connects with Yasuda's elbow.
Yasuda will no doubt start fighting again in a minute but for now he's just having a little rest, leaning Hayashida up against the cage.
Yasuda trying to stall but Hayashida improves his position.
Hayashida tries to take the fight to the ground by pulling guard but can't manage it.
That's four minutes gone in the round.
The crowd are showing their displeasure at the lack of action as loud boos ring out around the arena.
Hayashida is trying to force a seperation but Yasuda has the dominant position.
Hayashida fails to pull guard.
Zari Yasuda has stuffed three takedown attempts in the round now. That's going to take a lot out of Heihachi Hayashida.
Good anti-grappling being displayed by Yasuda as Hayashida tries to tie him up.

Yasuda breaks from the clinch.
Hayashida shoots in for a takedown. He's persisting with it as Yasuda sprawls well. Yasuda wins this battle and keeps the fight standing. Hayashida gets slowly back to his feet.
Yasuda throws a body kick but he wasn't in range.
A lazy body kick from Yasuda
and Hayashida counters with a low kick, right behind Yasuda 's knee.
Yasuda thows a body shot but no joy.
Yasuda looks to score with a combo but nothing lands.
Yasuda scores with a slapping inside leg kick.
Hayashida lands with a nice low kick. That'll leave a bruise.
Yasuda misses with a body shot.
Hayashida moves out of range of the body kick.
Yasuda connects with a high kick.
Yasuda is the aggressor but that punch slipped nicely by Hayashida.
And thats the end of the round the fighters go back to their corners.
That was a close second round but I would say that Zari Yasuda will probably get the nod.
The cut man is working on Heihachi Hayashida's cut.
The fighters get back to their feet, the hooter sounds and we're back to the action! The crowd applaud as we get ready to start the final round!

Yasuda throws a jab to the body, straight down the pipe. Boom. That sent Hayashida stumbling backwards but he manages to regain his composure quickly.
Yasuda lunges in with an uppercut that skims his opponent's chin.
A leg kick checked by Yasuda.
Yasuda moves out of range of the body kick.
Hayashida doesn't react quick enough there as he takes a shot to the body.
Hayashida shoots in for a takedown and gets it. Oh and he's advanced to full mount straight away.
Hayashida postures up and cracks his opponent a couple of times before moving back into close ground control. Yasuda looks a forlorn figure.
You get the feeling that Yasuda really doesn't like being in this position too much.
Yasuda is squirming around, avoiding Hayashida's attempts to control the action.
Hayashida lands a heavy elbow.
Yasuda tries to hold on but Hayashida postures up.
The ref warns both fighters not to hold the cage as they work up against the meshing.
Yasuda holds of for dear life.
Both fighters are breathing heavily.
That's one minute gone in the round.
Hayashida has hold of Yasuda's left arm, perhaps looking for a submission. The two fighters tussle over control of the isolated limb and Yasuda manages to get his arm back to his side and away from danger.
Yasuda knows he needs to get back to his feet asap. He's simply no match for Hayashida on the ground.
Yasuda tries to lock up and control but Hayashida gives him a forearm to the face and pushes him away.
Hayashida postures up and cracks his opponent a couple of times before moving back into close ground control. Yasuda looks a forlorn figure.
Yasuda wants to control but Hayashida is having none of it.
Hayashida throwing shots from mount but they're not landing.
Yasuda defends a decent attempt at a guillotine from Hayashida.
That's two minutes gone in the round.
The crowd are showing their displeasure at the lack of action as loud boos ring out around the arena.
Hayashida is still in mount, landing shots to his trapped opponent. Yasuda can't stay in a position like this for much longer.
Yasuda is looking to get to half guard.
Hayashida jumps to the side looking to secure the arm triangle
. Ooooh, that looks tight
Yasuda is gargling but he's managed to escape! Nice work there by Yasuda and Hayashida has given up the dominant position trying to land that submission.
Hayashida misses with a strike but at least he's keeping busy, looking to cause some damage - that will still help him when it comes to the judges scorecards.
Yasuda manages to get one leg in to regain half guard.
Yasuda is not content to let Hayashida control the position.
Hayashida might have to switch it up a bit here because his efforts to control Yasuda kaven't been going to plan, at least at the current moment in time.
Yasuda avoiding damage under a succession of punches from Hayashida.
That's three minutes gone in the round.
Yasuda has no desire to be mounted, so is trying to control. Hayashida is working away from the top position though.
Hayashida is looking to take a break and control but Yasuda is keeping him honest, looking to work from the bottom.
Hayashida drops an elbow to the side of Yasuda's head.
Yasuda works his way to full guard. Good work.
Hayashida wants to pass the guard but Yasuda is keeping the position.
Hayashida works over Yasuda with some ground and pound from guard.
Yasuda wants to stand but Hayashida is controlling the position.
Hayashida is trying to work a guillotine from the top, or something like that? Don't know how he thinks he's going to get a finish from there.
A real slowdown in the pace of the fight for a moment, as Yasuda holds on and takes a little breather.
That's four minutes gone in the round.
The crowd are getting on the fighters' backs, as the pace has dropped off in the last minute or so.
Hayashida pressing down on his opponent's thigh, looking to pass guard. Yasuda is keeping the position for now.
Hayashida trying to control the position from guard on top but Yasuda is wriggling around, looking for whatever he can.
Yasuda wants to get back to his feet but Hayashida is in a dominant position and won't allow it.
The referee has ruled that neither fighter is active enough on the ground and has stood them back up.
Yasuda throws a quick head kick that skims the top of Hayashida's head.
Hayashida avoids the body shot from Yasuda.
Hayashida throws the overhand right but ducks down into a quick takedown attempt. Yasuda was covering up waiting for the punch and Hayashida finishes the takedown easily into guard.
Yasuda is trying to stand up but he's not managed so far.
Hayashida passes Yasuda's right leg, so he's now in half guard.
And that's the end of the fight!
Heihachi Hayashida comfortably won the final round on my scorecard.
I think Hayashida has won this one but let's see whether the judges agree with me. Over to the ring announcer for the scorecards.
Ladies and gentlemen, after 3 rounds of action, we go to the scorecards for a decision.
Judge Ren Mimura scores the fight 28:29
Judge Tatsuya Matsuyama scores the fight 28:29
Judge Yukihiro Yamamoto scores the fight 29:28
In favor of your winner, by split decision... Heihachi Hayashida!
|
|
|
|
|
|
|
|
|
|
|
|
|
|
|
|
|
|
|
|
|
|
|
| S |
C
A |
G |
S |
C
B |
G |
|
S |
C |
G |
|
energy
A | B |
|
hype
A | B |
|
pop
A | B |
|
mgr
A | B |
|
FIGHT
RATING
55% |
|
|
|
|
|
|

