|
|
PBP Commentary |
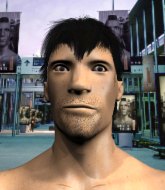
Coming up we have a welterweight MMA rules bout between Jake Swick (ranked 0 p4p, 0 weight class) and EF Hutton (ranked 0 p4p, 0 weight class). Chooooooooon! I think Swick might be my favorite fighter, now he's come out to A Little Less Conversation - Elvis Presley. Buckle up people - heeeeeeeeeere we go!
 |
|
 |
| 183 cm
22
180 lbs
7 - 3 - 1 |
|
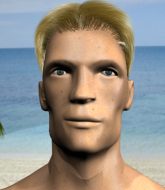
186 cm
25
185 lbs
8 - 7 - 1 |
BJJ Purple Belt
Solid boxing
Very strong |
|
BJJ Purple Belt
Excellent boxer
Determined |
|
| |
|
Ladies and gentlemen. This fight is 3 rounds, in the welterweight division.
Introducing the fighter to my left, fighting out of the red corner.
With a record of
7 - 3 - 1, fighting out of Sydney, Jake Swick!
And introducing the fighter to my right, fighting out of the blue corner.
With a record of
8 - 7 - 1, fighting out of Sydney, EF Hutton!
The judges for this bout are John Mangel, Eliza Hachem and Skip Squint.

The bell rings for round one and we are underway!
Hutton connects with a looping left hand that seems like it dazed Swick momentarily.
Hutton changes levels and looks for a double leg takedown. Swick tries to avoid it but Hutton manages to keep hold of a leg and drag Swick to the ground. Swick escapes though and pops straight back up to his feet.
Hutton looks frustrated there after his takedown attempt is stuffed easily.
Hutton misses with a half-hearted attempt at a head kick.
EF Hutton seems to be the more aggressive standup fighter in this bout.
Hutton slaps away a takedown attempt from Swick, before circling back to the center of the mat.
Horrible takedown by Swick or perhaps it was just good defense by Hutton which made him look bad.
Hutton misses with a double jab.
Swick shoots in for a takedown - he's clinched up with Hutton but Hutton pushes him off and we're back to square one.
That's three failed takedown attempts in the round for Jake Swick. That's going to take a lot out of him.
Hutton throws an overhand right that lands on Swick's shoulder, as Swick tries to avoid the shot.
Hutton looks to throw the jab but Swick is out of range.

Excellent takedown into side control there by Swick.
Swick wants to lay and pray for a moment but Hutton keeps working.

That's one minute gone in the round.
Hutton is trying to get back to half guard.
Hutton is looking to work his way out of this bad position but Swick is controlling him well.
Hutton regains half guard.
Swick working some ground and pound from close in. He's looking to maintain this position and strike for a while by the looks of things... although he'll probably advance to full mount in a minute now I've said that.
Hutton is refusing to be controlled, as Swick sits in half guard.
Hutton looks like he's trying to stand up.
Hutton looks gassed!
Swick passes to side control.
Swick throws a strike aimed at the side of Hutton's head but Hutton avoids it well.
Swick wants to control but Hutton is keeping him busy.

That's two minutes gone in the round.
The crowd are starting to boo a lack of action.
Swick content to control the pace. The referee will try and keep them active though.
Hutton defending against the ground and pound.
A lull in the action here as Swick stalls from top position.
Hutton misses with an elbow from the bottom.
Swick controls the position.
Swick trying to control the position but Hutton is working away.

The referee decides to stand the fighters back up, due to lack of activity on the part of Jake Swick.
Hutton throws a jab but it's blocked by Swick.
Swick shoots in for a takedown but Hutton shows good takedown defense there and keeps this one on the feet.
Swick shoots in for a takedown. He's persisting with it as Hutton sprawls well. Hutton wins this battle and keeps the fight standing. Swick gets slowly back to his feet.

That's three minutes gone in the round.
The fighters are starting to perspire pretty heavily.
Hutton looks for a takedown but Swick sprawls well.
Swick looks for a takedown. He's got it. We're now in half guard.
Hutton keeping his head moving to avoid the ground and pound.
Swick trying to control the action but Hutton is working from the bottom.

Swick looking for a kimura but he'll have to free his other leg if he wants to finish that. Perhaps he's just using it as a distraction technique.
Hutton is looking to control Swick's leg but it's slowly edging free. Can Hutton avoid being mounted?

That's four minutes gone in the round.
Hutton pushes Swick off looking to stand but Swick dives back in and keeps control.
Swick is working for submissions here but there's nothing on.
Hutton is looking to improve his position.
Hutton trying to control but Swick postures up.
Neither fighter is doing enough for the referee's liking and he's decided to stand them back up.
Swick ducks under an overhand right and circles away with a smile on his face.
Hutton moves into range and throws a combination. A nice jab followed by a hook to the body.
A telegraphed takedown attempt from Swick is defended easily by Hutton.
Hutton gets his takedown attempt stuffed easily
and Swick counters with a nice single leg takedown and he's in Hutton's guard now.
And thats the end of the round the fighters go back to their corners.
Jake Swick dominated that round.
OK. That's time! The bell goes and we're back to the action.

Swick shoots in and scores a nice double leg takedown into half guard.
Swick working Hutton over with strikes.
Hutton is not content to let Swick control the position.
Swick takes a deep breath and rests his weight momentarily on top of his opponent, to control the position.
Swick missing with some ground and pound from the half guard.
Hutton looking for submissions off his back.
Nice strikes from Swick there.
Swick thumps the canvas. Not on purpose obviously - he just missed Hutton's head.
Hutton is breathing heavily.
Swick slows the pace down in half guard.
Hutton wants to get back to his feet.
That's one minute gone in the round.
Swick working the head and body with strikes.
Swick wants to lay and pray for a moment but Hutton keeps working.
Swick is working for submissions here but there's nothing on.
Hutton is trying to control but can't.
Hutton misses with some strikes from the bottom.
The fighters are pressed up against the cage, both looking to find a bit of space to work.
Hutton looking to work for a kimura from the bottom.
Swick perhaps working for something from half guard, or maybe not. It looks like he's just sitting there.
Swick is trying to control the action in half guard but Hutton is working away on the bottom, looking perhaps to get back to full guard.
Hutton is defending against the submission attempts here by Swick.
That's two minutes gone in the round.
The crowd are starting to boo a lack of action.
It looks like we're going to have a standup here. Neither fighter is doing enough on the ground.
Hutton ducks down and throws a hook to the body but Swick moves away.
Hutton throws an overhand right that lands on Swick's shoulder, as Swick tries to avoid the shot.
Swick fails with a takedown attempt.
Swick shoots for a double leg takedown but Hutton sprawls well. He's pushed Swick's face into the mat and manages to get back to his feet relatively easily.
Swick shoots in and drives through. Hutton sprawls well.
That's three failed takedown attempts in the round for Jake Swick. That's going to take a lot out of him.
Hutton scores with a nice takedown into half guard. Let's see what he's got on the ground.
Swick looking to work for a kimura from the bottom.
Swick is looking to sinch up a guillotine here but Hutton pulls his head out easily.
That's three minutes gone in the round.
Hutton frees up his trapped foot and advances to mount.
Hutton trying to control but he's not successful this time.
Hutton goes for an armbar but he's not got it
Swick turns into him and now he's in Hutton's guard.
Hutton avoiding any damage from the ground and pound.
Swick sitting in guard here, content to control.
Hutton looking for a guillotine here but Swick defends easily.
Jake Swick overall seems to be getting the better of the ground position in the fight so far.
That's four minutes gone in the round.
Swick is pushing down on Hutton's leg trying to pass to half guard. Hutton is fighting to maintain full guard but Swick has managed to sneak the leg through.
Hutton looking for submissions from an awkward position here.
Hutton is trying to stand up here but Swick is controlling him well.
Swick is trying to work for a kimura but Hutton is defending well.
Neither fighter is being very active at the moment, with Swick in particular looking to stall.
Swick in half guard on the top. He's looking for a kimura... He's got it locked and he's managed to free his trapped foot. Hutton tries to escape but it's on too tight and he has to tap! Great BJJ skills there from Swick!
Ladies and gentlemen, after 4:59 of round 2, we have a winner by way of Submission (Kimura). Jake Swick!
|
|
|
|
|
|
|
|
|
|
|
|
|
|
|
|
|
|
|
|
|
|
|
| S |
C
A |
G |
S |
C
B |
G |
|
S |
C |
G |
|
energy
A | B |
|
hype
A | B |
|
pop
A | B |
|
mgr
A | B |
|
FIGHT
RATING
40% |
|
|
|
|
|
|
