|
|
PBP Commentary |
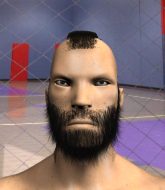
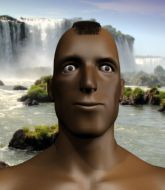
Coming up we have a welterweight MMA rules bout between Rick Rawse (ranked 0 p4p, 0 weight class) and James Jameson (ranked 0 p4p, 0 weight class). Chooooooooon! I think Rawse might be my favorite fighter, now he's come out to Hustlin'. James Jameson will no doubt be looking to use his reach advantage to good effect.
 |
|
 |
| 170 cm
26
181 lbs
6 - 6 - 0 |
|
184 cm
24
180 lbs
10 - 6 - 0 |
BJJ Brown Belt
Excellent boxer
KO power |
|
BJJ Purple Belt
Good kicks
Powerful |
|
| |
|
Ladies and gentlemen. This fight is 3 rounds, in the welterweight division.
Introducing the fighter to my left, fighting out of the red corner.
With a record of
6 - 6 - 0, fighting out of Los Angeles, Rick Rawse!
And introducing the fighter to my right, fighting out of the blue corner.
With a record of
10 - 6 - 0, fighting out of Los Angeles, James Jameson!
The judges for this bout are Frank Antenori, and .

The bell rings for round one and we are underway!
Rawse fails miserably with a takedown attempt.
A combination from Rawse does no damage.
Jameson fails in his attempt to clinch.
Jameson scores with a reasonable looking shot to the body. Rawse doesn't seem bothered though.
Rawse has a takedown stuffed.
A combination from Rawse does no damage.

Jameson closes the distance and clinches.

Jameson manages to break the clinch.
Rawse lands the left hand.
Rawse avoids the clinch attempt nicely.
Rawse tries to shoot in for a takedown. He's got hold of a leg but Jameson swivels and escapes.
That's three failed takedown attempts in the round for Rick Rawse. That's going to take a lot out of him.
Jameson moves into the clinch successfully.
Rawse takes a knee to the side of the body.
Jameson is leaning against Rawse and scores with a nice uppercut to the body.
Rawse avoiding damage as Jameson throws knees to the body.
Jameson breaks the clinch and we're back to striking at distance.
Wow, both these guys are really going for it!
Jameson moves into the clinch successfully.
Jameson tries a knee to the head but he's missed.
Jameson lands a hook to the body. It's hard to tell if that hurt Rawse or not.
Jameson breaks the clinch and we're back to striking at distance.
Rawse connects with a lovely right hand, straight down the pipe.

That's one minute gone in the round.
Like a baseball bat into the meat of his leg there - nice leg kick by Jameson.
Rawse lands a lovely overhand right.
Rawse dives in and grabs Jameson's left leg, looking for a takedown. Jameson pushes down on Rawse's head and hops out.
Rawse is breathing heavily.
Jameson lands with a slapping head kick.
Jameson wants to clinch.
Jameson throws a wild body kick that Rawse sees coming a mile off.

Jameson gets caught on his heels momentarily as he allows Rawse to score an easy takedown into full guard.
Rawse postures up.
There's a bit of a scramble here and now Jameson is on top in guard.
Rawse controls Jameson momentarily but Jameson frees himself.
The ref warns both fighters not to hold the cage as they work up against the meshing.
Rawse keeping moving, preventing Jameson from controlling successfully.

That's two minutes gone in the round.
Rawse wants to sweep here but Jameson controlling him for the moment.

Jameson is trying to work a guillotine from the top, or something like that? Don't know how he thinks he's going to get a finish from there.
Rawse might be looking to lock onto one of his opponent's long limbs for a submission, whilst we're on the ground.
Rawse is looking for a triangle but Jameson pushes his legs off easily.
Jameson wants to control from the top but Rawse keeps moving.
Rawse has momentary wrist control but Jameson slips an elbow through the middle.
Rawse looking for submissions off his back, moving his hips, looking for an opening.
Jameson must be cautious of submissions here, given that his opponent has the superior Jiu Jitsu.
Jameson trying to pass the guard but can't manage it just yet.
Jameson won't allow Rawse to sweep him here.

That's three minutes gone in the round.
Jameson trying to control the position from guard on top but Rawse is wriggling around, looking for whatever he can.
Rawse can't keep his opponent in guard - Jameson advances to half guard, no doubt looking to mount.
Jameson is working for a kimura but Rawse is defending it quite comfortably.
Rawse has no desire to be mounted, so is trying to control. Jameson is working away from the top position though.
Rawse moves his hips nicely and gets into full guard.
Jameson working in close now, lands a nice elbow to the side of Rawse's head.
Rawse is working actively off his back, looking to secure an arm or perhaps work for a triangle.
Rawse had isolated an arm as going for a kimura. Jameson defends it easily.

That's four minutes gone in the round.
Jameson controls from within his opponent's guard.
Jameson is fighting to break Rawse's control of his arms but Rawse is doing a good job of controlling the position at the moment.
Jameson wants to control from the top but Rawse keeps moving.
Rawse is looking for a triangle but Jameson pushes his legs off easily.
The crowd applaud the fighters efforts here as the round comes to an end.
Rawse keeping moving, preventing Jameson from controlling successfully.
Rawse wants to sweep but no luck.
And thats the end of the round the fighters go back to their corners.
James Jameson dominated that round.
Well, the break between rounds is over. Let's get back to the scrappin!

Jameson forces Rawse back against the cage and clinches.
Jameson manages to break the clinch.
Jameson thows a body kick. Rawse tries to catch it but that hurt him.
The fight moves into the clinch position.
Kneeeeees! The crowd are calling for knees to the body. Jameson obliges.
Jameson using the Thai clinch to land knees to the body.
Jameson manages to get underhooks and slows down the pace for a moment.
Jameson continues to stall. The referee tells him to work or he's going to break them up.
Jameson utilising his Muay Thai to score with a knee to the body.
Rawse is trying to drag Jameson to the mat but Jameson just about manages to keep his footing. He used the cage to his advantage there.
Jameson using the Thai clinch to land knees to the body.
Both fighters are absolutely exhausted here.
That's one minute gone in the round.
Jameson using the Thai clinch to land knees to the body.
A battle for position here, against the cage.
Rawse drops down for a takedown but doesn't get it.
Jameson landing knees to the body.
Jameson breaks the clinch and we return to the middle of the mat.
Rawse sees a low kick coming and goes to check it, but it's actually a body kick and it thuds into his unprotected ribs.
Jameson is looking to slow Rawse down with leg kicks.
Rawse avoids a punch combination nicely.
Jameson moves into the clinch successfully.
Rawse takes a knee to the side of the body.
Jameson pushes off and circles away, back to the middle of the mat.
Jameson clinches up with Rawse and pushes him back against the cage.
Jameson leaning his opponent against the cage.
Jameson lands a knee to the head.
That's two minutes gone in the round.
Jameson pushes off and circles away, back to the middle of the mat.
Jameson stuffs a takedown. It's all about dictating where the fight takes place and Jameson wants it to stay on the feet.
That's three failed takedown attempts in the round for Rick Rawse. That's going to take a lot out of him.
Jameson throws a hook to the body but it doesn't connect.
Jameson tries to clinch there but Rawse circles away.
Jameson fakes with an overhand right and moves in to clinch with Rawse, pushing him back against the cage.
Rawse takes a knee to the side of the body.
Rawse tries to take the fight to the ground by pulling guard but can't manage it.
Jameson lands a body shot in the clinch.
Rawse is trying to maintain a safe position but Jameson gets an underhook and turns Rawse into the cage.
Rawse is working for a takedown up against the cage. He can't get it on this occasion though.
Jameson breaks the clinch and we return to the middle of the mat.
A slow jab from Jameson misses its intended target.
Jameson lands a nice looking kick to the body. Rawse takes a step back to recover.
Fantastic stuff here - a very entertaining period of action, which has drawn cheers from the crowd.
A kick lands to the mid section there for Jameson.
That's three minutes gone in the round.
Crunch! Jameson slams his shin into Rawse's torso.
A slapping leg kick lands for Jameson.
Jameson lands with a slapping head kick.
Jameson moves into the clinch.
Jameson lands a knee to the body.
Jameson breaks from the clinch.
Jameson closes the distance and presses his opponent up against the cage.
Jameson prevents a takedown attempt there.
Knees to the body from Jameson.
Jameson manages to break the clinch.
Jameson feints and then cracks Rawse's leading leg with a nice low kick. He's obviously looking to slow Rawse down.
Jameson pulls out of a head kick attempt.
Rawse throws a hard body shot but it just misses.
Jameson throws a head kick that looked like it stung.
Jameson clinches up with Rawse and pushes him back against the cage.
Jameson tries to land knees in the clinch but Rawse avoids the damage to the body.
Jameson stalls.
That's four minutes gone in the round.
Jameson is trying to wear down his opponent with knees to the body.
Jameson missing with knees to the body.
Knees in the clinch landing for Jameson.
The crowd cheering loudly, showing their appreciation for the quality fight we're seeing here.
Jameson lands a knee to the head there! That was nasty!
Jameson connects with a knee to the head.
Rawse lands a body shot.
Rawse stalling in the clinch but Jameson improves position.
Rawse has clasped his hands together around Jameson's back... aaand, he's got a takedown into side control. Nicely done.
Rawse fails to land a wild elbow strike.
As the round comes to an end the crowd are showing their appreciation for a great round of action.
Jameson is trying to get back to half guard. He's pushing on Rawse's leg. He's managed it. Nice work.
Jameson has no desire to be mounted, so is trying to control. Rawse is working away from the top position though.
And thats the end of the round the fighters go back to their corners.
James Jameson showed his class in that round. I'd imagine he'll take it on all the scorecards.
The fighters get back to their feet, the hooter sounds and we're back to the action! Let's hear some noise people - this is the final round!

The fight moves into the clinch position.
Jameson prevents a takedown attempt there.
Knees in the clinch landing for Jameson.
Rawse tries to pull guard but Jameson holds him up against the cage and eventually Rawse drops back down to his feet.
Jameson misses with a knee to the head.
Jameson connects with a knee to the head.
Jameson lands a body shot in the clinch.
Jameson unloads a knee to the mid-section. Rawse lets out a prehistoric sounding urrrrgh.
Jameson is pressed up against the cage. Rawse has hold of a leg and is looking to drag Jameson down to the mat. Jameson avoids the attempt though and has circled away. We're back to striking at a distance.
That's three failed takedown attempts in the round for Rick Rawse. That's going to take a lot out of him.
Rawse tries to land with a swinging hook to the body but Jameson was well out of range. Poor timing from Rawse.
Jameson throws a quick inside leg kick.
Jameson throws a front kick that sends Rawse stumbling back into the cage.
Both fighters are breathing heavily.
The fight stays on the outside here - Jameson looks like he's thinking about clinching though.
Jameson thuds a mid kick into his opponent's body. That will wear on Rawse if he has to take too many more of those.
That's one minute gone in the round.
Jameson is looking to clinch.
Jameson closes the distance and pushes Rawse back into the cage.
Jameson lands a nice knee to the body.
Jameson working Rawse over with knees to the body.
Jameson breaks the clinch.
Jameson is looking to clinch.
Ouch! a nice leg kick from Jameson, right into the meat.
Jameson clinches up against the cage.
Jameson leaning against his opponent.
Rawse will be looking to protect his midsection after taking some solid kicks to the body.
Rawse avoiding damage as Jameson throws knees to the body.
Jameson breaks the clinch.
Jameson misses with the combination.
Jameson tries to close the distance and clinch up against the cage but Rawse paws at him with a jab and circles away.
Rawse misses with a jab, cross combination.
Rick Rawse is looking to throw some combinations by the looks of things.
Rawse ducks down and throws a hook to the body but Jameson moves away.
That's two minutes gone in the round.
Rawse thows a body shot but no joy.
Rawse shoots in for a takedown! He's got it and he's managed to land in full mount! That's better than Rawse was expecting from the takedown attempt, I'm sure!
Rawse looking for a guillotine from mount but Jameson is having none of it.
Jameson wants to hold on but Rawse pushes him away.
Jameson working to try and regain half guard.
Rawse can't quite control the action as he would like just now, as Jameson is looking to escape.
Rawse avoids the attempt from Jameson to control.
That's three minutes gone in the round.
Rawse controlling the position easily from mount.
Rawse looking to ground and pound his opponent to a finish here.
Rawse tries to control but Jameson wriggling away.
Rawse with good strikes from the mount here!
Rawse jumps to side control looking for an arm triangle but Jameson manages to avoid the submission attempt.
Jameson is moving his hips around well on the bottom and has managed to get back to half guard.
That's four minutes gone in the round.
Jameson slips a foot under and gets full guard. Nice work.
Jameson throws some sloppy strikes off his back.
Jameson trying to control the position here.
Rawse throwing strikes but missing.
Rawse trying to control but Jameson is working from the bottom.
Rawse postures up to throw the ground and pound strikes but they don't connect.
Rawse distracts Jameson with his right hand and drops a big elbow with his other arm.
Jameson trying to keep a closed guard but Rawse is proving a slippery customer.
Rick Rawse has stepped it up - he knows he needs a finish here!
James Jameson is fighting for a decision here - he's started to take the cautious approach.
Rawse drops back for a leg! It's a sloppy attempt though and Rawse jumps back into guard quickly, to retain the dominant position.
And that's the end of the fight!
James Jameson comfortably won the final round on my scorecard.
I've got Jameson winning every round here. Surely the decision will go his way and he'll pick up a well deserved decision victory. Over to the ring announcer for the scorecards.
Ladies and gentlemen, after 3 rounds of action, we go to the scorecards for a decision.
Judge Frank Antenori scores the fight 27:30
Judge Percy O'Donnell scores the fight 27:30
Judge Suge Night scores the fight 27:30
In favor of your winner, by unanimous decision... James Jameson!
|
|
|
|
|
|
|
|
|
|
|
|
|
|
|
|
|
|
|
|
|
|
|
| S |
C
A |
G |
S |
C
B |
G |
|
S |
C |
G |
|
energy
A | B |
|
hype
A | B |
|
pop
A | B |
|
mgr
A | B |
|
FIGHT
RATING
78% |
|
|
|
|
|
|
