|
|
PBP Commentary |
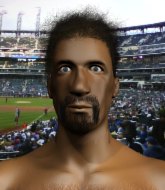
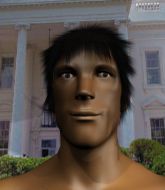
Coming up we have a lightweight MMA rules bout between Aychtoo Sushi (ranked 0 p4p, 0 weight class) and Takumi Mayama (ranked 0 p4p, 0 weight class). Aychtoo Sushi could well score a knockout today. He has the power to get to Takumi Mayama's chin.
 |
|
 |
| 170 cm
21
166 lbs
0 - 0 - 0 |
|
176 cm
26
165 lbs
5 - 6 - 0 |
Abu Dhabi Champ
Solid boxing
Cardio machine |
|
BJJ Brown Belt
Decent boxing
Heavy handed |
|
| |
|
Ladies and gentlemen. This fight is 3 rounds, in the lightweight division.
Introducing the fighter to my left, fighting out of the red corner.
With a record of
0 - 0 - 0, fighting out of Tokyo, Aychtoo Sushi!
And introducing the fighter to my right, fighting out of the blue corner.
With a record of
5 - 6 - 0, fighting out of Tokyo, Takumi Mayama!
The judges for this bout are Hirohito Nitta, Sosuke Kotani and Kenichi Hosakawa.

The bell rings for round one and we are underway!
A decent looking cross lands there for Sushi.

It looks like Takumi Mayama has been cut.
Mayama will need to tighten up his combinations if he doesn't want to gas himself out, swinging at thin air.
Mayama rushes forward with a series of wild hooks but Sushi moves out of range and avoids them all easily.
A telegraphed right hand from Sushi misses the target.
Mayama cracks a nice hook into Sushi's ribs.
Sushi looks to score with a jab to the body but Mayama is just out of range.
Mayama misses with an uppercut.
Mayama looks to score with a jab to the body but Sushi is just out of range.
Mayama lands a right hook to the body.
Sushi misses with a hook. Mayama ducked under it nicely.
Mayama looks to land a right hand but Sushi moved out of range.
Sushi misses with a series of wild punches.
Sushi jabbing away but nothing is landing.
Mayama scores with a one two! Sushi had his feet all tangled up there and couldn't avoid the strikes.
Mayama slips under a jab.
Sushi throws a body punch but Mayama moves out of range.
A slow jab from Sushi misses its intended target.
Mayama scores with a hook.
A big right from Sushi misses.
Sushi connects with a good right hand that stumbles Mayama. Mayama circles away out of range and recomposes himself.
Wow, both these guys are really going for it!
Sushi swings and misses with a shot to the body
and Mayama counters with a good right hand that lands right on the jaw.
Sushi waving his hands out in front of him, looking to distract Mayama.
Mayama fakes a head punch and goes low to the body. Nicely done.

Mayama throws the overhand right but ducks down into a quick takedown attempt. Sushi was covering up waiting for the punch and Mayama finishes the takedown easily into guard.
Mayama must be cautious of submissions here, given that his opponent has the superior Jiu Jitsu.

That's one minute gone in the round.
Sushi tries to land a sweep but no joy.
The fighters are pressed up against the cage, both looking to find a bit of space to work.
Mayama trying to control the position from guard on top but Sushi is wriggling around, looking for whatever he can.

Sushi looking for submissions from the bottom here. Moving his hips around, possibly looking for an armbar.
Mayama controlling from the guard. I say controlling but really, he's stalling.
Mayama drops back looking for a leg! Sushi is in trouble here! The fighters roll with the hold and Sushi manages to kick Mayama off! Mayama jumps back into Sushi's guard.
Sushi controlling Mayama's posture.

That's two minutes gone in the round.
The crowd are getting on the fighters' backs, as the pace has dropped off in the last minute or so.
Sushi striking off his back but it's not causing Mayama any problems.
Sushi working for a triangle but Mayama defends it easily.
Sushi is working an open guard here, looking to improve his position. No doubt that will leave him open to counters but at least he's being more offensive.
Mayama trying to control the position from guard on top but Sushi is wriggling around, looking for whatever he can.
Sushi looking for submissions from the bottom here. Moving his hips around, possibly looking for an armbar.
Sushi keeping moving, preventing Mayama from controlling successfully.
Mayama postures up.

That's three minutes gone in the round.
Mayama is trying to work a guillotine from the top, or something like that? Don't know how he thinks he's going to get a finish from there.

Well, the referee has seen enough. Neither fighter is active enough on the ground so he's stood them back up.
Sushi waving his hands out in front of him, looking to distract Mayama.
Sushi ducks under a wild hook from Mayama.
Sushi lands a vicious shot with the stealth of a sniper and the strength of a viper. Are vipers that strong? I can think of lots of things that are stronger than a viper - not many rhyme with sniper though.
Mayama scores with a nice looking left hook and follows it up with an uppercut!
Mayama uses good footwork to avoid the strikes from Sushi.
Sushi takes a shot to the eye socket. That's gotta hurt.
Mayama bobs and weaves well there to avoid the strikes.
Mayama lands a nice shot to the body.
Sushi takes a shot right to the bread basket.
Mayama throws a right hand that Sushi ducks under and follows up with a left that Sushi also avoids with ease.
Mayama displays some good footwork, moving neatly out of range as Sushi throws out the jab.
Sushi takes a punch right to his stomach. That took the wind out of him momentarily.
Jab from Sushi.
Mayama connects with a nice looking jab.
Sushi fakes high and swings low for a body shot but Mayama manages to avoid it.
Sushi looks to score with a jab to the body but Mayama is just out of range.
Sushi on the wrong end of an overhand right that came out of nowhere.
Mayama throws a shot from downtown. Sushi moves away and avoids it.

That's four minutes gone in the round.
Sushi misses with a looping left.
Mayama throws a jab but it's blocked by Sushi.
Mayama moves out of range of the strikes.
Mayama stuns Sushi with a nice body shot, before stepping back out of range.
Mayama scores with a sloppy punch to the body. Not much technique there but it did the business.
Mayama scores with a jab to the jaw.
The crowd cheering loudly, showing their appreciation for the quality fight we're seeing here.
Nice cross by Mayama.
Nice defenses there by Mayama.
A big left from Sushi misses.
Mayama fails to land with a series of punches.
Sushi throws a wild combination but nothing lands.
Sushi throws a hard body shot but it just misses.
Mayama is moving around nicely and scores here with a single head shot.
Sushi waving his hands out in front of him, looking to distract Mayama.
Mayama closes the distance and lands a one-two.
Mayama is landing a lot of head punches in this opening round! Sushi had better start moving his head a bit unless he wants his face to turn into pâté.
Mayama scores with a nice head shot.
The crowd applaud the fighters efforts here as the round comes to an end.
Mayama jabs away that one connects to the head of his opponent.
Nice body punch from Mayama.
Mayama connects with the punch.
Sushi fakes a jab and then connects with a hook.
Mayama scores with a body shot.
Sushi is breathing heavily.
Mayama uses good footwork to get in and out, landing a nice hook.
And thats the end of the round the fighters go back to their corners.
Takumi Mayama dominated that round.
The cut man is working on Takumi Mayama's cut.
That's the end of the interval. I'm sure that seemed a lot quicker than a minute for our two fighters! Back to the action.

Mayama scores with a sloppy punch to the body. Not much technique there but it did the business.
Mayama lands a jab-cross combination.

Sushi is rocked!
Mayama shoots in looking for a single leg takedown. Sushi is trying to defend but Mayama finishes it well and ends up in half guard. Let's see if he can advance position further.
Oh Sushi is still in real trouble! Will he be able to recover?!!
Sushi is in trouble now - Mayama has advanced to mount!
Mayama is thinking about an arm triangle here, looking to tighten it up before moving to side control. Sushi can see it coming though and defends well with a couple of strikes to the head and some good arm positioning.
Sushi seems to have got his legs back now.
Sushi is desperately trying to improve his position but Mayama has a good base and remains in mount.
Mayama looking for a guillotine from mount but Sushi is having none of it.
Sushi wants to hold on but Mayama pushes him away.
Sushi is desperately trying to improve his position but Mayama has a good base and remains in mount.
Mayama controlling from mount.
That's one minute gone in the round.
Mayama's corner are shouting for him to control the position and he seems happy to oblige.
Sushi tries to hold on but Mayama pushes him away.
Sushi is in a bad position, trying to hold on for dear life but he is really struggling to maintain any sort of control.
Sushi sneaks a leg back under and regains half guard and is working straight away to try and get back to guard. He hasn't managed just yet though.
Mayama wants to work for an arm triangle but Sushi is really keeping half guard well and defending the submission attempt.
Mayama is breathing heavily.
Sushi looking to work for a kimura from the bottom.
Sushi is trying to control but can't.
The fighters are battling for position here. Sushi manages to regain full guard. Nice work.
That's two minutes gone in the round.
The crowd are hurling abuse towards the fighters... You can hardly blame them though because there isn't a lot going on in the fight.
Sushi tries to land a sweep but no joy.
Sushi working a defensive guard here.
Sushi is looking for a triangle but Mayama pushes his legs off easily.
Mayama content to stall in guard here.
Mayama got a little sloppy there for a moment and Sushi has worked his way into a loose triangle - can he finish it?! No, Mayama has managed to get both his arms back between Sushi's legs - danger averted.
Mayama is frustrating his opponent with some stalling tactics from top position.
Sushi is trying to keep Mayama in close.
That's three minutes gone in the round.
Mayama postures up as if he's going to throw some strikes but drops back for an ankle! Sushi is in big trouble! He looks ready to tap! But no, he's escaped and dives on top of Mayama, into his guard.
Sushi trying to pass the guard but can't manage it just yet.
Sushi working some ground and pound from guard but it's not doing any damage.
Mayama tries to land a sweep but no joy.
Sushi stands and throws Mayama's legs to the side, diving into side control.
Mayama is positioning himself to get back to half guard.
Sushi looking to control but instead Mayama has slipped a leg in, to regain half guard.
That's four minutes gone in the round.
A few boos can be heard. I'm sure they will multiply if the fighters don't pick up the pace.
Sushi is trying for a guillotine from the top but the pressure isn't in the right place so Mayama is just riding it out for now. Sushi eventually gives up the hold.
Mayama keeping hold of Sushi's head, controlling as best he can.
Sushi is taking a breather. Mayama says something to him but it's hard to make out. Perhaps he's telling him to get on with it and actually do something.
Mayama works his way to full guard. Good work.
And thats the end of the round the fighters go back to their corners.
Takumi Mayama showed his class in that round. I'd imagine he'll take it on all the scorecards.
The cut man is working on Takumi Mayama's cut.
The referee calls time. The cornermen exit stage left and we're back to business. This is the final round!

Mayama moves away from the strike by Sushi.
Sushi tries to land with a swinging hook to the body but Mayama was well out of range. Poor timing from Sushi.
Mayama throws a sloppy body shot
and Sushi counters with a stiff right hand.
Mayama ducks low and lands a nice hook to the body of his opponent.
Mayama scores with a jab.
Mayama throws a hook to the body but it doesn't connect.
Sushi throws a jab to the body, straight down the pipe. Boom. That sent Mayama stumbling backwards but he manages to regain his composure quickly.
Mayama lands with a shot to the body.
Mayama bobs and weaves into range and then changes levels and scores with a nice takedown into side control.
You can see the frustration on Sushi's face, being in this tough position on the bottom.
The ref warns both fighters not to hold the cage as they work up against the meshing.
Sushi is not content to let Mayama control the position.
You can see the frustration on Sushi's face, being in this tough position on the bottom.
Mayama tries for a kimura but Sushi is defending well.
That's one minute gone in the round.
Sushi is not content to let Mayama control the position.
Sushi tries to bench press Mayama off him but Mayama keeps the position.
Mayama trying to control the position but Sushi is working away.
Neither fighter is doing enough for the referee's liking and he's decided to stand them back up.
Mayama looks to land a combination. Sushi sees it coming but can only parry a couple of the shots.
Sushi slips a jab and a cross from Mayama.
Sushi looks to throw the jab but Mayama is out of range.
Sushi ducks under a wild hook from Mayama.
Sushi looks to throw the jab but Mayama is out of range.
Mayama throws a hook to the body but it doesn't connect.
Aychtoo Sushi seems to be the more aggressive standup fighter in this bout.
Sushi misses with a jab to the body
and Mayama counters with a two punch combo.
Sushi misses with a shot to the body
enabling Mayama to counter with a crisp jab.
Sushi misses with a body shot. Nice footwork from Mayama.
That's two minutes gone in the round.
Sushi missing with a left hand there. Mayama was out of range so wasted energy throwing that one.
Takumi Mayama seems to be getting the better of the standup.
Sushi throws a sloppy body shot
and Mayama counters with a shoot takedown. Sushi fights it but they end up in guard.
Sushi trying to keep a closed guard but Mayama is proving a slippery customer.
Both fighters are breathing heavily.
Sushi is throwing his legs up, looking for submissions. Mayama is aware though and is defending well.
Mayama slows down the pace of the fight, as he sits in guard.
Sushi trying to control the position.
Mayama thinks about going for a leg but decides against it, in order to maintain the position.
Sushi tries to land a sweep but no joy.
Sushi trying to keep a closed guard but Mayama is proving a slippery customer.
Mayama drops back looking for a leg! Sushi is in trouble here! The fighters roll with the hold and Sushi manages to kick Mayama off! Mayama jumps back into Sushi's guard.
That's three minutes gone in the round.
Well, the referee has seen enough. Neither fighter is active enough on the ground so he's stood them back up.
Mayama slips a jab and a cross from Sushi.
Sushi throws an overhand right that lands on Mayama's shoulder, as Mayama tries to avoid the shot.
Mayama ducks under a wild hook from Sushi.
Sushi lands a straight punch to the body, keeping Mayama at a distance.
Sushi lands a head shot.
Mayama throws a hook but Sushi blocks it.
Mayama takes a jab on the nose there. A little bit of blood seems to be coming out. Hopefully that won't affect his breathing.
Mayama decides to change it up a bit and drives through with a nice takedown into half guard.
Sushi trying to control from the bottom.
Mayama is trying to work for a kimura but Sushi is defending well.
Mayama wants to work for an arm triangle but Sushi is really keeping half guard well and defending the submission attempt.
Sushi regains full guard. Nicely done.
That's four minutes gone in the round.
Sushi throws some sloppy strikes off his back.
Mayama wants to control from the top but Sushi keeps moving.
Sushi is active off his back here, looking for submissions.
Sushi is working the butterfly guard. He manages to land a nice scissor sweep and is now in half guard on the top. Nice move.
Takumi Mayama is fighting for a decision here - he's started to take the cautious approach.
Mayama keeping his head moving to avoid the ground and pound.
Aychtoo Sushi has stepped it up - he knows he needs a finish here!
Mayama is not content to let Sushi control the position.
Mayama is trying to get back to full guard.
Mayama regains full guard, whilst avoiding punches from Sushi.
And that's the end of the fight!
Takumi Mayama comfortably won the final round on my scorecard.
Well Mayama has outworked and out performed his opponent in all aspects of the game today. He was simply too good and the decision should be no more than a formality. Over to the ring announcer for the scorecards.
Ladies and gentlemen, after 3 rounds of action, we go to the scorecards for a decision.
Judge Hirohito Nitta scores the fight 27:30
Judge Sosuke Kotani scores the fight 27:30
Judge Kenichi Hosakawa scores the fight 27:30
In favor of your winner, by unanimous decision... Takumi Mayama!
|
|
|
|
|
|
|
|
|
|
|
|
|
|
|
|
|
|
|
|
|
|
|
| S |
C
A |
G |
S |
C
B |
G |
|
S |
C |
G |
|
energy
A | B |
|
hype
A | B |
|
pop
A | B |
|
mgr
A | B |
|
FIGHT
RATING
82% |
|
|
|
|
|
|
