|
|
PBP Commentary |
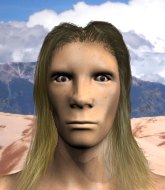
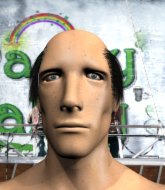
Coming up we have a bantamweight MMA rules bout between Go Yamamoto (ranked 0 p4p, 0 weight class) and Wendell Diefendorf (ranked 0 p4p, 0 weight class). Go Yamamoto has the edge in experience - let's see if he can make that count tonight.
 |
|
 |
| 177 cm
22
135 lbs
1 - 0 - 0 |
|
178 cm
22
140 lbs
0 - 0 - 0 |
BJJ Blue Belt
Brawler
Big heart |
|
BJJ Blue Belt
Brawler
Granite chin |
|
| |
|
Ladies and gentlemen. This fight is 2 rounds, in the bantamweight division.
Introducing the fighter to my left, fighting out of the red corner.
With a record of
1 - 0 - 0, fighting out of London, Go Yamamoto!
And introducing the fighter to my right, fighting out of the blue corner.
With a record of
0 - 0 - 0, fighting out of London, Wendell Diefendorf!
The judges for this bout are Sam Margolis, Andrew Berry and Paul Tew.

The bell rings for round one and we are underway!
Yamamoto misses with a wild combination.
Diefendorf swings for the body but Yamamoto moves out of range.

Yamamoto clinches with his opponent.
Yamamoto with the Thai clinch. He's looking to land a big knee but he's not managed it this time.
Yamamoto tries to land a knee to the head but Diefendorf blocks with his arms.
Yamamoto stops a takedown attempt from Diefendorf.
Diefendorf fails to pull guard.

Diefendorf escapes the clinch and we're back to striking.
Diefendorf throws a half hearted mid kick.
Yamamoto tries to clinch but is not successful on this occasion.
Diefendorf takes a really solid shot there but just smiles back and shrugs his shoulders.
Diefendorf shoots in but Yamamoto avoids the takedown attempt easily.
Go Yamamoto has stuffed three takedown attempts in the round now. That's going to take a lot out of Wendell Diefendorf.

Diefendorf shoots in from a long way out. He's driving through with the takedown attempt and he eventually gets it, landing in Yamamoto's guard.
Diefendorf looking to pass the guard.
Diefendorf wants to control from the top but Yamamoto keeps moving.
Diefendorf in full guard, throwing the ground and pound. No damage this time.
Diefendorf tries to free his leg and advance position but Yamamoto is retaining full guard.
Yamamoto is looking to stand up but Diefendorf isn't so interested in that idea.
Yamamoto keeping full guard, as Diefendorf tries to pass.

That's one minute gone in the round.
Diefendorf with a flurry of punches that miss.
Yamamoto lands a beautiful switch and he's in full mount! That could spell trouble for Diefendorf!
The fighters are tangled up in the ropes here. We might need a restart if the fighters can't break free themselves.
Yamamoto prevents Diefendorf from getting the reversal.
Diefendorf is persisting with the attempt to improve his position.
The fighters are trapped in the ropes so we're going to have a reposition here. The ref calls for a break and repositions the fighters in the center of the ring.
Diefendorf wants to hold on but Yamamoto pushes him away.
Diefendorf tries to get back to half guard but can't.
Yamamoto is breathing heavily.

That's two minutes gone in the round.
The crowd are showing their displeasure at the lack of action as loud boos ring out around the arena.
Yamamoto scoring with strikes but Diefendorf is staying in there.
Diefendorf bucks up and manages to get a nice reversal! He's in guard on the top - nicely done!
Diefendorf wants to control from the top but Yamamoto keeps moving.
Diefendorf content to strike from guard, landing some decent shots.
Diefendorf passes easily into side control. Nice work.
Yamamoto tries to get back to half guard but can't.

Diefendorf wants to work for a kimura but he's foiled early by Yamamoto, who protects the arm well.
Diefendorf tries for an arm triangle. That looks pretty tight to me. Is this one over!?! Possibly, maybe, no Diefendorf has let go of the choke. Obviously it wasn't as tight as we thought!

That's three minutes gone in the round.
Diefendorf tries for a kimura. Not really close to a finish though.
Yamamoto is looking for a sweep.
Diefendorf goes for an armbar! This could be all over! Wait, no, Yamamoto rolls with the submission and now he's on top in Diefendorf's guard! Nice work there by Yamamoto!
Diefendorf wants to sweep but no luck.
Diefendorf looking for submissions from the bottom here. Moving his hips around, possibly looking for an armbar.

That's four minutes gone in the round.
Diefendorf wants to improve his position but instead Yamamoto has moved into half guard.
Diefendorf punching from the bottom.
Diefendorf is looking to improve his position.
Diefendorf gets back to full guard.
Diefendorf is working actively off his back, looking to secure an arm or perhaps work for a triangle.
Diefendorf wants to hit a switch here but Yamamoto passes into full mount! Oh no, disaster for Diefendorf there!
Diefendorf slips a leg in and gets back to half guard.

That's five minutes gone in the round.
Diefendorf has no desire to be mounted, so is trying to control. Yamamoto is working away from the top position though.
Yamamoto trying to pass the guard but Diefendorf defending well.
Diefendorf looking for subs from the bottom but Yamamoto mounts him!
Diefendorf is desperately trying to get back to half guard.
Yamamoto connects with a couple of good shots from mount.
Diefendorf really trying hard to get back to half guard here.
Yamamoto in mount throwing good strikes here, bouncing his opponent's head off the canvas.

That's six minutes gone in the round.
Yamamoto working away from the top, dropping strikes.
Diefendorf is looking to improve his position but Yamamoto isn't that keen on the idea.
Diefendorf is trying to get back to his feet but can't.
Yamamoto pausing momentarily but resumes with a couple of decent strikes that do a bit of damage.
Yamamoto landing strikes from the mount and Diefendorf is in trouble!
Diefendorf regains half guard.

Diefendorf kicks Yamamoto off and gets back to his feet.
A left and a right from Yamamoto both land. Nice combination.
Yamamoto tries to bum rush Diefendorf with a series of wild strikes but Diefendorf uses good footwork to avoid the assault.
Diefendorf shoots in for a takedown. "Ole!" shouts Yamamoto as he jumps to the side.
Yamamoto wants to clinch up but Diefendorf keeps it at a distance.
Like a baseball bat into the meat of his leg there - nice leg kick by Yamamoto.
Yamamoto forces Diefendorf back against the ropes and clinches.
This is a great period of action - very entertaining stuff!
Yamamoto using the Thai plumb to throw knees but Diefendorf has his back arched nicely, preventing the strike.
Yamamoto misses with a knee to the head.
Yamamoto really does look like a pencil wearing a pair of gloves. Let's hope he has a gameplan to suit that ridiculous body shape.

That's seven minutes gone in the round.
Yamamoto lands a knee to the head.
Yamamoto using the Thai plumb to throw knees but Diefendorf has his back arched nicely, preventing the strike.
Yamamoto using the Thai plumb to throw knees but Diefendorf has his back arched nicely, preventing the strike.
Yamamoto tries a knee to the head but he's missed.
Yamamoto connects with a nasty looking knee right to Diefendorf's face.
Diefendorf has Yamamoto pressed up against the ropes and is working for takedown. Yamamoto manages to improve position though and keeps the fight standing.
Diefendorf tries to pull guard but can't drag his opponent to the mat. Yamamoto just stands there and leans against the ropes.
Diefendorf fails to pull guard.
Yamamoto tries a knee to the head but he's missed.
Yamamoto tries a knee to the head but Diefendorf blocks it.
Diefendorf is working for a takedown up against the ropes. He can't get it on this occasion though.
Yamamoto connects with a knee to the head.
Diefendorf looking to stall.
Diefendorf tries to take the fight to the ground by pulling guard but can't manage it.
Yamamoto throws a knee to the head but misses.
Yamamoto with an attempt at a knee that misses.
Yamamoto misses with a knee to the head.
Yamamoto with the Thai clinch. He's looking to land a big knee but he's not managed it this time.
Yamamoto gets double underhooks to prevent a takedown attempt from Diefendorf.
Diefendorf fails to pull the fight into his guard.
Diefendorf jumps guard but Yamamoto stands there with Diefendorf around his waist. Diefendorf gives up and drops back to his feet. We remain in the clinch.
Yamamoto using the Thai plumb to throw knees but Diefendorf has his back arched nicely, preventing the strike.
Diefendorf is trying to trip Yamamoto. He has hold of a leg but Yamamoto is hopping around, keeping his balance for the moment. Diefendorf persists though and gets the takedown into guard.
Diefendorf decides he's had enough of playing guard and decides to stand. Come on Yamamoto, up you get!
Yamamoto tries to clinch but Diefendorf is having none of it.
Nice sprawl there from Yamamoto as Diefendorf shoots in.
Diefendorf shoots in for a takedown and gets it. Oh and he's advanced to full mount straight away.
Diefendorf is looking to secure an arm. He's managed it! He's pivoting for an armbar - that looks tight! But Yamamoto has managed to get out of it and now he's in a dominant position. Nice work from Yamamoto!

That's eight minutes gone in the round.
Yamamoto is sitting in guard, working some ground and pound.
Diefendorf bucks up whilst keeping hold of a body lock, managing to reverse the position. Now he's in top in Yamamoto's guard. Yamamoto keeping full guard, as Diefendorf tries to pass.
Diefendorf drops back looking for a heel hook - he quickly realises he's not going to get it but Yamamoto manages to dive on top of him before he can escape and now Diefendorf has Yamamoto in his guard.
Diefendorf looking for a guillotine here but Yamamoto defends easily.

That's nine minutes gone in the round.
Yamamoto won't allow Diefendorf to sweep him here.
Diefendorf keeping full guard, as Yamamoto tries to pass.
Diefendorf working from the bottom, still in full guard. He's managed to get a loose triangle. Yamamoto doesn't seem to be doing much to defend here, obviously he feels comfortable in the position. Yamamoto manages to throw the legs off his shoulder and he's back into guard - no problem.
Diefendorf is looking to get back to his feet but can't, whilst Yamamoto is controlling him.
Yamamoto landing with the ground and pound.
Diefendorf is looking for a triangle here but Yamamoto uses the submission attempt to pass into side control.
And thats the end of the round the fighters go back to their corners.
A close round but Wendell Diefendorf will probably get the nod.
The corners get their ten second warning. Both fighters stand from their stools and stare eachother down, ready to get back to the action. So, we enter the final round. Let's see if either fighter can bring us a finish, or whether we're going to the judges scorecards.

Yamamoto closes the distance and clinches.
Diefendorf breaks the clinch.
The fight stays on the outside here - Yamamoto looks like he's thinking about clinching though.
Diefendorf moves out of range of the leg kick from Yamamoto.
Yamamoto tries to clinch up.
Yamamoto tries to clinch but Diefendorf is having none of it.
Diefendorf drives through and clinches with Yamamoto against the ropes.
Diefendorf drops down for a takedown but doesn't get it.
Diefendorf wants a takedown but no success here.
Diefendorf wants to break the clinch but can't.
Diefendorf breaks the clinch and we return to the middle of the mat.
Left hook, right uppercut from Yamamoto.
Yamamoto uses some good footwork to avoid the body shot by Diefendorf.
Diefendorf looks to land a body kick but Yamamoto moved away.
Diefendorf shoots in for a takedown. "Ole!" shouts Yamamoto as he jumps to the side.
Go Yamamoto has stuffed three takedown attempts in the round now. That's going to take a lot out of Wendell Diefendorf.
Diefendorf shoots in but no luck this time.
Diefendorf closes this distance looking for a takedown but Yamamoto circles away.
Yamamoto wants to clinch up but Diefendorf keeps it at a distance.
Diefendorf looking to land some kicks to the body here.
Both fighters are absolutely exhausted here.
Yamamoto shoots in for a takedown - he's clinched up with Diefendorf but Diefendorf pushes him off and we're back to square one.
Diefendorf shoots in but no luck this time.
Diefendorf fails with a takedown attempt.
That's one minute gone in the round.
Diefendorf shoots in for a takedown - he's clinched up with Yamamoto but Yamamoto pushes him off and we're back to square one.
Diefendorf gets the takedown into side control.
Diefendorf advances to full mount.
Yamamoto gets back to half guard.
Diefendorf takes advantage of the dominant position to land a couple of big hammer fists.
Diefendorf is working for a submission of some sort.
Diefendorf lands a big shot. The thud that echoes around the arena is like music to the fans' ears.
Diefendorf is thinking about going for an arm triangle but he can't free his leg.
Diefendorf is working hard to pass the guard. He's done it - he's now in full mount! Trouble for Yamamoto!
That's two minutes gone in the round.
Diefendorf lands a big elbow.
Diefendorf fails to take his opponent's back.
Diefendorf moves into side control, trying to work for a kimura. That looks painful! Will he finish!!?? No, Yamamoto has worked his arm free - good work by Yamamoto!
Yamamoto sneaks a leg under to get back to half guard.
Diefendorf is working for submissions here but there's nothing on.
Wooooo! Give it up for these two warriors! They are putting on a show!
Diefendorf is pressing down on Yamamoto's thigh, looking to free his foot. Yamamoto is holding on for now.
Diefendorf has freed up his trapped foot and advances to mount.
That's three minutes gone in the round.
Yamamoto taking shots to the head.
Yamamoto prevents Diefendorf from taking his back.
Diefendorf jumps to the side looking to secure the arm triangle
. Ooooh, that looks tight
Yamamoto is gargling but he's managed to escape! Nice work there by Yamamoto and Diefendorf has given up the dominant position trying to land that submission.
Yamamoto on the wrong end of some ground and pound.
Diefendorf works to advance to full mount. Yamamoto defends for a few seconds but eventually he succumbs.
Diefendorf is thinking about an arm triangle here, looking to tighten it up before moving to side control. Yamamoto can see it coming though and defends well with a couple of strikes to the head and some good arm positioning.
Yamamoto is trying to escape the mount.
That's four minutes gone in the round.
Diefendorf dominating with strikes here.
Diefendorf moves into side control, trying to work for a kimura. That looks painful! Will he finish!!?? No, Yamamoto has worked his arm free - good work by Yamamoto!
Diefendorf swings around for an armbar but Yamamoto sees it coming a mile off and turns beautifully into Diefendorf's guard.
Yamamoto postures up and lands a big shot to Diefendorf's brow.
Diefendorf has a butterfly guard looking to sweep but Yamamoto has passed into side control.
Diefendorf is looking to slip a leg under and get half guard but Yamamoto is one step ahead and moves to full mount!
Diefendorf tries to get back to half guard but can't.
Diefendorf manages to regain half guard. Good work.
Diefendorf is looking to regain full guard. Not this time though.
That's five minutes gone in the round.
Yamamoto is trying for a guillotine from the top but the pressure isn't in the right place so Diefendorf is just riding it out for now. Yamamoto eventually gives up the hold.
Yamamoto throwing shots but they're hitting the canvas more than the man.
Diefendorf has no desire to be mounted, so is trying to control. Yamamoto is working away from the top position though.
Diefendorf wants to get back to full guard.
Diefendorf moves his hips nicely and gets into full guard.
Diefendorf manages to land a sweep and now he's in mount on top!
Yamamoto is desperately trying to get back to half guard.
That's six minutes gone in the round.
Well. There's a bit of a lull in the action here and the crowd are starting to get restless.
Diefendorf wants to take Yamamoto's back but he can't do it this time.
Diefendorf is still in mount, landing shots to his trapped opponent. Yamamoto can't stay in a position like this for much longer.
Diefendorf gets to his feet and calls his opponent to stand. Here come the fireworks!
Yamamoto wants to clinch up but Diefendorf keeps it at a distance.
Yamamoto moves into range and throws a lovely three punch combination.
Yamamoto looking for a takedown here - he's got it.
Diefendorf throwing his legs up looking for a triangle.
That's seven minutes gone in the round.
Yamamoto with a nice head shot there.
Diefendorf throws his legs up looking for a submission but Yamamoto uses it to pass to side control.
Diefendorf sneaks a leg under to get back to half guard.
Diefendorf is looking to regain full guard. Not this time though.
Diefendorf trying to get back to full guard but Yamamoto takes advantage of the position and moves to full mount!
Diefendorf is in all sorts of trouble here.
That's eight minutes gone in the round.
There's not a lot going on here and the crowd are letting the fighters know they're not willing to tolerate a lack of action.
Yamamoto lands with some strikes.
Diefendorf is looking to get to half guard.
Diefendorf wants to use the ropes to get back to his feet here.
Wendell Diefendorf has got the better of the ground game so far.
Diefendorf is desperately trying to get back to half guard.
Diefendorf manages to regain half guard. Good work.
That's nine minutes gone in the round.
Diefendorf gets full guard.
Diefendorf is looking for a triangle but Yamamoto pushes his legs off easily.
Diefendorf working from the bottom, still in full guard. He's managed to get a loose triangle. Yamamoto doesn't seem to be doing much to defend here, obviously he feels comfortable in the position. Yamamoto manages to throw the legs off his shoulder and he's back into guard - no problem.
Yamamoto postures up to throw the ground and pound strikes but they don't connect.
Diefendorf working from the bottom, still in full guard. He's managed to get a loose triangle. Yamamoto doesn't seem to be doing much to defend here, obviously he feels comfortable in the position. Yamamoto manages to throw the legs off his shoulder and he's back into guard - no problem.
Yamamoto chips away with some ground and pound.
The crowd applaud the fighters efforts here as the round comes to an end.
Diefendorf manages to land a sweep and now he's in mount on top!
Diefendorf scores with a couple of good head shots there.
And that's the end of the fight!
Wendell Diefendorf comfortably won the final round on my scorecard.
I think Diefendorf has won this one but let's see whether the judges agree with me. Over to the ring announcer for the scorecards.
Ladies and gentlemen, after 2 rounds of action, we go to the scorecards for a decision.
Judge Sam Margolis scores the fight for Wendell Diefendorf!
Judge Andrew Berry scores the fight for Wendell Diefendorf!
Judge Paul Tew scores the fight for Wendell Diefendorf!
Wendell Diefendorf wins by unanimous decision!
|
|
|
|
|
|
|
|
|
|
|
|
|
|
|
|
|
|
|
|
|
|
|
| S |
C
A |
G |
S |
C
B |
G |
|
S |
C |
G |
|
energy
A | B |
|
hype
A | B |
|
pop
A | B |
|
mgr
A | B |
|
FIGHT
RATING
55% |
|
|
|
|
|
|
