|
|
PBP Commentary |
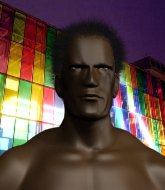
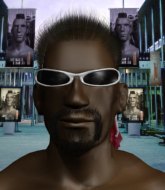
Coming up we have a bantamweight MMA rules bout between Dandy Bigglesworth (ranked 0 p4p, 0 weight class) and Nuriel Leonard (ranked 0 p4p, 0 weight class). Bigglesworth's ring entrance music is that housewives' favourite, Car Bomb by Negativland. Nuriel Leonard will no doubt be looking to use his reach advantage to good effect.
 |
|
 |
| 155 cm
23
135 lbs
10 - 1 - 0 |
|
168 cm
20
147 lbs
2 - 0 - 0 |
BJJ Purple Belt
Excellent boxer
Very strong |
|
Good wrestler
Excellent boxer
Granite chin |
|
| |
|
Ladies and gentlemen. This fight is 5 rounds, for the bantamweight championship of the world!
Introducing the champion to my left, fighting out of the red corner.
With a record of
10 - 1 - 0, fighting out of Amsterdam, Dandy Bigglesworth!
And introducing the challenger to my right, fighting out of the blue corner.
With a record of
2 - 0 - 0, fighting out of London, Nuriel Leonard!
The judges for this bout are Albert Achterberg, Daniel Blasius and Paulsen Ambrosius.

The bell rings for round one and we are underway!
Leonard uses good head movement to avoid the hook from Bigglesworth.
Leonard missing with a left hand there. Bigglesworth was out of range so wasted energy throwing that one.
Leonard staying out of range there.
Dandy Bigglesworth seems to be the more aggressive standup fighter in this bout.
Nice defenses there by Bigglesworth.
Leonard throws a good cross that connects.
Leonard is on the wrong end of a nice combination from Bigglesworth.

Leonard looking for a takedown here - he's got it.
Leonard preventing the sweep.
Leonard trying to control but Bigglesworth is working from the bottom.
Leonard trying to pass the guard but can't manage it just yet.
Leonard stops Bigglesworth from standing up.
Bigglesworth looking to hit a scissor sweep but Leonard is one step ahead there.
Leonard is working Bigglesworth over from the guard. He should look to pass the guard and do a little more damage with these strikes.

That's one minute gone in the round.
Leonard working some ground and pound from guard but it's not doing any damage.

It looks like we're going to have a standup here. Neither fighter is doing enough on the ground.
Bigglesworth digs a good hook to Leonard's body.
Bigglesworth thows a body shot but no joy.
Leonard avoids the clinch attempt nicely.
Bigglesworth lands a vicious shot with the stealth of a sniper and the strength of a viper. Are vipers that strong? I can think of lots of things that are stronger than a viper - not many rhyme with sniper though.
A telegraphed right hand from Bigglesworth misses the target.
Leonard scores with a takedown into Bigglesworth's guard.
Bigglesworth is trying to keep Leonard in close.
Leonard trying to control but Bigglesworth is working from the bottom.
Leonard throws a big right hand that misses.
Leonard wants to control from the top but Bigglesworth keeps moving.

That's two minutes gone in the round.
Leonard slows down the pace of the fight, as he sits in guard.
Leonard postures up to throw the ground and pound strikes but they don't connect.

Leonard got a little sloppy there for a moment and Bigglesworth has worked his way into a loose triangle - can he finish it?! No, Leonard has managed to get both his arms back between Bigglesworth's legs - danger averted.
Leonard trying to pass the guard but can't manage it just yet.
Neither fighter is doing enough for the referee's liking and he's decided to stand them back up.
Leonard decides to change it up a bit and drives through with a nice takedown into half guard.
Bigglesworth is trying to stand.
Bigglesworth tries to get to full guard but Leonard has control of the leg.
Bigglesworth regains full guard, whilst avoiding punches from Leonard.
Leonard stopping the sweep attempt from Bigglesworth.

That's three minutes gone in the round.
Leonard in full guard, throwing the ground and pound. No damage this time.
Bigglesworth preventing the ground and pound from doing any damage.
Leonard trying to control but Bigglesworth is working from the bottom.
The fighters are starting to get a bit slippery now, which will make submissions a bit more difficult.
Bigglesworth looking to control.
It looks like we're going to have a standup here. Neither fighter is doing enough on the ground.
Bigglesworth blocks a jab.
Bigglesworth swings wildly with a right hand that was never going to find it's target.
Leonard lands a pitter patter jab to the forehead of his opponent.
Bigglesworth misses with a body shot.
Leonard keeping his hands up high there, blocking the jab from Bigglesworth.
Leonard throws a monster uppercut resembling something out of street fighter but it doesn't land.
Bigglesworth is really struggling to find his range with his punches. Leonard's reach advantage is clearly causing him problems.
Leonard has his head snapped back a nice jab. A little nod from Leonard there as he acknowledges the shot.

That's four minutes gone in the round.
Well. There's a bit of a lull in the action here and the crowd are starting to get restless.
Bigglesworth fails to land with a series of punches.
Bigglesworth is looking to clinch.
Bigglesworth thows a left - swing and a miss!
A jab from Bigglesworth misses.
Leonard avoids a punch combination nicely.
Bigglesworth thows a body shot but no joy.
Leonard staying out of range there.
Bigglesworth misses with a body shot. Nice footwork from Leonard.
Leonard misses with a two punch combination.
Leonard staying out of range there.
Leonard throws a right hand that Bigglesworth ducks under and follows up with a left that Bigglesworth also avoids with ease.
Leonard cracks Bigglesworth with an open hand slap.
Leonard looks to throw the jab but Bigglesworth is out of range.
Leonard slips a jab from Bigglesworth.
Leonard blocks a jab.
And thats the end of the round the fighters go back to their corners.
Nuriel Leonard dominated that round.
That's the end of the round. The referee orders the cornermen out of the cage so we can get back down to business.

Bigglesworth throws a shot from downtown. Leonard moves away and avoids it.
Leonard moves out of range as Bigglesworth strikes.
Leonard looks to land a combination but Bigglesworth avoids it well.
Leonard jabs at Bigglesworth's body.
Bigglesworth takes a big uppercut there. He seems a bit wobbly but no, he's OK.
Bigglesworth throws a monster uppercut resembling something out of street fighter but it doesn't land.
Bigglesworth misses with a two punch combination.
Leonard throws a hard body shot but it just misses.
Leonard misses with a takedown attempt - Bigglesworth sprawls well and throws a nice strike on the way out which just misses.
Bigglesworth misses with a looping right.
Bigglesworth walks into a left hand.
Leonard ducks low and lands a nice hook to the body of his opponent.
Bigglesworth lets the fists fly and connects with a left straight followed by a right hook.
Leonard fails with a takedown attempt from distance.
Bigglesworth throws a hook to the body but it doesn't connect.
That's one minute gone in the round.
Leonard ducks under a wild hook from Bigglesworth.
Leonard misses with an uppercut. Bigglesworth saw that one coming.
Bigglesworth takes a shot to the body in his stride.
Leonard moves out of range as Bigglesworth strikes.
Leonard slips under a jab.
Leonard keeping a good distance there, avoiding the body shot.
Bigglesworth throws a hook to the body but it doesn't connect.
Leonard tries to land with a swinging hook to the body but Bigglesworth was well out of range. Poor timing from Leonard.
Bigglesworth misses with a jab to the body
and Leonard counters with a three punch combination, finished off with a leg kick. Nice work.
Leonard moves out of range of the strikes.
Bigglesworth defending well as Leonard loads up on a big left hand.
Bigglesworth closes the distance but Leonard moves to the side
and Leonard counters with a shoot takedown. Bigglesworth fights it but they end up in guard.
Leonard is looking to work some ground and pound but Bigglesworth has wrist control.
Bigglesworth is trying to stand up but he's not managed so far.
Leonard throwing elbows and punches but not connecting, as Bigglesworth works some decent striking defense from the bottom.
That's two minutes gone in the round.
Leonard trying to pass the guard but can't manage it just yet.
Leonard with a flurry of punches that miss.
Leonard working some ground and pound from guard but it's not doing any damage.
The fighters are pressed up against the cage, both looking to find a bit of space to work.
Leonard with a nice head shot there.
Bigglesworth preventing the ground and pound from doing any damage.
It looks like we're going to have a standup here. Neither fighter is doing enough on the ground.
Leonard lands an overhand right.
Bigglesworth throws a combination but comes up with nothing but fresh air.
Bigglesworth fakes a head punch and goes low to the body. Nicely done.
Bigglesworth waving his hands out in front of him, looking to distract Leonard.
Leonard looks to throw the jab but Bigglesworth is out of range.
Bigglesworth misses with a double jab.
A big left from Bigglesworth misses.
Bigglesworth misses the shot to the body.
Bigglesworth takes a body punch that cleary hurt but he's trying not to show any weakness.
That's three minutes gone in the round.
Bigglesworth loads up on a big right hand but Leonard slips the punch.
Leonard is using his reach advantage to land shots from outside his opponent's range.
Bigglesworth dodges the punch combination from Leonard.
Bigglesworth throws a big shot that misses.
Bigglesworth tries to clinch
and Leonard counters with a takedown into full mount! That could mean trouble for Bigglesworth!
Leonard avoids the attempt from Bigglesworth to control.
Bigglesworth really trying hard to get back to half guard here.
Leonard scores with a couple of good head shots there.
Bigglesworth can't escape the position.
Bigglesworth regains half guard.
Leonard missing with some ground and pound from the half guard.
That's four minutes gone in the round.
Bigglesworth is trying to stand.
Bigglesworth is looking to control Leonard's leg but it's slowly edging free. Can Bigglesworth avoid being mounted?
Leonard sitting in half guard, looking to land shots. Bigglesworth defending well though.
Leonard not throwing his punches with enough precision this time.
Leonard thows a wild elbow that connects with the canvas.
Leonard throwing punches and elbows but they're not doing any damage.
Bigglesworth keeping control of the leg, stopping his opponent passing to mount.
Neither fighter is doing enough for the referee's liking and he's decided to stand them back up.
Leonard shoots in for a takedown - he's clinched up with Bigglesworth but Bigglesworth pushes him off and we're back to square one.
Dandy Bigglesworth has stuffed three takedown attempts in the round now. That's going to take a lot out of Nuriel Leonard.
Bigglesworth tries to clinch but fails miserably
and Leonard counters with a takedown into side control.
The fans in attendance giving it up for the two fighters, who have really let it all hang out in the last minute or so!
The crowd applaud the fighters efforts here as the round comes to an end.
Bigglesworth manages to work his way to half guard, despite Leonard's best efforts.
Bigglesworth wants to get back to his feet.
And thats the end of the round the fighters go back to their corners.
Nuriel Leonard showed his class in that round. I'd imagine he'll take it on all the scorecards.
The referee calls time. The cornermen exit stage left and we're back to business.

This fight brought to you by 5M nutrition - it's mmmmm tasty. Nice jab by Bigglesworth.
Bigglesworth moves out of range as Leonard strikes.
Bigglesworth tries to clinch up
letting Leonard counter with a right hand.
Bigglesworth rushes forward with a series of wild hooks but Leonard moves out of range and avoids them all easily.
Leonard keeps the fight on the outside.
Bigglesworth throws a big shot that misses.
Leonard uses some good footwork to avoid the body shot by Bigglesworth.
Bigglesworth looks to throw the jab but Leonard is out of range.
We've had a slow start to the round here - hopefully the action picks up.
Bigglesworth tries to clinch but is not successful on this occasion.
Leonard fails with the takedown.
Leonard throws an uppercut from half a mile away. Bigglesworth sees it coming and avoids it easily.
Leonard moves out of range of the strikes.
Leonard throws out a powerful jab.
That's one minute gone in the round.
Bigglesworth lands a beauty of a right hand that gets the crowd cheering.
Leonard displays some good footwork, moving neatly out of range as Bigglesworth throws out the jab.
Bigglesworth thows a body shot but no joy.
Bigglesworth thows a left - swing and a miss!
Bigglesworth showing good head movement there, avoiding the strikes from Leonard.
Bigglesworth throws a right hand that Leonard ducks under and follows up with a left that Leonard also avoids with ease.
Some wild striking there from Bigglesworth.
Bigglesworth fails to land with a series of punches.
A big left from Bigglesworth misses.
Leonard gets cracked with a nice right hand there by Bigglesworth.
Dandy Bigglesworth is looking to keep the fight on the feet at all costs.
Leonard throws a hook to the side of Bigglesworth's head but Bigglesworth sees it coming and ducks under it beautifully.
A jab from Leonard misses.
Leonard blocks a jab.
That's two minutes gone in the round.
My god... these two guys really need to pick up the pace or everyone will leave to go get a beer.
Leonard swings and misses with a hook to the body.
Bigglesworth throws a jab but it's blocked by Leonard.
Bigglesworth scores with a big left there. The judges will like that one.
Bigglesworth walks into a jab.
Leonard takes a solid shot to the body. That one hurt him but he's trying not to show it.
Bigglesworth looks to land a left hand but Leonard moved out of range nicely.
Bigglesworth misses with a double jab
enabling Leonard to counter with a crisp jab.
A slow jab from Leonard misses its intended target.
Leonard swats away the attempt to clinch by Bigglesworth.
Bigglesworth fakes high and swings low for a body shot but Leonard manages to avoid it.
Bigglesworth misses with an uppercut. Leonard saw that one coming.
Leonard misses with an uppercut.
Bigglesworth walks into a straight right hand from Leonard.
That's three minutes gone in the round.
Bigglesworth misses with a telegraphed body shot
and Leonard counters with a one-two to the body.
Bigglesworth bobs and weaves and unloads with a good uppercut.
Leonard keeping a good distance there, avoiding the body shot.
Bigglesworth darts in and out, connecting with a jab.
Bigglesworth misses with a looping right.
Bigglesworth throws a one two combo.
Bigglesworth tries to clinch up
and Leonard counters with a stiff right hand.
Bigglesworth throws a jab but it's blocked by Leonard.
Bigglesworth doesn't react quick enough there as he takes a shot to the body.
Bigglesworth throws a shot from downtown. Leonard moves away and avoids it.
Bigglesworth missing with a left hand there. Leonard was out of range so wasted energy throwing that one.
A jab from Leonard misses.
Leonard avoids the body shot from Bigglesworth.
Dandy Bigglesworth is winning the standup battle so far.
That's four minutes gone in the round.
Bigglesworth misses with a wild combination.
Bigglesworth takes a shot to the body in his stride.
Leonard shoots in for a takedown and gets it. Oh and he's advanced to full mount straight away.
Bigglesworth gets back to half guard.
Nuriel Leonard has got the better of the ground game so far.
Bigglesworth tries to kick Leonard off but Leonard keeps his base steady and stays in half guard.
The two fighters exchange a few words. I couldn't hear what they were saying but maybe it's more fun if you make it up yourself. Leonard connects with a nice short shot to Bigglesworth's temple.
The fighters are battling for position here. Bigglesworth manages to regain full guard. Nice work.
Leonard trying to pass the guard but can't manage it just yet.
Leonard takes a big intake of breath there - he's definitely tired.
Bigglesworth looking to hit a scissor sweep but Leonard is one step ahead there.
Leonard keeps in close for a moment and lands a decent shot to the side of Bigglesworth's head.
Bigglesworth wants to stand but Leonard is controlling the position.
And thats the end of the round the fighters go back to their corners.
That was a close round but Dandy Bigglesworth did the better work so I'd imagine he'll take it.
That's the end of the interval. I'm sure that seemed a lot quicker than a minute for our two fighters! Back to the action.

Bigglesworth rushes forward with a series of wild hooks but Leonard moves out of range and avoids them all easily.
Leonard keeping a good distance there, avoiding the body shot.
Bigglesworth lands a glancing blow to the side of Leonard's head.
Bigglesworth ducks under a wild hook from Leonard.
Bigglesworth throws a combination but comes up with nothing but fresh air.
Leonard moves away from the strike by Bigglesworth.
Bigglesworth moves away from the strike by Leonard.
Bigglesworth throws an uppercut from half a mile away. Leonard sees it coming and avoids it easily.
Bigglesworth avoids a punch combination nicely.
We've had a slow start to the round here - hopefully the action picks up.
Bigglesworth misses with a looping right.
Leonard lands with a good body shot.
Leonard scores with the left hand. Bigglesworth knows he should have avoided that one.
Leonard fakes high and shoots in for a takedown but Bigglesworth avoids it really well and circles away.
That's one minute gone in the round.
Bigglesworth misses the shot to the body.
Leonard tries to land with a swinging hook to the body but Bigglesworth was well out of range. Poor timing from Leonard.
Bigglesworth lands with a nice body punch.
Leonard takes a shot right to the bread basket.
Leonard bobs and weaves well there to avoid the strikes.
Bigglesworth takes a swing at Leonard's ribcage but misses.
Bigglesworth throws a hook to the body but it doesn't connect.
Leonard gets cracked with a nice right hand there by Bigglesworth.
Leonard clobbers Bigglesworth with an overhand right that has the crowd gasping. That made a horrendous noise.
Bigglesworth swings for the body but Leonard moves out of range.
Leonard moves out of range as Bigglesworth strikes.
Leonard throws a shot to the body.
Bigglesworth blocks a jab.
That's two minutes gone in the round.
Leonard looks shocked there as he takes a right hand to the temple.
Bigglesworth looks to throw the jab but Leonard is out of range.
Leonard avoids the body shot from Bigglesworth.
Bigglesworth fakes and then throws a beautiful body shot. Leonard looks a bit winded and takes a step backwards to take a breath.
Leonard circles away from the clinch attempt.
Bigglesworth wants to clinch but Leonard slips to the side
and Leonard counters with a crisp hook to the side of the head.
Bigglesworth ducks under a wild hook from Leonard.
Leonard throws a hook but Bigglesworth blocks it.
Leonard slips under a jab from Bigglesworth.
Bigglesworth will need to tighten up his combinations if he doesn't want to gas himself out, swinging at thin air.
Leonard scores a trip takedown into side control. Nice.
Leonard is trying to ground and pound but Bigglesworth uses the momentary lack of control by Leonard to regain half guard.
Leonard wants to pass to mount but Bigglesworth is defending the position.
Leonard is absolutely dripping with sweat - he looks exhausted.
That's three minutes gone in the round.
Bigglesworth is looking to improve his position.
Leonard has decided to stand back up but his arm is trapped. Whilst he's worrying about his arm, Bigglesworth works to full guard.
Bigglesworth lands a beautiful switch and he's in full mount! That could spell trouble for Leonard!
Bigglesworth avoids the attempt from Leonard to control.
Bigglesworth lands with some strikes.
Bigglesworth looking to control but Leonard is working nicely, looking to advance position himself.
Leonard tries to hold on but Bigglesworth pushes him away.
That's four minutes gone in the round.
A lull in the action here being met with boos from the crowd.
Bigglesworth looking to control but Leonard is working nicely, looking to advance position himself.
Leonard really trying hard to get back to half guard here.
Bigglesworth tries to control but Leonard wriggling away.
Leonard in a bad spot here, taking shots to the head.
Bigglesworth wants to control the pace but Leonard is squirming around nicely.
Leonard is wriggling around trying to escape.
Bigglesworth landing strikes from the mount and Leonard is in trouble!
Leonard is in all sorts of trouble here.
And thats the end of the round the fighters go back to their corners.
Dandy Bigglesworth had his way with Nuriel Leonard in that round.
The fighters get back to their feet, the hooter sounds and we're back to the action! This is the final round!

Leonard misses with a wild body shot.
Bigglesworth is the aggressor but that punch slipped nicely by Leonard.
Bigglesworth looks to land a right hand but Leonard moved out of range.
No joy there for Bigglesworth, who threw a few shots but didn't land.
Bigglesworth fakes high and swings low for a body shot but Leonard manages to avoid it.
Leonard drops his hands and takes a jab to the jaw for his troubles.
Leonard throws a looping overhand right but Bigglesworth ducks down to avoid it.
Bigglesworth misses with a telegraphed body shot
and Leonard counters with a straight right hand.
A big right from Bigglesworth misses.
Leonard throws a combination but comes up with nothing but fresh air.
We've had a slow start to the round here - hopefully the action picks up.
A jab from Bigglesworth misses.
Bigglesworth comes forward and lands a shot to the body, then darts back out of range.
Bigglesworth misses with a two punch combination.
Bigglesworth connects with a body shot.
Bigglesworth tries to clinch but is not successful on this occasion.
Leonard is wobbling all over the place through exhaustion. Will he make it to the final bell?
That's one minute gone in the round.
Bigglesworth lands a straight punch to the body, keeping Leonard at a distance.
Some wild striking there from Leonard.

Bigglesworth darts in and clinches Leonard up against the cage.
Bigglesworth misses with the head strike.
Bigglesworth fails to pull the fight into his guard.
Nice body punch from Leonard.
A hook to the body from Bigglesworth.
Leonard looks like he'd prefer to be striking at range right now.
Bigglesworth tries to jump guard but he falls flat on his backside. Leonard smiles and moves away.
Leonard ducks under an overhand right and circles away with a smile on his face.
Bigglesworth throws an overhand right that lands on Leonard's shoulder, as Leonard tries to avoid the shot.
Bigglesworth misses with a double jab
and Leonard counters nicely by changing levels and landing a hook to the body.
Bigglesworth misses with a wild body shot.
That's two minutes gone in the round.
A big left from Leonard misses.
Bigglesworth moves into range and clinches up with Leonard.
Bigglesworth is pressed up against the cage. Leonard has hold of a leg and is looking to drag Bigglesworth down to the mat. Bigglesworth avoids the attempt though and has circled away. We're back to striking at a distance.
Bigglesworth misses with a jab to the body
and Leonard counters with a quick right hand to the jaw.
Bigglesworth misses with a wild body shot.
Leonard has his head slapped from side to side by a 3 punch combination. That must have hurt him.
Leonard misses with a hook.
Bigglesworth stuns Leonard with a nice body shot, before stepping back out of range.
Bigglesworth connects with a looping left hand that seems like it dazed Leonard momentarily.
Bigglesworth misses with a straight left.
Bigglesworth lands a really nice looking cross but Leonard seems unphased.
Bigglesworth misses with a hook. Leonard ducked under it nicely.
Leonard misses with a hook.
Leonard misses with a looping right.
Bigglesworth fails to land with a series of punches.
That's three minutes gone in the round.
Bigglesworth dips down and scores with a jab to the body.
Bigglesworth looks to land a right hand but Leonard moved out of range.
Bigglesworth misses with a straight right.
Leonard slips under a jab.
A telegraphed right hand from Bigglesworth misses the target.
Bigglesworth sizes up Leonard with a pawing jab and scores with a straight right down the middle.
Bigglesworth looks to score with a combo but nothing lands.
Bigglesworth tries to clinch but fails miserably
enabling Leonard to counter with a crisp jab.
Bigglesworth misses with a few strikes there.
Nice shot lands for Bigglesworth.
Leonard keeps the fight on the outside.
Leonard fails to land with a series of punches.
Leonard tries to score a power double leg takedown but Bigglesworth sees that one coming and sprawls well. That will dishearten Leonard somewhat.
Bigglesworth misses with an uppercut. Leonard saw that one coming.
That's four minutes gone in the round.
A slow jab from Bigglesworth misses its intended target.
A jab from Bigglesworth misses.
Bigglesworth closes the distance looking to clinch
and Leonard counters with a good right hand that lands right on the jaw.
Nice shot lands for Bigglesworth.
Bigglesworth lands with a shot to the body.
Bigglesworth throws a big shot that misses.
Bigglesworth throws a shot from downtown. Leonard moves away and avoids it.
Bigglesworth loads up on a big right hand but Leonard slips the punch.
A punch combination from Bigglesworth misses.
Bigglesworth just misses with a punch to the body.
And that's the end of the fight!
Dandy Bigglesworth showed his dominance in that final round.
I think Bigglesworth has won this one but let's see what the judges have to say. Over to the ring announcer for the scorecards.
Ladies and gentlemen, after 5 rounds of action, we go to the scorecards for a decision.
Judge Albert Achterberg scores the fight 48:47
Judge Daniel Blasius scores the fight 48:47
Judge Paulsen Ambrosius scores the fight 48:47
In favor of your winner, by unanimous decision... Dandy Bigglesworth!
Dandy Bigglesworth retains his bantamweight title!
|
|
|
|
|
|
|
|
|
|
|
|
|
|
|
|
|
|
|
|
|
|
|
| S |
C
A |
G |
S |
C
B |
G |
|
S |
C |
G |
|
energy
A | B |
|
hype
A | B |
|
pop
A | B |
|
mgr
A | B |
|
FIGHT
RATING
76% |
|
|
|
|
|
|
