|
|
PBP Commentary |
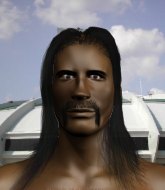
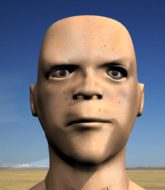
Coming up we have a middleweight MMA rules bout between Daniel Eggleston (ranked 0 p4p, 0 weight class) and Dai Hard (ranked 0 p4p, 0 weight class). Both fighters look fresh as a daisy as they make their way towards the cage.
 |
|
 |
| 187 cm
25
190 lbs
2 - 1 - 0 |
|
180 cm
19
185 lbs
2 - 1 - 0 |
Decent wrestler
Basic striking
Cuts easily |
|
BJJ Purple Belt
Basic striking
Tends to cut |
|
| |
|
Ladies and gentlemen. This fight is 3 rounds, in the middleweight division.
Introducing the fighter to my left, fighting out of the red corner.
With a record of
2 - 1 - 0, fighting out of London, Daniel Eggleston!
And introducing the fighter to my right, fighting out of the blue corner.
With a record of
2 - 1 - 0, fighting out of London, Dai Hard!
The judges for this bout are Donald Grub, Richard Clark and Colin Fotheringham.

The bell rings for round one and we are underway!

Eggleston shoots in for a takedown! He's got it and he's managed to land in full mount! That's better than Eggleston was expecting from the takedown attempt, I'm sure!
Eggleston sends his fist crashing into the mat - the crowd let out a collective ooooooh. Let's hope he's not broken it!
Eggleston knows he needs to get back to his feet asap. He's simply no match for Hard on the ground.
Hard is squirming around, avoiding Eggleston's attempts to control the action.
Hard is desperately trying to get back to half guard.
A nice elbow there by Eggleston.
Hard is working to get back to half guard.
Eggleston landing punches.
Eggleston lands a big shot there that rocks Hard but he's holding on and managing to survive for now.
Hard wants to control but Eggleston is having none of it.
Eggleston is still in mount, landing shots to his trapped opponent. Hard can't stay in a position like this for much longer.
Eggleston looking to ground and pound his opponent to a finish here.

It looks like Dai Hard has been cut.
Hard sneaks a leg under to get to half guard.

That's one minute gone in the round.
Eggleston missing with some ground and pound from the half guard.
Eggleston prevents Hard from improving his position.
Hard is staying active underneath Eggleston, who seems content to just control the action from this position.
Eggleston working to pass to mount. He's got his hand pressing down on Hard's thigh. Hard counters though and makes it back to full guard.
Eggleston stands up and looks to throw the legs aside to pass to side control. Hard swivels though and keeps the full guard.
Hard tries to land a sweep but no joy.
There's a bit of a scramble here and now Hard is on top in guard.
Hard in full guard, throwing the ground and pound. No damage this time.
Hard throws a strike but Eggleston rolls with it and manages to sweep. Now he's in guard on top.

That's two minutes gone in the round.
There's not a lot going on here and the crowd are letting the fighters know they're not willing to tolerate a lack of action.
The fighters are starting to get a bit slippery now, which will make submissions a bit more difficult.
Eggleston forces his way into half guard.
Hard is trying to stand up here but Eggleston is controlling him well.
Hard trying to control but Eggleston postures up.
Eggleston looks to land a strike but Hard avoids it nicely and regains full guard.
Hard keeping moving, preventing Eggleston from controlling successfully.
Eggleston pressing down on his opponent's thigh, looking to pass guard. Hard is keeping the position for now.
Hard throws some sloppy strikes off his back.
Hard is trying to control the position but Eggleston postures up.
Hard keeping moving, preventing Eggleston from controlling successfully.

The referee decides to stand the fighters back up.
A solid leg kick lands there for Eggleston.

That's three minutes gone in the round.
Hard misses with a hook.
Hard walks into a straight right hand from Eggleston.
Nice defenses there by Eggleston.
A swing and a miss from Hard.
Eggleston misses with a body shot.

Eggleston moves into the clinch.
Knees in the clinch landing for Eggleston.
Hard scores with a shoulder strike.
Eggleston blocks a couple of punches on the inside.

Eggleston escapes the clinch and we're back to striking.
Eggleston takes a jab on the nose. He smiles like he loves it and keeps coming.
Hard pushing out the jab but it's not landing.
Eggleston tries to shoot in for a takedown. He's got hold of a leg but Hard swivels and escapes.
Eggleston walks into a stiff left hand from Hard.
Dai Hard seems to be the more aggressive standup fighter in this bout.
Hard moves into the clinch successfully.
Hard blocks a knee to the body. He'll have a nicely bruised forearm in the morning.
Hard working aggressively here.
Eggleston has Hard pressed up against the cage and is working for takedown. Hard manages to improve position though and keeps the fight standing.
Eggleston is breathing heavily.
Hard drops to a knee looking for a takedown but Eggleston gets the underhooks and prevents it.
Hard swings away with an uppercut that misses.

That's four minutes gone in the round.
Hard wants to strike at distance but he can't break free of the clinch.
Eggleston taking a breather.
Hard working hard to break the clinch.
Eggleston lands a nice knee to the body.
Hard prevents a takedown attempt there.
That's three failed takedown attempts in the round for Daniel Eggleston. That's going to take a lot out of him.
A battle for position here, against the cage.
Hard tries to score a body lock takedown but Eggleston shows good agility there to stay on his feet.
Hard misses with the head strike.
Eggleston utilising his Muay Thai to score with a knee to the body.
Hard can't get the takedown.
Hard stalling the fight.
Eggleston tries for a takedown but Hard manages to get underhooks.
Hard lands a nice uppercut.
Hard on the defensive, avoiding the knees to the body.
Hard fails to land with a short punch on the inside.
Hard working aggressively here.
Hard makes some space for himself and lands an uppercut.
A head punch on the inside from Hard fails to land.
Hard avoiding damage as Eggleston throws knees to the body.
Hard wants to break the clinch but can't.
And thats the end of the round the fighters go back to their corners.
Daniel Eggleston dominated that round.
The cut man is working on Dai Hard's cut.
Well, the break between rounds is over. Let's get back to the scrappin!

Hard takes the fight into the clinch.
Eggleston goes for a takedown in the clinch but Hard prevents it.
Eggleston tries for a takedown but Hard manages to get underhooks.
Eggleston tries for a takedown but Hard manages to get underhooks.
That's three failed takedown attempts in the round for Daniel Eggleston. That's going to take a lot out of him.
Eggleston tries to land a knee to the body but he is off balance and Hard avoids it.
Eggleston blocks an uppercut.
Hard is looking to control Eggleston's arms but Eggleston gets an underhook and turns him. Now Hard has his back to the cage.
Hard misses with some punches.
Eggleston is looking to score with knees to the body. Maybe he'll change it up and go body then head. Hard is defending well for now.
Hard working some nice short punches in the clinch.
It looks like Daniel Eggleston has been cut.
Hard wants to break free. God knows he wants to breaaaak freeee.
Eggleston is trying to work out of this bad position, with his back against the cage.
Hard wants to strike at distance but he can't break free of the clinch.
Hard misses with a hook from the clinch.
Hard has Eggleston pressed up against the cage and is working for takedown. Eggleston manages to improve position though and keeps the fight standing.
Hard throws a punch but it's blocked by Eggleston.
Both fighters are absolutely exhausted here.
Eggleston is trying to slow down the pace in the clinch, to catch his breath.
Hard has Eggleston pressed up against the cage and is working for takedown. Eggleston manages to improve position though and keeps the fight standing.
Eggleston's corner calls for him to break the clinch, which he does.
Hard throws a lazy right hand but Eggleston sees it coming a mile off and sidesteps it easily.
Eggleston swings away with a leg kick that misses.
That's one minute gone in the round.
Hard closes the distance, clinches up and gets a nice trip takedown into side control. Very smooth.

Hard is looking to finish here, going for an Americana. Eggleston knows the correct defense though, so he's OK.
Eggleston is trying to get back to half guard.
Hard working away diligently from side control. Landing strikes effectively there - that will score him some points on the judges scorecards.
Hard fails to land a wild elbow strike.
Hard is trying to land an Americana. He has the arm isolated but Eggleston is keeping cool and he's avoided the danger for now.
Hard throwing ground and pound but whilst doing so, he forgets to control position and Eggleston works his way back to half guard. Good composure under pressure.
That's two minutes gone in the round.
Hard thows a huge punch but Eggleston dodges it nicely.
Eggleston trying to hold on to Hard's head to control him but Hard postures up.
The fighters are pressed up against the cage, both looking to find a bit of space to work.
Hard lands with an elbow from half guard - that looked like it hurt.
Hard throwing punches and elbows but they're not doing any damage.
Hard has freed up his trapped foot and advances to mount.
Hard fakes a shot to the body and cracks his opponent in the head. Nice ground and pound there!
That's three minutes gone in the round.
Hard thowing strikes but they're hitting the gloves, not doing any damage.
Hard throwing strikes here but Eggleston is writhing around nicely and avoiding any serious damage.
Hard throwing shots from mount but they're not landing.
Hard prevents Eggleston from getting the reversal.
Hard throws some wild stikes that Eggleston manages to avoid easily.
Hard fakes a shot to the body and cracks his opponent in the head. Nice ground and pound there!
Eggleston is writhing around trying to get back to his feet.
Hard punching from mount but Eggleston doing a good job of avoiding damage.
Eggleston on his back here. We all know that wrestlers don't like being on their back so let's see if Eggleston tries to get out of the position.
Eggleston working to try and regain half guard.
That's four minutes gone in the round.
Neither fighter has done anything of merit for a good minute or two here and the crowd are not happy about it.
Hard with shots to the head and body - Eggleston looks very uncomfortable down there.
Hard can't quite control the action as he would like just now, as Eggleston is looking to escape.
Hard has the superior BJJ but he's also working some ground strikes into his gameplan.
Hard scores with a couple of good head shots there.
Hard throwing strikes here but Eggleston is writhing around nicely and avoiding any serious damage.
Hard misses with a head shot.
Hard can't quite control the action as he would like just now, as Eggleston is looking to escape.
Eggleston is in a horrible position here. Hard smacks him with another shot as he tries to escape the position.
And thats the end of the round the fighters go back to their corners.
Dai Hard showed his class in that round. I'd imagine he'll take it on all the scorecards.
Both fighters have cut men working on them during the interval.
That's time! Back to the action! This is the final round!

Eggleston stumbles momentarily as he takes a strong leg kick from Hard.
Daniel Eggleston's cut is getting worse.
Hard tries to clinch up.
Eggleston scoring well with a low kick there.
Eggleston shoots in for a takedown. "Ole!" shouts Hard as he jumps to the side.
Hard throws a two punch combo that lands nicely.
Jeez, Daniel Eggleston's cut is really nasty now. The referee must be thinking about getting that checked.
No luck with that takedown attempt from Eggleston.
Eggleston fails in his attempt to clinch.
Hard doesn't manage to clinch there - Eggleston circles away.
Hard throws a shot from downtown. Eggleston moves away and avoids it.
Eggleston bobs and weaves well there to avoid the strikes.
Eggleston bobs and weaves well there to avoid the strikes.
Hard fakes with an overhand right and moves in to clinch with Eggleston, pushing him back against the cage.
Hard throws a punch but it's blocked by Eggleston.
Hard throws a hook to the body. More of an arm punch but it's all scoring with the judges.
A frustrated look appears on Hard's face as he tries to break the clinch.
Both fighters are breathing heavily.
Hard works for the underhooks and manages to get a trip takedown into guard.
Hard working some ground and pound from guard but it's not doing any damage.
Hard scores with a decent looking elbow strike.
That's one minute gone in the round.
Hard postures up in Eggleston's guard and throws a big left but Eggleston blocks it.
Hard in full guard, throwing the ground and pound. No damage this time.
The ref warns both fighters not to hold the cage as they work up against the meshing.
Eggleston has a closed guard, preventing Hard from standing up.
Eggleston avoiding any damage from the ground and pound.
Hard is working the ground and pound from guard. He might want to try advancing position though to get more of an impact.

Hard stands up from guard. Let's bang!
Eggleston takes a jab on the nose there. A little bit of blood seems to be coming out. Hopefully that won't affect his breathing.
Hard lands a nice shot that snaps Eggleston's head back.
Hard fails in his attempt to clinch.
Eggleston takes one to the side of the head.
Eggleston keeps the fight standing with a nice sprawl.
Eggleston circles away from the clinch attempt.
That's two minutes gone in the round.
Eggleston takes a head kick and keeps coming.
Eggleston wants to clinch.
Hard looks to land a combination but Eggleston avoids it well.
Hard scores with a nice strike.
A telegraphed right hand from Hard misses the target.
Hard tries to close the distance and clinch but Eggleston swats him to one side with an open hand palm strike and circles away.
Eggleston takes the fight into the clinch.
Hard drops to a knee looking for a takedown but Eggleston gets the underhooks and prevents it.
Hard gets through Eggleston's defenses to land a nice punch to the side of the head.
Hard has a body lock and is looking for a takedown. Eggleston is bouncing around trying to prevent the takedown and somehow he has indeed managed to stay on his feet.
Daniel Eggleston has stuffed three takedown attempts in the round now. That's going to take a lot out of Dai Hard.
Hard working on landing some head shots here - that one got through nicely.
A head punch on the inside from Hard fails to land.
Eggleston stalling in the clinch.
Hard looking for a takedown.
Hard prevents the takedown attempt.
That's three minutes gone in the round.
Hard is working for takedown but Eggleston is calmly controlling the position for now.
Hard ties up his opponent against the cage and manages to drag the fight down to the ground. Hard no doubt will be looking to work submissions from his guard.
Hard keeping moving, preventing Eggleston from controlling successfully.
Hard keeping full guard, as Eggleston tries to pass.
Eggleston in full guard, throwing the ground and pound. No damage this time.
Eggleston throwing elbows and punches but not connecting, as Hard works some decent striking defense from the bottom.
Hard has his feet on Eggleston's thighs here. He's pushed Eggleston off and worked for a very quick armbar from the bottom! He's flipped onto his stomach and he's cranking hard on the arm! Eggleston screams in pain and taps out! This one is all over!
Ladies and gentlemen, after 3:53 of round 3, we have a winner by way of Submission (Armbar). Dai Hard!
|
|
|
|
|
|
|
|
|
|
|
|
|
|
|
|
|
|
|
|
|
|
|
| S |
C
A |
G |
S |
C
B |
G |
|
S |
C |
G |
|
energy
A | B |
|
hype
A | B |
|
pop
A | B |
|
mgr
A | B |
|
FIGHT
RATING
83% |
|
|
|
|
|
|
