|
|
PBP Commentary |
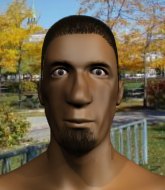
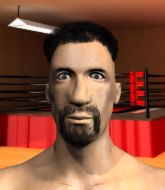
Coming up we have a light heavyweight MMA rules bout between Ryu Hoshi (ranked 0 p4p, 0 weight class) and Hado Ken (ranked 0 p4p, 0 weight class). I don't know about you partner, but I'm pumped for this one!
 |
|
 |
| 183 cm
25
199 lbs
3 - 7 - 0 |
|
195 cm
24
225 lbs
2 - 3 - 0 |
BJJ White Belt
Solid Muay Thai
KO power |
|
ADCC Champion
Decent boxing
Good gas tank |
|
| |
|
Ladies and gentlemen. This fight is 3 rounds, in the light heavyweight division.
Introducing the fighter to my left, fighting out of the red corner.
With a record of
3 - 7 - 0, fighting out of Tokyo, Ryu Hoshi!
And introducing the fighter to my right, fighting out of the blue corner.
With a record of
2 - 3 - 0, fighting out of Tokyo, Hado Ken!
The judges for this bout are Hirohito Nitta, Ren Mimura and Yasuomi Hirokawa.

The bell rings for round one and we are underway!
Ken misses with a looping left.
Hoshi tries to close the distance and clinch but Ken swats him to one side with an open hand palm strike and circles away.
Ken lands the left hand.
Ken connects with a nice looking jab.
Hoshi doesn't manage to clinch there - Ken circles away.
Ken lands a powerful looking uppercut that connected with his opponent's jaw.
Ken shoots in for a takedown. He's persisting with it as Hoshi sprawls well. Hoshi wins this battle and keeps the fight standing. Ken gets slowly back to his feet.
Hoshi tries to clinch there but Ken circles away.
A looping hook to the body misses from Ken. Hoshi does a little dance to reset his feet.
Hoshi takes one on the chin but seems OK.
Ken misses with a body shot.
Hoshi moves forwards but Ken connects with a nice, crisp jab.
Ken cracks Hoshi with a good jab.
Ken circles away from the clinch attempt.
Ken closes the distance and clinches up with Hoshi, looking for a takedown. Ken pushes Hoshi against the ropes but Hoshi circles to the side and manages to break the clinch.
Hoshi doesn't manage to clinch there - Ken circles away.
Ken fails to land the takedown.
Ryu Hoshi has stuffed three takedown attempts in the round now. That's going to take a lot out of Hado Ken.
Hoshi walks into a jab.

That's one minute gone in the round.
Ken swats away the attempt to clinch by Hoshi.
Hoshi is looking to take this fight into the clinch.
Ken fails with a takedown attempt.
Ken looks to score with a combo but nothing lands.
Ken is using his reach advantage to land shots from outside his opponent's range.
Hoshi tries to close the distance and clinch up against the ropes but Ken paws at him with a jab and circles away.
Hoshi ducks under a wild hook from Ken.
Hoshi wants to clinch up but Ken keeps it at a distance.
Hoshi on the wrong end of a vicious looking body shot.
Hoshi slips a jab from Ken.
Hoshi is looking to clinch but Ken is avoiding it.
The fight stays on the outside here - Hoshi looks like he's thinking about clinching though.
Ken lands a lovely overhand right.
Ken lands with a nice body punch.

That's two minutes gone in the round.
Ken swats away the attempt to clinch by Hoshi.

Hoshi darts in and clinches Ken up against the ropes.
Hoshi tries to land a knee to the head but Ken blocks with his arms.
Hoshi throws a vicious knee straight up the middle but Ken blocks it with crossed arms.
Ken on the defensive, avoiding the knees to the body.

Ken breaks the clinch and we return to the middle of the mat.
Ken misses with a looping left.
Ken fakes high and swings low for a body shot but Hoshi manages to avoid it.
Hoshi with poor footwork there. He got himself in a bit of a tangle, enabling Ken to score with a decent uppercut.
Hoshi wants to clinch.
Ken throws a low kick but it's checked well by Hoshi.
Hoshi moves in looking to clinch but Ken pushes him off.
Ryu Hoshi is looking to keep the fight on the feet at all costs.
Ken comes forward and lands a shot to the body, then darts back out of range.
Hoshi tries to clinch up.
Hoshi wants to clinch.

That's three minutes gone in the round.
Ken waving his hands out in front of him, looking to distract Hoshi.
The fight moves into the clinch position.

Ken pulls guard effortlessly.
Ken trying to strike from the bottom but really, it's not the best position to be doing that from!

Ken working from the bottom, still in full guard. He's managed to get a loose triangle. Hoshi doesn't seem to be doing much to defend here, obviously he feels comfortable in the position. Hoshi manages to throw the legs off his shoulder and he's back into guard - no problem.
The fighters are trapped in the ropes so we're going to have a reposition here. The ref calls for a break and repositions the fighters in the center of the ring.
Hoshi wanted to stand there but Ken had control of the position.
Ken has managed to work for a loose triangle. I think Hoshi should be able to defend this one pretty easily though. Oh, Ken has tightened it up now! Hoshi should have reacted faster there - he's in big trouble and yes, he's tapped out! This one is all over!
Ladies and gentlemen, after 4:01 of round 1, we have a winner by way of Submission (Triangle). Hado Ken!
|
|
|
|
|
|
|
|
|
|
|
|
|
|
|
|
|
|
|
|
|
|
|
| S |
C
A |
G |
S |
C
B |
G |
|
S |
C |
G |
|
energy
A | B |
|
hype
A | B |
|
pop
A | B |
|
mgr
A | B |
|
FIGHT
RATING
57% |
|
|
|
|
|
|
