|
|
PBP Commentary |
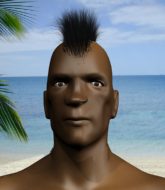
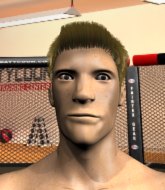
Coming up we have a light heavyweight MMA rules bout between Wallie Bundabe (ranked 0 p4p, 0 weight class) and Adam Beasley (ranked 0 p4p, 0 weight class). Beasley is bobbing his head along to his entrance song: Metalingus . Wallie Bundabe could well score a knockout today. He has the power to get to Adam Beasley's chin.
 |
|
 |
| 190 cm
22
203 lbs
1 - 1 - 0 |
|
200 cm
18
205 lbs
2 - 1 - 0 |
BJJ Purple Belt
Brawler
KO power |
|
BJJ Blue Belt
Brawler
Very confident |
|
| |
|
Ladies and gentlemen. This fight is 3 rounds, in the light heavyweight division.
Introducing the fighter to my left, fighting out of the red corner.
With a record of
1 - 1 - 0, fighting out of Los Angeles, Wallie Bundabe!
And introducing the fighter to my right, fighting out of the blue corner.
With a record of
2 - 1 - 0, fighting out of Los Angeles, Adam Beasley!
The judges for this bout are , and Jack Bonds.

The bell rings for round one and we are underway!
Donk. Beasley catches Bundabe right on the button with a cross.
Bundabe tries to clinch but is not successful on this occasion.
Beasley stalks Bundabe and leaps in with a furious combination of punches. Uppercuts and crosses smash into Bundabe's face. Bundabe staggers backwards, shaken.
Bundabe tries to close the distance and clinch up but Beasley swats him away and circles back towards the center.
Bundabe tries to clinch up but Beasley circles away and keeps his distance.
Bundabe tries to close the distance and clinch but Beasley swats him to one side with an open hand palm strike and circles away.
Beasley goes to the watering hole and comes back with a big thumbs up from the judges as he scores a three punch combo.
Beasley looks to score with a jab to the body but Bundabe is just out of range.
Bundabe looking to throw a kick but he's pulled out of it.
Bundabe is looking to take this fight into the clinch.
Bundabe misses with a head kick.
Bundabe is looking to clinch but Beasley is avoiding it.
Bundabe tries to close the distance and clinch up against the cage but Beasley paws at him with a jab and circles away.
Bundabe throws a right hand that Beasley ducks under and follows up with a left that Beasley also avoids with ease.

Beasley has taken the fight to the clinch.
Beasley wants to push off and get back to the center of the mat but Bundabe has him pressed against the cage.
Beasley avoiding damage as Bundabe throws knees to the body.

Bundabe wants the takedown. Beasley is fighting it off but Bundabe persists and manages to bring the fight to the ground, ending up in Beasley's guard against the cage.
Wooooo! Give it up for these two warriors! They are putting on a show!
Bundabe prevents Beasley from getting back to his feet.
Bundabe trying to control but Beasley is working from the bottom.

That's one minute gone in the round.
Beasley is looking to stand up but Bundabe isn't so interested in that idea.

Beasley has his feet on Bundabe's hips. He pushes off and gets to his feet. Nice work.
Bundabe defending well as Beasley loads up on a big left hand.
Bundabe tries to clinch up
and Beasley counters with a three punch combo that has Bundabe backing up. Bundabe nods at Beasley to acknowledge the strikes.
Bundabe wants to clinch but Beasley slips to the side
and Beasley makes him pay by landing a nice hook to the body before moving out of range.
Bundabe darts in trying to clinch
and Beasley counters with a nice jab to the body that keeps Bundabe thinking.
Beasley misses with a few strikes there.
Bundabe tries to shoot in for a takedown. He's got hold of a leg but Beasley swivels and escapes.
Bundabe is breathing heavily.
Beasley swings for the body but Bundabe moves out of range.
Adam Beasley is looking to keep the fight on the feet at all costs.
Bundabe doesn't succeed with the takedown
and Beasley counters by moving into the clinch.

Beasley breaks the clinch and we're back to striking at distance.
Beasley throws a nice hook to the body that draws an oooh from the crowd.
Bundabe gets his head snapped back by a nice shot there.

That's two minutes gone in the round.
The crowd are loving this. Great action here.
Beasley connects with a crisp jab.
Bundabe gets to the clinch - let's see what his plan is here.
Beasley breaks from the clinch.
Bundabe ducks under a wild hook from Beasley.
Bundabe avoids a punch combination nicely.
Bundabe tries to grapple but his opponent circles
and Beasley holds on and brings the fighters into a clinch.
Beasley breaks the clinch.
Wow, both these guys are really going for it!
Beasley misses with a body shot. Nice footwork from Bundabe.
Bundabe tries for a takedown but Beasley circles away easily
and Beasley counters with a lovely shot to the body.
That's three failed takedown attempts in the round for Wallie Bundabe. That's going to take a lot out of him.
Beasley misses with a body shot. Nice footwork from Bundabe.
Bundabe changes levels and looks for a double leg takedown. Beasley tries to avoid it but Bundabe manages to keep hold of a leg and drag Beasley to the ground. Beasley escapes though and pops straight back up to his feet.
Beasley just misses with a punch to the body.
Bundabe tries to clinch but fails miserably
and Beasley moves into the clinch.
Bundabe throws a nice elbow but it doesn't land.
Bundabe lands an elbow inside that Beasley shrugs off.
Beasley dodges an elbow strike from Bundabe.
Bundabe is looking for a takedown up against the cage. Beasley gets underhooks though and prevents the takedown attempt.
Bundabe throws an elbow that misses.
The two fighters are working to gain dominance in the clinch.

That's three minutes gone in the round.
Beasley wants to get back to striking at distance but Bundabe won't allow it.
Bundabe has clasped his hands together around Beasley's back... aaand, he's got a takedown into side control. Nicely done.
Bundabe trying to control the action but Beasley is working from the bottom.
Bundabe decides to take the fight back to the feet.
Bundabe doesn't succeed with the takedown
and Beasley counters with a body kick that brings a smile to the face of both fighters.
Beasley clinches up with Bundabe and pushes him back against the cage.
Bundabe goes for a body shot but it's blocked.
Beasley avoids the elbow strike from Bundabe, against the cage.
Bundabe tries to jump guard but he falls flat on his backside. Beasley smiles and moves away.
Bundabe tries to clinch there but Beasley circles away.
Bundabe fails in his attempt to clinch.
Beasley is throwing a lot of body shots here, looking to wear down Bundabe rather than just go for the knockout.

That's four minutes gone in the round.
Beasley fails in his attempt to clinch.
Bundabe wants to clinch.
Bundabe has Beasley up against the cage in a clinch.
Beasley managing to block the knees to the body from Bundabe.
Beasley gets underhooks to prevent Bundabe's takedown attempt.
Bundabe creates a bit of distance and throws an elbow that only just misses.
Beasley is looking to break free of the clinch but Bundabe has double underhooks.
Bundabe has Beasley pressed up against the cage and is working for takedown. Beasley manages to improve position though and keeps the fight standing.
Bundabe tries to land knees in the clinch but Beasley avoids the damage to the body.
With the fighters up against the cage, Bundabe throws an elbow but misses.
Beasley prevents a takedown attempt there.
Bundabe throws an elbow that misses.
As the round comes to an end the crowd are showing their appreciation for a great round of action.
Bundabe missing with knees to the body.
Bundabe lands a nice elbow from the clinch.
Beasley gets double underhooks to prevent a takedown attempt from Bundabe.
Beasley avoids the elbow strike from Bundabe, against the cage.
And thats the end of the round the fighters go back to their corners.
Adam Beasley dominated that round.
OK. That's time! The bell goes and we're back to the action.

Bundabe drives through and clinches with Beasley against the cage.
Bundabe has a body lock and is looking for a takedown. Beasley is bouncing around trying to prevent the takedown and somehow he has indeed managed to stay on his feet.
Bundabe tries a knee to the head but he's missed.
Beasley is trying to work out of this bad position, with his back against the cage.
Beasley wants to get back to striking at distance but Bundabe won't allow it.
Beasley manages to break the clinch.
Bundabe is looking to clinch.
Bundabe wants to clinch.
Beasley pushing out the jab but it's not landing.
Beasley lands a nice looking body shot.
Beasley just misses with a punch to the body.
Bundabe tries to clinch up but Beasley circles away and keeps his distance.
Beasley misses with a body shot.
Beasley clinches.
Bundabe jumps guard and drags Beasley to the mat. He's obviously going to be looking for submissions off his back.
Beasley wants to stand but Bundabe has a closed guard, so he can't escape.
Bundabe is working an open guard so Beasley takes the opportunity to get back to his feet.
Beasley is breathing heavily.
Beasley misses with a hook. Bundabe ducked under it nicely.
That's one minute gone in the round.
Bundabe is looking to clinch.
Beasley throws a combination but comes up with nothing but fresh air.
Bundabe fails with an attempt to clinch.
Bundabe tries to clinch but Beasley is having none of it.
Beasley drives through and clinches with Bundabe against the cage.
Bundabe misses the knee to the body. Nice hip positioning from Beasley.
Bundabe lands a glancing elbow in the clinch.
Bundabe trying to land knees to the body.
Beasley wants to break free. God knows he wants to breaaaak freeee.
Bundabe scores a nice knee to the body.
Bundabe throws a nice elbow but it doesn't land.
Bundabe swings wildly with an uppercut but Beasley uses good head movement to avoid it.
Bundabe fails to pull guard.
Bundabe tries to pull guard but Beasley holds him up against the cage and eventually Bundabe drops back down to his feet.
That's three failed takedown attempts in the round for Wallie Bundabe. That's going to take a lot out of him.
Bundabe drops to a knee looking for a takedown but Beasley gets the underhooks and prevents it.
Beasley wants to get back to striking at distance but Bundabe won't allow it.
With the two fighters working up against the cage, Bundabe just misses with a elbow thrown towards Beasley's brow.
That's two minutes gone in the round.
There's not a lot going on here and the crowd are letting the fighters know they're not willing to tolerate a lack of action.
Bundabe lands a damaging elbow.
Bundabe landing some nice looking knees to the body.
Both guys are working to get underhooks.
Beasley avoids the elbow strike from Bundabe, against the cage.
Bundabe tries to pull guard but Beasley won't allow it.
Bundabe throws a head punch that misses.
Bundabe stalling in the clinch but Beasley improves position.
Beasley breaks the clinch and we return to the middle of the mat.
Bundabe tries to clinch but fails miserably
and Beasley counters with a shot to the ribs. That looked like it hurt.
Adam Beasley seems to be getting the better of the standup.
Nice defenses there by Bundabe.
Bundabe tries to clinch but Beasley moves away
and Beasley counters with a three punch combination, finished off with a leg kick. Nice work.
Bundabe doesn't manage to clinch there - Beasley circles away.
Bundabe closes the distance and gets a double leg, slamming Beasley to the mat! Beasley manages to get full guard.
Beasley wants to stand and escape but Bundabe is having none of it.
Beasley uses the cage to get back to his feet.
That's three minutes gone in the round.
Bundabe closes the distance and clinches up with Beasley, looking for a takedown. Bundabe pushes Beasley against the cage but Beasley circles to the side and manages to break the clinch.
Bundabe takes a body punch but keeps moving.
Beasley moves into the clinch successfully.
Bundabe has Beasley pressed up against the cage and is working for takedown. Beasley manages to improve position though and keeps the fight standing.
Bundabe throws a nice elbow but it doesn't land.
Bundabe unloads a knee to the mid-section. Beasley lets out a prehistoric sounding urrrrgh.
Bundabe tries to pull guard but can't drag his opponent to the mat. Beasley just stands there and leans against the cage.
Bundabe throws a nice elbow but it doesn't land.
A bit of stalling here from Bundabe.
Bundabe looking for a takedown.
Beasley breaks the clinch and we're back to striking at distance.
No joy there for Beasley, who threw a few shots but didn't land.
Bundabe looks for a takedown here. Will he get it? Beasley is fending him off so far but Bundabe persists. Nope, Beasley circles away and we're back to standing.
Bundabe takes a solid shot to the body. That one hurt him but he's trying not to show it.
Bundabe scores with a nice takedown into half guard. Let's see what he's got on the ground.
The ref warns both fighters not to hold the cage as they work up against the meshing.
Beasley is trying to stand.
That's four minutes gone in the round.
Bundabe is tying to control. Beasley wants to improve his position but can't escape this time.
Bundabe decides to stand up and try his luck on the feet.
Bundabe fails with an attempt to clinch.
Bundabe shoots in for a double leg but Beasley sprawls well. That's going to sap some energy.
Bundabe wants to clinch
and Bundabe takes a counter punch right on the button for his troubles.
The fight stays on the outside here - Bundabe looks like he's thinking about clinching though.
Bundabe tries to clinch up
and Beasley holds on and brings the fighters into a clinch.
The fans in attendance giving it up for the two fighters, who have really let it all hang out in the last minute or so!
Bundabe throws a nice elbow but it doesn't land.
Bundabe tries to take the fight to the ground by pulling guard but can't manage it.
Bundabe lands an elbow that stopped Beasley in his tracks for a moment.
Bundabe fails to land with a short punch on the inside.
The crowd applaud the fighters efforts here as the round comes to an end.
Bundabe misses with some punches.
Bundabe lands an elbow inside that Beasley shrugs off.
Bundabe scores a nice knee to the body.
Bundabe missing with knees to the body.
Beasley on the defensive, avoiding the knees to the body.
And thats the end of the round the fighters go back to their corners.
A close second round but Adam Beasley will probably get the nod - 10:9.
The corners get their ten second warning. Both fighters stand from their stools and stare eachother down, ready to get back to the action. And we move into the final round!

The fight moves into the clinch position.
Beasley breaks the clinch.
Bundabe misses with a takedown attempt
and Beasley counters with a two punch combo.
Beasley swats away the attempt to clinch by Bundabe.
Beasley scores with a body shot.
Beasley wings a very wild body shot but it does the job and lands to the midsection.
Bundabe throws a leg kick which misses Beasley's front leg but catches the back leg as Beasley tries to avoid it.
We've seen a great period of action over the last minute or so - credit to both fighters for leaving it all in the cage!
Bundabe forces Beasley back against the cage and clinches.
Bundabe is working for takedown but Beasley is calmly controlling the position for now.
Bundabe throws an elbow that misses.
Bundabe throws an elbow but it's blocked.
Bundabe prevents Beasley from breaking the clinch.
Beasley stops a takedown attempt from Bundabe.
That's three failed takedown attempts in the round for Wallie Bundabe. That's going to take a lot out of him.
Bundabe jumps guard but Beasley stands there with Bundabe around his waist. Bundabe gives up and drops back to his feet. We remain in the clinch.
Bundabe misses with a hook from the clinch.
Bundabe looking to slow down the pace here.
Bundabe looks to throw an elbow but misses.
Beasley blocks the elbow strike.
That's one minute gone in the round.
Bundabe misses the knee to the body. Nice hip positioning from Beasley.
Bundabe trying to stall but Beasley improves his position.
Bundabe breaks from the clinch.
Beasley gets a clinch.
Bundabe tries to throw a body punch but Beasley avoids it by throwing Bundabe back against the cage.
Beasley tries to break the clinch but Bundabe is controlling the position.
Beasley is trying to work out of this bad position, with his back against the cage.
Beasley wants to get back to striking at distance but Bundabe won't allow it.
Bundabe wants a takedown.
Beasley escapes the clinch and we're back to striking.
Bundabe takes a shot to the body in his stride.
Both fighters are breathing heavily.
Bundabe takes a solid shot to the body. That one hurt him but he's trying not to show it.
Bundabe closes the distance and takes a jab right on the nose as he does so.
Beasley lands a vicious shot with the stealth of a sniper and the strength of a viper. Are vipers that strong? I can think of lots of things that are stronger than a viper - not many rhyme with sniper though.
Bundabe shoots in but no luck this time.
Beasley blocks a head kick by Bundabe.
Bundabe avoids the body shot from Beasley.
Bundabe clinches but Beasley breaks the clinch
and Beasley counters with a nice jab to the body that keeps Bundabe thinking.
Bundabe is looking to take this fight into the clinch.
Bundabe tries to clinch but fails miserably
and Beasley counters with a stiff right hand.
Wooooo! Give it up for these two warriors! They are putting on a show!
Bundabe wants to clinch
and Beasley counters with a lovely shot to the body.
That's two minutes gone in the round.
Bundabe wants to clinch up but Beasley keeps it at a distance.
Beasley lands a nice looking body shot.
Bundabe tries to clinch but Beasley is having none of it.
Beasley tries a switch kick but it misses it's target.
Bundabe moves out of range of the strikes.
Bundabe closes the distance looking to clinch
and Beasley counters by clinching up.
Good body shot from Bundabe.
Bundabe lands an elbow inside.
Bundabe tries to land knees in the clinch but Beasley avoids the damage to the body.
Bundabe drags the fight down to the ground.
Beasley wanted to stand there but Bundabe had control of the position.
A real slowdown in the pace of the fight for a moment, as Bundabe holds on and takes a little breather.
Beasley really doesn't want to stay on the ground with Bundabe. If he can't get it back to his feet, it's only a matter of time before he'll be tapping out.

Beasley is trying to tuck his arms in to keep them safe but Bundabe has managed to isolate one of them and has got a loose triangle. Beasley is looking to defend but Bundabe has done well to lock his legs together - this could be big trouble for Beasley! Bundabe pulls down on the head and a little smile comes across his face - he knows he's got it. Yep, Beasley taps out and this one is all over!
Ladies and gentlemen, after 3:05 of round 3, we have a winner by way of Submission (Triangle). Wallie Bundabe!
|
|
|
|
|
|
|
|
|
|
|
|
|
|
|
|
|
|
|
|
|
|
|
| S |
C
A |
G |
S |
C
B |
G |
|
S |
C |
G |
|
energy
A | B |
|
hype
A | B |
|
pop
A | B |
|
mgr
A | B |
|
FIGHT
RATING
100% |
|
|
|
|
|
|
