|
|
PBP Commentary |
Coming up we have a featherweight MMA rules bout between James Hardy II (ranked 0 p4p, 0 weight class) and Sam Hart (ranked 0 p4p, 0 weight class). Over to our ring announcer for the fighter introductions!
 |
|
 |
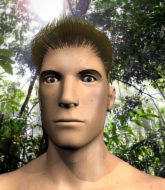
| 180 cm
23
155 lbs
2 - 0 - 0 |
|
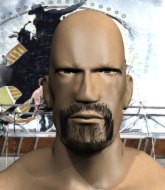
176 cm
19
155 lbs
5 - 2 - 0 |
Good takedowns
Counter striker
Cuts easily |
|
BJJ Purple Belt
Basic striking
Knockout power |
|
| |
|
Ladies and gentlemen. This fight is 3 rounds, in the featherweight division.
Introducing the fighter to my left, fighting out of the red corner.
With a record of
2 - 0 - 0, fighting out of London, James Hardy II!
And introducing the fighter to my right, fighting out of the blue corner.
With a record of
5 - 2 - 0, fighting out of London, Sam Hart!
The judges for this bout are James Glass, William Gold and Sam Margolis.

The bell rings for round one and we are underway!
Hart goes for a spinning back kick but it misses.
Hart connects with a leg kick. He turned his hip over nicely there.
Hart tries to land a leg kick but Hardy II saw it coming and moves away.
Sam Hart seems to be the more aggressive standup fighter in this bout.

Hart looking to shoot here. He's gone for it and he's landed a takedown into mount! Oh, that's bad for Hardy II!
Hart controlling the pace for now.
Hart prevents Hardy II from getting the reversal.
Hart looking to control but Hardy II is working nicely, looking to advance position himself.
Hardy II is looking to get to half guard.
Hart landing strikes, looking to finish!
Hardy II looking to escape from mount but he's given up his back!
The ref warns both fighters not to hold the cage as they work up against the meshing.

That's one minute gone in the round.
Hardy II is trying to stand back up.
So, who will make the next big move? In this position it could be crucial.
Hart is hanging on to Hardy II's back as he tries to escape.
Hart controls the action.
Hart is trying to stick to Hardy II's back but Hardy II is turning into Hart. He's managed to reverse the position - now he's in Hart's guard. Polite applause from the crowd in appreciation of some nice Jiu Jitsu by Hardy II.
Hart pulls Hardy II in to control the position.
If this pace continues, the referee will definitely step in and force a standup.
Let's hope that Hart has the urge to step up the pace any second now because for the last 15 or 20 seconds he's just been holding on tight.

The ref calls for a clean break and stands the fighters back up. Sam Hart wasn't active enough on the ground.
Hart throws a wild body kick that Hardy II sees coming a mile off.

That's two minutes gone in the round.
Well. There's a bit of a lull in the action here and the crowd are starting to get restless.
Hart scores with a nice takedown into half guard. Let's see what he's got on the ground.

Hardy II looking for submissions from an awkward position here.
Hart wants to get back to his feet.
Hart controlling the action here.
Hardy II wants to improve his position but Hart is controlling well.
Hart is working for a submission of some sort.
Hart tries to stand but can't do so whilst Hardy II controls his leg.

That's three minutes gone in the round.
Hart seems content to maintain position for now, rather than mounting any offense.
Hardy II is not content to let Hart control the position.
Hardy II trying to control here.
Hart is trying to control. Hardy II wants to improve his position but can't escape this time.
Hardy II actively working from the bottom here.
Hart is thwarting Hardy II's attempts to control the position.
Hart prevents Hardy II from improving his position.

That's four minutes gone in the round.
A few boos can be heard. I'm sure they will multiply if the fighters don't pick up the pace.
Hart seems content to maintain position for now, rather than mounting any offense.
Hardy II works his way to full guard. Good work.
Hardy II controlling the position.
Sam Hart has forced the referee to step in and restart the fight on the feet.
Hart tries to clinch up.
Hardy II bobs and weaves into range and then changes levels and scores with a nice takedown into side control.
Hardy II swings around for an armbar but Hart sees it coming a mile off and turns beautifully into Hardy II's guard.
Hardy II is breathing heavily.
Hart avoids a guillotine attempt easily.

Hart stands up and waves to Hardy II to follow him.
Hardy II tries to clinch up.
And thats the end of the round the fighters go back to their corners.
Sam Hart dominated that round.
The corners get their ten second warning. Both fighters stand from their stools and stare eachother down, ready to get back to the action.

Hardy II blocks a head kick by Hart.
The fight stays on the outside here - Hart looks like he's thinking about clinching though.
Hart tries to score with a low kick but Hardy II moves his leg out of the way.
Hart looking to take his opponent's legs away with the low kicks.
Hart walks forward and throws out a flicking leg kick. Hardy II checks it nicely though, as he moves to the side.
Hart throws a sloppy head kick and Hardy II moves out of range easily.
Hart misses with a head kick.
Hart throws a wild body kick that Hardy II sees coming a mile off.
Hardy II fails with the takedown
and Hart counters with a good low kick that Hardy II was not able to check.
We've had a slow start to the round here - hopefully the action picks up.
A nice inside leg kick there by Hart. That's going to slow Hardy II down.
Hardy II tries a switch kick but it misses it's target.

Hart gets to the clinch - let's see what his plan is here.
Hart misses the knee to the body. Nice hip positioning from Hardy II.
Hart misses with a body punch.
That's one minute gone in the round.
Hardy II blocks a knee to the body. He'll have a nicely bruised forearm in the morning.
Hardy II drops down for a takedown but doesn't get it.
Hardy II wants to break free. God knows he wants to breaaaak freeee.
Hardy II fails to pull the fight into his guard.
That's three failed takedown attempts in the round for James Hardy II. That's going to take a lot out of him.
Hart throws a knee to the head but misses.
Hardy II gets double underhooks to prevent a takedown attempt from Hart.
With the fighters up against the cage, Hardy II throws an elbow but misses.
Hardy II goes for a takedown in the clinch but Hart prevents it.
Hardy II manages to pull guard. Let's see whether he can land a sub off his back.
Hardy II is looking for a guillotine. You can't force these things though and Hart defends well.
Hart must be cautious of submissions here, given that his opponent has the superior Jiu Jitsu.
Both fighters are absolutely exhausted here.
Hardy II can't do much from the bottom at the moment, as Hart controls the pace.
That's two minutes gone in the round.
Hart trying to control the position from guard on top but Hardy II is wriggling around, looking for whatever he can.
Hart trying to pass the guard but can't manage it just yet.
Hardy II wants to sweep but no luck.
Hart gets to his feet - Hardy II follows without any prompting.
Hart throws a head kick that misses
and Hardy II counters with a shoot takedown into half guard.
Hart tries to roll over but Hardy II keeps him under control.
Hardy II gets to his feet - back to striking we go!
Hart throws a head kick but Hardy II moves out of range.
That's three minutes gone in the round.
Hart rushes Hardy II and presses him up against the cage.
Hardy II avoiding damage as Hart throws knees to the body.
Hart tries to circle away but Hardy II has him pinned against the cage.
Hart has Hardy II pressed up against the cage and is working for takedown. Hardy II manages to improve position though and keeps the fight standing.
Hart tries to land a knee to the body but he is off balance and Hardy II avoids it.
Hart misses with a knee strike.
Hardy II drops down for a takedown but doesn't get it.

Hart escapes the clinch and we're back to striking.
Hardy II misses with a takedown
and Hart decides to take the opportunity to score a takedown. He's landed in Hardy II's guard.
Hardy II is working from a closed guard but he's struggling to control his opponent.
Hart trying to control but Hardy II is working from the bottom.
That's four minutes gone in the round.
Hardy II is pulling down on Hart's head. It's preventing any offense from Hart, at least for the moment.
The referee has ruled that neither fighter is active enough on the ground and has stood them back up.
Hardy II swats away the attempt to clinch by Hart.
Hart pivots as if he's going to throw a leg kick but stops half way.
Hart throws a leg kick that is checked
and Hardy II counters by moving into the clinch. Good anticipation by Hardy II.
Hardy II jumps guard but Hart stands there with Hardy II around his waist. Hardy II gives up and drops back to his feet. We remain in the clinch.
Hardy II tries to score a body lock takedown but Hart shows good agility there to stay on his feet.
Knees to the body from Hart.
Hardy II jumps guard but Hart stands there with Hardy II around his waist. Hardy II gives up and drops back to his feet. We remain in the clinch.
And thats the end of the round the fighters go back to their corners.
A close second round but Sam Hart will probably get the nod - 10:9.
OK. That's time! The bell goes and we're back to the action. This is the final round!

A lazy body kick from Hart
and Hardy II counters with a nice double leg into half guard.
Hart trying to control but Hardy II postures up.
Hardy II slows the pace down in half guard.
Hart trying to control but Hardy II postures up.
Hardy II works his foot free and advances to mount.
Hardy II trying to control but he's not successful this time.
That's one minute gone in the round.
Hardy II goes for an armbar but he's not got it
Hart turns into him and now he's in Hardy II's guard.
Both fighters are breathing heavily.
Hardy II is trying to keep Hart in close.
Hart sitting in guard here, content to control.
Hardy II pulls Hart in close to prevent any damage.
That's two minutes gone in the round.
The crowd are showing their displeasure at the lack of action as loud boos ring out around the arena.
We must be close to a standup if these guys don't pick up the pace.
The referee has ruled that neither fighter is active enough on the ground and has stood them back up.
A chopping leg kick lands by Hart.
Hardy II misses with a takedown
and Hart counters with a takedown into side control.
Hart stands up and beckons Hardy II to his feet.
Hart throws a quick inside leg kick.
Hart scoring well with a low kick there.
Hart fakes with a right hand and throws a good leg kick, right into the thigh. That had to hurt Hardy II.
Hart fakes an overhand right and shoots for a takedown. Hardy II sprawls well initially but Hart persists and gets the takedown into half guard.
Hart passes the guard and advances to mount!
Hart controlling the pace for now.
Sam Hart is fighting for a decision here - he's started to take the cautious approach.
That's three minutes gone in the round.
Hardy II is desperately trying to get back to half guard.
Hart controlling from the full mount.
The fighters are pressed up against the cage, both looking to find a bit of space to work.
Hart trying to control but Hardy II is having none of it.
That's four minutes gone in the round.
The crowd are starting to boo a lack of action.
The ref calls for a clean break and stands the fighters back up. Sam Hart wasn't active enough on the ground.
Hart closes the distance and gets a trip takedown into side control. Hardy II quickly recovers to half guard.
Hart trying to control from half guard but Hardy II is working away.
Hart is in a good position here but he's just trying to control... And he's not even managing to do that successfully.
If this pace continues, the referee will definitely step in and force a standup.
Hardy II tries to get to full guard but Hart has control of the leg.
Hardy II is trying to maintain the position but Hart is very close to passing his half guard.
The crowd applaud the fighters efforts here as the round comes to an end.
Hart trying to control from half guard but Hardy II is working away.
James Hardy II has stepped it up - he knows he needs a finish here!
The ref stands the fighters back up, due to lack of action by Sam Hart.
Hart blocks the body kick.
And that's the end of the fight!
Sam Hart comfortably won the final round on my scorecard.
Well Hart has outworked and out performed his opponent in all aspects of the game today. He was simply too good and the decision should be no more than a formality. Over to the ring announcer for the scorecards.
Ladies and gentlemen, after 3 rounds of action, we go to the scorecards for a decision.
Judge James Glass scores the fight 27:30
Judge William Gold scores the fight 27:30
Judge Sam Margolis scores the fight 27:30
In favor of your winner, by unanimous decision... Sam Hart!
|
|
|
|
|
|
|
|
|
|
|
|
|
|
|
|
|
|
|
|
|
|
|
| S |
C
A |
G |
S |
C
B |
G |
|
S |
C |
G |
|
energy
A | B |
|
hype
A | B |
|
pop
A | B |
|
mgr
A | B |
|
FIGHT
RATING
56% |
|
|
|
|
|
|

