|
|
PBP Commentary |
Coming up we have a bantamweight MMA rules bout between George Mako (ranked 0 p4p, 0 weight class) and Kanye Yamamoto (ranked 0 p4p, 0 weight class). The crowd seem to be enjoying Yamamoto's choice of entrance music: No Way Out by ZZ. Kanye Yamamoto struggled to make weight for this fight. He only made it down to 136.2lbs at the first attempt and had to take the additional two hours to make the official bout weight. Let's see how much it's taken out of him. I'm sure you'll be fascinated to know that I was talking to some pointless Z list celebrity before the fight and he thought that Kanye Yamamoto was going to win. Let's see if he was right.
 |
|
 |
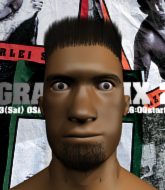
| 160 cm
18
140 lbs
4 - 1 - 0 |
|
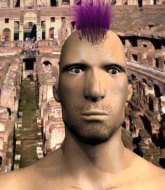
169 cm
22
145 lbs
2 - 2 - 0 |
BJJ Blue Belt
Basic striking
Good chin |
|
BJJ Blue Belt
Counter striker
Likes ground |
|
| |
|
Ladies and gentlemen. This fight is 3 rounds, in the bantamweight division.
Introducing the fighter to my left, fighting out of the red corner.
With a record of
4 - 1 - 0, fighting out of Montreal, George Mako!
And introducing the fighter to my right, fighting out of the blue corner.
With a record of
2 - 2 - 0, fighting out of Montreal, Kanye Yamamoto!
The judges for this bout are Robert Douchet, Steve Smith and Yves DeLean.

The bell rings for round one and we are underway!
Mako tries to shoot in for a takedown. He's got hold of a leg but Yamamoto swivels and escapes.
The fight stays on the outside here - Mako looks like he's thinking about clinching though.
Mako fails in his attempt to clinch.
Mako swings away but doesn't land with a series of punches.

Mako bobs and weaves into range and then changes levels and scores with a nice takedown into side control.
Yamamoto is looking for a sweep.
Mako lands a nice forearm strike.
Yamamoto parries the strikes from Mako easily there. Mako is wary of posturing up too much because it might enable Yamamoto to escape.
Mako cracks Yamamoto with an elbow. That is naaassty.

Yamamoto is rocked!
Mako moves into full mount!
Yamamoto is still in real trouble! Can Mako finish him?
Mako tries to control but Yamamoto wriggling away.
The fighters are pressed up against the cage, both looking to find a bit of space to work.

Mako is in full mount, looking to secure a guillotine but Yamamoto is surviving well by controlling Mako's body position as best he can.
Yamamoto is working to get back to half guard.
Yamamoto seems to have recovered his senses.

That's one minute gone in the round.
Mako working for a guillotine from mount but Yamamoto is in no mood to give up.
Yamamoto is in all sorts of trouble here.
Yamamoto is bucking up trying to escape but Mako cracks him with another couple of good strikes.
Mako prevents Yamamoto from getting the reversal.
Yamamoto is wriggling around here but as he tries to escape, Mako has taken his back.
Mako lands a punch to the side of the head from the back.
Mako lands an elbow to the side of the head.
Will Mako go for the finish here or will he try and keep control of the position?
Yamamoto is defending well here and trying to improve his position.
Yamamoto turns into Mako and is now in his guard.
Mako working a defensive guard here.
Mako seems keen to control rather than go for a submission, at least for now.

That's two minutes gone in the round.
Yamamoto tries to free his leg and advance position but Mako is retaining full guard.
Yamamoto drops back looking for a heel hook - he quickly realises he's not going to get it but Mako manages to dive on top of him before he can escape and now Yamamoto has Mako in his guard.
Yamamoto looks gassed!
Mako trying to pass the guard but can't manage it just yet.
Mako stops Yamamoto from standing up.
Yamamoto keeping moving, preventing Mako from controlling successfully.
Yamamoto wants to sweep but no luck.
Mako pushing down on Yamamoto's thigh, trying to pass to half guard. He's managed it... Nice work.
Mako wants to lay and pray for a moment but Yamamoto keeps working.
Yamamoto wants to improve his position but Mako is controlling well.

That's three minutes gone in the round.

The referee has ruled that neither fighter is active enough on the ground and has stood them back up.
Yamamoto stuffs the takedown attempt from Mako. Mako gets slowly back to his feet.
Mako misses with a body kick.

Mako tries to keep at a distance but Yamamoto has taken the fight into the clinch.
Mako is trying to work for a single leg takedown but Yamamoto pulls him back up using the underhooks.
That's three failed takedown attempts in the round for George Mako. That's going to take a lot out of him.
Some stalling of biblical proportions here from Yamamoto.
Yamamoto wants a takedown but no success here.
Mako tries to score a body lock takedown but Yamamoto shows good agility there to stay on his feet.
Yamamoto has picked Mako up - he's going for a ride! Yamamoto dumps his opponent to the mat with a thud and settles into half guard.
Mako looking for submissions from an awkward position here.
Yamamoto has freed up his trapped foot and advances to mount.
Yamamoto wants to finish this one by submission but Mako is holding onto his waist, trying to prevent any attacks from Yamamoto.
Yamamoto moves into side control, trying to work for a kimura. That looks painful! Will he finish!!?? No, Mako has worked his arm free - good work by Mako!

That's four minutes gone in the round.
Mako regains half guard.
Yamamoto is thwarting Mako's attempts to control the position.
Mako manages to get to full guard.
Yamamoto looking to pass the guard.
Mako bucks up whilst keeping hold of a body lock, managing to reverse the position. Now he's in top in Yamamoto's guard.
Yamamoto had isolated an arm as going for an omaplata. Mako is defending the submission well but is in a very vulnerable position. Yamamoto Is leaning forward trying to finish the omaplata but decides to abandon it, and take Mako's back instead.
Yamamoto is trying to stick to Mako's back but Mako is turning into Yamamoto. He's managed to reverse the position - now he's in Yamamoto's guard. Polite applause from the crowd in appreciation of some nice Jiu Jitsu by Mako.
Mako controls the pace of the fight for a moment.
Yamamoto keeping moving, preventing Mako from controlling successfully.
And thats the end of the round the fighters go back to their corners.
George Mako dominated that round.
OK. That's time! The bell goes and we're back to the action.

Yamamoto is looking to clinch but Mako is avoiding it.
No luck for Mako with that takedown attempt.
Mako throws a hook to the side of Yamamoto's head but Yamamoto sees it coming and ducks under it beautifully.
The fight stays on the outside here - Yamamoto looks like he's thinking about clinching though.
Mako looks frustrated there after his takedown attempt is stuffed easily.
Mako closes the distance but Yamamoto moves to the side
and Yamamoto finishes the little exchange by landing a big kick to the body.
We've had a slow start to the round here - hopefully the action picks up.
Yamamoto feints and then dives in with a takedown. That was a long way out but the feint bought him enough time to close the distance and complete the takedown. Now we'll play guard for a bit and see who can get the better of that position.
Yamamoto is breathing heavily.
Mako is working the butterfly guard. He manages to land a nice scissor sweep and is now in half guard on the top. Nice move.
Mako wants to control but Yamamoto is keeping him busy.
That's one minute gone in the round.
Yamamoto has no desire to be mounted, so is trying to control. Mako is working away from the top position though.
Well, if Mako is going to just lie there, perhaps we should talk about what we're having for dinner tonight
I'm having a ham and pineapple pizza
Yum. Can't wait.
Yamamoto actively working from the bottom here.
Mako wants to control but Yamamoto is keeping him busy.
The ref warns both fighters not to hold the cage as they work up against the meshing.
The referee walks around the fighters to get a better view of the action. Mako lands a nice short elbow.
Mako wants to take a breather but Yamamoto is having none of it.
Mako landing with strikes to the body and head, softening up his opponent.
Mako stalling.
Yamamoto is looking for a sweep. Mako is wise to his cunning plan and keeps the top position.
Yamamoto makes his way to full guard. A much better position for Yamamoto.
Mako postures up and lands a big shot to Yamamoto's brow.
Yamamoto escapes his hips to the side and looks to be working for an armbar. Mako gives him a little smile and shakes his head. No chance.
That's two minutes gone in the round.
Yamamoto trying to strike off his back.
Yamamoto looking to sweep here. No luck so far.
Mako has been looking to land a fair amount of strikes on the ground. He might be looking to soften his opponent up in order to work for a submission.
Mako trying to pass the guard but can't manage it just yet.
Mako trying to control but Yamamoto is working from the bottom.
Yamamoto looking for submissions off his back, moving his hips, looking for an opening.
Yamamoto working for a triangle but Mako defends it easily.
Yamamoto pushes a forearm under Mako's chin to create some space. He's escaped his hips and pivoted quickly for an armbar! Can he extend the arm? Yes, Mako is tapping out! Damn, that was fast!
Ladies and gentlemen, after 2:52 of round 2, we have a winner by way of Submission (Armbar). Kanye Yamamoto!
|
|
|
|
|
|
|
|
|
|
|
|
|
|
|
|
|
|
|
|
|
|
|
| S |
C
A |
G |
S |
C
B |
G |
|
S |
C |
G |
|
energy
A | B |
|
hype
A | B |
|
pop
A | B |
|
mgr
A | B |
|
FIGHT
RATING
65% |
|
|
|
|
|
|

