|
|
PBP Commentary |
Coming up we have a welterweight MMA rules bout between Brad Rood (ranked 0 p4p, 0 weight class) and Larry Lennox (ranked 0 p4p, 0 weight class). Rood comes to the cage accompanied by Enter Sandman, by Metallica. The crowd giving both fighters a great reception on their way into the arena. That's good to see.
 |
|
 |
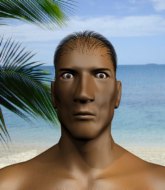
| 182 cm
23
179 lbs
10 - 2 - 0 |
|
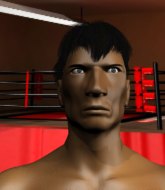
175 cm
28
179 lbs
13 - 8 - 0 |
Good wrestling
Excellent boxer
Very quick |
|
BJJ Brown Belt
Excellent boxer
Tends to cut |
|
| |
|
Ladies and gentlemen. This fight is 5 rounds, for the welterweight championship of the world!
Introducing the champion to my left, fighting out of the red corner.
With a record of
10 - 2 - 0, fighting out of New York, Brad Rood!
And introducing the challenger to my right, fighting out of the blue corner.
With a record of
13 - 8 - 0, fighting out of Las Vegas, Larry Lennox!
The judges for this bout are Jonathan Paton, Reed Andrews and Franklyn Lucas.

The bell rings for round one and we are underway!
Lennox throws a chopping leg kick but Rood manages to avoid taking any serious damage.
A looping hook to the body misses from Lennox. Rood does a little dance to reset his feet.
Rood lands a jab.

It looks like Larry Lennox has been cut.
Rood takes a punch to the jaw and another one to the bread basket.
Lennox throws a combination but comes up with nothing but fresh air.
Lennox slaps away a takedown attempt from Rood, before circling back to the center of the mat.
Lennox connects with a lovely jab that went straight through the gap between Rood's hands.
Lennox scores with a crisp jab that stopped Rood in his tracks.
Lennox looks to score with a combo but nothing lands.
Rood looks to score with a jab to the body but Lennox is just out of range.

Rood rushes Lennox and pushes him back against the cage in a clinch.
Good anti-grappling being displayed by Rood as Lennox tries to tie him up.
Rood pressing his opponent against the cage.
Rood blocks a couple of punches on the inside.
Rood prevents a body shot from Lennox.
A short uppercut from Lennox.

That's one minute gone in the round.
The two fighters are working to gain dominance in the clinch.

Rood ties up his opponent against the cage and manages to drag the fight down to the ground. Rood no doubt will be looking to work submissions from his guard.
Rood keeping moving, preventing Lennox from controlling successfully.
Lennox postures up in Rood's guard and throws a big left but Rood blocks it.
Lennox throws a big right hand that misses.
Lennox sitting in guard, not really doing much.
Rood wants to control here, rather than go for any submissions from the bottom. At least for now.
The ref warns both fighters not to hold the cage as they work up against the meshing.
Lennox wants to pass the guard but Rood is keeping the position.
Rood preventing the ground and pound from doing any damage.

That's two minutes gone in the round.
A few boos can be heard. I'm sure they will multiply if the fighters don't pick up the pace.

Rood had isolated an arm as going for a kimura. Lennox defends it easily.
Lennox throwing strikes from guard but Rood blocks nicely.
Rood is adopting a defensive guard.
Lennox loading up with the ground and pound but he's missing more than he's landing in this flurry.
Lennox with a flurry of punches that miss.
Rood trying to control the position.

That's three minutes gone in the round.
Rood keeping moving, preventing Lennox from controlling successfully.
Lennox throwing shots from guard but he's hitting more mat than opponent.
Lennox preventing the sweep.
Lennox with a flurry of punches that miss.
Lennox throwing shots from guard but he's hitting more mat than opponent.
Lennox postures up in Rood's guard and throws a big left but Rood blocks it.
Rood looking to sweep here. No luck so far.
Lennox wants to control from the top but Rood keeps moving.
Rood pulls Lennox in close to prevent any damage.

That's four minutes gone in the round.
The crowd are starting to boo a lack of action.

The referee has ruled that neither fighter is active enough on the ground and has stood them back up.
Lennox swings and misses with a shot to the body
and Rood counters with a nice double leg into guard.
Lennox looking to control.
Rood working some ground and pound from guard but it's not doing any damage.
The fighters are pressed up against the cage, both looking to find a bit of space to work.
Rood showing good wrestling skills to control the position.
Lennox working a defensive guard here.
Rood wants to pass the guard but Lennox is keeping the position.
OK we're going to have a standup here. Larry Lennox hasn't been effective enough on the ground and the referee wants a restart.
Lennox misses with a jab and misses with a cross straight after too.
And thats the end of the round the fighters go back to their corners.
Brad Rood dominated that round.
The cut man is working on Larry Lennox's cut.
The minute break is over - no more time for sponges and pep talks - back to the action!

Rood wants to clinch.
Lennox throws a combination but comes up with nothing but fresh air.
Lennox fails to land with a series of punches.
Rood doesn't manage to clinch there - Lennox circles away.
Rood swings for the body but Lennox moves out of range.
Lennox leaves Rood with his face pressed against the mat as he sprawls beautifully, defending against a solid takedown attempt.
Rood is looking to clinch but Lennox is avoiding it.
Lennox fails to land with the punch combination there - jab, cross, hook, miss, miss, miss.
Rood misses with a body punch
and Lennox counters with a left to the body.
We've had a slow start to the round here - hopefully the action picks up.
Lennox moving in and out of range nicely, whilst landing the scoring shot.
Lennox leaves Rood with his face pressed against the mat as he sprawls beautifully, defending against a solid takedown attempt.
Lennox throws a couple of head shots and lands with the final one - a decent hook, which struck Rood on the side of the head.
Lennox throws a right hand that Rood ducks under and follows up with a left that Rood also avoids with ease.
That's one minute gone in the round.
Rood closes this distance looking for a takedown but Lennox circles away.
That's three failed takedown attempts in the round for Brad Rood. That's going to take a lot out of him.
No joy there for Lennox, who threw a few shots but didn't land.
Lennox throws a hook but Rood avoids it easily.
Rood is looking to clinch.
Brad Rood is looking to throw some combinations by the looks of things.
Nice takedown defense from Lennox. No joy for Rood on that attempt.
Rood scores with a reasonable looking shot to the body. Lennox doesn't seem bothered though.
Rood shoots in and scores a nice double leg takedown into half guard.
Lennox trying to get back to full guard but Rood takes advantage of the position and moves to full mount!
Lennox tries to hold on but Rood postures up.
Rood can't quite control the action as he would like just now, as Lennox is looking to escape.
That's two minutes gone in the round.
Rood lands a big shot there that rocks Lennox but he's holding on and managing to survive for now.
Rood tries to control but Lennox wriggling away.
Lennox keeping his composure momentarily, calmly looking to get back to half guard.
Rood looking to control and managing it successfully.
Lennox gets back to half guard.
Rood wants to take a breather but Lennox is having none of it.
Lennox trying to control but Rood postures up.
Rood is looking to advance position but Lennox won't allow it.
That's three minutes gone in the round.
Lennox wants to improve his position but Rood is controlling well.
Lennox trying to control from the bottom.
Rood sitting and controlling from the half guard.
We've had a lack of effective grappling in the last minute or so, which could well see a referee standup.
The referee has ruled that neither fighter is active enough on the ground and has stood them back up.
Rood misses with a jab and misses with a cross straight after too.
Lennox stuffs a takedown. It's all about dictating where the fight takes place and Lennox wants it to stay on the feet.
Rood fakes an overhand right and shoots for a takedown. Lennox sprawls well initially but Rood persists and gets the takedown into half guard.
Rood scores with a couple of good hammerfists.
Lennox is trying to get back to full guard.
Lennox is trying to maintain the position but Rood is very close to passing his half guard.
That's four minutes gone in the round.
Rood seems to be taking a bit of a break to think of his next move. He lands a short punch in the meantime.
Lennox is holding on to half guard well.
Rood seems content to maintain position for now, rather than mounting any offense.
Rood lands strikes from half guard.
Rood working the head and body with strikes.
Rood passes to side control.
Lennox struggling a bit here.
And thats the end of the round the fighters go back to their corners.
Brad Rood dominated that second round.
The cut man is working on Larry Lennox's cut.
That's the end of the round. The referee orders the cornermen out of the cage so we can get back down to business.

Rood takes a body punch that cleary hurt but he's trying not to show any weakness.
Some wild striking there from Lennox.
Rood throws a jab when Lennox was well out of range.
Rood closes this distance looking for a takedown but Lennox circles away.
Rood throws a sloppy body shot
and Lennox counters with a nice body shot.
Rood throws a series of punches but Lennox avoids them all with ease.
Rood misses with a takedown attempt
and Lennox counters with a nice body shot.
Rood tries for a takedown but Lennox circles away easily
and Lennox counters with a left and a right that stings Rood.
That's three failed takedown attempts in the round for Brad Rood. That's going to take a lot out of him.
Rood throws a hard body shot but it just misses.
Rood tries to shoot in for a takedown. He's got hold of a leg but Lennox swivels and escapes.
Lennox scores to the head and body with a nice combination!
Both fighters are breathing heavily.
A punch combination from Lennox misses.
The fight stays on the outside here - Rood looks like he's thinking about clinching though.
That's one minute gone in the round.
Lennox falls off balance throwing a combination
and Rood moves into the clinch.
Lennox swings away with an uppercut that misses.
Rood tries to jump guard but he falls flat on his backside. Lennox smiles and moves away.
Rood is looking to wear down Lennox with body shots, infact he's throwing more body shots than head shots at the moment.
Lennox moves out of range of the strikes.
Rood walks into a stiff left hand from Lennox.
Rood closes the distance but Lennox moves to the side
and Lennox counters with a straight right hand.
Rood is looking to clinch.
Rood wants to clinch.
Lennox misses with a wild body shot.
Some bone on bone action there as Lennox checks a low kick. Luckily it wasn't a particularly hard one.
Larry Lennox seems to be getting the better of the standup.
That's two minutes gone in the round.
Rood tries to clinch but fails miserably
and Lennox counters into the clinch. Nicely done.
Rood has managed to pull guard. Let's see whether he can work an aggressive guard. It will also be interesting to see what tactics Lennox uses from the top position.
Lennox being controlled here momentarily.
Lennox throwing elbows and punches but not connecting, as Rood works some decent striking defense from the bottom.
Lennox trying to pass the guard. He's being very persistent here but Rood manages to land a sweep and now he's on top!
Lennox is trying to keep Rood in close.
Rood trying to control but Lennox is working from the bottom.
Brad Rood overall seems to be getting the better of the ground position in the fight so far.
Lennox trying to control the position.
That's three minutes gone in the round.
Lennox has a butterfly guard looking to sweep but Rood has passed into side control.
Rood working away.
Rood tries to cartwheel into mount but he doesn't manage it.
Lennox is trying to control Rood's posture but Rood avoids it.
Lennox is trying to improve his position.
Rood is looking to take a break and control but Lennox is keeping him honest, looking to work from the bottom.
That's four minutes gone in the round.
The crowd are showing their displeasure at the lack of action as loud boos ring out around the arena.
Rood is really struggling to control Lennox but he's trying to hold on to the position.
Rood working the head with strikes.
Rood is moving around in side control but his primary objective seems to be to maintain the position.
Lennox gets back to half guard.
Rood content to control rather than advance.
Lennox is looking to regain full guard. Not this time though.
And thats the end of the round the fighters go back to their corners.
Larry Lennox really dominated that round.
The cut man is working on Larry Lennox's cut.
Well, the break between rounds is over. Let's get back to the scrappin!

The fight stays on the outside here - Rood looks like he's thinking about clinching though.
Lennox misses with a double jab.
Rood throws a hook but Lennox blocks it.
Rood takes a shot right to the liver - Bas would have been proud of that punch.
Lennox misses with a body shot.
Rood tries to grapple but his opponent circles
and Lennox counters with a one-two to the body.
Lennox throws a left and a right that both miss
and Rood counters with a takedown into side control.
Lennox tries to work a leg under to get back to half guard but Rood wriggles his own leg back out and remains in side control.
Rood is looking to take a break and control but Lennox is keeping him honest, looking to work from the bottom.
Lennox can't do much from the bottom here.
That's one minute gone in the round.
Lennox taking punishment in the form of punches.
Rood is looking to take a break and control but Lennox is keeping him honest, looking to work from the bottom.
Lennox tries to work a leg under to get back to half guard but Rood wriggles his own leg back out and remains in side control.
Lennox is working to avoid the ground and pound but Rood connects with a decent elbow.
Rood working away.
Rood in side control, just content to control the action for now.
Check out the look on Rood's face as he threw that strike - that's one determined fighter!
That's two minutes gone in the round.
A bit of a lull in the action. I'm sure it will pick up again soon... even if the ref has to physically pick them up and put them back on their feet.
Lennox is looking for a sweep.
Lennox wants to control but Rood postures up.
Lennox is looking for a sweep.
Lennox takes a nasty elbow to the side of the head.
A bit of a lull in the action. I'm sure it will pick up again soon... even if the ref has to physically pick them up and put them back on their feet.
Lennox tries to buck Rood off but Rood is having none of it.
Lennox is absolutely dripping with sweat - he looks exhausted.
Lennox is moving his hips around well on the bottom and has managed to get back to half guard.
Rood looks towards his corner to check for any instructions. The corner give him nothing to work with, so he cracks Lennox with a short hammerfist. I guess that's as good as any advice he could get in this position.
Rood content to control rather than advance.
Lennox taking some punishment here, with Rood in his half guard.
That's three minutes gone in the round.
Lennox wants to control the action here but instead Rood manages to pass to full mount!
Lennox wants to control but Rood is having none of it.
Rood lands with some strikes.
Rood putting on the heat here with some good ground and pound!
Rood takes a little breather and maintains the position. The referee will be looking for him to stay active from such a dominant position though.
Lennox is squirming around, avoiding Rood's attempts to control the action.
That's four minutes gone in the round.
Lennox is writhing around trying to get back to his feet.
Lennox is wriggling around trying to escape.
Rood looking for an armbar but decides to keep the dominant position instead.
Rood working Lennox over with strikes here.
Lennox wants to control but Rood is having none of it.
Rood landing punches.
Lennox can't escape the position.
Lennox is persisting with the attempt to improve his position.
Lennox tries to improve his position but Rood has taken his back! Rood has a choke - it's sunk in pretty tight... Will Lennox tap? No... maybe... yes! He's tapped! Rood pushes Lennox away and gets up to celebrate with his corner!
Ladies and gentlemen, after 4:55 of round 4, we have a winner by way of Submission (RNC). Brad Rood!
Brad Rood retains his welterweight title!
|
|
|
|
|
|
|
|
|
|
|
|
|
|
|
|
|
|
|
|
|
|
|
| S |
C
A |
G |
S |
C
B |
G |
|
S |
C |
G |
|
energy
A | B |
|
hype
A | B |
|
pop
A | B |
|
mgr
A | B |
|
FIGHT
RATING
61% |
|
|
|
|
|
|
