|
|
PBP Commentary |
Coming up we have a super heavyweight MMA rules bout between Sean Yamamoto (ranked 0 p4p, 0 weight class) and Chris Zorba (ranked 0 p4p, 0 weight class). The fight MMA fans around the world have waited their entire lives for!
 |
|
 |
| 180 cm
22
284 lbs
2 - 4 - 0 |
|
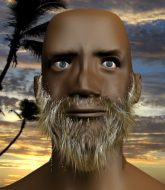
199 cm
19
300 lbs
0 - 0 - 0 |
BJJ Blue Belt
Counter striker
Self confident |
|
BJJ White Belt
Excellent boxer
Heavy handed |
|
| |
|
Ladies and gentlemen. This fight is 3 rounds, in the super heavyweight division.
Introducing the fighter to my left, fighting out of the red corner.
With a record of
2 - 4 - 0, fighting out of Rio de Janeiro, Sean Yamamoto!
And introducing the fighter to my right, fighting out of the blue corner.
With a record of
0 - 0 - 0, fighting out of Rio de Janeiro, Chris Zorba!
The judges for this bout are Luis Engracia, Emerson Jorge and Daniel Cesar.

The bell rings for round one and we are underway!
Yamamoto shoots in looking for a takedown. Zorba tries to sprawl out of it but Yamamoto keeps driving through. The fighters are pinned against the cage. Zorba manages to get underhooks and after a bit of a struggle, circles away and we're back to standing.

Yamamoto closes the distance and clinches.
Zorba goes for a body shot but it's blocked.

Yamamoto gets the body lock takedown. After a quick scramble, Zorba regains guard.

Yamamoto thinks about going for a leg but decides against it, in order to maintain the position.
Zorba keeping moving, preventing Yamamoto from controlling successfully.
Yamamoto is just sitting in guard, looking to avoid any submissions.
Yamamoto drops back for a leg! It's a sloppy attempt though and Yamamoto jumps back into guard quickly, to retain the dominant position.

Yamamoto decides to stand up and beckons his opponent to follow.
Zorba tries to keep at a distance but Yamamoto has taken the fight into the clinch.

That's one minute gone in the round.
Zorba lands a short shot on the inside that snaps the head of Yamamoto backwards.
Yamamoto prevents a body shot from Zorba.
Yamamoto prevents Zorba from breaking the clinch.
Zorba wants to break free but Yamamoto has control.
Zorba has had enough of the clinch but Yamamoto keeps him there for the moment.
Zorba misses with some punches.
Zorba is trying to break free.
Zorba misses with a punch to the body.
Yamamoto blocks a body shot from Zorba.
Yamamoto changes levels and goes for a takedown here. Zorba fights it off and pushes away nicely.
Some wild striking there from Yamamoto.
Zorba closes the distance but Yamamoto moves to the side
and Yamamoto counters with a nice double leg into guard.
Yamamoto drops back looking for a leg! Zorba is in trouble here! The fighters roll with the hold and Zorba manages to kick Yamamoto off! Yamamoto jumps back into Zorba's guard.

That's two minutes gone in the round.
Yamamoto sitting in guard here, content to control.
Yamamoto gets to his feet - Zorba follows without any prompting.
Zorba lands with a two punch combination before moving back out of range.
Zorba lands with an overhand left.
Wooooo! Give it up for these two warriors! They are putting on a show!
Zorba throws a jab, cross combination which is slipped
and Yamamoto counters with a nice shoot takedown that brings the fighters to the ground.
Yamamoto is breathing heavily.
Zorba not looking particularly offensive just at the moment.
Yamamoto loading up with the ground and pound but he's missing more than he's landing in this flurry.
Zorba utilising some decent striking defenses from the guard, preventing the ground and pound.
Zorba is looking to stand up but Yamamoto isn't so interested in that idea.

That's three minutes gone in the round.
Yamamoto wants to control from the top but Zorba keeps moving.
Yamamoto has been looking to land a fair amount of strikes on the ground. He might be looking to soften his opponent up in order to work for a submission.
Yamamoto won't allow Zorba to get back to his feet.
Yamamoto drops back for a leg! It's a sloppy attempt though and Yamamoto jumps back into guard quickly, to retain the dominant position.
Yamamoto trying to control but Zorba is working from the bottom.

It looks like we're going to have a standup here. Neither fighter is doing enough on the ground.
Zorba keeps his opponent at a distance with a nice jab.
Zorba displays good takedown defense there as he swats away a double leg from Yamamoto.
That's three failed takedown attempts in the round for Sean Yamamoto. That's going to take a lot out of him.
Zorba lands an overhand right.
Chris Zorba seems to be the more aggressive standup fighter in this bout.
Zorba throws a leg kick
and Yamamoto counters with a takedown into side control.

That's four minutes gone in the round.
Yamamoto controlling the position from side mount.
Yamamoto advances nicely into full mount.
Yamamoto jumps to side control looking for an arm triangle but Zorba manages to avoid the submission attempt.
Yamamoto is looking for a kimura. He might have it! No, Zorba has escaped the position, nice work there.
This has been an exciting period of action!
As the round comes to an end the crowd are showing their appreciation for a great round of action.
Yamamoto in side control, working for a kimura. He's got hold of an arm and he's torquing it... Zorba is tapping! That's the end of the fight!
Ladies and gentlemen, after 4:57 of round 1, we have a winner by way of Submission (Kimura). Sean Yamamoto!
|
|
|
|
|
|
|
|
|
|
|
|
|
|
|
|
|
|
|
|
|
|
|
| S |
C
A |
G |
S |
C
B |
G |
|
S |
C |
G |
|
energy
A | B |
|
hype
A | B |
|
pop
A | B |
|
mgr
A | B |
|
FIGHT
RATING
57% |
|
|
|
|
|
|

