|
|
PBP Commentary |
Coming up we have a heavyweight MMA rules bout between Tong Sagat (ranked 0 p4p, 0 weight class) and Gerald Young II (ranked 0 p4p, 0 weight class). These two fighters really are very evenly matched on the feet - it will be fascinating to see who can assert themselves in that aspect of the fight.
 |
|
 |
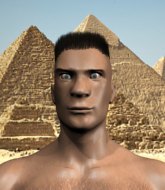
| 204 cm
25
251 lbs
6 - 4 - 0 |
|
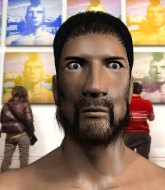
150 cm
26
265 lbs
5 - 6 - 0 |
BJJ Purple Belt
Solid Muay Thai
Very strong |
|
Good wrestler
Decent boxing
Granite chin |
|
| |
|
Ladies and gentlemen. This fight is 3 rounds, in the heavyweight division.
Introducing the fighter to my left, fighting out of the red corner.
With a record of
6 - 4 - 0, fighting out of London, Tong Sagat!
And introducing the fighter to my right, fighting out of the blue corner.
With a record of
5 - 6 - 0, fighting out of London, Gerald Young II!
The judges for this bout are William Gold, James Atkins and Andrew Berry.

The bell rings for round one and we are underway!

The fight moves into the clinch position.
Sagat with an attempt at a knee that misses.
Sagat using the Thai plumb to throw knees but Young II has his back arched nicely, preventing the strike.
Sagat misses with a knee strike.
Sagat throws a knee to the head but misses.
Young II's corner are urging him to control the action in the clinch for a moment, rather than mount any serious offense. I'm sure the crowd appreciate those instructions... not.
Young II has Sagat pressed up against the cage and is working for takedown. Sagat manages to improve position though and keeps the fight standing.
Sagat throws a vicious knee straight up the middle but Young II blocks it with crossed arms.
Young II's corner are urging him to control the action in the clinch for a moment, rather than mount any serious offense. I'm sure the crowd appreciate those instructions... not.
Young II drops to a knee looking for a takedown but Sagat gets the underhooks and prevents it.
Young II is working for takedown but Sagat is calmly controlling the position for now.
Tong Sagat has stuffed three takedown attempts in the round now. That's going to take a lot out of Gerald Young II.
We've had a slow start to the round here - hopefully the action picks up.
Sagat using the Thai plumb to throw knees but Young II has his back arched nicely, preventing the strike.
Sagat gets double underhooks to prevent a takedown attempt from Young II.
Sagat tries a knee to the head but Young II blocks it.
Sagat looking to throw knees to the head but Young II is blocking nicely.
Sagat tries to land a knee to the head but Young II blocks with his arms.
Sagat unloads a knee to the mid-section.

That's one minute gone in the round.
Sagat misses with a knee to the head.
Young II being controlled against the cage.
Sagat using the Thai plumb to throw knees but Young II has his back arched nicely, preventing the strike.
Sagat tries to land a knee to the head but misses.
Young II blocks the elbow strike.
Young II slows down the pace here.
Sagat is pressed up against the cage. Young II has hold of a leg and is looking to drag Sagat down to the mat. Sagat avoids the attempt though and has circled away. We're back to striking at a distance.
Young II avoids the clinch attempt nicely.
Young II tries to score a power double leg takedown but Sagat sees that one coming and sprawls well. That will dishearten Young II somewhat.
Young II fails with a takedown attempt from distance.
Sagat forces Young II back against the cage and clinches.
Sagat using the Thai plumb to throw knees but Young II has his back arched nicely, preventing the strike.
Some stalling of biblical proportions here from Young II.
Young II avoids a wild elbow strike from Sagat.
Sagat with the Thai clinch. He's looking to land a big knee but he's not managed it this time.

That's two minutes gone in the round.
A few boos can be heard. I'm sure they will multiply if the fighters don't pick up the pace.
Sagat throws a knee to the head but misses.
Sagat tries a knee to the head but Young II blocks it.
Sagat working Young II over with knees to the body.
Sagat using the Thai plumb to throw knees but Young II has his back arched nicely, preventing the strike.
Sagat is breathing heavily.
Sagat scores with a knee to the head.

It looks like Gerald Young II has been cut.
Sagat stops a takedown attempt from Young II.
Sagat tries a knee to the head but he's missed.
Sagat tries a knee to the head but he's missed.
Sagat throws a vicious knee straight up the middle but Young II blocks it with crossed arms.
Sagat misses with a knee strike.

Young II gets double underhooks and manages to take the fight to the ground.
Sagat avoiding any damage from the ground and pound.
Sagat keeping full guard, as Young II tries to pass.
Young II throwing strikes from guard but Sagat blocks nicely.
Young II stands up and looks to throw the legs aside to pass to side control. Sagat swivels though and keeps the full guard.

That's three minutes gone in the round.
Sagat preventing the ground and pound from doing any damage.
Sagat keeping full guard, as Young II tries to pass.
The fighters are pressed up against the cage, both looking to find a bit of space to work.
Young II passes Sagat's right leg, so he's now in half guard.

That's four minutes gone in the round.
Well. There's a bit of a lull in the action here and the crowd are starting to get restless.
Young II looking to pass the half guard. Not this time.
Young II is persisting with the attempt to improve his position.
Young II is looking for the mount but instead finds himself back in full guard.
Young II looking to pass the guard.
Young II is looking to advance position but Sagat has hit a scissor sweep - now he's on top in mount!
We get told so often about how wrestlers don't like to be on their backs. Let's see if Young II can do anything to dispel that myth.
Young II is in all sorts of trouble here.
And thats the end of the round the fighters go back to their corners.
Tong Sagat dominated that round.
The cut man is working on Gerald Young II's cut.
Well, the break between rounds is over. Let's get back to the scrappin!

Young II will have to do better than that with his takedown attempts.
Sagat wants to clinch up but Young II keeps it at a distance.
Young II closes the distance and looks for a trip takedown... aaaand he's got it - Young II lands in his opponent's guard.
Young II stands up and looks to throw the legs aside to pass to side control. Sagat swivels though and keeps the full guard.
Young II slips nicely into half guard.
Young II is pressing down on Sagat's thigh, looking to free his foot. Sagat is holding on for now.
Young II misses with a head shot. Sagat uses the momentum to regain guard.
That's one minute gone in the round.
Young II wants to pass the guard but Sagat is keeping the position.
Young II trying to pass the guard. He's being very persistent here but Sagat manages to land a sweep and now he's on top!
Young II manages to sweep nicely, so he's now on top. Sagat manages to get himself to full guard.
Young II advances position into side control!
Young II advances to full mount.
That's two minutes gone in the round.
Young II thuds his fist into the canvas! Oooouch!
Young II thowing strikes but they're hitting the gloves, not doing any damage.
Young II sends his fist crashing into the mat - the crowd let out a collective ooooooh. Let's hope he's not broken it!
Sagat blocking the ground and pound.
Young II cracks Sagat with a nasty head shot there - the crowd let out an audible gasp there, as the noise reverberated around the arena.

Young II swings around for an armbar but it's a sloppy attempt and Sagat is now in Young II's guard. A big mistake from Young II there, giving up the dominant position!
Young II is working an open guard here, looking to improve his position. No doubt that will leave him open to counters but at least he's being more offensive.
That's three minutes gone in the round.
Young II is breathing heavily.
Sagat drops back looking for a leg! Young II is in trouble here! The fighters roll with the hold and Young II manages to kick Sagat off! Sagat jumps back into Young II's guard.
Young II lands a beautiful switch and he's in full mount! That could spell trouble for Sagat!
Young II throws an elbow from mount that misses. Lucky escape for Sagat because Young II loaded up on that one.
That's four minutes gone in the round.
A few boos can be heard. I'm sure they will multiply if the fighters don't pick up the pace.
Sagat is trying to stand.
Young II goes for an armbar but Sagat turns quickly into his guard - lovely anticipation from Sagat.
Young II has his foot on Sagat's thigh. He's trying to push off and get in position for a triangle, I think. Sagat works his way back into a safe position though.
There's a bit of a scramble here and now Young II is on top in guard.
Young II in full guard, throwing the ground and pound. No damage this time.
Young II trying to pass the guard but can't manage it just yet.
Young IIis looking to pass into half guard but Sagat pushes him away with his feet and jumps on top - now Sagat is in guard.
And thats the end of the round the fighters go back to their corners.
Gerald Young II showed his class in that round. I'd imagine he'll take it on all the scorecards.
The cut man is working on Gerald Young II's cut.
The referee calls time. The cornermen exit stage left and we're back to business. And we move into the final round!

Nice sprawl there from Sagat as Young II shoots in.
Sagat tries to clinch up against the cage, rushing in the close the distance. Young II manages to break the clinch and circles back to the middle of the mat.
Sagat is looking to clinch.
Young II shoots for a takedown but Sagat saw that one coming a mile off and avoided it easily.
Sagat stuffs a takedown. It's all about dictating where the fight takes place and Sagat wants it to stay on the feet.
Tong Sagat has stuffed three takedown attempts in the round now. That's going to take a lot out of Gerald Young II.
The fight stays on the outside here - Sagat looks like he's thinking about clinching though.
Young II shoots in for a takedown - he's clinched up with Sagat but Sagat pushes him off and we're back to square one.
Sagat gets in close and instigates a clinch.
Sagat tries to land a knee to the head but Young II blocks with his arms.
Sagat misses with a knee to the head.
Sagat using the Thai plumb to throw knees but Young II has his back arched nicely, preventing the strike.
Sagat wants to stall.
Both fighters are breathing heavily.
We've had a slow start to the round here - hopefully the action picks up.
Sagat tries to land knees in the clinch but Young II avoids the damage to the body.
Sagat tries to stall but Young II uses the opportunity to gain a better position.
Young II blocks a knee to the body. He'll have a nicely bruised forearm in the morning.
Young II will no doubt start fighting again in a minute but for now he's just having a little rest, leaning Sagat up against the cage.
Sagat prevents the takedown attempt.
That's one minute gone in the round.
Sagat prevents the takedown attempt.
Sagat tries to stall but Young II uses the opportunity to gain a better position.
Sagat using the Thai plumb to throw knees but Young II has his back arched nicely, preventing the strike.
Young II is looking for a takedown up against the cage. Sagat gets underhooks though and prevents the takedown attempt.
Sagat controlling the action here for a moment.
Young II has dropped down and is working for a takedown. Sagat is trying to keep an underhook but Young II manages to get the takedown into half guard.
Young II is looking to pass Sagat's guard but actually Sagat recovers to full guard.
Sagat will need to keep those long limbs tucked in whilst he's on the ground, to prevent any submissions.
Young II stands up and looks to throw the legs aside to pass to side control. Sagat swivels though and keeps the full guard.
Gerald Young II has got the better of the ground game so far.
That's two minutes gone in the round.
Young II is looking to advance position but Sagat has hit a scissor sweep - now he's on top in mount!
Young II sneaks a leg under to get to half guard.
Sagat maintaining the dominant position here and is working for a kimura. He's locked it up! Young II could be in real trouble here! He's trying to wriggle out but Sagat has cracked it and Young II is screaming in pain - he's tapped out! Great finish by Sagat!
Ladies and gentlemen, after 3:04 of round 3, we have a winner by way of Submission (Kimura). Tong Sagat!
|
|
|
|
|
|
|
|
|
|
|
|
|
|
|
|
|
|
|
|
|
|
|
| S |
C
A |
G |
S |
C
B |
G |
|
S |
C |
G |
|
energy
A | B |
|
hype
A | B |
|
pop
A | B |
|
mgr
A | B |
|
FIGHT
RATING
81% |
|
|
|
|
|
|
