|
|
PBP Commentary |
Coming up we have a middleweight MMA rules bout between Michael Rourk (ranked 0 p4p, 0 weight class) and Rock Hardmeat (ranked 0 p4p, 0 weight class). Hardmeat has chosen Take The A Train as his entrance music. Over to our ring announcer for the fighter introductions!
 |
|
 |
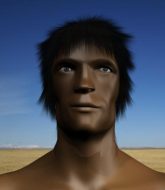
| 190 cm
20
190 lbs
6 - 2 - 0 |
|
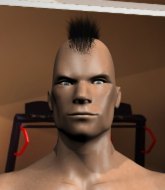
182 cm
21
195 lbs
9 - 3 - 0 |
Good takedowns
Counter striker
Granite chin |
|
BJJ Purple Belt
Good kicks
Good gas tank |
|
| |
|
Ladies and gentlemen. This fight is 5 rounds, for the middleweight championship of the world!
Introducing the champion to my left, fighting out of the red corner.
With a record of
6 - 2 - 0, fighting out of Tokyo, Michael Rourk!
And introducing the challenger to my right, fighting out of the blue corner.
With a record of
9 - 3 - 0, fighting out of Tokyo, Rock Hardmeat!
The judges for this bout are Tatsuya Matsuyama, Shigeki Fujiwara and Kenichi Hosakawa.

The bell rings for round one and we are underway!
Hardmeat looking to land some kicks to the body here.
Hardmeat defends well against a solid takedown attempt from Rourk.
Hardmeat throws a low kick but Rourk avoids it.
Hardmeat throws a body kick that misses.
Both fighters are looking to counter, which isn't making for the most exciting fight in the world.
Hardmeat is looking to slow Rourk down with leg kicks.
Rourk blocks the body kick.
Rourk looks frustrated there after his takedown attempt is stuffed easily.
We've had a slow start to the round here - hopefully the action picks up.
Rourk fails with a takedown attempt.
That's three failed takedown attempts in the round for Michael Rourk. That's going to take a lot out of him.
Hardmeat lets loose with a powerful body kick. Rourk will feel that in the morning.

That's one minute gone in the round.
Hardmeat fakes the leg kick and cracks Rourk in the body.
Hardmeat throws the kick towards the body but Rourk avoids it.
Hardmeat goes for a spinning back kick but it misses.
Hardmeat tries a head kick but it misses.
Rourk misses with a takedown attempt - Hardmeat sprawls well and throws a nice strike on the way out which just misses.
Hardmeat cracks the inside of Rourk's front leg.

That's two minutes gone in the round.
Hardmeat misses with a head kick.
Rourk changes levels and looks for a double leg takedown. Hardmeat tries to avoid it but Rourk manages to keep hold of a leg and drag Hardmeat to the ground. Hardmeat escapes though and pops straight back up to his feet.
Well, he's not going to score with shots like that. A lazy body kick attempt from Hardmeat.
Rourk shoots in for a takedown. "Ole!" shouts Hardmeat as he jumps to the side.

Rourk decides to change it up a bit and drives through with a nice takedown into half guard.

Rourk seems to be looking for submissions.
Hardmeat tries to get to full guard but Rourk has control of the leg.

That's three minutes gone in the round.
Rourk is looking for a kimura but Hardmeat is holding onto that half guard position, so it's hard for Rourk to get the leverage.
Hardmeat is looking for a sweep. Rourk is wise to his cunning plan and keeps the top position.
Hardmeat wants to control but Rourk is keeping busy and won't allow it.
Rourk sitting in half guard, looking to land shots. Hardmeat defending well though.
Hardmeat is defending against the submission attempts here by Rourk.
Hardmeat moves into full guard.
Hardmeat is doing well to control the posture of his opponent and prevent any damage.

That's four minutes gone in the round.
The crowd are showing their displeasure at the lack of action as loud boos ring out around the arena.
Rourk has gone for a leg lock! Hardmeat slips out almost immediately though and dives into Rourk's guard.
Rourk pulls Hardmeat in close to his closed guard and prevents Hardmeat from doing any damage or advancing position.
Hardmeat trying to control but Rourk is working from the bottom.
Rourk trying to keep a closed guard but Hardmeat is proving a slippery customer.
And thats the end of the round the fighters go back to their corners.
Rock Hardmeat dominated that round.
That's time! Back to the action!

Hardmeat looks to land a body kick but Rourk moved away.
Hardmeat tries a head kick but it misses.
Hardmeat throws the kick towards the body but Rourk avoids it.
Hardmeat displays good takedown defense there as he swats away a double leg from Rourk.
Rourk shoots in for a takedown. "Ole!" shouts Hardmeat as he jumps to the side.
We've had a slow start to the round here - hopefully the action picks up.
Hardmeat stuffs the takedown.
That's three failed takedown attempts in the round for Michael Rourk. That's going to take a lot out of him.
That's one minute gone in the round.
Hardmeat throws a sloppy head kick and Rourk moves out of range easily.
Hardmeat misses with a jab, cross combination.
Hardmeat keeps the fight standing with a nice sprawl.
Rourk shoots in for a takedown but doesn't get it.
Hardmeat tries a head kick but it misses.
Hardmeat displays good takedown defense there as he swats away a double leg from Rourk.
That's two minutes gone in the round.
The crowd are starting to boo a lack of action.
Hardmeat throws a leg kick but Rourk sees it coming and moves out of range.
A really sloppy takedown attempt there from Rourk.
Michael Rourk is looking to throw some combinations by the looks of things.
Rourk is trying hard to land a takedown here. Hardmeat sprawls well and keeps this one on the feet.
Hardmeat throws a series of punches but Rourk avoids them all with ease.
Hardmeat throws a head kick that misses and slips in the process. He scrambles back to his feet and the fighters circle.
A nice leg kick lands there from Hardmeat.
That kick from Hardmeat tenderised Rourk's leg. Rourk is trying to keep his angry face on.
That's three minutes gone in the round.
Rourk scores a trip takedown into side control. Nice.
Rourk working hard here to secure a kimura but he's not really in the right position for it.
Rourk working hard here to secure a kimura but he's not really in the right position for it.
Hardmeat is looking for a sweep.
That's four minutes gone in the round.
Hardmeat sneaks a leg under to get back to half guard.
The ref warns both fighters not to hold the cage as they work up against the meshing.
The fighters are starting to get a bit slippery now, which will make submissions a bit more difficult.
Rourk sitting in half guard, looking to land shots. Hardmeat defending well though.
Hardmeat wants to control but Rourk is keeping busy.
Rourk prevents Hardmeat from improving his position.
Rourk is thwarting Hardmeat's attempts to control the position.
Rourk with the ground and pound but Hardmeat uses the opportunity to regain guard.
The crowd thankful this round is nearly over.
Rourk drops back looking for a heel hook - he quickly realises he's not going to get it but Hardmeat manages to dive on top of him before he can escape and now Rourk has Hardmeat in his guard.
And thats the end of the round the fighters go back to their corners.
Rock Hardmeat showed his class in that round. I'd imagine he'll take it on all the scorecards.
The corners get their ten second warning. Both fighters stand from their stools and stare eachother down, ready to get back to the action.

Rourk takes a thudding leg kick, right into the meat of the thigh.
Rourk dives in and grabs Hardmeat's left leg, looking for a takedown. Hardmeat pushes down on Rourk's head and hops out.
Hardmeat lets loose with a powerful body kick. Rourk will feel that in the morning.
That kick from Hardmeat tenderised Rourk's leg. Rourk is trying to keep his angry face on.
Hardmeat throws a head kick but Rourk moves out of range.
That's one minute gone in the round.
Hardmeat misses with a head kick.
Hardmeat throws a sloppy head kick and Rourk moves out of range easily.
Hardmeat tries a switch kick but it misses it's target.
Rock Hardmeat seems to be getting the better of the standup.
Hardmeat lands with a thumping leg kick.
Hardmeat goes for a spinning back kick but it misses.
A head kick misses from Hardmeat.
Hardmeat throws a leg kick which misses Rourk's front leg but catches the back leg as Rourk tries to avoid it.
Rourk shoots in for a takedown but Hardmeat shows good takedown defense there and keeps this one on the feet.
That's two minutes gone in the round.
Rourk shoots in but Hardmeat avoids the takedown attempt easily.
That's three failed takedown attempts in the round for Michael Rourk. That's going to take a lot out of him.
Hardmeat looks to score with a combo but nothing lands.
Hardmeat pulls out of a head kick attempt.
Rourk is trying hard to land a takedown here. Hardmeat sprawls well and keeps this one on the feet.
Hardmeat lands with a nice low kick. That'll leave a bruise.
Rourk avoids the body shot from Hardmeat.
A telegraphed takedown attempt from Rourk is defended easily by Hardmeat.
That's three minutes gone in the round.
Hardmeat turns his hip over beautifully as he lands a nice leg kick.
Hardmeat scores with a nice body kick.
Both fighters are breathing heavily.
Rourk is trying hard to land a takedown here. Hardmeat sprawls well and keeps this one on the feet.
Hardmeat throws a half hearted mid kick.
Rourk fails with a takedown attempt.
Rock Hardmeat is looking to keep the fight on the feet at all costs.
That's four minutes gone in the round.
Rourk fails miserably with a takedown attempt.
Hardmeat thuds his shin into the meat of Rourk's side.
Hardmeat lands a high kick!
Wooooo! Give it up for these two warriors! They are putting on a show!
The crowd applaud the fighters efforts here as the round comes to an end.
Hardmeat throws a sloppy head kick and Rourk moves out of range easily.
Rourk tries to score a power double leg takedown but Hardmeat sees that one coming and sprawls well. That will dishearten Rourk somewhat.
And thats the end of the round the fighters go back to their corners.
Rock Hardmeat really dominated that round.
The minute break is over - no more time for sponges and pep talks - back to the action!

Hardmeat fails to land with the punch combination there - jab, cross, hook, miss, miss, miss.
Rourk dives in and grabs Hardmeat's left leg, looking for a takedown. Hardmeat pushes down on Rourk's head and hops out.
A punch combination from Hardmeat misses.
Hardmeat throws a head kick that misses.
We've had a slow start to the round here - hopefully the action picks up.
Hardmeat tries a head kick but it misses.
Hardmeat tries a head kick but it misses.
That's one minute gone in the round.
Rourk shoots for a takedown but Hardmeat saw that one coming a mile off and avoided it easily.
Hardmeat throws a head kick that misses.
Rourk takes a nice looking leg kick right on the meat of his thigh there.
Rourk looks for a takedown but Hardmeat sprawls well.
That's three failed takedown attempts in the round for Michael Rourk. That's going to take a lot out of him.
Hardmeat stuffs a takedown. It's all about dictating where the fight takes place and Hardmeat wants it to stay on the feet.
Hardmeat throws a body kick but he wasn't in range.
Rourk shoots in for a takedown! He's got it and he's managed to land in full mount! That's better than Rourk was expecting from the takedown attempt, I'm sure!
That's two minutes gone in the round.
Hardmeat bucks up and manages to get a nice reversal! He's in guard on the top - nicely done!
Rourk keeping moving, preventing Hardmeat from controlling successfully.
Rourk manages to land a sweep and now he's in mount on top!
Rourk landing strikes from the mount.
Hardmeat wriggling around on the bottom manages to avoid the strikes thrown by Rourk.
Rourk is looking to secure an arm. He's managed it! He's pivoting for an armbar - that looks tight! But Hardmeat has managed to get out of it and now he's in a dominant position. Nice work from Hardmeat!
That's three minutes gone in the round.
Rourk working a defensive guard here.
Rourk working a defensive guard but Hardmeat manages to pass into side control anyway.
Rourk struggling a bit here.
Rourk is in a bad position, trying to hold on for dear life but he is really struggling to maintain any sort of control.
Rourk is trying to escape the position but Hardmeat is controlling the position.
That's four minutes gone in the round.
A lull in the action here being met with boos from the crowd.
Hardmeat tries for a kimura but Rourk is defending well.
Rourk is looking for a sweep.
Hardmeat trying to control the action but Rourk is working from the bottom.
Rourk sneaks a leg under to get back to half guard.
Rourk regains full guard. Nicely done.
Hardmeat pushes down on Rourk's leg and manages to get into half guard.
Hardmeat is trying to control. Rourk wants to improve his position but can't escape this time.
Hardmeat trying to mount his opponent but Rourk defends it.
And thats the end of the round the fighters go back to their corners.
A close fourth round but Rock Hardmeat will probably get the nod - 10:9.
That's time! Rourk's corner gives him a slap on the ass as he gets ready to fight. This is the final round!

Hardmeat moves into range and lands a nice body kick.
Rourk blocks a head kick by Hardmeat.
Rourk fakes high and shoots in for a takedown but Hardmeat avoids it really well and circles away.
Rourk shoots in but no luck this time.
We've had a slow start to the round here - hopefully the action picks up.
Rourk avoids the head kick by Hardmeat.
That's one minute gone in the round.
Rourk is trying hard to land a takedown here. Hardmeat sprawls well and keeps this one on the feet.
That's three failed takedown attempts in the round for Michael Rourk. That's going to take a lot out of him.
Hardmeat stuffs a takedown. It's all about dictating where the fight takes place and Hardmeat wants it to stay on the feet.
Rourk blocks the body kick.
Rourk shoots in with a takedown attempt and he has Hardmeat pinned against the cage. Hardmeat gets the underhooks and manages to circle away.
Hardmeat keeps the fight standing with a nice sprawl.
That's two minutes gone in the round.
A lull in the action here being met with boos from the crowd.
Rourk shoots in looking for a takedown. Hardmeat tries to sprawl out of it but Rourk keeps driving through. The fighters are pinned against the cage. Hardmeat manages to get underhooks and after a bit of a struggle, circles away and we're back to standing.
Rourk shoots in looking for a takedown but Hardmeat manages to keep the fight standing, pushing Rourk's face into the canvas for good measure before circling away.
Hardmeat thows a body kick. Rourk tries to catch it but that hurt him.
Hardmeat connects with a body shot.
Both of our modern day gladiators look out of it here - an gruelling 5 rounds of action taking it's toll on them, no doubt.
Hardmeat throws a sloppy head kick and Rourk moves out of range easily.
That's three minutes gone in the round.
Hardmeat pulls out of a head kick attempt.
Hardmeat connects with an inside leg kick.
Rourk avoids the head kick by Hardmeat.
Hardmeat throws a nice outside leg kick.
Hardmeat explodes with a nice body kick and back out of range. Nice work.
Hardmeat leaves Rourk with his face pressed against the mat as he sprawls beautifully, defending against a solid takedown attempt.
Rourk takes a head kick and keeps coming.
That's four minutes gone in the round.
Hardmeat throws a head kick that misses.
Rourk shoots in for a takedown. "I don't think so" says Hardmeat as he avoids it easily.
Rourk fails with a takedown attempt.
An inside leg kick lands from Hardmeat.
This has been an exciting period of action!
The crowd applaud the fighters efforts here as the round comes to an end.
Rourk shoots in and drives through. Hardmeat sprawls well.
Michael Rourk has stepped it up - he knows he needs a finish here!
Ooooh, nice body kick lands from Hardmeat. Rourk shrugs it off though.
And that's the end of the fight!
Rock Hardmeat comfortably won the final round on my scorecard.
I've got Hardmeat winning every round here. Surely the decision will go his way and he'll pick up a well deserved decision victory. Over to the ring announcer for the scorecards.
Ladies and gentlemen, after 5 rounds of action, we go to the scorecards for a decision.
Judge Tatsuya Matsuyama scores the fight 43:50
Judge Shigeki Fujiwara scores the fight 43:50
Judge Kenichi Hosakawa scores the fight 43:50
In favor of your winner, by unanimous decision... Rock Hardmeat!
Rock Hardmeat is the new middleweight champion!
|
|
|
|
|
|
|
|
|
|
|
|
|
|
|
|
|
|
|
|
|
|
|
| S |
C
A |
G |
S |
C
B |
G |
|
S |
C |
G |
|
energy
A | B |
|
hype
A | B |
|
pop
A | B |
|
mgr
A | B |
|
FIGHT
RATING
65% |
|
|
|
|
|
|
