|
|
PBP Commentary |
Coming up we have a welterweight MMA rules bout between Ian Carter (ranked 0 p4p, 0 weight class) and Brad Rood (ranked 0 p4p, 0 weight class). Rood has chosen Enter Sandman, by Metallica as his entrance music, which hasn't gone down very well with the crowd. Over to our ring announcer for the fighter introductions!
 |
|
 |
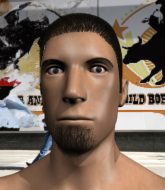
| 180 cm
21
185 lbs
6 - 1 - 0 |
|
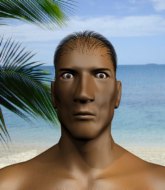
182 cm
24
179 lbs
11 - 2 - 0 |
Good wrestling
Excellent boxer
Cardio machine |
|
Good wrestler
Excellent boxer
Powerful |
|
| |
|
Ladies and gentlemen. This fight is 5 rounds, for the welterweight championship of the world!
Introducing the champion to my left, fighting out of the red corner.
With a record of
6 - 1 - 0, fighting out of New York, Ian Carter!
And introducing the challenger to my right, fighting out of the blue corner.
With a record of
11 - 2 - 0, fighting out of New York, Brad Rood!
The judges for this bout are Alyssa Summers, Dean Styles and Bruno Lombardi.

The bell rings for round one and we are underway!
Carter stuffs the takedown.
Rood fakes high and shoots in for a takedown but Carter avoids it really well and circles away.
Carter has his head snapped back a nice jab. A little nod from Carter there as he acknowledges the shot.
Carter throws a lazy right hand but Rood sees it coming a mile off and sidesteps it easily.
Rood fails to land the takedown.
Ian Carter has stuffed three takedown attempts in the round now. That's going to take a lot out of Brad Rood.
Carter lands with a cross to side of his opponent's head.

Rood closes the distance and gets a trip takedown into side control. Carter quickly recovers to half guard.
Carter wants to get back to full guard.
Carter gets back to full guard.
Rood sitting in guard, not really doing much.
Carter is working an open guard here, looking to improve his position. No doubt that will leave him open to counters but at least he's being more offensive.

That's one minute gone in the round.
Rood with a flurry of punches that miss.
The fighters are pressed up against the cage, both looking to find a bit of space to work.
Rood wants to control from the top but Carter keeps moving.
Rood throwing strikes from guard but Carter blocks nicely.
Carter keeping full guard, as Rood tries to pass.
Carter is doing well to control the posture of his opponent and prevent any damage.
Carter wants to hit a switch here but Rood passes into full mount! Oh no, disaster for Carter there!
Carter wants to hold on but Rood pushes him away.

That's two minutes gone in the round.
The crowd are hurling abuse towards the fighters... You can hardly blame them though because there isn't a lot going on in the fight.
Carter tries to get back to half guard but can't.
Carter regains half guard.
Rood trying to pass the guard but Carter defending well.

Rood is working for a submission of some sort.
Rood tries to pass to full mount but Carter defends it.
The two fighters exchange a few words. I couldn't hear what they were saying but maybe it's more fun if you make it up yourself. Rood connects with a nice short shot to Carter's temple.

That's three minutes gone in the round.
Carter is looking to regain full guard. Not this time though.
Rood is trying to control the action in half guard but Carter is working away on the bottom, looking perhaps to get back to full guard.
The ref warns both fighters not to hold the cage as they work up against the meshing.
Rood thumps the canvas. Not on purpose obviously - he just missed Carter's head.
Carter is trying to control but can't.
Neither fighter is being very active at the moment, with Rood in particular looking to stall.
Carter trying to control here.
Rood is trying to control the action in half guard but Carter is working away on the bottom, looking perhaps to get back to full guard.

The referee has ruled that neither fighter is active enough on the ground and has stood them back up.
Carter tries to work over Rood's front leg with a kick but Rood checks it.
Carter wants to land a leg kick but Rood is out of range.
Rood shoots in for a takedown and gets it. Oh and he's advanced to full mount straight away.

That's four minutes gone in the round.
Carter can't escape the position.
Rood scoring with some good ground and pound from mount here. Will he manage to finish Carter?
Carter working to try and regain half guard.
Rood controlling from the full mount.
Rood dominating with strikes here.
Carter tries to lock up and control but Rood gives him a forearm to the face and pushes him away.
Rood looking to control but Carter is working nicely, looking to advance position himself.
And thats the end of the round the fighters go back to their corners.
Brad Rood dominated that round.
OK. That's time! The bell goes and we're back to the action.


Rood moves into the clinch.
Carter tries a body shot but Rood blocks it.
A frustrated look appears on Carter's face as he tries to break the clinch.
Carter doesn't land with the attempted body shot.
Carter is trying to break the clinch but Rood is controlling him.
Rood tries for a takedown but Carter manages to get underhooks.

Rood breaks the clinch.
Rood is looking to clinch but Carter is avoiding it.
Rood is looking for a takedown here. He's shot in and has managed to get it, finishing up in Carter's half guard.
Rood perhaps working for something from half guard, or maybe not. It looks like he's just sitting there.
Carter moves into full guard.
Carter is adopting a defensive guard.
Carter's ground tactics aren't going to win him many fans. Let's hope he's got fireworks for us if he gets back to his feet because he's not doing much on the ground.
That's one minute gone in the round.
Carter is working from a closed guard but he's struggling to control his opponent.
Rood won't allow Carter to sweep him here.
It looks like the ref is thinking about a standup.
Rood wants to control from the top but Carter keeps moving.
Carter seems keen to control Rood's posture.
We're going to have a standup here because Ian Carter wasn't active enough for the referee's liking.
Carter looks to throw the jab but Rood is out of range.
Rood shoots in with a takedown attempt and he has Carter pinned against the cage. Carter gets the underhooks and manages to circle away.
Carter misses with a straight left.
Rood scores with a punch to the head.
That's two minutes gone in the round.
The crowd are getting on the fighters' backs, as the pace has dropped off in the last minute or so.
Rood bobs and weaves well there to avoid the strikes.
Rood uses decent footwork to sidestep a right hand from Carter.
Carter cracks Rood with a hook to the jaw. Both fighters smile at eachother and high-five before getting back down to business.
Carter moves out of range of the strikes.
Rood checks a leg kick nicely.
Ian Carter seems to be the more aggressive standup fighter in this bout.
Rood ducks under a wild hook from Carter.
Rood dives in and grabs Carter's left leg, looking for a takedown. Carter pushes down on Rood's head and hops out.
Ian Carter has stuffed three takedown attempts in the round now. That's going to take a lot out of Brad Rood.
Carter throws a big shot that misses.
Rood tries to land with a swinging hook to the body but Carter was well out of range. Poor timing from Rood.
Carter throws a good cross that connects.
Rood waving his hands out in front of him, looking to distract Carter.
Carter connects nicely with a jab. Noted by the judges no doubt.
Carter misses the shot to the body.
Ian Carter is looking to throw some combinations by the looks of things.
A big right from Carter misses.
Rood slips under a jab from Carter.
Carter ducks under a wild hook from Rood.
Rood will have to do better than that with his takedown attempts.
That's three minutes gone in the round.
Carter connects with a hook to the side of his opponent's head.
Rood takes one on the button.
Carter lands the left hand.
Carter misses with a jab and misses with a cross straight after too.
Rood getting the better of the striking in that exchange.
Carter looks to score with a jab to the body but Rood is just out of range.
A jab from Carter misses.
Rood fakes a head shot and lands one to the body.
Both fighters are absolutely exhausted here.
Rood fails to land the takedown.
No joy there for Carter, who threw a few shots but didn't land.
A nice leg kick lands there from Rood.
Rood will need to tighten up his combinations if he doesn't want to gas himself out, swinging at thin air.
The fighters circling - Carter throws out the jab but it was never going to land.
Carter clobbers Rood with an overhand right that has the crowd gasping. That made a horrendous noise.
That's four minutes gone in the round.
A cross from Rood lands.
Carter lunges in with an uppercut that skims his opponent's chin.
Rood misses with a straight right.
Rood steps to the side to avoid the strikes from Carter.
Carter doesn't react quick enough there as he takes a shot to the body.
Fantastic stuff here - a very entertaining period of action, which has drawn cheers from the crowd.
Rood is the aggressor but that punch slipped nicely by Carter.
Carter throws an uppercut from half a mile away. Rood sees it coming and avoids it easily.
Carter avoids the body shot from Rood.
Carter keeping at a good range here, avoiding a leg kick.
Carter misses with a wild combination.
Rood defending well as Carter loads up on a big left hand.
The crowd applaud the fighters efforts here as the round comes to an end.
Rood closes the distance and scores a nice trip takedown into half guard. Carter did well to prevent Rood getting side control.
Rood seems very keen to just sit and control from half guard but Carter does not like that idea so much and is remaining active off his back.
Rood content to sit in half guard and control for a moment.
And thats the end of the round the fighters go back to their corners.
Brad Rood showed his class in that round. I'd imagine he'll take it on all the scorecards.
OK. That's time! The bell goes and we're back to the action.

Rood swings wildly with a couple of big hooks
letting Carter counter with a right hand.
Carter keeping a good distance there, avoiding the body shot.
Ian Carter is winning the standup battle so far.
Carter throws a hook to the side of Rood's head but Rood sees it coming and ducks under it beautifully.
Rood throws a shot to the body.
Carter will need to close the distance a bit before he attacks - that leg kick was thrown from too far away.
Rood throws a sloppy head kick and Carter moves out of range easily.
Carter looks to score with a combo but nothing lands.
Rood is the aggressor but that punch slipped nicely by Carter.
Rood fails miserably with a takedown attempt.
Carter misses with a hook to the body
and Rood makes him pay by landing a nice hook to the body before moving out of range.
Carter throws a combination but comes up with nothing but fresh air.
Rood scores with a crisp jab that stopped Carter in his tracks.
Carter throws a left and a right that both miss
and Rood counters with a low kick, right behind Carter 's knee.
Rood dives in and grabs Carter's left leg, looking for a takedown. Carter pushes down on Rood's head and hops out.
Both fighters are breathing heavily.
Carter shakes his hands off, looking to compose himself, but takes a jab to the jaw whilst he does it.
Rood swinging wildly here.
That's one minute gone in the round.
No joy there for Rood, who threw a few shots but didn't land.
Rood misses with a shot to the body
and Carter counters with a quick right hand to the jaw.
Carter throws out a loose jab but Rood uses good head movement to avoid it.
Carter slips a jab and a cross from Rood.
Carter ducks down and throws a hook to the body but Rood moves away.
Rood shoots for a takedown but Carter saw that one coming a mile off and avoided it easily.
Ian Carter has stuffed three takedown attempts in the round now. That's going to take a lot out of Brad Rood.
Rood lands a right hook to the body.
Rood pulls out of a head kick attempt.
Carter avoids the head kick by Rood.
Rood throws a jab to the body, straight down the pipe. Boom. That sent Carter stumbling backwards but he manages to regain his composure quickly.
Carter lands a jab, followed by a cross and another cross, as Rood backs up against the cage.
Nice sprawl there from Carter as Rood shoots in.
A shot to the liver by Carter. Beautiful body shot.
Carter throws a lazy right hand but Rood sees it coming a mile off and sidesteps it easily.
Rood looks to land a right hand but Carter moved out of range.
That's two minutes gone in the round.
Rood moves into range and throws a lovely three punch combination.
Rood shakes his hands off, looking to compose himself, but takes a jab to the jaw whilst he does it.
Rood scores with a hook to the body. Carter takes a step back and tries to catch his breath.
Carter lands a jab-cross combination.
Rood misses with a low kick as Carter jumps back.
Rood connects with a single shot there.
Rood avoids the head kick by Carter.
Carter just misses with a punch to the body.
Rood connects with a lovely right hand, straight down the pipe.
Carter misses with a straight left.
Rood misses with a body shot
and Carter counters with a one-two to the body.
Rood moves away from the strike by Carter.
Rood scores with a one two! Carter had his feet all tangled up there and couldn't avoid the strikes.
That's three minutes gone in the round.
Carter throws the kick towards the body but Rood avoids it.
Carter moves forwards but Rood connects with a nice, crisp jab.
A really sloppy takedown attempt there from Rood.
Rood lands a leg kick and bounces back out of range.
Rood tries to clinch up but Carter circles away and keeps his distance.
Carter takes a solid shot to the body. That one hurt him but he's trying not to show it.
Rood throws a two punch combo that lands nicely.
Rood cracks a nice hook into Carter's ribs.
Rood jabs Carter to the body, keeping him at a distance.
Carter swings and misses with a shot to the body
and Rood counters with a nice jab to the body that keeps Carter thinking.
Carter slips a jab and a cross from Rood.
Rood tries to clinch there but Carter circles away.
Rood thows a body shot but no joy.
Rood moves out of range of the body kick.
That's four minutes gone in the round.
Rood closes this distance looking for a takedown but Carter circles away.
Carter scores with a nice head shot.
Rood misses with a straight right.
Rood throws a wild combination but nothing lands.
Rood pushing out the jab but it's not landing.
Rood throws a body punch but Carter moves out of range.
Rood throws a jab, cross combination which is slipped
letting Carter counter with a right hand.
Rood walks straight into a jab right on the nose. That one stung - he's blinking and trying to clear his head.
Carter tests Rood's chin there with a solid looking shot.
An inside leg kick from Carter misses.
As the round comes to an end the crowd are showing their appreciation for a great round of action.
Rood shoots in for a takedown - he's clinched up with Carter but Carter pushes him off and we're back to square one.
Carter cracks Rood with an open hand slap.
We've seen a great period of action over the last minute or so - credit to both fighters for going all out!
A jab from Carter finds it's way through Rood's defenses.
And thats the end of the round the fighters go back to their corners.
Brad Rood really dominated that round.
The corners get their ten second warning. Both fighters stand from their stools and stare eachother down, ready to get back to the action.

Rood lets the fists fly and connects with a left straight followed by a right hook.
Carter scores with a hook to the body. Rood takes a step back and tries to catch his breath.
Rood with a poor takedown
and Carter counters with a lovely shot to the body.
Rood drops his hands and takes a jab to the jaw for his troubles.
Rood looks to score with a jab to the body but Carter is just out of range.
Well, he's not going to score with shots like that. A lazy body kick attempt from Carter.
An inside leg kick from Carter misses.
Carter cracks Rood with a good shot that sees him stumbling back into the cage.
Rood throws out a powerful jab.
Carter takes a jab right on the kisser.
Rood checks a low kick from Carter.
Carter misses with a low kick.
Rood throws a predictable looking body shot
and Carter counters with a one-two to the body.
Rood misses with a hook. Carter ducked under it nicely.
Rood staying out of range there.
That's one minute gone in the round.
Carter thows a left - swing and a miss!
It's got to the stage where if one of these guys blows hard enough, the other might fall over.
The fighters circling - Carter throws out the jab but it was never going to land.
Carter gets taken down but at least he's managed to land in guard.
Rood in full guard, throwing the ground and pound. No damage this time.
Carter looking for a sweep. Not yet Carter, not yet.
Carter is avoiding any damage by keeping wrist control.
Rood trying to control but Carter is working from the bottom.
Rood scoring with punches to the head and body.
Carter is working an open guard here, looking to improve his position. No doubt that will leave him open to counters but at least he's being more offensive.
Rood stands up over Carter, holding his feet. He dives back in and lands a decent shot to the head.
That's two minutes gone in the round.
Carter trying to keep a closed guard but Rood is proving a slippery customer.
Rood seems content to control from guard here. He's going to have to remain active though if he doesn't want to get stood back up.
Carter keeping moving, preventing Rood from controlling successfully.
Rood has the superior BJJ but he's also working some ground strikes into his gameplan.
It looks like we're going to have a standup here. Neither fighter is doing enough on the ground.
A telegraphed right hand from Carter misses the target.
Carter missing with a left hand there. Rood was out of range so wasted energy throwing that one.
Rood slips a jab from Carter.
Rood throws a nice head kick!
Carter connects with a crisp jab.
That's three minutes gone in the round.
Carter lands with a good body shot.
A punch combination from Carter misses.
Carter throws a big shot that misses.
Carter fakes with the hands and throws a leg kick but Rood is out of range.
Carter missing with a left hand there. Rood was out of range so wasted energy throwing that one.
Rood misses with a body shot.
Rood takes a step towards his opponent and connects with a left hand, before circling away.
Rood has a pretty nasty looking mouse under his right eye.
Rood throws a series of punches but Carter moves out of range.
Carter moves into range and throws a combination. A nice jab followed by a hook to the body.
Rood scores with a crisp jab that stopped Carter in his tracks.
Rood scores with a body shot.
Rood takes a swing at Carter's ribcage but misses.
Carter lunges in with swinging rights and lefts but Rood circles away quickly and effectively.
Rood swings and misses with a hook to the body.
Carter ducks under a wild hook from Rood.
That's four minutes gone in the round.
Carter misses with a double jab.
Carter swings and misses with a shot to the body
letting Rood counter with a right hand.
Rood's corner calls for a 1,2 combination and Rood duly obliges.
Carter throws a hook to the body but it doesn't connect.
Rood misses with a telegraphed body shot
letting Carter counter with a right hand.
Rood throws a nice hook to the body that draws an oooh from the crowd.
Excellent takedown into side control there by Rood.
You can see the frustration on Carter's face as Rood controls the position.
Carter is looking to regain half guard here but Rood keeps moving and retains side control.
Carter parries the strikes from Rood easily there. Rood is wary of posturing up too much because it might enable Carter to escape.
The crowd applaud the fighters efforts here as the round comes to an end.
You can see the frustration on Carter's face, being in this tough position on the bottom.
Rood landing strikes.
And thats the end of the round the fighters go back to their corners.
Brad Rood dominated that fourth round.
The referee calls time. The cornermen exit stage left and we're back to business. This is the final round!

Carter misses with a hook.
Carter misses with a straight right.
Carter lands with a nice body punch.
Rood misses with an uppercut. Carter saw that one coming.
Rood will have to do better than that with his takedown attempts.
Carter tests Rood's chin there with a solid looking shot.
Rood tries to land with a swinging hook to the body but Carter was well out of range. Poor timing from Rood.
Rood misses with a body shot. Nice footwork from Carter.
Carter ducks low and lands a nice hook to the body of his opponent.
Rood lands with a nice body punch.
Rood moves into range and throws a lovely three punch combination.
Both of our modern day gladiators look out of it here - an gruelling 5 rounds of action taking it's toll on them, no doubt.
Carter misses with a two punch combination.
Carter connects with a looping left hand that seems like it dazed Rood momentarily.
Rood uses decent footwork to sidestep a right hand from Carter.
That's one minute gone in the round.
Rood ducks down and throws a hook to the body.
Nice uppercut lands for Carter. That snapped Rood's head back.
Rood scores with a jab to the body.
Carter ducks right into an uppercut from Rood.
Carter throws a leg kick which misses Rood's front leg but catches the back leg as Rood tries to avoid it.
Rood throws out a token jab with nothing on it.
Rood misses with a body shot.
Rood connects with a looping right hand.
Carter throws a low kick but his opponent is out of range.
Carter takes a thudding leg kick, right into the meat of the thigh.
Rood throws a series of punches but Carter avoids them all with ease.
Rood misses with a double jab.
Carter dodges the punch combination from Rood.
Carter throws out a token jab with nothing on it.
That's two minutes gone in the round.
Carter keeping a good distance there, avoiding the body shot.
Rood takes one to the chin there.
Rood thuds a left hand into Carter's body.
A low kick from Carter is predictable there
and Rood decides to take the opportunity to score a takedown. He's landed in Carter's guard.
Carter manages to land a sweep and now he's in mount on top!
Wooooo! Give it up for these two warriors! They are putting on a show!
Rood bucks up and manages to get a nice reversal! He's in guard on the top - nicely done!
Rood looking to pass the guard.
Carter utilising some decent striking defenses from the guard, preventing the ground and pound.
Rood drops back for a leg! It's a sloppy attempt though and Rood jumps back into guard quickly, to retain the dominant position.
That's three minutes gone in the round.
Carter not looking particularly offensive just at the moment.
Ian Carter has stepped it up - he knows he needs a finish here!
Brad Rood has got the better of the ground game so far.
Carter is looking for a guillotine. You can't force these things though and Rood defends well.
Rood showing good wrestling skills to control the position.
Rood tries to free his leg and advance position but Carter is retaining full guard.
Brad Rood is fighting for a decision here - he's started to take the cautious approach.
That's four minutes gone in the round.
Well. There's a bit of a lull in the action here and the crowd are starting to get restless.
Carter is controlling Rood's posture.
The referee is pacing around the two fighters - he looks like he's thinking about a standup.
Neither fighter is doing enough for the referee's liking and he's decided to stand them back up.
Rood swings for the body but Carter moves out of range.
Carter ducks down and throws a hook to the body but Rood moves away.
Rood shoots in for a takedown - he's clinched up with Carter but Carter pushes him off and we're back to square one.
Carter bobs and weaves well there to avoid the strikes.
Rood ducks under a wild hook from Carter.
Rood misses with a wild body shot.
Carter swings and misses with a hook to the body.
Carter keeps the fight standing with a nice sprawl.
Ian Carter has stuffed three takedown attempts in the round now. That's going to take a lot out of Brad Rood.
Carter scores with a nice strike.
Rood fails miserably with a takedown attempt.
Rood is throwing a lot of body shots here, looking to wear down Carter rather than just go for the knockout.
Carter thuds his right hand into Rood's forehead from close range. That could be painful for both fighters.
And that's the end of the fight!
Brad Rood comfortably won the final round on my scorecard.
Well Rood has outworked and out performed his opponent in all aspects of the game today. He was simply too good and the decision should be no more than a formality. Over to the ring announcer for the scorecards.
Ladies and gentlemen, after 5 rounds of action, we go to the scorecards for a decision.
Judge Alyssa Summers scores the fight 45:50
Judge Dean Styles scores the fight 45:50
Judge Bruno Lombardi scores the fight 45:50
In favor of your winner, by unanimous decision... Brad Rood! Brad Rood retains his welterweight title!
|
|
|
|
|
|
|
|
|
|
|
|
|
|
|
|
|
|
|
|
|
|
|
| S |
C
A |
G |
S |
C
B |
G |
|
S |
C |
G |
|
energy
A | B |
|
hype
A | B |
|
pop
A | B |
|
mgr
A | B |
|
FIGHT
RATING
100% |
|
|
|
|
|
|

