|
|
PBP Commentary |
Coming up we have a welterweight MMA rules bout between Bhang Bhang (ranked 0 p4p, 0 weight class) and Marlo Bell (ranked 0 p4p, 0 weight class). Both these guys have really solid chins. Will we see a standup war or will they both decide that a knockout is unlikely and try to win the fight elsewhere?
 |
|
 |
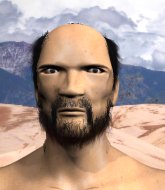
| 176 cm
23
184 lbs
7 - 2 - 0 |
|
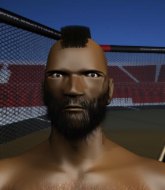
200 cm
27
180 lbs
9 - 3 - 1 |
Good wrestling
Excellent boxer
Very strong |
|
Decent wrestler
Excellent boxer
Powerful |
|
| |
|
Ladies and gentlemen. This fight is 3 rounds, in the welterweight division.
Introducing the fighter to my left, fighting out of the red corner.
With a record of
7 - 2 - 0, fighting out of Hilo, Bhang Bhang!
And introducing the fighter to my right, fighting out of the blue corner.
With a record of
9 - 3 - 1, fighting out of Hilo, Marlo Bell!
The judges for this bout are , and .

The bell rings for round one and we are underway!
Bhang fakes high and swings low for a body shot but Bell manages to avoid it.
Bhang swings and misses with a hook to the body.
Bhang tries to land with a swinging hook to the body but Bell was well out of range. Poor timing from Bhang.
Bhang swats away the attempt to clinch by Bell.
Bell throws a jab to the body, straight down the pipe. Boom. That sent Bhang stumbling backwards but he manages to regain his composure quickly.
Bell doesn't manage to clinch there - Bhang circles away.
Bhang tries to clinch up.
Bell thuds his right hand into Bhang's forehead from close range. That could be painful for both fighters.
Bhang lands a jab to Bell's midsection.
Bell has his hands up protecting his head but a hook from Bhang finds it's way round the side to connect with Bell's head.
Bell takes a shot to the eye socket. That's gotta hurt.
Bell shoots in for a takedown but Bhang shows good takedown defense.
Bhang pulls out of a head kick attempt.
Bhang tries for a takedown but Bell sees it coming a mile off and avoids it easily.

Bhang scores a takedown into full mount!
Bhang lands a big shot there that rocks Bell but he's holding on and managing to survive for now.
Bell tries to lock up and control but Bhang gives him a forearm to the face and pushes him away.
Bhang lands an elbow that was bordering on illegal but the referee lets it go with a warning.
Bhang is landing with some decent strikes but Bell is trying to advance his position so the referee is letting the fight continue.
The referee warns Bell that he has to improve his position here as he takes two more clean shots to the head.
We've seen a great period of action over the last minute or so - credit to both fighters for going all out!
Bhang avoids the attempt from Bell to control.
Bell really doesn't want to stay on the ground with Bhang. If he can't get it back to his feet, it's only a matter of time before he'll be tapping out.

That's one minute gone in the round.
Bell is wriggling around trying to escape.
Bhang controlling his opponent.
The ref warns both fighters not to hold the cage as they work up against the meshing.
Bell is looking to improve his position but Bhang isn't that keen on the idea.
Bell is a painfully thin specimen of a man. You do wonder whether a good body kick would snap him clean in two.
Bhang working the ground and pound effectively.
Bhang landing shots from mount.
Bhang is in the full mount, landing strikes.
Bell is desperately trying to improve his position but Bhang has a good base and remains in mount.
Bhang tries to control but Bell wriggling away.
Bell wants to hold on but Bhang pushes him away.
Bhang lands a heavy elbow.
Bell really trying hard to get back to half guard here.
Bhang lands with some strikes.

That's two minutes gone in the round.
Bhang tries to control but Bell wriggling away.
Bell is not a happy chappy
he wants out of there.
Bell is writhing around trying to get back to his feet.
Bhang cracks Bell with a nasty head shot there - the crowd let out an audible gasp there, as the noise reverberated around the arena.
Bhang unloading with bombs!
Bell tries to hold on but Bhang pushes him away.
We get told so often about how wrestlers don't like to be on their backs. Let's see if Bell can do anything to dispel that myth.
Bell is wriggling around trying to escape.
Bhang with shots to the head and body - Bell looks very uncomfortable down there.
Bhang has been looking to land a fair amount of strikes on the ground. He might be looking to soften his opponent up in order to work for a submission.
Bell is looking to get to half guard.
Bhang raining down shots from the mount!
Bhang landing strikes from the mount.
The fighters are pressed up against the cage, both looking to find a bit of space to work.
Wooooo! Give it up for these two warriors! They are putting on a show!
Bell is in a horrible position here. Bhang smacks him with another shot as he tries to escape the position.
Bhang is in the full mount, landing strikes.

That's three minutes gone in the round.
Bhang avoids the attempt from Bell to control.
Bhang looking to finish Bell with some ground and pound. This is bad for Bell!
Bhang scoring with strikes but Bell is staying in there.
Bell is desperately trying to improve his position but Bhang has a good base and remains in mount.
Bell is bucking up trying to escape but Bhang cracks him with another couple of good strikes.
A nice elbow there by Bhang.

It looks like Marlo Bell has been cut.
Bhang with the ground and pound from mount.
Bell can't escape the position.
Bell looks gassed!
Bhang putting on the heat here with some good ground and pound!
Bhang is in the full mount, landing strikes.
Bhang lands a big shot there that rocks Bell but he's holding on and managing to survive for now.
Bhang scores with a couple of good head shots there.
Bhang controlling from mount.
Bell working to try and regain half guard.

That's four minutes gone in the round.
The fans in attendance giving it up for the two fighters, who have really let it all hang out in the last minute or so!
Bhang raining down shots from the mount!
Bhang pausing momentarily but resumes with a couple of decent strikes that do a bit of damage.
Bhang sitting in mount, just looking to control for the moment.
Bhang landing punches.
Bhang punishing his opponent with strikes.
As the round comes to an end the crowd are showing their appreciation for a great round of action.
Bhang lands a big elbow.
Bhang raining down hammerfists from mount.
Bhang has his opponent pinned against the cage, landing some nasty ground and pound that is really making a bit of a mess out of Bell's face.
That has opened up Marlo Bell's cut even more.
Bell is wriggling around trying to escape.
Bhang content just to control the position here.
And thats the end of the round the fighters go back to their corners.
Bhang Bhang dominated that round.
The cut man is working on Marlo Bell's cut.
That's time! Bhang's corner gives him a slap on the ass as he gets ready to fight.

Bhang shoots in for a takedown but Bell shows good takedown defense there and keeps this one on the feet.
Bell swings wildly with a hook that is half blocked by Bhang.
Bell scores with a straight right hand, right through his opponent's guard.
Bhang circles away from the clinch attempt.
Bell is looking to clinch but Bhang is avoiding it.
Bell throws a big shot that misses.
Bell looks to score with a combo but nothing lands.
Bell takes a body punch but keeps moving.
Bell tries to clinch but fails miserably
and Bhang counters with a stiff right hand.
Bell uses good footwork to get in and out, landing a nice hook.
Bell clobbers Bhang with an overhand right that has the crowd gasping. That made a horrendous noise.
Bell has used his reach advantage pretty well so far tonight.
Bhang avoids the body shot from Bell.
Bhang throws a wild combination but nothing lands.
Bell fakes a head punch and goes low to the body. Nicely done.
Bell doesn't manage to clinch there - Bhang circles away.
Nice sprawl there from Bell as Bhang shoots in.

Bhang closes the distance and presses his opponent up against the cage.
Bhang lands a short shot on the inside that snaps the head of Bell backwards.
Bhang working aggressively here.
That's one minute gone in the round.
Bhang throws a blind hook that connects with the side of Bells head.
Bhang lands punches inside but they're not really causing much damage.
The cut above Marlo Bell's eye is starting to cause him problems now.
Bhang looking to stall.
Bell wants to break the clinch but can't.
Bhang tries to land a knee to the body but he is off balance and Bell avoids it.
Bell blocks a punch to the side of the head.
Bell wants a takedown.
Bell misses the knee to the body. Nice hip positioning from Bhang.
Bell tried to land a shot to the body but connects with Bhang's elbow.
A real battle for position is taking place between these two warriors.
A left hand lands to the body for Bhang.
Bell is working hard here but doesn't seem to be able to control effectively, up against the cage.
Bell is breathing heavily.
A right hook to the body lands for Bhang.
A short right from Bhang.
Bhang managing to block the knees to the body from Bell.
Bhang is looking for a takedown up against the cage. Bell gets underhooks though and prevents the takedown attempt.
That's three failed takedown attempts in the round for Bhang Bhang. That's going to take a lot out of him.
Bhang is trying to maintain a safe position but Bell gets an underhook and turns Bhang into the cage.
Bhang lands a nice knee to the body.
Bell is trying to break the clinch but Bhang has him pressed against the cage.
Bell has Bhang pressed up against the cage and is working for takedown. Bhang manages to improve position though and keeps the fight standing.
Bhang effectively controlling the action here.
Bhang lands a damaging elbow.
That's two minutes gone in the round.
Bhang works for underhooks and lands a body shot in the process.
Bell goes for a body shot but it's blocked.
Bell managing to block the knees to the body from Bhang.
Bell is leaning against Bhang and scores with a nice uppercut to the body.
Bell is trying to break the clinch but Bhang has him pressed against the cage.
Bhang lands a nice elbow from the clinch.
Bhang lands a body punch in the clinch.
Bhang presses Bell against the cage and delivers a mid-strength body shot.
Bhang has Bell pushed against the cage.
Bhang lands a nice looking hook to the body, against the cage.
A short right from Bhang.

Bhang's corner calls for him to break the clinch, which he does.
Bhang turns his hip over beautifully as he lands a nice leg kick.
Bell tries to grapple but his opponent circles
and Bhang counters with a nice leg kick.
Bhang throws a poor cross that misses
and Bell counters with a straight punch to the midsection.
Bell swings away with a body shot that misses
and Bhang counters with a thumping low kick.
Bell wants to clinch up but Bhang keeps it at a distance.
Bhang misses with an uppercut.
Bell thows a body shot but no joy.
That's three minutes gone in the round.
Bell ducks under a wild hook from Bhang.
Bhang throws a nice hook to the body that draws an oooh from the crowd.
Bhang shoots in and gets a takedown into half guard. Bhang showed some decent athleticism there.
Ground and pound from Bhang.
Bell makes his way to full guard. A much better position for Bell.
Bhang wants to control from the top but Bell keeps moving.
Bhang Bhang overall seems to be getting the better of the ground position in the fight so far.
Bell not looking particularly offensive just at the moment.
Bhang stopping the sweep attempt from Bell.
Bhang chips away with some ground and pound.
Bell keeping full guard, as Bhang tries to pass.
Bhang is working the ground and pound from guard. He might want to try advancing position though to get more of an impact.
That's four minutes gone in the round.
Bell looking for a sweep. Not yet Bell, not yet.
Bhang wants to control from the top but Bell keeps moving.
Bell looking for a sweep. Not yet Bell, not yet.
Bell manages to land a sweep and now he's in mount on top!
Bhang is looking to get to half guard.
Bhang regains half guard.
Bhang controlling the position for now.
And thats the end of the round the fighters go back to their corners.
Bhang Bhang dominated that second round.
The cut man is working on Marlo Bell's cut.
OK. That's time! The bell goes and we're back to the action. So, we enter the final round. Let's see if either fighter can bring us a finish, or whether we're going to the judges scorecards.

Bell connects nicely with a jab. Noted by the judges no doubt.
Bhang takes a body punch that cleary hurt but he's trying not to show any weakness.
Bell scores with a decent looking hook.
Bell stooping low to avoid any incoming strikes and then lunges in with an uppercut come cross that lands flush.
Bell tries to clinch but Bhang is having none of it.
Bell is using his reach advantage to land shots from outside his opponent's range.
Bell gets to the clinch - let's see what his plan is here.
Bell working hard to break the clinch.
Bell misses the knee to the body. Nice hip positioning from Bhang.
Bhang lands a hook that snaps the head of Bell backwards.
Bhang presses Bell against the cage and delivers a mid-strength body shot.
Bell misses with a body punch.
Bhang lands a nice shot to the body.
Bhang holding his opponent close, against the cage.
Bell breaks the clinch.
Bhang shoots in and gets a takedown into half guard. Bhang showed some decent athleticism there.
Bhang seems to be taking a bit of a break to think of his next move. He lands a short punch in the meantime.
Bhang moves into full mount! Bell won't be happy about that!
Both fighters are breathing heavily.
That's one minute gone in the round.
Bhang avoids the attempt from Bell to control.
Bhang tries to control but Bell wriggling away.
Bhang working away from the top, dropping strikes.
Bhang raining down hammerfists from mount.
Bhang lands a shot to the body, followed up by a shot to the exposed head of his trapped opponent.
Bell is in all sorts of trouble here.
Bhang dominating with strikes here.
Bhang with shots to the head and body - Bell looks very uncomfortable down there.
Bhang is in the full mount, landing strikes.
Bell is desperately trying to get back to half guard.
Bhang lands a shot to the body, followed up by a shot to the exposed head of his trapped opponent.
Bhang lands a big shot there that rocks Bell but he's holding on and managing to survive for now.
That's two minutes gone in the round.
Bhang tucks in and makes sure he doesn't lose the dominant position.
Bhang looking to ground and pound his opponent to a finish here.
Bell tries to get back to half guard but can't.
Bhang fakes a shot to the body and cracks his opponent in the head. Nice ground and pound there!
Marlo Bell's cut is absolute horrible now. This looks like something out of a horror film with blood covering both fighters.
The referee calls the doctor in to look at Marlo Bell's cut. Oh no, the doctor has called an end to the bout!
Ladies and gentlemen, after 2:38 of round 3, we have a winner by way of TKO (Cut). Bhang Bhang!
|
|
|
|
|
|
|
|
|
|
|
|
|
|
|
|
|
|
|
|
|
|
|
| S |
C
A |
G |
S |
C
B |
G |
|
S |
C |
G |
|
energy
A | B |
|
hype
A | B |
|
pop
A | B |
|
mgr
A | B |
|
FIGHT
RATING
100% |
|
|
|
|
|
|
