|
|
PBP Commentary |
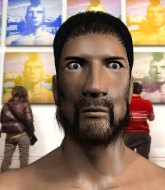
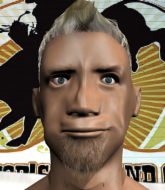
Coming up we have a heavyweight MMA rules bout between Gerald Young II (ranked 0 p4p, 0 weight class) and Puukko Punkkari (ranked 0 p4p, 0 weight class). Over to our ring announcer for the fighter introductions!
 |
|
 |
| 150 cm
27
265 lbs
6 - 7 - 0 |
|
225 cm
24
250 lbs
10 - 12 - 0 |
Good wrestling
Solid boxing
Granite chin |
|
BJJ Purple Belt
Excellent MT
Knockout power |
|
| |
|
Ladies and gentlemen. This fight is 3 rounds, in the heavyweight division.
Introducing the fighter to my left, fighting out of the red corner.
With a record of
6 - 7 - 0, fighting out of London, Gerald Young II!
And introducing the fighter to my right, fighting out of the blue corner.
With a record of
10 - 12 - 0, fighting out of London, Puukko Punkkari!
The judges for this bout are Richard Clark, Colin Fotheringham and James Ackerman.

The bell rings for round one and we are underway!

Young II closes the distance and gets a double leg, slamming Punkkari to the mat! Punkkari manages to get full guard.
Punkkari is a painfully thin specimen of a man. You do wonder whether a good body kick would snap him clean in two.
Punkkari is trying to keep Young II in close.
Young II throwing strikes from guard but Punkkari blocks nicely.

Punkkari is looking for a guillotine. You can't force these things though and Young II defends well.
Punkkari preventing the ground and pound from doing any damage.
Punkkari preventing the ground and pound from doing any damage.
Punkkari is working the butterfly guard. He manages to land a nice scissor sweep and is now in half guard on the top. Nice move.
Young II wants to get back to full guard.
Punkkari sitting in half guard, looking to land shots. Young II defending well though.

That's one minute gone in the round.
Young II has no desire to be mounted, so is trying to control. Punkkari is working away from the top position though.
Punkkari passes to full mount!
Young II wants to control but Punkkari is having none of it.
Poor strikes thrown by Punkkari there. More accuracy and less frantic strikes would help!
Young II is wriggling around trying to escape.

That's two minutes gone in the round.
Neither fighter has done anything of merit for a good minute or two here and the crowd are not happy about it.
Young II on his back here. We all know that wrestlers don't like being on their back so let's see if Young II tries to get out of the position.
Young II blocking the ground and pound.
Young II tries to get back to half guard but can't.
Punkkari thuds his fist into the canvas! Oooouch!

That's three minutes gone in the round.
Young II working to try and regain half guard.
Punkkari has the superior BJJ but he's also working some ground strikes into his gameplan.
Young II slips a leg in and gets back to half guard.
Punkkari tries to stand but his hand is stuck under Young II.
Young II is looking to regain full guard. Not this time though.
Young II wants to control but Punkkari is keeping busy.

That's four minutes gone in the round.
The crowd are getting on the fighters' backs, as the pace has dropped off in the last minute or so.
Punkkari missing with some ground and pound from the half guard.
Punkkari is keen to just control but Young II is a slippery customer.
The ref warns both fighters not to hold the cage as they work up against the meshing.
Punkkari not landing any meaningful shots this time.
Young II wants to get back to full guard.
Young II has hold of Punkkari's hands but Punkkari slips his arm to the side and lands an elbow.
The crowd thankful this round is nearly over.
Punkkari wants to work for an arm triangle but Young II is really keeping half guard well and defending the submission attempt.
Young II gets full guard.
And thats the end of the round the fighters go back to their corners.
A close round but Puukko Punkkari will probably get the nod.
That's time! Young II's corner gives him a slap on the ass as he gets ready to fight.

Young II closes the distance and clinches up, looking for a takedown. He shifts his weight and gets a nice trip into half guard.
Young II misses with a head shot. Punkkari uses the momentum to regain guard.
Young II postures up as if he's going to throw some strikes but drops back for an ankle! Punkkari is in big trouble! He looks ready to tap! But no, he's escaped and dives on top of Young II, into his guard.
Young II knows he needs to get back to his feet asap. He's simply no match for Punkkari on the ground.
Punkkari trying to control the position from guard on top but Young II is wriggling around, looking for whatever he can.
Young II is working the butterfly guard. He manages to land a nice scissor sweep and is now in half guard on the top. Nice move.
That's one minute gone in the round.
Young II is trying a forearm choke
I don't think that's going to do much at this level of the game.
Young II trying to mount his opponent but Punkkari defends it.
Young II is working hard here to advance position.
Punkkari has no desire to be mounted, so is trying to control. Young II is working away from the top position though.
Young II tries to pass the half guard into mount. Punkkari knows what he's doing though and prevents the attempt.
That's two minutes gone in the round.
The crowd are hurling abuse towards the fighters... You can hardly blame them though because there isn't a lot going on in the fight.
Punkkari is defending against the submission attempts here by Young II.
Punkkari moves his hips nicely and gets into full guard.
Young II drops back looking for a heel hook - he quickly realises he's not going to get it but Punkkari manages to dive on top of him before he can escape and now Young II has Punkkari in his guard.
Young II managing to control the position.
Young II might be looking to lock onto one of his opponent's long limbs for a submission, whilst we're on the ground.
That's three minutes gone in the round.
Young II trying to strike from the bottom but really, it's not the best position to be doing that from!
Young II looking to sweep using the butterfly guard but Punkkari puts pay to that idea as he passes nicely into half guard.
Young II trying to control but Punkkari postures up.
Young II is looking to improve his position.
That's four minutes gone in the round.
My god... these two guys really need to pick up the pace or everyone will leave to go get a beer.
Young II trying to control but Punkkari postures up.
Punkkari prevents Young II from improving his position.
Punkkari missing with some ground and pound from the half guard.
The crowd thankful this round is nearly over.
Young II makes his way to full guard. A much better position for Young II.
Punkkari stopping the sweep attempt from Young II.
And thats the end of the round the fighters go back to their corners.
That was a close second round but I would say that Gerald Young II will probably get the nod.
The referee calls time. The cornermen exit stage left and we're back to business. This is the final round!

Punkkari fails to land with a series of punches.
Punkkari looking to take his opponent's legs away with the low kicks.
Young II shoots in for a takedown. "I don't think so" says Punkkari as he avoids it easily.
Young II fails with a takedown attempt from distance.
Young II fakes high and shoots in for a takedown but Punkkari avoids it really well and circles away.
That's three failed takedown attempts in the round for Gerald Young II. That's going to take a lot out of him.
Punkkari misses with a two punch combination.
Young II has his hands up protecting his head but a hook from Punkkari finds it's way round the side to connect with Young II's head.
Punkkari stuffs the takedown.
Young II wants to clinch.
Young II has his head slapped from side to side by a 3 punch combination. That must have hurt him.
Young II shoots for a double leg takedown but Punkkari sprawls well. He's pushed Young II's face into the mat and manages to get back to his feet relatively easily.
Young II has his head slapped from side to side by a 3 punch combination. That must have hurt him.
Young II looks frustrated there after his takedown attempt is stuffed easily.
Both fighters are breathing heavily.
That's one minute gone in the round.
Punkkari fakes a couple of low kicks, before throwing one on the third attempt. It connects and Young II has to reset his feet before getting ready to engage.
Punkkari scores with a body shot.
Punkkari scores with a hook to the body. Young II takes a step back and tries to catch his breath.
Gerald Young II seems to be the more aggressive standup fighter in this bout.
Punkkari lands a nice leg kick that just misses Young II's sensitive parts.
Punkkari lands with a slapping head kick.
Punkkari goes for a high kick. It partially lands.
Punkkari tries to bum rush Young II with a series of wild strikes but Young II uses good footwork to avoid the assault.
Punkkari lunges in with swinging rights and lefts but Young II circles away quickly and effectively.
Punkkari feints and then cracks Young II's leading leg with a nice low kick. He's obviously looking to slow Young II down.
Punkkari scores with a head kick. Young II tried to block it but didn't get his arm up in time.
Wooooo! Give it up for these two warriors! They are putting on a show!
Punkkari throws a wild combination but nothing lands.
Young II takes a jab right on the kisser.
Young II shoots in for a takedown but Punkkari shows good takedown defense there and keeps this one on the feet.
Punkkari lands a beauty of a right hand that gets the crowd cheering.
No joy there for Punkkari, who threw a few shots but didn't land.
Punkkari throws a combination. Young II tries to block but a couple of punches get through.
Punkkari goes for a high kick. It partially lands.
That's two minutes gone in the round.
Punkkari closes the distance and lands a one-two.
Young II tries to check the leg kick but that clearly hurt him.
Punkkari scores with a hook.
Young II takes a head kick and keeps coming.
Puukko Punkkari seems to be getting the better of the standup.
Young II fails miserably with a takedown attempt.
Punkkari lands with a two punch combination before moving back out of range.
Punkkari fakes a head punch and goes low to the body. Nicely done.
Punkkari scores to the head and body with a nice combination!
Punkkari is using his reach advantage to land shots from outside his opponent's range.
Punkkari lunges in with swinging rights and lefts but Young II circles away quickly and effectively.
Punkkari moves into range and throws a combination. A nice jab followed by a hook to the body.
Young II on the receiving end of a decent leg kick there by Punkkari. Punkkari obviously looking to wear him down.
Punkkari shuffles to his left behind two crisp jabs. Young II eats them both and turns towards Punkkari to reposition himself and eats a stinging right hand-left hook combo.
Young II gets his head snapped back by a nice shot there.
Young II is on the wrong end of a nice combination from Punkkari.
Punkkari scores with a jab. Young II acknowledges it with a nod of the head.
Young II dodges the punch combination from Punkkari.
That's three minutes gone in the round.
Punkkari rushes forward with a series of wild hooks but Young II moves out of range and avoids them all easily.
Punkkari's corner calls for a 1-2. Punkkari obliges with the 1 part as he scores the single shot and moves back out of range.
Punkkari is moving around nicely and scores here with a single head shot.
Punkkari thuds a left hand into Young II's body.
Young II closes this distance looking for a takedown but Punkkari circles away.
Punkkari lands a front kick.
Young II tries to clinch
and Punkkari counters with a quick right hand to the jaw.
A right-left combo lands from Punkkari.
Punkkari scores to the head and body with a nice combination!
Punkkari lets the fists fly and connects with a left straight followed by a right hook.
We've seen a great period of action over the last minute or so - credit to both fighters for going all out!
Young II walks into a straight right hand from Punkkari.
Young II looks like he's developed a pretty tasty lump over his left eye. He'll need to avoid taking much more damage to that.
Punkkari lunges in with swinging rights and lefts but Young II circles away quickly and effectively.
Punkkari lands with a slapping head kick.
Punkkari displays good takedown defense there as he swats away a double leg from Young II.
Punkkari has been the more effective fighter overall so far.
Young II fails with a takedown attempt.
That's four minutes gone in the round.
Punkkari lands with a cross to side of his opponent's head.
Young II takes a kick to the side of the head.
Punkkari scores with a jab to the jaw.
Punkkari's corner calls for a 1,2 combination and Punkkari duly obliges.
Puukko Punkkari is looking to keep the fight on the feet at all costs.
Punkkari lands a high kick!
Young II looks shocked there as he takes a right hand to the temple.
Young II scores with a takedown into Punkkari's guard.
Punkkari is working from a closed guard but he's struggling to control his opponent.
Punkkari working from the bottom, still in full guard. He's managed to get a loose triangle. Young II doesn't seem to be doing much to defend here, obviously he feels comfortable in the position. Oh but Punkkari is tightening it up a little... Young II has to be careful here... He's got his foot tucked under now, this looks tight! Young II reacted too slowly and this one could be over in a matter of seconds! YES! Young II taps out! nice BJJ there by Punkkari!
Ladies and gentlemen, after 5:02 of round 3, we have a winner by way of Submission (Triangle Choke). Puukko Punkkari!
|
|
|
|
|
|
|
|
|
|
|
|
|
|
|
|
|
|
|
|
|
|
|
| S |
C
A |
G |
S |
C
B |
G |
|
S |
C |
G |
|
energy
A | B |
|
hype
A | B |
|
pop
A | B |
|
mgr
A | B |
|
FIGHT
RATING
42% |
|
|
|
|
|
|
