|
|
PBP Commentary |
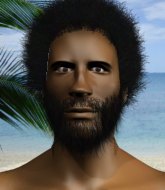
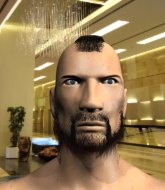
Coming up we have a featherweight MMA rules bout between Hitoshi Matsumoto (ranked 0 p4p, 0 weight class) and Aruneru Hero (ranked 0 p4p, 0 weight class). Matsumoto kept the crowd waiting but all that was forgotten when his ring entrance music started. The incomparable musical genius that is Otep - Blood Pigs. Aruneru Hero has the better chin. Will he look to stand and bang today?
 |
|
 |
| 170 cm
24
150 lbs
6 - 8 - 0 |
|
180 cm
25
151 lbs
6 - 8 - 0 |
BJJ Purple Belt
Basic striking
Experienced |
|
BJJ Blue Belt
Basic striking
Solid chin |
|
| |
|
Ladies and gentlemen. This fight is 3 rounds, in the featherweight division.
Introducing the fighter to my left, fighting out of the red corner.
With a record of
6 - 8 - 0, fighting out of Tokyo, Hitoshi Matsumoto!
And introducing the fighter to my right, fighting out of the blue corner.
With a record of
6 - 8 - 0, fighting out of Tokyo, Aruneru Hero!
The judges for this bout are Ren Mimura, Shigeki Sano and Shigeki Fujiwara.

The bell rings for round one and we are underway!
Matsumoto scores with a shot to the body.
Hero keeps the fight on the outside.
Aruneru Hero seems to be the more aggressive standup fighter in this bout.

Matsumoto rushes Hero and pushes him back against the cage in a clinch.
Hero with the Thai clinch, lands a knee to the head.
Matsumoto looking for a takedown.
Hero misses with an elbow over the top.
Matsumoto drops down for a takedown but doesn't get it.
Hero tries to land a knee to the head but misses.
Hero tries to land a knee to the head but misses.
Hero tries a knee to the head but he's missed.
Hero prevents a takedown attempt there.
That's three failed takedown attempts in the round for Hitoshi Matsumoto. That's going to take a lot out of him.
Hero using the Thai plumb to throw knees but Matsumoto has his back arched nicely, preventing the strike.
Matsumoto is trying to work for a single leg takedown but Hero pulls him back up using the underhooks.
Matsumoto dodges an elbow strike from Hero.
Matsumoto wants to break the clinch but can't.
Hero tries to land knees in the clinch but Matsumoto avoids the damage to the body.
Matsumoto tries to pull guard but can't drag his opponent to the mat. Hero just stands there and leans against the cage.
Matsumoto fails to pull the fight into his guard.

Matsumoto is trying to trip Hero. He has hold of a leg but Hero is hopping around, keeping his balance for the moment. Matsumoto persists though and gets the takedown into guard.
Matsumoto is frustrating his opponent with some stalling tactics from top position.

That's one minute gone in the round.
Matsumoto trying to control but Hero is working from the bottom.

Hero is looking for a guillotine. You can't force these things though and Matsumoto defends well.
Hero has a closed guard, preventing Matsumoto from standing up.
Hero controlling the position.
Matsumoto content to stall in guard here.

The referee decides to stand the fighters back up, due to lack of activity on the part of Hitoshi Matsumoto.
Hero closes the distance and clinches up, looking for a takedown. He shifts his weight and gets a nice trip into half guard.
Matsumoto is breathing heavily.
Hero is scoring with some nice ground and pound from the dominant position.

That's two minutes gone in the round.
Matsumoto pushes Hero off looking to stand but Hero dives back in and keeps control.
Hero drops an elbow to the side of Matsumoto's head.
Hero blocks the strikes from Matsumoto.
Hero lands with an elbow from half guard - that looked like it hurt.
The ref warns both fighters not to hold the cage as they work up against the meshing.
Matsumoto punching from the bottom.
Hero wants to control but Matsumoto is keeping him busy.
Matsumoto blocking the ground and pound attempt from Hero.
The fighters are pressed up against the cage, both looking to find a bit of space to work.
Hero is trying for a guillotine from the top but the pressure isn't in the right place so Matsumoto is just riding it out for now. Hero eventually gives up the hold.
Matsumoto tries to get to full guard but Hero has control of the leg.

That's three minutes gone in the round.
Hero throwing shots but Matsumoto is blocking nicely.
Matsumoto is staying active underneath Hero, who seems content to just control the action from this position.
Matsumoto has no desire to be mounted, so is trying to control. Hero is working away from the top position though.
Hero sitting in half guard, looking to land shots. Matsumoto defending well though.

Matsumoto makes some distance and scrambles quickly back to his feet. Nice work!
Hero throws a head kick that misses and slips in the process. He scrambles back to his feet and the fighters circle.
Matsumoto is on the wrong end of a nice combination from Hero.
Hero shoots in with a takedown attempt and he has Matsumoto pinned against the cage. Matsumoto gets the underhooks and manages to circle away.
Matsumoto tries to keep at a distance but Hero has taken the fight into the clinch.
Hero unloads a knee to the mid-section. Matsumoto lets out a prehistoric sounding urrrrgh.
Hero gets through Matsumoto's defenses to land a nice punch to the side of the head.

That's four minutes gone in the round.
Hero scores with a knee to the head.
Hero tries a knee to the head but he's missed.
Matsumoto tries to break free but Hero pushes him back against the cage.
Hero manages to pull guard. Let's see whether he can land a sub off his back.
Hero keeping moving, preventing Matsumoto from controlling successfully.
Hero escapes his hips to the side and looks to be working for an armbar. Matsumoto gives him a little smile and shakes his head. No chance.
Matsumoto trying to control the position from guard on top but Hero is wriggling around, looking for whatever he can.
Hero is trying to control the position but Matsumoto postures up.
Hero looking for submissions from the bottom here. Moving his hips around, possibly looking for an armbar.
Matsumoto working some strikes from top position.
And thats the end of the round the fighters go back to their corners.
Aruneru Hero dominated that round.
That's time! Matsumoto's corner gives him a slap on the ass as he gets ready to fight.

Matsumoto tries to clinch but Hero is having none of it.
Hero throws a head kick that misses and slips in the process. He scrambles back to his feet and the fighters circle.
Wow, both these guys are really going for it!
Hero fails with a takedown attempt.
Matsumoto wants to clinch
enabling Hero to counter with a crisp jab.
Matsumoto gets a clinch.
Hero stops a takedown attempt from Matsumoto.
Hero tries to land knees in the clinch but Matsumoto avoids the damage to the body.
Hero tries to land a knee to the head but Matsumoto blocks with his arms.
Matsumoto tries to jump guard but he falls flat on his backside. Hero smiles and moves away.
Matsumoto gets caught flat footed, as Hero shoots in with a quick takedown into guard.
Matsumoto is trying to keep Hero in close.
Both fighters are absolutely exhausted here.
Hero is looking to work some ground and pound but Matsumoto has wrist control.
Matsumoto is trying to stand up but he's not managed so far.
Hero trying to control the position from guard on top but Matsumoto is wriggling around, looking for whatever he can.
That's one minute gone in the round.
Matsumoto tries to land a sweep but no joy.
Matsumoto is working hard here to advance position.
Hero postures up and scores with a shot to the body and a follow up elbow to the head.
Hero stands up from guard. Let's bang!
Hero wants to clinch up but Matsumoto keeps it at a distance.
Hero looking for a takedown here - he's got it.
Hero with a nice head shot there.
Matsumoto avoiding any damage from the ground and pound.
Hero scoring with some ground and pound.
Hero trying to control but Matsumoto is working from the bottom.
That's two minutes gone in the round.
Matsumoto is trying to control the position but Hero postures up.
Hero stopping the sweep attempt from Matsumoto.
Hero trying to control the position from guard on top but Matsumoto is wriggling around, looking for whatever he can.
Hero is in a good position here but he's just trying to control... And he's not even managing to do that successfully.
The ref calls for a clean break and stands the fighters back up. Aruneru Hero wasn't active enough on the ground.
Hero tries to clinch up but Matsumoto circles away and keeps his distance.
Hero doesn't manage to clinch there - Matsumoto circles away.
Hero lands with a kick to the ribs.
Matsumoto dives in and grabs Hero's left leg, looking for a takedown. Hero pushes down on Matsumoto's head and hops out.
That's three failed takedown attempts in the round for Hitoshi Matsumoto. That's going to take a lot out of him.
That's three minutes gone in the round.
Hero looks to score with a combo but nothing lands.
Hero throws a right and a left that both miss.
A slapping body kick lands there for Hero.
The fight moves into the clinch position.
Hero with a knee to the head.
Hero throws a head punch that misses.
Hero is looking to score with knees to the body. Maybe he'll change it up and go body then head. Matsumoto is defending well for now.
Both guys are working to get underhooks.

Matsumoto breaks the clinch and we're back to striking at distance.
Hero throws a looping left and ducks down for a takedown. He's got his arms around Matsumoto's waist but Matsumoto gets an underhook and avoids the takedown by throwing Hero off to one side.
Hero fails to land with a series of punches.
Hero changes levels and drives through with a really nice takedown into side control. Matsumoto looks really pissed at himself for not defending that better.
Both fighters really going for it on the ground here!
Hero controlling from side mount.
Hero throwing ground and pound but whilst doing so, he forgets to control position and Matsumoto works his way back to half guard. Good composure under pressure.
That's four minutes gone in the round.
Hero trying to control from half guard but Matsumoto is working away.
Matsumoto trying to control here.
Hero is sneakily working for an arm triangle but Matsumoto sees it coming and defends easily.
Hero trying to control from Matsumoto's half guard. Matsumoto has other ideas though and has regained full guard.
Matsumoto wants to stand and escape but Hero is having none of it.
Hero throwing strikes but missing.
And thats the end of the round the fighters go back to their corners.
Aruneru Hero showed his class in that round. I'd imagine he'll take it on all the scorecards.
That's the end of the interval. I'm sure that seemed a lot quicker than a minute for our two fighters! Back to the action. This is the final round!

Hero scoring well with a low kick there.
Hero scores with a three punch combo!
Matsumoto avoids the head kick by Hero.
Hero swings away but doesn't land with a series of punches.
Matsumoto wants to clinch but Hero slips to the side
and Hero counters with a nice double leg into half guard.
Matsumoto is working on a guillotine. He's managed to get to full guard and he's really squeezing tight! Hero is tapping! Great win for Matsumoto!
Ladies and gentlemen, after 0:25 of round 3, we have a winner by way of Submission (Guillotine). Hitoshi Matsumoto!
|
|
|
|
|
|
|
|
|
|
|
|
|
|
|
|
|
|
|
|
|
|
|
| S |
C
A |
G |
S |
C
B |
G |
|
S |
C |
G |
|
energy
A | B |
|
hype
A | B |
|
pop
A | B |
|
mgr
A | B |
|
FIGHT
RATING
100% |
|
|
|
|
|
|
