|
|
PBP Commentary |
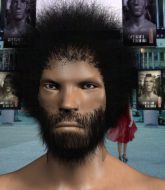
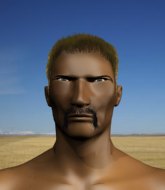
Coming up we have a featherweight MMA rules bout between Floyd Chapman II (ranked 0 p4p, 0 weight class) and Samart Payakaroon (ranked 0 p4p, 0 weight class). Samart Payakaroon will no doubt be trying to keep this one on the feet, where he has a distinct advantage.
 |
|
 |
| 170 cm
26
145 lbs
4 - 2 - 0 |
|
167 cm
27
150 lbs
5 - 3 - 0 |
Good wrestling
Brawler
Experienced |
|
BJJ White Belt
Good kicks
Knockout power |
|
| |
|
Ladies and gentlemen. This fight is 3 rounds, in the featherweight division.
Introducing the fighter to my left, fighting out of the red corner.
With a record of
4 - 2 - 0, fighting out of Amsterdam, Floyd Chapman II!
And introducing the fighter to my right, fighting out of the blue corner.
With a record of
5 - 3 - 0, fighting out of Amsterdam, Samart Payakaroon!
The judges for this bout are Paulsen Ambrosius, Nard Betker and Daniel Blasius.

The bell rings for round one and we are underway!
Chapman II shoots in for a takedown but doesn't get it.

Chapman II shoots in and gets a takedown into Payakaroon's guard.
We get told so often about how wrestlers don't like to be on their backs. Let's see if Payakaroon can do anything to dispel that myth.
Chapman II with a flurry of punches that miss.
Chapman II wants to control from the top but Payakaroon keeps moving.
Payakaroon really doesn't want to stay on the ground with Chapman II. If he can't get it back to his feet, it's only a matter of time before he'll be tapping out.
Chapman II throwing strikes from guard but Payakaroon blocks nicely.

Chapman II stands and steps away. Payakaroon gets to his feet too and we're back to the striking game.
Chapman II shoots in for a takedown. "I don't think so" says Payakaroon as he avoids it easily.
Chapman II shoots in for a takedown. "Ole!" shouts Payakaroon as he jumps to the side.
That's three failed takedown attempts in the round for Floyd Chapman II. That's going to take a lot out of him.
Payakaroon misses with a jab, cross combination.
Chapman II tries for a takedown but Payakaroon sees it coming a mile off and avoids it easily.
Payakaroon fails in his attempt to clinch.
Chapman II tries to shoot in for a takedown. He's got hold of a leg but Payakaroon swivels and escapes.

That's one minute gone in the round.
Chapman II shoots in looking for a takedown but Payakaroon manages to keep the fight standing, pushing Chapman II's face into the canvas for good measure before circling away.
Payakaroon fails in his attempt to clinch.
Chapman II shoots in for a takedown but doesn't get it.
Chapman II is breathing heavily.
Chapman II looks frustrated there after his takedown attempt is stuffed easily.
Chapman II shoots in and drives through. Payakaroon sprawls well.
Payakaroon looks to land a combination but Chapman II avoids it well.
Chapman II swats away the attempt to clinch by Payakaroon.
The fight stays on the outside here - Payakaroon looks like he's thinking about clinching though.
Payakaroon tries to clinch up.

Payakaroon forces Chapman II back against the cage and clinches.
Payakaroon lands an elbow inside.
Payakaroon lands an elbow inside.
Chapman II takes a knee right on the jaw!
Payakaroon throws a vicious knee straight up the middle but Chapman II blocks it with crossed arms.
Payakaroon tries to land a knee to the head but Chapman II blocks with his arms.
Nice elbow from Payakaroon.
Payakaroon lands an elbow inside that Chapman II shrugs off.
Payakaroon looking to throw knees to the head but Chapman II is blocking nicely.
Payakaroon lands a glancing elbow in the clinch.
Payakaroon with an attempt at a knee that misses.

That's two minutes gone in the round.
Payakaroon tries to land a knee to the head but misses.
Payakaroon using the Thai plumb to throw knees but Chapman II has his back arched nicely, preventing the strike.
Chapman II is working for takedown but Payakaroon is calmly controlling the position for now.
Chapman II takes a knee right on the jaw!
Payakaroon landing knees to the head.
Chapman II looking for a takedown.
Chapman II has hold of a leg and is looking for a trip takedown. Payakaroon avoids it nicely though and we remain in the clinch.
Chapman II wants a takedown but no success here.
Payakaroon lands a knee to the head there! That was nasty!
Payakaroon using the Thai plumb to throw knees but Chapman II has his back arched nicely, preventing the strike.
Payakaroon looking to throw knees to the head but Chapman II is blocking nicely.
Payakaroon tries to land a knee to the head but misses.
Payakaroon tries a knee to the head but he's missed.
Payakaroon with the Thai clinch. He's looking to land a big knee but he's not managed it this time.
Payakaroon tries a knee to the head but Chapman II blocks it.
Payakaroon throws a knee to the head but misses.
Chapman II is looking for a takedown up against the cage. Payakaroon gets underhooks though and prevents the takedown attempt.
Payakaroon misses with a knee to the head.
Payakaroon misses with a knee to the head.
Payakaroon tries a knee to the head but he's missed.
Payakaroon using the Thai plumb to throw knees but Chapman II has his back arched nicely, preventing the strike.
Payakaroon throws a knee to the head but misses.

That's three minutes gone in the round.
Payakaroon landing knees to the head.
Payakaroon throws a knee to the head but misses.
Payakaroon throws a vicious knee straight up the middle but Chapman II blocks it with crossed arms.
A knee to the head by Payakaroon.
Payakaroon misses with a knee to the head.
Payakaroon connects with a knee to the head.
Payakaroon tries to land a knee to the head but misses.
Payakaroon comes over the top with an elbow. That landed flush.
Payakaroon with a knee to the head.
Payakaroon prevents a takedown attempt there.
Chapman II is working for a takedown up against the cage. He can't get it on this occasion though.
Payakaroon misses with a knee strike.
Chapman II goes for a takedown in the clinch but Payakaroon prevents it.
Chapman II looking for a takedown.
Payakaroon with the Thai clinch. He's looking to land a big knee but he's not managed it this time.
Chapman II takes an elbow to the temple.
Payakaroon misses with a knee to the head.
Chapman II drops to a knee looking for a takedown but Payakaroon gets the underhooks and prevents it.
Payakaroon lands a knee to the head there! That was nasty!

That's four minutes gone in the round.
The crowd are hurling abuse towards the fighters... You can hardly blame them though because there isn't a lot going on in the fight.
Payakaroon tries to land a knee to the head but Chapman II blocks with his arms.
Payakaroon gets double underhooks to prevent a takedown attempt from Chapman II.
Payakaroon throws a vicious knee straight up the middle but Chapman II blocks it with crossed arms.
Chapman II tries for a takedown. No joy.
Payakaroon connects with a nasty looking knee right to Chapman II's face.
Chapman II has a body lock and is looking for a takedown. Payakaroon is bouncing around trying to prevent the takedown and somehow he has indeed managed to stay on his feet.
Payakaroon with an attempt at a knee that misses.
Payakaroon lands a nice elbow from the clinch.
Payakaroon throws a vicious knee straight up the middle but Chapman II blocks it with crossed arms.
Chapman II is working for a takedown up against the cage. He can't get it on this occasion though.
Payakaroon throws a knee to the head but misses.
Payakaroon misses with a knee to the head.
Payakaroon looking to throw knees to the head but Chapman II is blocking nicely.
Payakaroon tries a knee to the head but he's missed.
The fighters are starting to perspire pretty heavily.
Payakaroon tries a knee to the head but Chapman II blocks it.
Payakaroon lands a knee to the head.
Chapman II looking for a takedown.
Payakaroon connects with a knee to the head.
Payakaroon misses with a knee strike.
And thats the end of the round the fighters go back to their corners.
Samart Payakaroon dominated that round.
The fighters' corners scream their final instructions, as the referee calls time. Here we go, back to the action!

Payakaroon displays good takedown defense there as he swats away a double leg from Chapman II.
Chapman II fakes an overhand right and shoots for a takedown. Payakaroon sprawls well initially but Chapman II persists and gets the takedown into half guard.
Chapman II throwing shots but Payakaroon is blocking nicely.

Chapman II is trying a forearm choke
I don't think that's going to do much at this level of the game.
Chapman II thows a huge punch but Payakaroon dodges it nicely.
That's one minute gone in the round.
Chapman II seems to be looking for submissions.
Chapman II has been looking to land a fair amount of strikes on the ground. He might be looking to soften his opponent up in order to work for a submission.
Both fighters are absolutely exhausted here.
Chapman II decides he's had enough of the ground and stands up.
Payakaroon is looking to clinch but Chapman II is avoiding it.
Payakaroon is looking to clinch but Chapman II is avoiding it.
Payakaroon gets to the clinch - let's see what his plan is here.
Payakaroon creates a bit of space for himself and sneaks an elbow through Chapman II's defenses.
Payakaroon using the Thai plumb to throw knees but Chapman II has his back arched nicely, preventing the strike.
Payakaroon tries a knee to the head but he's missed.
Chapman II can't get the takedown.
Chapman II takes a knee right on the jaw!
Chapman II tries for a takedown but Payakaroon manages to get underhooks.
That's three failed takedown attempts in the round for Floyd Chapman II. That's going to take a lot out of him.
Payakaroon lands a knee to the head.
Payakaroon misses with a knee strike.
That's two minutes gone in the round.
Payakaroon tries to land a knee to the head but misses.
Payakaroon prevents the takedown attempt.
Payakaroon prevents the takedown attempt.
Payakaroon connects with a knee to the head.
Chapman II looking for a takedown.
Payakaroon tries a knee to the head but he's missed.
Payakaroon with an attempt at a knee that misses.
Payakaroon tries a knee to the head but Chapman II blocks it.
Chapman II wants a takedown but no success here.
Chapman II takes an elbow to the forehead.
Chapman II looking for a takedown.
Payakaroon with an attempt at a knee that misses.
Payakaroon with the Thai clinch. He's looking to land a big knee but he's not managed it this time.
Chapman II changes levels and goes for a takedown here. Payakaroon fights it off and pushes away nicely.
Payakaroon rushes forward with a series of wild hooks but Chapman II moves out of range and avoids them all easily.
Payakaroon tries to clinch up.
Chapman II shoots in but no luck this time.
Horrible takedown by Chapman II or perhaps it was just good defense by Payakaroon which made him look bad.
Payakaroon wants to clinch up but Chapman II keeps it at a distance.
That's three minutes gone in the round.
Payakaroon tries to clinch but is not successful on this occasion.
Payakaroon doesn't manage to clinch there - Chapman II circles away.
Payakaroon connects with an inside leg kick.
Chapman II throws a loose over hand right and dives in with a double leg takedown. Payakaroon tries to sprawl but it's too late and the fighters hit the mat. Chapman II is in Payakaroon's guard.
Payakaroon is controlling Chapman II's posture.
Chapman II trying to pass the guard but can't manage it just yet.
Payakaroon working the defensive guard well to avoid strikes from Chapman II.
Chapman II is pushing down on Payakaroon's leg trying to pass to half guard. Payakaroon is fighting to maintain full guard but Chapman II has managed to sneak the leg through.
That's four minutes gone in the round.
Chapman II tries to pass to full mount but Payakaroon defends it.
Payakaroon taking some punishment here, with Chapman II in his half guard.
Chapman II thows a wild elbow that connects with the canvas.
Chapman II sitting and controlling from the half guard.
Chapman II is trying to control the action in half guard but Payakaroon is working away on the bottom, looking perhaps to get back to full guard.
And thats the end of the round the fighters go back to their corners.
Floyd Chapman II dominated that second round.
That's time! Back to the action! Let's get this one finished - here comes the final round!

Chapman II throws the overhand right but ducks down into a quick takedown attempt. Payakaroon was covering up waiting for the punch and Chapman II finishes the takedown easily into guard.
Chapman II trying to control the position from guard on top but Payakaroon is wriggling around, looking for whatever he can.
Both fighters are breathing heavily.
Payakaroon working the defensive guard well to avoid strikes from Chapman II.
That's one minute gone in the round.
Chapman II is trying to work a guillotine from the top, or something like that? Don't know how he thinks he's going to get a finish from there.
Chapman II working some ground and pound from guard but it's not doing any damage.
The fighters are pressed up against the cage, both looking to find a bit of space to work.
Chapman II's corner is telling him to maintain position.
Payakaroon is trying to control the position but Chapman II postures up.
Chapman II throwing elbows and punches but not connecting, as Payakaroon works some decent striking defense from the bottom.
Chapman II controlling from the guard. I say controlling but really, he's stalling.
That's two minutes gone in the round.
The crowd are hurling abuse towards the fighters... You can hardly blame them though because there isn't a lot going on in the fight.
Chapman II stands and throws Payakaroon's legs to the side, diving into side control.
Chapman II is looking to finish here, going for an Americana. Payakaroon knows the correct defense though, so he's OK.
Payakaroon avoids any damage from the ground and pound of Chapman II.
That's three minutes gone in the round.
Chapman II lands a decent elbow from side control.
Chapman II lands a knee to the body and follows it up with some ground and pound to the head. That will wear Payakaroon down.
Payakaroon is letting Chapman II control him for a moment.
Chapman II throws a strike aimed at the side of Payakaroon's head but Payakaroon avoids it well.
That's four minutes gone in the round.
Chapman II looks up at the clock and then as Payakaroon takes his cue and looks up at the clock too, Chapman II smacks him right in the chops with a big elbow! How rude!
Chapman II content to control the pace. The referee will try and keep them active though.
Chapman II working the ground and pound but Payakaroon is defending the strikes.
The crowd thankful this round is nearly over.
Chapman II stands up and we're back to a striking position.
And that's the end of the fight!
Floyd Chapman II showed his dominance in that final round.
I think Chapman II has won this one but let's see what the judges have to say. Over to the ring announcer for the scorecards.
Ladies and gentlemen, after 3 rounds of action, we go to the scorecards for a decision.
Judge Paulsen Ambrosius scores the fight 29:28
Judge Nard Betker scores the fight 29:28
Judge Daniel Blasius scores the fight 29:28
In favor of your winner, by unanimous decision... Floyd Chapman II!
|
|
|
|
|
|
|
|
|
|
|
|
|
|
|
|
|
|
|
|
|
|
|
| S |
C
A |
G |
S |
C
B |
G |
|
S |
C |
G |
|
energy
A | B |
|
hype
A | B |
|
pop
A | B |
|
mgr
A | B |
|
FIGHT
RATING
32% |
|
|
|
|
|
|
