|
|
PBP Commentary |
Coming up we have a middleweight MMA rules bout between Sammy Swagger (ranked 0 p4p, 0 weight class) and John Holliday (ranked 0 p4p, 0 weight class). John Holliday told me before the fight that he's been watching a lot of DVDs so let's see if that helps him in this one! I can't wait to find out!
 |
|
 |
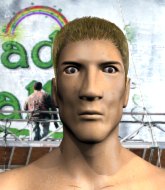
| 185 cm
21
190 lbs
2 - 4 - 0 |
|
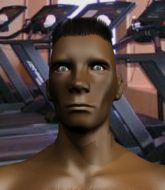
183 cm
28
200 lbs
8 - 7 - 0 |
BJJ Purple Belt
Solid boxing
Granite chin |
|
BJJ Brown Belt
Excellent boxer
Determined |
|
| |
|
Ladies and gentlemen. This fight is 3 rounds, in the middleweight division.
Introducing the fighter to my left, fighting out of the red corner.
With a record of
2 - 4 - 0, fighting out of Las Vegas, Sammy Swagger!
And introducing the fighter to my right, fighting out of the blue corner.
With a record of
8 - 7 - 0, fighting out of Las Vegas, John Holliday!
The judges for this bout are Frank Dennis, Chris Downing and Gwen Towbar.

The bell rings for round one and we are underway!
Holliday keeps the fight standing with a nice sprawl.
Sloppy strikes from Holliday. Those never looked like landing.
A telegraphed takedown attempt from Swagger is defended easily by Holliday.
Swagger takes a punch right to his stomach. That took the wind out of him momentarily.
Holliday throws a right and a left that Swagger avoids nicely.
Holliday swings away but doesn't land with a series of punches.
Holliday bobs and weaves well there to avoid the strikes.
Holliday misses with a double jab

and Swagger counters by moving into the clinch. Good anticipation by Swagger.

Swagger ties up his opponent against the cage and manages to drag the fight down to the ground. Swagger no doubt will be looking to work submissions from his guard.

Swagger is working an open guard so Holliday takes the opportunity to get back to his feet.
Swagger shoots in but doesn't get the takedown
and Holliday counters by moving into the clinch.
That's three failed takedown attempts in the round for Sammy Swagger. That's going to take a lot out of him.

Holliday breaks the clinch and we're back to striking at distance.
Swagger lands a right hook to the body.
Holliday throws a jab, cross combination which is slipped
and Swagger counters by clinching up.
Swagger is working for a takedown up against the cage. He can't get it on this occasion though.
A right handed body shot lands from Holliday.

That's one minute gone in the round.
Holliday is pressed up against the cage. Swagger has hold of a leg and is looking to drag Holliday down to the mat. Holliday avoids the attempt though and has circled away. We're back to striking at a distance.
John Holliday seems to be the more aggressive standup fighter in this bout.
Holliday lands a jab to Swagger's midsection.
Swagger misses with a takedown
and Holliday counters with a three punch combo that has Swagger backing up. Swagger nods at Holliday to acknowledge the strikes.
Holliday gets caught on his heels momentarily as he allows Swagger to score an easy takedown into full guard.
The ref warns both fighters not to hold the cage as they work up against the meshing.
Swagger is breathing heavily.
Swagger stops Holliday from standing up.
Swagger has to be careful here, sitting in the guard of a superior BJJ player.
Holliday keeping moving, preventing Swagger from controlling successfully.
Holliday wants to stand up but Swagger is controlling him.
Holliday is pulling down on Swagger's head. It's preventing any offense from Swagger, at least for the moment.
Holliday wants to stand and escape but Swagger is having none of it.

That's two minutes gone in the round.
The referee claps his hands together and tells the fighters to work.
Swagger preventing the sweep.
The fighters are pressed up against the cage, both looking to find a bit of space to work.

The referee decides to stand the fighters back up.
Holliday tries to clinch up.
Swagger avoids the clinch attempt nicely.
A telegraphed takedown attempt from Swagger is defended easily by Holliday.
Swagger fails with a rather predictable takedown attempt.
Swagger throws a combination but comes up with nothing but fresh air.
Jab, cross, leg kick. Nice combination by Holliday!
Swagger circles away from the clinch attempt.
A looping hook to the body misses from Holliday. Swagger does a little dance to reset his feet.
Swagger lands a head kick. Holliday smiles back at him and beckons him forward.

That's three minutes gone in the round.
Swagger tries to clinch but Holliday moves out of range.
Swagger shoots in but doesn't get the takedown
and Holliday counters by moving into the clinch.
Holliday is looking to break free of the clinch but Swagger has double underhooks.
Swagger fails to pull the fight into his guard.
Swagger has a body lock and is looking for a takedown. Holliday is bouncing around trying to prevent the takedown and somehow he has indeed managed to stay on his feet.
Holliday can't break the clinch.
Swagger goes for a takedown in the clinch but Holliday prevents it.
Swagger just leaning against Holliday, taking a breather.
Swagger breaks from the clinch.
Holliday scores with a hook to the body. Swagger takes a step back and tries to catch his breath.
Swagger dodges the punch combination from Holliday.
Holliday rushes Swagger and presses him up against the cage.
Holliday gets underhooks to prevent Swagger's takedown attempt.
Holliday lands on the inside with an uppercut.
Holliday is trying to break the clinch but Swagger has him pressed against the cage.
Swagger tries to pull guard but Holliday holds him up against the cage and eventually Swagger drops back down to his feet.
Holliday gets double underhooks to prevent a takedown attempt from Swagger.

That's four minutes gone in the round.
Swagger drops down for a takedown but doesn't get it.
Swagger tries to pull guard but can't drag his opponent to the mat. Holliday just stands there and leans against the cage.
Holliday breaks from the clinch.
Swagger tries to clinch but Holliday moves away
and Holliday holds on and brings the fighters into a clinch.
Holliday pushes Swagger back against the cage and unloads with a body punch.
Holliday lands a hook to the side of the head.
Swagger breaks the clinch and we're back to striking at distance.
Holliday is moving around nicely and scores here with a single head shot.
Swagger misses with a takedown
and Holliday holds on and brings the fighters into a clinch.
The crowd applaud the fighters efforts here as the round comes to an end.
Holliday can't break the clinch.
Holliday's corner calls for him to break the clinch, which he does.
Holliday looks to score with a combo but nothing lands.
A right-left combo lands from Holliday.
Holliday works Swagger's body with a nice hook.
And thats the end of the round the fighters go back to their corners.
John Holliday dominated that round.
That's time! Swagger's corner gives him a slap on the ass as he gets ready to fight.

Holliday moves out of range of the body kick.
Holliday scores to the head and body with a nice combination!
Holliday with a body punch. A glancing blow.
Swagger looks for a takedown. He's got it. We're now in half guard.
The fighters are starting to perspire pretty heavily.
Holliday is staying active underneath Swagger, who seems content to just control the action from this position.
Swagger tries to stand and escape but Holliday is controlling the position.
Holliday kicks Swagger off and gets back to his feet.
Left hook, right uppercut from Holliday.
Swagger closes the distance and clinches.
Swagger dictating the pace here, as the fighters clinch against the cage.
Swagger tries to pull guard but can't drag his opponent to the mat. Holliday just stands there and leans against the cage.
Swagger tried to land a shot to the body but connects with Holliday's elbow.
Swagger is trying to break the clinch but Holliday has him pressed against the cage.
Swagger has hold of a leg and is looking for a trip takedown. Holliday avoids it nicely though and we remain in the clinch.
Swagger tries to pull guard but Holliday won't allow it.
That's three failed takedown attempts in the round for Sammy Swagger. That's going to take a lot out of him.
That's one minute gone in the round.
Holliday wants to strike at distance but he can't break free of the clinch.
A frustrated look appears on Holliday's face as he tries to break the clinch.
A right hook to the body lands for Holliday.
Holliday wants to push off and get back to the center of the mat but Swagger has him pressed against the cage.
A hook to the body from Holliday.
Holliday is trying to work out of this bad position, with his back against the cage.
Swagger tries for a takedown. No joy.
A frustrated look appears on Holliday's face as he tries to break the clinch.
Holliday lands a body punch.
Swagger is trying to stall.
Swagger has Holliday pressed up against the cage and is working for takedown. Holliday manages to improve position though and keeps the fight standing.
Both fighters are absolutely exhausted here.
A frustrated look appears on Holliday's face as he tries to break the clinch.
Swagger tries to pull guard but Holliday won't allow it.
Holliday lands with a short shot to the head.
Swagger wants a takedown.
Swagger breaks the clinch.
Holliday moves into range and clinches up with Swagger.
Swagger jumps guard but Holliday stands there with Swagger around his waist. Swagger gives up and drops back to his feet. We remain in the clinch.
A quick uppercut on the inside from Swagger.
That's two minutes gone in the round.
Swagger drops down looking for an ankle pick but Holliday pulls his leg out and moves away.
Sammy Swagger is looking to throw some combinations by the looks of things.
Holliday avoids the clinch attempt nicely.
Swagger walks into a left hand.
Holliday is throwing a lot of body shots here, looking to wear down Swagger rather than just go for the knockout.
Swagger shoots in looking for a takedown but Holliday manages to keep the fight standing, pushing Swagger's face into the canvas for good measure before circling away.
Holliday has taken the fight to the clinch.
Holliday lands with a quick shot inside that doesn't really do much damage.
Holliday manages to break the clinch.
Swagger tries to clinch up but Holliday circles away and keeps his distance.
Swagger tries to close the distance and clinch up but Holliday swats him away and circles back towards the center.
Swagger changes levels and looks for a double leg takedown. Holliday tries to avoid it but Swagger manages to keep hold of a leg and drag Holliday to the ground. Holliday escapes though and pops straight back up to his feet.
Holliday lunges in with swinging rights and lefts but Swagger circles away quickly and effectively.
Swagger misses with a head kick.
Holliday lunges in with swinging rights and lefts but Swagger circles away quickly and effectively.
Holliday tries to close the distance and clinch up but Swagger swats him away and circles back towards the center.
Swagger fails miserably with a takedown attempt.
Holliday connects with a jab.
That's three minutes gone in the round.
A punch combination from Holliday misses.
Holliday is looking to take this fight into the clinch.
Holliday slaps away a takedown attempt from Swagger, before circling back to the center of the mat.
A telegraphed takedown attempt from Swagger is defended easily by Holliday.
Swagger takes a shot to the eye socket. That's gotta hurt.
Holliday cracks Swagger with a good shot that sees him stumbling back into the cage.
Holliday displays good takedown defense there as he swats away a double leg from Swagger.
Swagger looking to land some kicks to the body here.
John Holliday is looking to keep the fight on the feet at all costs.
Swagger has Holliday up against the cage in a clinch.
Swagger throws a head punch that misses.
That's four minutes gone in the round.
Holliday digs a right hand underneath Swagger's ribcage. Swagger let out a lung full of air as it connected.
Swagger keeps control of Holliday as he tries to wriggle out of the double underhooks.
Holliday working hard to break the clinch.
Swagger tries to land a knee to the head but Holliday blocks with his arms.
Swagger jumps guard and drags Holliday to the mat. He's obviously going to be looking for submissions off his back.
Holliday gets to his feet. Swagger looking to butt scoot but the ref puts an end to that. On your feet son!
Holliday throws a left and a right that both miss
and Swagger counters with a single leg into guard. Holliday didn't expect that.
Fantastic stuff here - a very entertaining period of action, which has drawn cheers from the crowd.
Swagger wants to control from the top but Holliday keeps moving.
Holliday controlling the position.
Swagger wants to control from the top but Holliday keeps moving.
The crowd applaud the fighters efforts here as the round comes to an end.
The referee claps his hands together and tells the fighters to work.
Sammy Swagger has forced the referee to step in and bring the fight back to the feet.
Swagger tries to close the distance and clinch but Holliday swats him to one side with an open hand palm strike and circles away.
And thats the end of the round the fighters go back to their corners.
John Holliday showed his class in that round. I'd imagine he'll take it on all the scorecards.
The fighters' corners scream their final instructions, as the referee calls time. Here we go, back to the action! Let's hear some noise people - this is the final round!

Swagger with a poor takedown
and Holliday holds on and brings the fighters into a clinch.
Holliday wants to get back to striking at distance but Swagger won't allow it.
Holliday lands a nice shot to the body.
Holliday lands a shot to the body.
Swagger wants to break the clinch but can't.
Holliday has had enough of the clinch but Swagger keeps him there for the moment.
Swagger is stalling here. The referee will be looking to step in if he doesn't pick up the pace.
Holliday lands on the inside with an uppercut.
Swagger prevents Holliday from breaking the clinch.
Swagger is trying to work for a single leg takedown but Holliday pulls him back up using the underhooks.
Swagger taking a breather.
Swagger has Holliday pressed against the cage, preventing Holliday from circling away and getting back to striking at range.
Swagger struggles to land a body shot inside as Holliday controls his hands.
Swagger tries to pull guard but Holliday won't allow it.
That's three failed takedown attempts in the round for Sammy Swagger. That's going to take a lot out of him.
Holliday's corner calls for him to break the clinch, which he does.
Holliday is looking to clinch but Swagger is avoiding it.
Holliday clinches with his opponent.
Holliday escapes the clinch and we're back to striking.
Horrible takedown by Swagger or perhaps it was just good defense by Holliday which made him look bad.
Swagger walks into a left hand.
That's one minute gone in the round.
Holliday bobs and weaves well there to avoid the strikes.
Holliday moves into range and clinches up with Swagger.
Holliday looks like he'd prefer to be striking at range right now.
Holliday wants to push off and get back to the center of the mat but Swagger has him pressed against the cage.
Swagger tries to pull guard but Holliday won't allow it.
Swagger goes for a takedown attempt but Holliday pushes him away and we're back to fighting at a distance.
Swagger misses with a takedown attempt - Holliday sprawls well and throws a nice strike on the way out which just misses.
Both fighters are breathing heavily.
Holliday is looking to take this fight into the clinch.
Both fighters circling a little - Swagger finishes the exchange with a kick to the body.
Swagger shoots in but doesn't get the takedown
enabling Holliday to counter with a crisp jab.
Holliday misses with a combination
and Swagger counters by moving into the clinch.
That's two minutes gone in the round.
Swagger is working for takedown but Holliday is calmly controlling the position for now.
Swagger trying to stall but Holliday improves his position.
Swagger keeps the fight in the clinch, despite Holliday's efforts to push away.
Holliday scores with a shot to the side of Swagger's head.
Swagger trying to control the position but instead, Holliday has worked for underhooks and has pushed Swagger into the cage.
Holliday is trying to force a seperation but Swagger has the dominant position.
A quick uppercut on the inside from Swagger.
Holliday wants to get back to striking at distance but Swagger won't allow it.
John Holliday seems to be working more effectively in the clinch in the fight so far.
Swagger breaks from the clinch.
No luck with that takedown attempt from Swagger.
Holliday moves into the clinch.
Swagger has managed to pull guard. Let's see whether he can work an aggressive guard. It will also be interesting to see what tactics Holliday uses from the top position.
Swagger keeping full guard, as Holliday tries to pass.
Holliday stands up from Swagger's guard - Holliday perhaps looking for a knockout.
That's three minutes gone in the round.
Holliday throws a combination but comes up with nothing but fresh air.
Holliday closes the distance and clinches.
Swagger tries to pull guard but can't drag his opponent to the mat. Holliday just stands there and leans against the cage.
Swagger is trying to drag Holliday to the mat but Holliday just about manages to keep his footing. He used the cage to his advantage there.
A frustrated look appears on Holliday's face as he tries to break the clinch.
Holliday stops a takedown attempt from Swagger.
Holliday looks like he'd prefer to be striking at range right now.
Holliday is pressed up against the cage. Swagger has hold of a leg and is looking to drag Holliday down to the mat. Holliday avoids the attempt though and has circled away. We're back to striking at a distance.
Swagger doesn't succeed with the takedown
and Holliday counters with a left to the body.
Swagger throws a hard body shot but it just misses.
Holliday misses with the combination.
That's four minutes gone in the round.
Swagger has his takedown stuffed
and Holliday counters by clinching up.
Holliday tries to break the clinch but Swagger is controlling the position.
Holliday tries to break the clinch but Swagger is controlling the position.
Swagger is trying to work out of this bad position, with his back against the cage.
Holliday is trying to break free.
Swagger keeps the fight in the clinch, despite Holliday's efforts to push away.
Holliday gets double underhooks to prevent a takedown attempt from Swagger.
Swagger keeps control of Holliday as he tries to wriggle out of the double underhooks.
Holliday escapes the clinch and we're back to striking.
Holliday misses with the combination.
Holliday doesn't manage to clinch there - Swagger circles away.
Holliday misses with a two punch combination.
Swagger with a poor takedown
and Holliday counters by moving into the clinch.
And that's the end of the fight!
John Holliday comfortably won the final round on my scorecard.
I've got Holliday winning every round here. Surely the decision will go his way and he'll pick up a well deserved decision victory. Over to the ring announcer for the scorecards.
Ladies and gentlemen, after 3 rounds of action, we go to the scorecards for a decision.
Judge Frank Dennis scores the fight for John Holliday!
Judge Chris Downing scores the fight for John Holliday!
Judge Gwen Towbar scores the fight for John Holliday!
John Holliday wins by unanimous decision!
|
|
|
|
|
|
|
|
|
|
|
|
|
|
|
|
|
|
|
|
|
|
|
| S |
C
A |
G |
S |
C
B |
G |
|
S |
C |
G |
|
energy
A | B |
|
hype
A | B |
|
pop
A | B |
|
mgr
A | B |
|
FIGHT
RATING
78% |
|
|
|
|
|
|
