|
|
PBP Commentary |
Coming up we have a light heavyweight MMA rules bout between Graeme Souness (ranked 0 p4p, 0 weight class) and Kenichi Uzomaki (ranked 0 p4p, 0 weight class). The key to victory for Graeme Souness has got to be keeping the fight on the feet.
 |
|
 |
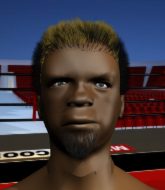
| 188 cm
21
213 lbs
4 - 1 - 0 |
|
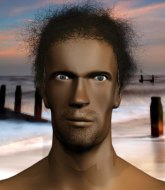
190 cm
24
215 lbs
8 - 5 - 0 |
BJJ Purple Belt
Solid boxing
Very strong |
|
BJJ Purple Belt
Counter striker
Granite chin |
|
| |
|
Ladies and gentlemen. This fight is 2 rounds, in the light heavyweight division.
Introducing the fighter to my left, fighting out of the red corner.
With a record of
4 - 1 - 0, fighting out of Tokyo, Graeme Souness!
And introducing the fighter to my right, fighting out of the blue corner.
With a record of
8 - 5 - 0, fighting out of Tokyo, Kenichi Uzomaki!
The judges for this bout are Shigeki Sano, Taro Takaoka and Tatsuya Matsuyama.

The bell rings for round one and we are underway!
Souness lunges in with swinging rights and lefts but Uzomaki circles away quickly and effectively.
Souness displays good takedown defense there as he swats away a double leg from Uzomaki.
No joy there for Souness, who threw a few shots but didn't land.
Souness tries a switch kick but it misses it's target.
Souness sizes up Uzomaki with a pawing jab and scores with a straight right down the middle.
Souness throws a series of punches but Uzomaki avoids them all with ease.
Souness scores with a nice body kick.

Uzomaki throws a loose over hand right and dives in with a double leg takedown. Souness tries to sprawl but it's too late and the fighters hit the mat. Uzomaki is in Souness's guard.
Souness is looking to get back to his feet but can't, whilst Uzomaki is controlling him.
The fighters are pressed up against the cage, both looking to find a bit of space to work.
Uzomaki works over Souness with some ground and pound from guard.

Souness pushes Uzomaki off and scrambles back to his feet.
The fans in attendance giving it up for the two fighters, who have really let it all hang out in the last minute or so!
Uzomaki shoots in for a takedown and gets it. Let's see what he's got on the mat.

That's one minute gone in the round.

Uzomaki is trying to work a guillotine from the top, or something like that? Don't know how he thinks he's going to get a finish from there.
Uzomaki won't allow Souness to get back to his feet.
Souness wriggles free and stands up.
Souness throws a big shot that misses.
Souness throws a left and a right that both miss
and Uzomaki counters with a nice shoot takedown that brings the fighters to the ground.
Uzomaki postures up in Souness's guard and throws a big left but Souness blocks it.
Souness wants to stand up but Uzomaki is controlling him.
Uzomaki is trying to work a guillotine from the top, or something like that? Don't know how he thinks he's going to get a finish from there.
Uzomaki looks gassed!

That's two minutes gone in the round.
Uzomaki drops back looking for a heel hook - he quickly realises he's not going to get it but Souness manages to dive on top of him before he can escape and now Uzomaki has Souness in his guard.
Uzomaki pulls Souness in close to his closed guard and prevents Souness from doing any damage or advancing position.
Souness wants to get up but he can't break Uzomaki's closed guard. He needs to be careful trying to break the legs open, as he's open to submissions here.
Uzomaki is trying to stand up but he's not managed so far.
Souness wants to stand but Uzomaki is controlling his posture from full guard.
Uzomaki tries to land a sweep but no joy.
Both fighters really going for it on the ground here!

That's three minutes gone in the round.
Uzomaki is trying to stand up but he's not managed so far.
Souness gets to his feet and steps away from his opponent.
Souness falls off balance throwing a combination
and Uzomaki counters with a nice single leg takedown and he's in Souness's guard now.
Souness keeping full guard, as Uzomaki tries to pass.
Souness is trying to stand up but he's not managed so far.
Souness pushes Uzomaki off and gets back to his feet.
Souness misses with a combination
so Uzomaki counters with a double leg into guard. Good agility.
The fans in attendance giving it up for the two fighters, who have really let it all hang out in the last minute or so!
Souness wants to stand up but Uzomaki is controlling him.

That's four minutes gone in the round.
Souness pushes Uzomaki off and scrambles back to his feet.
Uzomaki fails with the takedown
and Souness counters with a three punch combo that has Uzomaki backing up. Uzomaki nods at Souness to acknowledge the strikes.
Souness looking to land some kicks to the body here.
Uzomaki moves his head to the side to avoid a jab but walks straight into a cross.
Nice jab there from Souness.
Souness tries to clinch
and Uzomaki counters with a shoot takedown into half guard.
Souness tries to kick Uzomaki off but Uzomaki keeps his base steady and stays in half guard.
Souness trying desperately to get back to his feet here but he's not having any joy at all. He's going to tire himself out if he's not careful.
Souness makes some distance and scrambles quickly back to his feet. Nice work!

That's five minutes gone in the round.
Souness swings wildly with a couple of big hooks
and Uzomaki counters with a nice single leg takedown and he's in Souness's guard now.
Souness manages to escape and get back to his feet.
Uzomaki shoots in and drives through. Souness sprawls well.
Graeme Souness has stuffed three takedown attempts in the round now. That's going to take a lot out of Kenichi Uzomaki.
Souness misses with a head kick.
Uzomaki moves out of range as Souness strikes.
Souness tries to clinch but fails miserably
letting Uzomaki counter with a right hand.
Souness closes the distance and lands a one-two.
Sloppy strikes from Souness. Those never looked like landing.
Souness misses with a double jab
and Uzomaki counters with a driving takedown into guard. Nice work there by Uzomaki.

That's six minutes gone in the round.
The fans in attendance giving it up for the two fighters, who have really let it all hang out in the last minute or so!
Uzomaki drops back for a leg but he's not going to get it - he lets go and Souness dives on top into guard.
Souness gets to his feet and steps away from his opponent.
Uzomaki uses decent footwork to sidestep a right hand from Souness.
Souness misses with an uppercut.
Uzomaki ducks under a wild hook from Souness.
A head kick misses from Souness.
Souness swings wildly with a couple of big hooks
and Uzomaki counters with a takedown into side control.
Uzomaki working hard here to secure a kimura but he's not really in the right position for it.
Souness tries to escape but Uzomaki is in control.

That's seven minutes gone in the round.
Uzomaki tries for a kimura. Not really close to a finish though.
The ref warns both fighters not to hold the cage as they work up against the meshing.
Souness tries to escape but Uzomaki is in control.
Souness throws Uzomaki to one side and escapes!
Uzomaki fails with a takedown attempt.
Souness swinging wildly here.

That's eight minutes gone in the round.
Souness lunges at Uzomaki with a hook that half lands and is half blocked by Uzomaki's hand.
Souness scores with a jab to the head.
Uzomaki has a takedown stuffed.
Souness is looking to clinch.
Souness rushes forward with a series of wild hooks but Uzomaki moves out of range and avoids them all easily.
Souness misses with a two punch combination.

Souness rushes Uzomaki and pushes him back against the cage in a clinch.

That's nine minutes gone in the round.
Uzomaki goes for a takedown attempt but Souness pushes him away and we're back to fighting at a distance.
Graeme Souness seems to be the more aggressive standup fighter in this bout.
Uzomaki avoids the head kick by Souness.
Souness tries to bum rush Uzomaki with a series of wild strikes but Uzomaki uses good footwork to avoid the assault.
Souness tries to close the distance and clinch but Uzomaki swats him to one side with an open hand palm strike and circles away.
Souness comes forward and lands a shot to the body, then darts back out of range.
Uzomaki shoots in for a takedown. He's persisting with it as Souness sprawls well. Souness wins this battle and keeps the fight standing. Uzomaki gets slowly back to his feet.
As the round comes to an end the crowd are showing their appreciation for a great round of action.
Souness misses with a series of wild punches.
And thats the end of the round the fighters go back to their corners.
Kenichi Uzomaki dominated that round.
That's time! Back to the action! This is the final round!

Souness tries to clinch up.
Uzomaki uses some good footwork to avoid the body shot by Souness.
Uzomaki shoots in for a takedown. He's persisting with it as Souness sprawls well. Souness wins this battle and keeps the fight standing. Uzomaki gets slowly back to his feet.
Souness tries to clinch up.
We've had a slow start to the round here - hopefully the action picks up.
Souness misses with a two punch combination.
Uzomaki looks for a takedown. He's got it. We're now in half guard.
Uzomaki is working for submissions here but there's nothing on.
Uzomaki is breathing heavily.
Uzomaki seems to be looking for submissions.
That's one minute gone in the round.
Souness is trying to stand back up but Uzomaki is controlling him
Souness pushes Uzomaki off and gets back to his feet.
Souness throws a right and a left that Uzomaki avoids nicely.
Nice shot by Souness.
Souness throws a head kick that misses.
Graeme Souness is looking to keep the fight on the feet at all costs.
Souness slips a jab and a cross from Uzomaki.
A nice combination there by Souness.
Souness lands a two punch combo.
That's two minutes gone in the round.
Souness lands with a nice combination. Uzomaki backs away looking to recover.
Souness fails to land with the punch combination there - jab, cross, hook, miss, miss, miss.
Souness tries to clinch but fails miserably
and Uzomaki counters with a takedown into full mount! That could mean trouble for Souness!
The crowd are loving this. Great action here.
Souness trying desperately to get to his feet.
Uzomaki looking for a guillotine from mount but Souness is having none of it.
Uzomaki is standing up out of mount! Strange tactic there - he must really want this one on the feet!
Souness gets taken down but at least he's managed to land in guard.
That's three minutes gone in the round.
Souness wants to stand and escape but Uzomaki is having none of it.
Uzomaki working some strikes from top position.
Souness kicks Uzomaki off and gets to his feet.
Souness lands a jab, followed by a cross and another cross, as Uzomaki backs up against the cage.
Souness throws a jab, cross combination which is slipped
and Uzomaki counters with a single leg into guard. Souness didn't expect that.
Souness keeping full guard, as Uzomaki tries to pass.
Souness is edging up against the cage. He's using the cage to get back to his feet. Nice work there - the fighters are clinched.
Uzomaki prevents Souness from breaking the clinch.
Uzomaki wants to break the clinch but can't.

Souness breaks from the clinch.
Souness will need to tighten up his combinations if he doesn't want to gas himself out, swinging at thin air.
That's four minutes gone in the round.
The fighters circle momentarily. Uzomaki darts into range and connects with a nice straight punch.
Souness fails with an attempt to clinch.
Souness pivots as if he's going to throw a leg kick but stops half way.
Uzomaki takes a hook to the side of the head. I wonder if that's got his ears ringing.
Uzomaki circles away from the clinch attempt
and Uzomaki counters with a kick to the head that grazes his opponent. Souness is lucky that one didn't land flush.
We've seen a great period of action over the last minute or so - credit to both fighters for going all out!
Souness misses with an uppercut
and Uzomaki counters with a three punch combination, finished off with a leg kick. Nice work.
That's five minutes gone in the round.
Souness feints a jab promting Uzomaki to slip. Souness then demonstrates his capabilities by jabbing again. Uzomaki slips again and ducks right into an uppercut.
Souness throws a hard body shot but it just misses.
Souness misses with a series of wild punches.
Souness falls off balance throwing a combination
and Uzomaki counters with a nice single leg takedown and he's in Souness's guard now.
Uzomaki stops Souness from standing up.
Uzomaki thinks about going for a leg but decides against it, in order to maintain the position.
Uzomaki trying to pass the guard. He's being very persistent here but Souness manages to land a sweep and now he's on top!
Souness stands up from guard. Let's bang!
That's six minutes gone in the round.
Souness just misses with a punch to the body.
Souness throws a wild combination but nothing lands.
Uzomaki fails with a takedown attempt.
Souness throws an off balance right hand
and Uzomaki counters with a nice double leg into side control. Souness won't be happy with that.
This is a great period of action - very entertaining stuff!
Souness is working hard to escape and get back to his feet. After a battle for position, Uzomaki asserts his dominance and retains side control.
Uzomaki tries for a kimura but Souness is defending well.
Uzomaki prevents Souness from escaping the position.
That's seven minutes gone in the round.
Kenichi Uzomaki has got the better of the ground game so far.
Uzomaki landing strikes.
Souness tries to wriggle free to get back to his feet but he's given up his back! Oops.
Souness is trying to get back to his feet but Uzomaki has full control of the position and if anything, Souness has just worked his way into a worse spot.
Graeme Souness has stepped it up - he knows he needs a finish here!
Uzomaki softening up his opponent with strikes here.
Uzomaki is persistently looking for the submission but Souness is defending it well.
Souness manages to escape to his feet.
Uzomaki dodges the punch combination from Souness.
That's eight minutes gone in the round.
Uzomaki gets his head snapped back by a nice shot there.
A jab lands there for Uzomaki.
Uzomaki misses with a wild body shot.
Souness throws a head kick that misses.
Souness fails to land with the punch combination there - jab, cross, hook, miss, miss, miss.
Souness throws an ugly left hook that misses
and Uzomaki counters with a quick right hand to the jaw.
Uzomaki misses with a takedown attempt - Souness sprawls well and throws a nice strike on the way out which just misses.
Graeme Souness has stuffed three takedown attempts in the round now. That's going to take a lot out of Kenichi Uzomaki.
That's nine minutes gone in the round.
A combination from Souness does no damage.
Souness throws a combination that misses
and Uzomaki counters with a takedown into side control.
Souness is working hard to escape and get back to his feet. After a battle for position, Uzomaki asserts his dominance and retains side control.
Uzomaki thinks about going for a far side armbar but bails out and retains the dominant position instead.
Kenichi Uzomaki is fighting for a decision here - he's started to take the cautious approach.
Souness is trying to escape and get back to his feet.
As the round comes to an end the crowd are showing their appreciation for a great round of action.
Uzomaki controlling the position from side mount.
And that's the end of the fight!
Kenichi Uzomaki comfortably won the final round on my scorecard.
I think Uzomaki has won this one but let's see whether the judges agree with me. Over to the ring announcer for the scorecards.
Ladies and gentlemen, after 2 rounds of action, we go to the scorecards for a decision.
Judge Shigeki Sano scores the fight for Kenichi Uzomaki!
Judge Taro Takaoka scores the fight for Kenichi Uzomaki!
Judge Tatsuya Matsuyama scores the fight for Kenichi Uzomaki!
Kenichi Uzomaki wins by unanimous decision!
|
|
|
|
|
|
|
|
|
|
|
|
|
|
|
|
|
|
|
|
|
|
|
| S |
C
A |
G |
S |
C
B |
G |
|
S |
C |
G |
|
energy
A | B |
|
hype
A | B |
|
pop
A | B |
|
mgr
A | B |
|
FIGHT
RATING
74% |
|
|
|
|
|
|

