|
|
PBP Commentary |
Coming up we have a featherweight MMA rules bout between Nero Haynes (ranked 0 p4p, 0 weight class) and Masato Kameda (ranked 0 p4p, 0 weight class). Kameda has chosen D.O - I'm Back as his entrance music. Both fighters look fresh as a daisy as they make their way towards the cage.
 |
|
 |
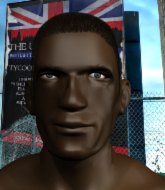
| 180 cm
21
153 lbs
1 - 1 - 0 |
|
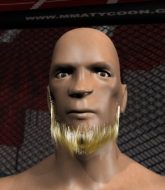
175 cm
18
154 lbs
0 - 1 - 0 |
BJJ Purple Belt
Solid Muay Thai
Good in bed |
|
BJJ White Belt
Excellent boxer
Solid chin |
|
| |
|
Ladies and gentlemen. This fight is 3 rounds, in the featherweight division.
Introducing the fighter to my left, fighting out of the red corner.
With a record of
1 - 1 - 0, fighting out of Tokyo, Nero Haynes!
And introducing the fighter to my right, fighting out of the blue corner.
With a record of
0 - 1 - 0, fighting out of Tokyo, Masato Kameda!
The judges for this bout are Yukihiro Yamamoto, Kenichi Hosakawa and Taro Takaoka.

The bell rings for round one and we are underway!
Kameda jabs away that one connects to the head of his opponent.
Haynes throws a nice outside leg kick.
Kameda swings wildly with a couple of big hooks
and Haynes counters with a body kick.
Kameda falls off balance throwing a combination
and Haynes counters with a head kick. That will keep Kameda thinking before he tries any more sloppy attacks!
Haynes fakes the leg kick and cracks Kameda in the body.
Haynes scores with a hook.
The fans in attendance giving it up for the two fighters, who have really let it all hang out in the last minute or so!
Haynes looks to throw the jab but Kameda is out of range.
Kameda throws a combination that misses
and Haynes counters with a body kick that stops Kameda in his tracks momentarily.
Kameda lands a jab-cross combination.
Kameda falls off balance throwing a combination
and Haynes counters with a nice body kick.
Kameda looks gassed!
Haynes with a poor takedown
enabling Kameda to counter with a crisp jab.

That's one minute gone in the round.
Kameda throws a lazy uppercut
and Haynes counters with a nice uppercut.
Kameda throws a jab, cross combination which is slipped
and Haynes counters with a good, hard body kick but Kameda shrugs it off.
Kameda throws a left and a right that both miss
and Haynes counters with a nice body kick.
Kameda stuffs the takedown attempt from Haynes. Haynes gets slowly back to his feet.
Haynes with a lazy takedown attempt
and Kameda counters with a two punch combo.
That's three failed takedown attempts in the round for Nero Haynes. That's going to take a lot out of him.
Haynes throws a body kick that digs right into the meat.
Haynes lands a leg kick. The shin dug right into the meat of the thigh.
Ouch! a nice leg kick from Haynes, right into the meat.
Thud! ouch! good body kick from Haynes - that will leave a mark!
The crowd cheering loudly, showing their appreciation for the quality fight we're seeing here.
Haynes lets the fists fly and connects with a left straight followed by a right hook.

That's two minutes gone in the round.
Haynes lands a kick to the ribs of his opponent. Nice work there - in and out in a flash.
Haynes lands three nice shots there - that looked like it hurt!
Haynes shoots in for a takedown. He's persisting with it as Kameda sprawls well. Kameda wins this battle and keeps the fight standing. Haynes gets slowly back to his feet.
Masato Kameda seems to be the more aggressive standup fighter in this bout.
Haynes tries to close the distance and clinch up but Kameda swats him away and circles back towards the center.
Haynes shoots in but doesn't get the takedown
enabling Kameda to counter with a crisp jab.
Kameda falls off balance throwing a combination
and Haynes counters with a one-two to the body.

That's three minutes gone in the round.
Haynes moves in looking to clinch but Kameda pushes him off.
Kameda swats away the attempt to clinch by Haynes.
Kameda misses with a double jab
and Haynes counters with a three punch combination, finished off with a leg kick. Nice work.
Kameda falls off balance throwing a combination

and Haynes counters by moving into the clinch.
Haynes tries to land knees in the clinch but Kameda avoids the damage to the body.
Haynes looking to throw knees to the head but Kameda is blocking nicely.
Haynes prevents Kameda from breaking the clinch.
Haynes wants to break free but Kameda has control.
Haynes prevents Kameda from breaking the clinch.
Haynes jumps guard but Kameda stands there with Haynes around his waist. Haynes gives up and drops back to his feet. We remain in the clinch.

That's four minutes gone in the round.
The crowd are hurling abuse towards the fighters... You can hardly blame them though because there isn't a lot going on in the fight.
Haynes unloads a knee to the mid-section. Kameda lets out a prehistoric sounding urrrrgh.
Both fighters working to control the clinch.
Haynes keeps the fight in the clinch, despite Kameda's efforts to push away.
Haynes keeps control of Kameda as he tries to wriggle out of the double underhooks.
Kameda prevents Haynes from breaking the clinch.
Kameda wants to strike at distance but he can't break free of the clinch.
Kameda tries to break free but Haynes pushes him back against the cage.
Kameda wants to break the clinch but can't.
Haynes wants to break free but Kameda has control.
Kameda on the defensive, avoiding the knees to the body.
Haynes drops down for a takedown but doesn't get it.
As the round comes to an end the crowd are showing their appreciation for a great round of action.
Kameda wants to get back to striking at distance but Haynes won't allow it.
Haynes is trying to break the clinch but Kameda has him pressed against the cage.
And thats the end of the round the fighters go back to their corners.
Nero Haynes dominated that round.
The corners get their ten second warning. Both fighters stand from their stools and stare eachother down, ready to get back to the action.

Kameda misses with a double jab
and he gets countered with a snapping leg kick.
Nero Haynes is looking to throw some combinations by the looks of things.
Kameda throws a right hand that Haynes ducks under and follows up with a left that Haynes also avoids with ease.
Kameda swings wildly with a couple of big hooks
and Haynes counters with a nice low kick that buckles Kameda's knee momentarily.
Kameda throws a left and a right that both miss
and Haynes counters with a good right hand that lands right on the jaw.
Kameda falls off balance throwing a combination
and Haynes counters with a flying knee. Nice.
Haynes tries to clinch up but Kameda circles away and keeps his distance.
Kameda throws a two punch combo that lands nicely.
Kameda misses with a jab to the body
and Haynes counters with a two punch combo.
Kameda is breathing heavily.
That's one minute gone in the round.
Haynes throws a combination but comes up with nothing but fresh air.
Ooooh, nice body kick lands from Haynes. Kameda shrugs it off though.
Kameda avoids the head kick by Haynes.
Kameda misses with a combination
letting Haynes counter with a right hand.
Kameda throws a jab, cross combination which is slipped
and Haynes counters with a left to the body.
Kameda falls off balance throwing a combination
and Haynes connects with a straight left hand counter down the middle.
Kameda looks to score with a jab to the body but Haynes is just out of range.
Kameda has developed a nice purple lump on his ribcage, as a result of some heavy body kicks from Haynes.
Kameda throws a combination that misses
and Haynes counters with a head kick. That will keep Kameda thinking before he tries any more sloppy attacks!
That's two minutes gone in the round.
Kameda throws a sloppy body shot
and Haynes counters with a kick to the head that grazes his opponent. Kameda is lucky that one didn't land flush.
Kameda throws a combination that misses
and Haynes counters with a nice low kick that buckles Kameda's knee momentarily.
Kameda misses with a left hand
and Haynes counters with a body kick that stops Kameda in his tracks momentarily.
Haynes scores with a head kick.
Kameda throws a left and a right that both miss
and Haynes counters with a lovely straight right hand!
Ooooh, nice body kick lands from Haynes. Kameda shrugs it off though.
Masato Kameda is looking to keep the fight on the feet at all costs.
We've seen a great period of action over the last minute or so - credit to both fighters for going all out!
Haynes doesn't manage to clinch there - Kameda circles away.
No luck with that takedown attempt from Haynes.
Kameda misses with an uppercut.
That's three minutes gone in the round.
Kameda misses with a double jab
and Haynes counters with a nice uppercut.
Haynes turns his hip over beautifully as he lands a nice leg kick.
Kameda punishes Haynes's body with a nice straight punch.
Haynes doesn't succeed with the takedown
and Kameda counters with a crisp hook to the side of the head.
Kameda misses with a combination
and Haynes counters with a three punch combination, finished off with a leg kick. Nice work.
Haynes tries for a takedown but Kameda circles away easily
and Kameda counters with a shot to the ribs. That looked like it hurt.
That's three failed takedown attempts in the round for Nero Haynes. That's going to take a lot out of him.
That's four minutes gone in the round.
Kameda misses with a combination
and Haynes counters with a big head kick but Kameda shrugs it off.
Kameda stalks Haynes and leaps in with a furious combination of punches. Uppercuts and crosses smash into Haynes's face. Haynes staggers backwards, shaken.
Kameda misses with a double jab
and Haynes counters with a good, hard body kick but Kameda shrugs it off.
Haynes gets in close and instigates a clinch.
The crowd applaud the fighters efforts here as the round comes to an end.
Haynes is looking to control Kameda's arms but Kameda gets an underhook and turns him. Now Haynes has his back to the cage.
Haynes using the Thai clinch to land knees to the body.
Kameda is trying to break the clinch but Haynes is controlling him.
Kameda blocks a knee to the body. He'll have a nicely bruised forearm in the morning.
And thats the end of the round the fighters go back to their corners.
Nero Haynes dominated that second round.
That's time! Back to the action! This is the final round!

Haynes misses with a series of wild punches.
Kameda misses with a combination
and Haynes counters with a solid body kick.
Kameda swings wildly with a couple of big hooks
and Haynes counters with a nice body kick.
Kameda misses with a shot to the body
and Haynes counters with a body kick that stops Kameda in his tracks momentarily.
Haynes swings for the body but Kameda moves out of range.
Haynes shoots in but Kameda avoids the takedown attempt easily.
Kameda throws a left and a right that both miss
and Haynes counters with a straight right hand.
Kameda misses with a combination
and he gets countered with a snapping leg kick.
That's one minute gone in the round.
Kameda defends well against a solid takedown attempt from Haynes.
Both fighters are breathing heavily.
Kameda swings wildly with a couple of big hooks
and Haynes counters nicely by changing levels and landing a hook to the body.
Kameda leaves Haynes with his face pressed against the mat as he sprawls beautifully, defending against a solid takedown attempt.
That's three failed takedown attempts in the round for Nero Haynes. That's going to take a lot out of him.
Haynes tries to clinch but is not successful on this occasion.
Haynes shoots in but doesn't get the takedown
and Kameda counters with a series of strikes. Haynes will be more careful next time no doubt.
Kameda throws a left and a right that both miss
enabling Haynes to counter with a crisp jab.
Kameda falls off balance throwing a combination
and Haynes makes the exchange count by landing a cracking kick to the body. Kameda really felt that one!
That's two minutes gone in the round.
My god... these two guys really need to pick up the pace or everyone will leave to go get a beer.
Kameda misses with a double jab
and Haynes counters with a straight right hand.
Haynes tries to land a front kick but Kameda steps back. That was a bit too telegraphed.
Haynes misses with a takedown attempt
and Kameda counters with a nice uppercut.
A shot to the body from Kameda misses
and Haynes counters with an inside leg kick.
Kameda throws a left and a right that both miss
and Haynes counters with a nice low kick that buckles Kameda's knee momentarily.
Haynes falls off balance throwing a combination
and Kameda counters with a three punch combination, finished off with a leg kick. Nice work.
That's three minutes gone in the round.
Kameda swings away with a body shot that misses
and Haynes counters with a slapping leg kick.
Kameda throws a jab, cross combination which is slipped
enabling Haynes to counter with a crisp jab.
Kameda swings wildly with a couple of big hooks
and Haynes counters with a nice low kick that buckles Kameda's knee momentarily.
Haynes looks for a takedown but Kameda sprawls well.
Haynes misses with an uppercut
and Kameda makes him pay by landing a nice hook to the body before moving out of range.
Kameda throws an off balance right hand
and Haynes counters with a body kick that brings a smile to the face of both fighters.
Haynes shoots in with a takedown attempt and he has Kameda pinned against the cage. Kameda gets the underhooks and manages to circle away.
Haynes is really dominating this fight. Is there anything that Kameda can do to turn this around?
Kameda looks to land a combination but Haynes avoids it well.
That's four minutes gone in the round.
Kameda throws a combination that misses
and Haynes counters with a crisp hook to the side of the head.
Haynes throws the left hand but Kameda avoids the punch easily.
The fighters are starting to get sweaty, which will make takedowns a bit more tricky.
Kameda scores with a shot to the body.
Kameda misses with a combination
and Haynes counters with a leg kick.
Kameda takes a step back and watches a body kick go sailing past his mid section.
Kameda walks forward, straight into a front kick from Haynes.
Masato Kameda has stepped it up - he knows he needs a finish here!
Nero Haynes is fighting for a decision here - he's started to take the cautious approach.
Kameda falls off balance throwing a combination
and Haynes counters with a straight right hand.
And that's the end of the fight!
Nero Haynes showed his dominance in that final round.
Well Haynes has outscored his opponent in every aspect of the fight today. Only a scarily incompetent judge or two will keep him from a well deserved win... Over to the ring announcer for the scorecards.
Ladies and gentlemen, after 3 rounds of action, we go to the scorecards for a decision.
Judge Yukihiro Yamamoto scores the fight 30:27
Judge Kenichi Hosakawa scores the fight 30:27
Judge Taro Takaoka scores the fight 30:27
In favor of your winner, by unanimous decision... Nero Haynes!
|
|
|
|
|
|
|
|
|
|
|
|
|
|
|
|
|
|
|
|
|
|
|
| S |
C
A |
G |
S |
C
B |
G |
|
S |
C |
G |
|
energy
A | B |
|
hype
A | B |
|
pop
A | B |
|
mgr
A | B |
|
FIGHT
RATING
49% |
|
|
|
|
|
|
