|
|
PBP Commentary |
Coming up we have a middleweight MMA rules bout between Fisto Hayuken (ranked 0 p4p, 0 weight class) and Pierre Tremblay (ranked 0 p4p, 0 weight class). Hayuken comes to the cage accompanied by Binaerpilot - Penguin. Pierre Tremblay struggled to make weight for this fight. He only made it down to 186.9lbs at the first attempt and had to take the additional two hours to make the official bout weight. Let's see how much it's taken out of him. Over to our ring announcer for the fighter introductions!
 |
|
 |
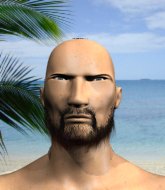
| 183 cm
22
190 lbs
4 - 2 - 0 |
|
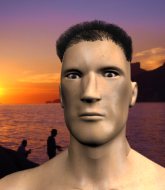
184 cm
21
200 lbs
6 - 3 - 1 |
BJJ Brown Belt
Solid boxing
Very quick |
|
Good wrestler
Counter striker
Powerful |
|
| |
|
Ladies and gentlemen. This fight is 5 rounds, in the middleweight division.
Introducing the fighter to my left, fighting out of the red corner.
With a record of
4 - 2 - 0, fighting out of Montreal, Fisto Hayuken!
And introducing the fighter to my right, fighting out of the blue corner.
With a record of
6 - 3 - 1, fighting out of Montreal, Pierre Tremblay!
The judges for this bout are Ian Loll, Gregory Folan and Dillan Fox.

The bell rings for round one and we are underway!
Hayuken with a lazy takedown attempt
letting Tremblay counter with a right hand.

Hayuken throws a loose over hand right and dives in with a double leg takedown. Tremblay tries to sprawl but it's too late and the fighters hit the mat. Hayuken is in Tremblay's guard.

Hayuken postures up as if he's going to throw some strikes but drops back for an ankle! Tremblay is in big trouble! He looks ready to tap! But no, he's escaped and dives on top of Hayuken, into his guard.
Hayuken looks to be working for a triangle here. Oh, it looks like he might have it! Tremblay has picked Hayuken up and slammed him! Hayuken can't keep hold of the triangle and Tremblay manages to pass to side control!
Hayuken can't do much from the bottom here.
Hayuken is trying to get back to half guard.
Tremblay wants to control but Hayuken is keeping him busy.

That's one minute gone in the round.
Tremblay tries to land with some ground and pound but misses.
Hayuken is trying to improve his position.
Hayuken is trying to get back to half guard. He's pushing on Tremblay's leg. He's managed it. Nice work.
Tremblay is controlling the pace.
Hayuken moves into full guard.

That's two minutes gone in the round.
The crowd are hurling abuse towards the fighters... You can hardly blame them though because there isn't a lot going on in the fight.
Hayuken is throwing his legs up, looking for submissions. Tremblay is aware though and is defending well.
Hayuken has a butterfly guard looking to sweep but Tremblay has passed into side control.
Hayuken tries to bench press Tremblay off him but Tremblay keeps the position.
Hayuken manages to work his way to half guard, despite Tremblay's best efforts.
Hayuken is looking to improve his position.
Hayuken gets full guard.
The fighters are pressed up against the cage, both looking to find a bit of space to work.
Hayuken is trying to control the position but Tremblay postures up.

That's three minutes gone in the round.
Hayuken has control of Tremblay's left arm, preventing Tremblay from doing any damage.
Hayuken wants to hit a switch here but Tremblay passes into full mount! Oh no, disaster for Hayuken there!
Hayuken really trying hard to get back to half guard here.
Tremblay controlling from the full mount.
Hayuken is in all sorts of trouble here.

That's four minutes gone in the round.
The crowd are getting on the fighters' backs, as the pace has dropped off in the last minute or so.
Hayuken sneaks a leg under to get to half guard.
Tremblay thows a wild elbow that connects with the canvas.
The ref warns both fighters not to hold the cage as they work up against the meshing.
Hayuken makes his way to full guard. A much better position for Hayuken.
Hayuken is avoiding any damage by keeping wrist control.
Tremblay must be cautious of submissions here, given that his opponent has the superior Jiu Jitsu.
Hayuken controls Tremblay momentarily but Tremblay frees himself.
Hayuken is going to have to think about doing something other than just controlling because Tremblay is managing to avoid having the position dictated to him.
And thats the end of the round the fighters go back to their corners.
Fisto Hayuken dominated that round.
The referee calls time. The cornermen exit stage left and we're back to business.

Hayuken swings for the body but Tremblay moves out of range.
Tremblay avoids the body shot from Hayuken.
Tremblay ducks under a wild hook from Hayuken.
Hayuken throws an off balance right hand
and Tremblay counters with a crisp hook to the side of the head.
Hayuken misses with a jab to the body
and Hayuken takes a counter punch right on the button for his troubles.
Hayuken swings away with a body shot that misses
and Tremblay counters with a nice uppercut.
Hayuken throws a right hand that misses
and Tremblay counters with a lovely straight right hand!
Hayuken staying out of range there.
Hayuken closes the distance and scores a nice trip takedown into half guard. Tremblay did well to prevent Hayuken getting side control.
Hayuken works his way into full mount!
Hayuken moves into side control, trying to work for a kimura. That looks painful! Will he finish!!?? No, Tremblay has worked his arm free - good work by Tremblay!
That's one minute gone in the round.
Hayuken working away.
Tremblay tries to improve position but can't.
Tremblay is breathing heavily.
Hayuken goes for an armbar! This could be all over! Wait, no, Tremblay rolls with the submission and now he's on top in Hayuken's guard! Nice work there by Tremblay!
A real slowdown in the pace of the fight for a moment, as Hayuken holds on and takes a little breather.
There's a bit of a scramble here and now Hayuken is on top in guard.
Hayuken drops back, looking for a kneebar! Tremblay looks panicked! The fighters roll across the mat, one looking to finish, one looking to escape. Tremblay looks to have wriggled free... Yes, he's got his leg free and he's dived into side control! Good work there from Tremblay!
That's two minutes gone in the round.
Hayuken wants to control but Tremblay postures up.
Hayuken sneaks back into half guard.
Hayuken looking for submissions off his back.
Hayuken gets back to full guard.
That's three minutes gone in the round.
Tremblay postures up.
Hayuken looking for submissions off his back, moving his hips, looking for an opening.
Hayuken looking for a sweep. Not yet Hayuken, not yet.
Hayuken manages to land a sweep and now he's in mount on top!
Hayuken goes for an armbar but he's not got it
Tremblay turns into him and now he's in Hayuken's guard.
Tremblay lands a couple of elbows.
That's four minutes gone in the round.
Hayuken is trying to control the position from the bottom.
Hayuken looking for submissions from the bottom here. Moving his hips around, possibly looking for an armbar.
Hayuken looking to control.
Hayuken avoiding any damage from the ground and pound.
Hayuken looking for submissions from the bottom here. Moving his hips around, possibly looking for an armbar.
Hayuken has his hands on Tremblay's head, controlling the position.
And thats the end of the round the fighters go back to their corners.
Fisto Hayuken dominated that second round.
That's time! Hayuken's corner gives him a slap on the ass as he gets ready to fight.

Hayuken misses with a telegraphed body shot
and Tremblay makes him pay by landing a nice hook to the body before moving out of range.
Tremblay takes a shot to the body in his stride.
Hayuken cracks a nice hook into Tremblay's ribs.
Hayuken misses with a straight left.
Hayuken gets his takedown attempt stuffed easily
letting Tremblay counter with a right hand.
Hayuken is looking to wear down Tremblay with body shots, infact he's throwing more body shots than head shots at the moment.
Hayuken darts in trying to clinch
and Hayuken takes a counter punch right on the button for his troubles.
Tremblay keeping a good distance there, avoiding the body shot.
Hayuken takes a really solid shot there but just smiles back and shrugs his shoulders.
A swing and a miss from Tremblay.
Tremblay misses with a straight right.
Hayuken tries to clinch up but Tremblay circles away and keeps his distance.
Tremblay takes a big intake of breath there - he's definitely tired.
Hayuken throws a right hand that misses
and Tremblay counters with a shoot takedown. Hayuken fights it but they end up in guard.
That's one minute gone in the round.
Tremblay tries to free his leg and advance position but Hayuken is retaining full guard.
Hayuken manages to sweep nicely, so he's now on top. Tremblay manages to get himself to full guard.
Hayuken pressing down on his opponent's thigh, looking to pass guard. Tremblay is keeping the position for now.
Hayuken controls from within his opponent's guard.
Hayuken wants to pass the guard but Tremblay is keeping the position.
Hayuken controlling from the guard. I say controlling but really, he's stalling.
That's two minutes gone in the round.
My god... these two guys really need to pick up the pace or everyone will leave to go get a beer.
Hayuken looking to pass the guard.
Hayuken thinks about going for a leg but decides against it, in order to maintain the position.
Hayuken postures up as if he's going to throw some strikes but drops back for an ankle! Tremblay is in big trouble! He looks ready to tap! But no, he's escaped and dives on top of Hayuken, into his guard.
Tremblay postures up.
That's three minutes gone in the round.
Tremblay is looking to work some ground and pound but Hayuken has wrist control.
Hayuken being controlled here, momentarily.
Hayuken trying to keep a closed guard but Tremblay is proving a slippery customer.
Tremblay won't allow Hayuken to sweep him here.
Hayuken wants to control the position but Tremblay says "no thanks buddy" and passes to half guard.
Tremblay is looking to pass the guard... He's managed it - he's now in full mount!
Hayuken is looking to improve his position but Tremblay isn't that keen on the idea.
That's four minutes gone in the round.
The crowd are hurling abuse towards the fighters... You can hardly blame them though because there isn't a lot going on in the fight.
Hayuken is working hard here to advance position.
Hayuken tries to hold on but Tremblay pushes him away.
Tremblay raining down shots from the mount!
Hayuken regains half guard.
Neither fighter is being very active at the moment, with Tremblay in particular looking to stall.
Tremblay is looking to take a break and control but Hayuken is keeping him honest, looking to work from the bottom.
And thats the end of the round the fighters go back to their corners.
Pierre Tremblay really dominated that round.
OK. That's time! The bell goes and we're back to the action.

Hayuken has his takedown stuffed
and Tremblay decides to take the opportunity to score a takedown. He's landed in Hayuken's guard.
Hayuken manages to sweep nicely, so he's now on top. Tremblay manages to get himself to full guard.
Tremblay keeping moving, preventing Hayuken from controlling successfully.
Hayuken slips effortlessly into side control - very nice.
Hayuken is looking for a kimura. He might have it! No, Tremblay has escaped the position, nice work there.
Hayuken is looking for a kimura. He might have it! No, Tremblay has escaped the position, nice work there.
Tremblay is absolutely dripping with sweat - he looks exhausted.
That's one minute gone in the round.
Tremblay tries to buck Hayuken off but Hayuken is having none of it.
Hayuken thinks about going for a far side armbar but bails out and retains the dominant position instead.
Hayuken goes for an armbar here - this could be all over! But no, Tremblay has escaped beautifully and is now on top in side control! Oh, that's unlucky for Hayuken but great work by Tremblay.
Hayuken sneaks back into half guard.
Hayuken is pressing down on Tremblay's left leg trying to get back to full guard. He's managed it.
That's two minutes gone in the round.
Hayuken had isolated an arm as going for a kimura. Tremblay defends it easily.
Hayuken looking to sweep using the butterfly guard but Tremblay puts pay to that idea as he passes nicely into half guard.
Hayuken regains full guard. Nicely done.
Tremblay wants to control from the top but Hayuken keeps moving.
Hayuken looking to control.
Tremblay slows down the pace of the fight, as he sits in guard.
Hayuken looking to control.
That's three minutes gone in the round.
Tremblay stays in close to Hayuken's body and controls the position.
We may be looking at a referee standup if the pace doesn't pick up soon.
Tremblay avoids a guillotine attempt easily.
Hayuken looking to control the pace of the fight rather than finish it.
Hayuken looking for a sweep. Not yet Hayuken, not yet.
That's four minutes gone in the round.
The crowd are starting to boo a lack of action.
Tremblay content to stall in guard here.

Well, the referee has seen enough. Neither fighter is active enough on the ground so he's stood them back up.
Hayuken throws a lazy right hand but Tremblay sees it coming a mile off and sidesteps it easily.
Hayuken misses with a body shot.
Hayuken misses with a straight right.
Hayuken misses the shot to the body.
Hayuken missing with a left hand there. Tremblay was out of range so wasted energy throwing that one.
Hayuken scores with a hook to the body. Tremblay takes a step back and tries to catch his breath.
Hayuken connects with a body shot.
Hayuken fails to land with a series of punches.
Tremblay circles away from the clinch attempt.
Hayuken lands with a right hand.
Tremblay might want to mix his strikes up a bit more. He's just going for head shots at the moment and that can become a bit predictable.
Hayuken shoots in looking for a takedown but Tremblay manages to keep the fight standing, pushing Hayuken's face into the canvas for good measure before circling away.
And thats the end of the round the fighters go back to their corners.
Fisto Hayuken had his way with Pierre Tremblay in that round.
The corners get their ten second warning. Both fighters stand from their stools and stare eachother down, ready to get back to the action. Let's hear some noise people - this is the final round!

Hayuken waving his hands out in front of him, looking to distract Tremblay.
Tremblay steps to the side to avoid the strikes from Hayuken.
Hayuken lands a really nice looking cross but Tremblay seems unphased.

It looks like Pierre Tremblay has been cut.
A looping hook to the body misses from Hayuken. Tremblay does a little dance to reset his feet.
Tremblay moves out of range of the strikes.
Tremblay throws a monster uppercut resembling something out of street fighter but it doesn't land.
Hayuken tries to clinch but Tremblay moves out of range.
Tremblay takes a solid shot to the body. That one hurt him but he's trying not to show it.
Tremblay shoots in but Hayuken avoids the takedown attempt easily.
Hayuken wants to clinch up but Tremblay keeps it at a distance.

Hayuken gets to the clinch - let's see what his plan is here.

Hayuken pushes off and circles away, back to the middle of the mat.
Hayuken just misses with a punch to the body.
Tremblay is wobbling all over the place through exhaustion. Will he make it to the final bell?
That's one minute gone in the round.
No luck for Hayuken with that takedown attempt.
Tremblay scores with a jab to the jaw of his opponent.
Tremblay uses some good footwork to avoid the body shot by Hayuken.
Tremblay connects with a crisp jab.
Hayuken tries for a takedown but Tremblay circles away easily
and Tremblay counters with a single leg into guard. Hayuken didn't expect that.
Hayuken keeping full guard, as Tremblay tries to pass.
Tremblay throwing shots from guard but he's hitting more mat than opponent.
Tremblay in full guard, throwing the ground and pound. No damage this time.
Hayuken wants to sweep here but Tremblay controlling him for the moment.
That's two minutes gone in the round.
Hayuken escapes his hips to the side and looks to be working for an armbar. Tremblay gives him a little smile and shakes his head. No chance.
Hayuken trying to control the position.
Hayuken looking for submissions off his back, moving his hips, looking for an opening.
Tremblay advances to half guard.
Hayuken wants to control the action here but instead Tremblay manages to pass to full mount!
Tremblay lands a nice shot to the head.
Fisto Hayuken is fighting for a decision here - he's started to take the cautious approach.
That's three minutes gone in the round.
Tremblay in mount throwing good strikes here, bouncing his opponent's head off the canvas.
Tremblay can't quite control the action as he would like just now, as Hayuken is looking to escape.
Hayuken is looking to improve his position but Tremblay isn't that keen on the idea.
Hayuken holds of for dear life.
That's four minutes gone in the round.
Hayuken tries to hold on but Tremblay pushes him away.
Hayuken is in all sorts of trouble here.
Tremblay trying to control but Hayuken is having none of it.
Hayuken looks out of his depth in this position - he's holding on tight.
Tremblay prevents Hayuken from getting the reversal.
And that's the end of the fight!
Pierre Tremblay comfortably won the final round on my scorecard.
I think Hayuken has won this one but let's see what the judges have to say. Over to the ring announcer for the scorecards.
Ladies and gentlemen, after 5 rounds of action, we go to the scorecards for a decision.
Judge Ian Loll scores the fight 48:47
Judge Gregory Folan scores the fight 48:47
Judge Dillan Fox scores the fight 48:47
In favor of your winner, by unanimous decision... Fisto Hayuken!
|
|
|
|
|
|
|
|
|
|
|
|
|
|
|
|
|
|
|
|
|
|
|
| S |
C
A |
G |
S |
C
B |
G |
|
S |
C |
G |
|
energy
A | B |
|
hype
A | B |
|
pop
A | B |
|
mgr
A | B |
|
FIGHT
RATING
69% |
|
|
|
|
|
|
