|
|
PBP Commentary |
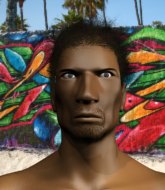
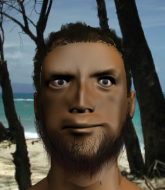
Coming up we have a light heavyweight MMA rules bout between Mocky Mok (ranked 0 p4p, 0 weight class) and Yashihiro Tony (ranked 0 p4p, 0 weight class). We have two fighters making their debuts here, so let's see who comes out of this one with their first professional victory.
 |
|
 |
| 189 cm
18
215 lbs
0 - 0 - 0 |
|
172 cm
20
205 lbs
0 - 0 - 0 |
BJJ Blue Belt
Brawler
Good chin |
|
BJJ Blue Belt
Brawler
Determined |
|
| |
|
Ladies and gentlemen. This fight is 3 rounds, in the light heavyweight division.
Introducing the fighter to my left, fighting out of the red corner.
With a record of
0 - 0 - 0, fighting out of Tokyo, Mocky Mok!
And introducing the fighter to my right, fighting out of the blue corner.
With a record of
0 - 0 - 0, fighting out of Tokyo, Yashihiro Tony!
The judges for this bout are Yuuki Gou, Ren Mimura and Yukihiro Yamamoto.

The bell rings for round one and we are underway!
Tony pulls out of a head kick attempt.

Mok closes the distance and clinches.
Tony landing some nice looking knees to the body.

Tony has Mok pressed up against the cage. He's trying to work for a single leg takedown. Tony pulls back from the cage and twists to the side, sending Mok tumbling to the mat - Tony dives into Mok's guard.
Mok keeping moving, preventing Tony from controlling successfully.
Mok knows he needs to get back to his feet asap. He's simply no match for Tony on the ground.
Mok seems keen to control rather than go for a submission, at least for now.

The ref stands the fighters back up. Yashihiro Tony was stalling too much, according to the referee.
Tony throws a combination that misses
and Mok counters with a nice double leg into side control. Tony won't be happy with that.
Mok will need to keep those long limbs tucked in whilst he's on the ground, to prevent any submissions.
Wooooo! Give it up for these two warriors! They are putting on a show!
Mok wants to take a breather but Tony manages to regain guard - a lesson learnt for Mok.
Mok stands up and looks to throw the legs aside to pass to side control. Tony swivels though and keeps the full guard.

That's one minute gone in the round.
Mok stopping the sweep attempt from Tony.
We're hearing some news coming in from back stage. It's official - Tony has eaten all the pies!
Mok has to be careful here, sitting in the guard of a superior BJJ player.
Mok won't allow Tony to get back to his feet.
Tony is trying to control the position but Mok postures up.
Mok throws a big right hand that misses.
Tony trying to control the position.

Tony is active off his back here, looking for submissions.

That's two minutes gone in the round.
A few boos can be heard. I'm sure they will multiply if the fighters don't pick up the pace.
Mok throwing strikes from guard but Tony blocks nicely.
Mok trying to control the position from guard on top but Tony is wriggling around, looking for whatever he can.
Mok pressing down on his opponent's thigh, looking to pass guard. Tony is keeping the position for now.
The fighters are starting to perspire pretty heavily.
Tony throws some shots to the body, keeping his opponent honest.
Tony wants to control but instead he gets his guard passed and Mok is now in half guard.
Tony works his way to full guard. Good work.

That's three minutes gone in the round.
Mok trying to control but Tony is working from the bottom.
Tony keeping full guard, as Mok tries to pass.
Mok is breathing heavily.
Tony is looking to get back to his feet but can't, whilst Mok is controlling him.
Mok would like to get this fight back to the feet but can't get free from the closed guard.
Mok trying to control the position from guard on top but Tony is wriggling around, looking for whatever he can.

That's four minutes gone in the round.
A few boos can be heard. I'm sure they will multiply if the fighters don't pick up the pace.
We're going to have a standup here because Mocky Mok wasn't active enough for the referee's liking.
Mok shoots in but doesn't get the takedown
and Tony counters with a nice double leg into guard.
Tony throwing shots from guard but he's hitting more mat than opponent.
Tony wants to control from the top but Mok keeps moving.
Tony landing with the ground and pound.
Tony wants to stand but Mok is controlling his posture from full guard.
The crowd applaud the fighters efforts here as the round comes to an end.
Tony wants to control from the top but Mok keeps moving.
And thats the end of the round the fighters go back to their corners.
Yashihiro Tony dominated that round.
OK. That's time! The bell goes and we're back to the action.

Tony shoots in with a lovely double leg takedown. Mok manages to land in full guard to minimise the damage.
Mok is looking to sweep but instead, Tony has passed into half guard.
Tony is keen to just control but Mok is a slippery customer.
Mok trying to control from the bottom.
Mok actively working from the bottom here.
Tony tries to stand but can't do so whilst Mok controls his leg.
Both fighters are absolutely exhausted here.
That's one minute gone in the round.
Mok is looking for a sweep. Tony is wise to his cunning plan and keeps the top position.
Tony wants to work for an arm triangle but Mok is really keeping half guard well and defending the submission attempt.
Mok trying to control here but he's found himself mounted! Oh no!
Mok is desperately trying to improve his position but Tony has a good base and remains in mount.
Mok wants to hold on but Tony pushes him away.
Tony looking to control and managing it successfully.
Yashihiro Tony has got the better of the ground game so far.
Tony wants to control the pace but Mok is squirming around nicely.
That's two minutes gone in the round.
The crowd are getting on the fighters' backs, as the pace has dropped off in the last minute or so.
Mok wants to hold on but Tony pushes him away.
Tony takes a little breather and maintains the position. The referee will be looking for him to stay active from such a dominant position though.
We must be close to a standup if these guys don't pick up the pace.
Mok is wriggling around trying to escape.
Tony lands a couple of nice shots there from mount.
Tony wants to control the pace but Mok is squirming around nicely.
The ref warns both fighters not to hold the cage as they work up against the meshing.
That's three minutes gone in the round.
Tony controlling the pace for now.
Tony looking to control but Mok is working nicely, looking to advance position himself.
The fighters are pressed up against the cage, both looking to find a bit of space to work.
A nice elbow there by Tony.
Mok is working to get back to half guard.
Mok is squirming around, avoiding Tony's attempts to control the action.
That's four minutes gone in the round.
Neither fighter has done anything of merit for a good minute or two here and the crowd are not happy about it.
Mok wants to improve position but instead he's given up his back.
Tony tries to get the hooks in deep but Mok pushed the leg off.
Tony looking for the RNC.
Mok looks to control his opponent's hands but he's not mananging it at the moment.
Will Tony go for the finish here or will he try and keep control of the position?
Tony punishes Mok with strikes from the back mount.
And thats the end of the round the fighters go back to their corners.
Yashihiro Tony showed his class in that round. I'd imagine he'll take it on all the scorecards.
Well, the break between rounds is over. Let's get back to the scrappin! This is the final round!

Mok tries for a takedown but Tony circles away easily
and Tony counters with a shoot takedown into half guard.
Tony missing with some ground and pound from the half guard.
Mok is staying active underneath Tony, who seems content to just control the action from this position.
Tony is stalling here. Mok is in no mood to hang around though. He's locked up a kimura from the bottom! Tony seems to be keeping calm but he's forced to roll out of the hold and Mok has ended up in side control on the top. Nice work.
Mok wants to work for a kimura but he's foiled early by Tony, who protects the arm well.
Tony is trying to get back to half guard. He's pushing on Mok's leg. He's managed it. Nice work.
Tony makes his way to full guard. A much better position for Tony.
Both fighters are breathing heavily.
That's one minute gone in the round.
Mok looking to sit in guard and control but Tony gets the butterfly guard and sweeps. He's now in the guard on the top.
Mok trying to keep a closed guard but Tony is proving a slippery customer.
Tony drops back looking for a leg! Mok is in trouble here! The fighters roll with the hold and Mok manages to kick Tony off! Tony jumps back into Mok's guard.
Tony makes a bit of distance and scores with some ground and pound, still in guard.
That's two minutes gone in the round.
My god... these two guys really need to pick up the pace or everyone will leave to go get a beer.
Mok wants to sweep but no luck.
Mok working from the bottom, still in full guard. He's managed to get a loose triangle. Tony doesn't seem to be doing much to defend here, obviously he feels comfortable in the position. Tony manages to throw the legs off his shoulder and he's back into guard - no problem.
Mok keeping full guard, as Tony tries to pass.
Tony chips away with some ground and pound.
Tony passes Mok's right leg, so he's now in half guard.
Mok is refusing to be controlled, as Tony sits in half guard.
That's three minutes gone in the round.
Tony tries to pass the half guard into mount. Mok knows what he's doing though and prevents the attempt.
Tony is keen to just control but Mok is a slippery customer.
Tony is looking for an arm triangle, whilst trying to pass to side control. Mok doesn't seem that keen to cooperate though. No luck this time Tony.
Mok tries to get to full guard but Tony has control of the leg.
That's four minutes gone in the round.
The crowd are starting to boo a lack of action.
Mok is trying to control but can't.
Tony performing his best blanket impression for a moment.
The ref stands the fighters back up. Yashihiro Tony was stalling too much, according to the referee.
Mok tries to sprawl but Tony drives through with a takedown into half guard.
Mocky Mok has stepped it up - he knows he needs a finish here!
Mok looking to work for a kimura from the bottom.
Yashihiro Tony is fighting for a decision here - he's started to take the cautious approach.
Mok wants to control but Tony passes into side.
And that's the end of the fight!
Yashihiro Tony comfortably won the final round on my scorecard.
Well Tony has outworked and out performed his opponent in all aspects of the game today. He was simply too good and the decision should be no more than a formality. Over to the ring announcer for the scorecards.
Ladies and gentlemen, after 3 rounds of action, we go to the scorecards for a decision.
Judge Yuuki Gou scores the fight 27:30
Judge Ren Mimura scores the fight 27:30
Judge Yukihiro Yamamoto scores the fight 27:30
In favor of your winner, by unanimous decision... Yashihiro Tony!
|
|
|
|
|
|
|
|
|
|
|
|
|
|
|
|
|
|
|
|
|
|
|
| S |
C
A |
G |
S |
C
B |
G |
|
S |
C |
G |
|
energy
A | B |
|
hype
A | B |
|
pop
A | B |
|
mgr
A | B |
|
FIGHT
RATING
43% |
|
|
|
|
|
|
