|
|
PBP Commentary |
Coming up we have a heavyweight MMA rules bout between Andre Cote (ranked 0 p4p, 0 weight class) and James Sansom (ranked 0 p4p, 0 weight class). Sansom has chosen PUBLIC DOMAIN - Operation Blade as his entrance music. Both fighters look fresh as a daisy as they make their way towards the cage.
 |
|
 |
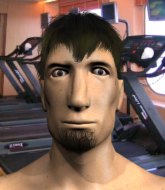
| 189 cm
23
265 lbs
2 - 0 - 0 |
|
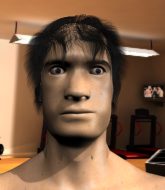
190 cm
23
230 lbs
0 - 0 - 0 |
Good wrestling
Brawler
Granite chin |
|
BJJ Blue Belt
Basic striking
Granite chin |
|
| |
|
Ladies and gentlemen. This fight is 3 rounds, in the heavyweight division.
Introducing the fighter to my left, fighting out of the red corner.
With a record of
2 - 0 - 0, fighting out of London, Andre Cote!
And introducing the fighter to my right, fighting out of the blue corner.
With a record of
0 - 0 - 0, fighting out of London, James Sansom!
The judges for this bout are James Ackerman, Donald Grub and Chris Edwards.

The bell rings for round one and we are underway!
Sansom has his takedown stuffed
and Cote cracks him with a counter punch right on the button.
Sansom wants to clinch
letting Cote counter with a right hand.

Sansom shoots in and scores a nice double leg takedown into half guard.
Sansom lands with an elbow from half guard - that looked like it hurt.
Fantastic stuff here - a very entertaining period of action, which has drawn cheers from the crowd.

Cote actively working from the bottom here.
Cote looking for submissions off his back.
Cote looking for submissions from an awkward position here.
Cote is looking to sinch up a guillotine here but Sansom pulls his head out easily.
Cote is looking to sinch up a guillotine here but Sansom pulls his head out easily.

That's one minute gone in the round.
Sansom prevents Cote from improving his position.
Cote slips a foot under and gets full guard. Nice work.
Cote isolates an arm and boxes in a triangle. Sansom stacks Cote on his neck as he steps over and passes to the side. He's now in a much more dominant position where he can look to do some serious damage. Nice move by Sansom!
Sansom wants to control but Cote is keeping him busy.
Cote is looking for a sweep.
Sansom is working Cote over with some ground and pound from side control.
Cote manages to work his way to half guard, despite Sansom's best efforts.
Sansom is trying to control the action in half guard but Cote is working away on the bottom, looking perhaps to get back to full guard.
Cote is looking to improve his position.
Cote has guillotine here! It looks pretty tight! Could this be all over! No, Sansom escapes and passes into side control at the same time. Nice work there by Sansom!
Sansom lands an elbow.
The fighters are pressed up against the cage, both looking to find a bit of space to work.

That's two minutes gone in the round.
Cote tries to bench press Sansom off him but Sansom keeps the position.
Cote is breathing heavily.
Sansom lands an elbow.
Sansom controls the position.
Cote tries to bench press Sansom off him but Sansom keeps the position.
Sansom lands a knee to the body and follows it up with some ground and pound to the head. That will wear Cote down.
Sansom working the ground and pound.
Cote is positioning himself to get back to half guard.
Sansom scores with a couple of nice shots to the head there. The referee takes a look at Cote to see if he's OK.
Both fighters really going for it on the ground here!
Sansom is looking for a kimura. He might have it! No, Cote has escaped the position, nice work there.
Cote takes a big shot right to the temple there but he's taken it well.
This is a great period of action - very entertaining stuff!
Sansom working the ground and pound.
Sansom lands a decent elbow from side control.

Sansom stands up and beckons Cote to his feet.

That's three minutes gone in the round.
Cote looks frustrated there after his takedown attempt is stuffed easily.
Cote swats away the attempt to clinch by Sansom.
Cote shoots in for a takedown from distance. He catches Sansom napping and manages to drive through into side control!
Sansom is trying to get back to his feet.
Cote tries for an arm triangle. That looks pretty tight to me. Is this one over!?! Possibly, maybe, no Cote has let go of the choke. Obviously it wasn't as tight as we thought!
Cote is looking for a kimura. He might have it! No, Sansom has escaped the position, nice work there.

That's four minutes gone in the round.
Cote tries for an arm triangle. That looks pretty tight to me. Is this one over!?! Possibly, maybe, no Cote has let go of the choke. Obviously it wasn't as tight as we thought!
Cote swings around for an armbar but Sansom sees it coming a mile off and turns beautifully into Cote's guard.
As the round comes to an end the crowd are showing their appreciation for a great round of action.
Cote throwing his legs up looking for a triangle.
Cote is working an open guard here, looking to improve his position. No doubt that will leave him open to counters but at least he's being more offensive.
And thats the end of the round the fighters go back to their corners.
James Sansom dominated that round.
Well, the break between rounds is over. Let's get back to the scrappin!

Sansom drives through with a takedown into guard.
Cote working for a triangle but Sansom defends it easily.
Cote on his back here. We all know that wrestlers don't like being on their back so let's see if Cote tries to get out of the position.
Cote looking for submissions off his back, moving his hips, looking for an opening.
Sansom must be cautious of submissions here, given that his opponent has the superior Jiu Jitsu.
Sansom trying to control the position from guard on top but Cote is wriggling around, looking for whatever he can.
Cote is looking for a triangle but Sansom pushes his legs off easily.
Cote could do with loosing a few pounds - he looks very soft around the mid section, to put it politely.
Cote wants to sweep but no luck.
Cote looking for subs off his back but Sansom has passed one foot through into half guard.
Sansom working Cote over with strikes.
Both fighters are absolutely exhausted here.
That's one minute gone in the round.
Cote tries to get to full guard but Sansom has control of the leg.
Sansom working Cote over with strikes.
James Sansom has got the better of the ground game so far.
Cote is refusing to be controlled, as Sansom sits in half guard.
Cote slips a foot under and gets full guard. Nice work.
Cote is throwing his legs up, looking for submissions. Sansom is aware though and is defending well.
Sansom got a little sloppy there for a moment and Cote has worked his way into a loose triangle - can he finish it?! No, Sansom has managed to get both his arms back between Cote's legs - danger averted.
Sansom is sitting in guard, working some ground and pound.
Sansom works over Cote with some ground and pound from guard.
Sansom sitting in guard, not really doing much.
Cote is looking for a triangle but Sansom pushes his legs off easily.
That's two minutes gone in the round.
Sansom trying to control but Cote is working from the bottom.
Sansom postures up and lands a big shot to Cote's brow.
Cote has a loose triangle. He'll be looking to tighten that up but Sansom can see exactly what he's planning and manages to posture up and free himself.
Sansom content to strike from guard, landing some decent shots.
Cote is working actively off his back, looking to secure an arm or perhaps work for a triangle.
Cote had isolated an arm as going for a kimura. Sansom defends it easily.
Sansom got a little sloppy there for a moment and Cote has worked his way into a loose triangle - can he finish it?! No, Sansom has managed to get both his arms back between Cote's legs - danger averted.
Cote looking for submissions off his back, moving his hips, looking for an opening.
That's three minutes gone in the round.
Sansom connects with a couple of short punches.
Hammerfist, elbow! yells Sansom's corner. There ya go! There ya go!
Sansom slows down the pace of the fight, as he sits in guard.
Sansom trying to pass the guard but can't manage it just yet.
Sansom trying to control but Cote is working from the bottom.
Sansom passes into half guard.
Cote actively working from the bottom here.
Sansom stands up from half guard... He's had enough of that ground malarky for the time being.
Sansom scores a takedown into full mount!
That's four minutes gone in the round.
Sansom scoring with some good ground and pound from mount here. Will he manage to finish Cote?
Cote is wriggling around trying to escape.
Cote in a bad spot here, taking shots to the head.
Sansom is still in mount, landing shots to his trapped opponent. Cote can't stay in a position like this for much longer.
Cote keeping his composure momentarily, calmly looking to get back to half guard.
Cote is working hard here to advance position.
Sansom controlling his opponent.
Sansom has hold of Cote's left arm, perhaps looking for a submission. The two fighters tussle over control of the isolated limb and Cote manages to get his arm back to his side and away from danger.
Cote is working to get back to half guard.
And thats the end of the round the fighters go back to their corners.
James Sansom showed his class in that round. I'd imagine he'll take it on all the scorecards.
The minute break is over - no more time for sponges and pep talks - back to the action! This is the final round!

Sansom slaps away a takedown attempt from Cote, before circling back to the center of the mat.
Sansom throws a one two combo.
Cote with a poor takedown
and Sansom counters with a good right hand that lands right on the jaw.
Sansom shoots in for a takedown but doesn't get it.
Cote fails with the takedown
and Sansom decides to take the opportunity to score a takedown. He's landed in Cote's guard.
That's three failed takedown attempts in the round for Andre Cote. That's going to take a lot out of him.
Sansom controlling from the guard. I say controlling but really, he's stalling.
Sansom advances position into side control!
Cote tries to buck Sansom off but Sansom is having none of it.
Both fighters are breathing heavily.
Sansom connects with a decent looking elbow from side control that caused Cote some visible discomfort.
That's one minute gone in the round.
Cote takes a big shot right to the temple there but he's taken it well.
Cote manages to land a sweep and he's now on top! Lovely Jiu Jitsu!
The ref warns both fighters not to hold the cage as they work up against the meshing.
Sansom makes his way to full guard. A much better position for Sansom.
Sansom is controlling Cote's posture.
Cote tries to free his leg and advance position but Sansom is retaining full guard.
Cote drops back for a leg! It's a sloppy attempt though and Cote jumps back into guard quickly, to retain the dominant position.
Cote postures up as if he's going to throw some strikes but drops back for an ankle! Sansom is in big trouble! He looks ready to tap! But no, he's escaped and dives on top of Cote, into his guard.
That's two minutes gone in the round.
Sansom with a nice head shot there.
Sansom avoids a guillotine attempt easily.
Sansom is working Cote over from the guard. He should look to pass the guard and do a little more damage with these strikes.
Cote had isolated an arm as going for a kimura. Sansom defends it easily.
Sansom is in close to Cote's body, working some short punches and elbows.
Sansom stands up from guard. Let's bang!
That's three minutes gone in the round.
Cote doesn't succeed with the takedown
and Sansom decides to take the opportunity to score a takedown. He's landed in Cote's guard.
Sansom content to strike from guard, landing some decent shots.
Sansom pressing down on his opponent's thigh, looking to pass guard. Cote is keeping the position for now.
Cote had isolated an arm as going for a kimura. Sansom defends it easily.
Sansom wants to control from the top but Cote keeps moving.
Sansom postures up and lands some nice ground and pound.
Sansom trying to control the position from guard on top but Cote is wriggling around, looking for whatever he can.
Cote has a loose triangle. He'll be looking to tighten that up but Sansom can see exactly what he's planning and manages to posture up and free himself.
This is a great period of action - very entertaining stuff!
Cote has a loose triangle. He'll be looking to tighten that up but Sansom can see exactly what he's planning and manages to posture up and free himself.
That's four minutes gone in the round.
Sansom lands a nice shot whilst sitting in his opponent's guard.
Cote working from the bottom, still in full guard. He's managed to get a loose triangle. Sansom doesn't seem to be doing much to defend here, obviously he feels comfortable in the position. Sansom manages to throw the legs off his shoulder and he's back into guard - no problem.
Sansom trying to control but Cote is working from the bottom.
Cote looking for a guillotine here but Sansom defends easily.
Sansom stopping the sweep attempt from Cote.
Andre Cote has stepped it up - he knows he needs a finish here!
James Sansom is fighting for a decision here - he's started to take the cautious approach.
As the round comes to an end the crowd are showing their appreciation for a great round of action.
Cote is looking for a guillotine. You can't force these things though and Sansom defends well.
And that's the end of the fight!
James Sansom comfortably won the final round on my scorecard.
I've got Sansom winning every round here. Surely the decision will go his way and he'll pick up a well deserved decision victory. Over to the ring announcer for the scorecards.
Ladies and gentlemen, after 3 rounds of action, we go to the scorecards for a decision.
Judge James Ackerman scores the fight 27:30
Judge Donald Grub scores the fight 27:30
Judge Chris Edwards scores the fight 27:30
In favor of your winner, by unanimous decision... James Sansom!
|
|
|
|
|
|
|
|
|
|
|
|
|
|
|
|
|
|
|
|
|
|
|
| S |
C
A |
G |
S |
C
B |
G |
|
S |
C |
G |
|
energy
A | B |
|
hype
A | B |
|
pop
A | B |
|
mgr
A | B |
|
FIGHT
RATING
91% |
|
|
|
|
|
|
