|
|
PBP Commentary |
Coming up we have a heavyweight MMA rules bout between Rin Itoshiki (ranked 0 p4p, 0 weight class) and Garai Totem (ranked 0 p4p, 0 weight class). Itoshiki comes to the cage accompanied by Hito toshite Jiku ga Bureteiru (SZS Mod. Rap ver.). Rin Itoshiki is staring across the cage at his opponent, tweaking his nipples... Tweaking his own nipples that is.
 |
|
 |
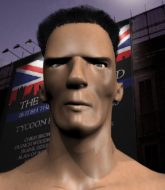
| 195 cm
23
270 lbs
6 - 0 - 0 |
|
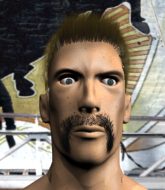
189 cm
22
260 lbs
6 - 3 - 0 |
BJJ Brown Belt
World class boxer
Very quick |
|
Powerful takedowns
Basic striking
Good gas tank |
|
| |
|
Ladies and gentlemen. This fight is 3 rounds, in the heavyweight division.
Introducing the fighter to my left, fighting out of the red corner.
With a record of
6 - 0 - 0, fighting out of Las Vegas, Rin Itoshiki!
And introducing the fighter to my right, fighting out of the blue corner.
With a record of
6 - 3 - 0, fighting out of Los Angeles, Garai Totem!
The judges for this bout are Tiny Johnson, Stewart Dunkirk and Alan Glass.

The bell rings for round one and we are underway!

Itoshiki moves into the clinch successfully.

Itoshiki breaks the clinch and we return to the middle of the mat.
Itoshiki tries to clinch up but Totem circles away and keeps his distance.
Totem on the wrong end of a nice low kick. He's acting like it's no big deal but he doesn't want to take many more of those.
Rin Itoshiki seems to be the more aggressive standup fighter in this bout.
Itoshiki tries to clinch up but Totem circles away and keeps his distance.
Itoshiki has closed the distance and engaged Totem in a clinch.
Itoshiki manages to break the clinch.
Itoshiki throws a half hearted mid kick.
Itoshiki delivers a nice body kick.
The crowd cheering loudly, showing their appreciation for the quality fight we're seeing here.
Itoshiki instigates a clinch.
Itoshiki manages to break the clinch.
Itoshiki moves into range and clinches up with Totem.
Good body shot from Itoshiki.
Totem looks gassed!
Totem can't find room to land a body shot as Itoshiki controls the action.
Itoshiki working Totem over with knees to the body.
Itoshiki presses Totem against the cage and delivers a mid-strength body shot.
Itoshiki putting his Muay Thai to good use. He has Totem in a tight clinch and is doing some damage with knees to the body.
Itoshiki putting his Muay Thai to good use. He has Totem in a tight clinch and is doing some damage with knees to the body.
Itoshiki is working Totem over against the cage.
Itoshiki slows down the pace here.
Itoshiki escapes the clinch and we're back to striking.
Itoshiki rushes Totem and pushes him back against the cage in a clinch.
Still in the clinch, Itoshiki scores with a nice short uppercut.

It looks like Garai Totem has been cut.
Itoshiki breaks from the clinch.
Itoshiki fakes low and throws an overhand right that catches Totem on the side of the head.

That's one minute gone in the round.
Itoshiki fakes with an overhand right and moves in to clinch with Totem, pushing him back against the cage.
Itoshiki's corner calls for him to break the clinch, which he does.
Itoshiki wants to clinch up but Totem keeps it at a distance.
Itoshiki lands a leg kick that knocks Totem off balance momentarily.
Itoshiki scores with a straight right hand, right through his opponent's guard.
Itoshiki is looking to slow Totem down with leg kicks.
Totem ducks right into an uppercut from Itoshiki.
Itoshiki scores with a slapping inside leg kick.
This is a great period of action - very entertaining stuff!
Itoshiki closes the distance and presses his opponent up against the cage.
Itoshiki lands a knee to the head.
Itoshiki manages to break the clinch.
Itoshiki lands a straight punch to the body, keeping Totem at a distance.
Itoshiki clinches up against the cage.
Totem takes a knee to the side of the body.
Itoshiki pushes off and circles away, back to the middle of the mat.
Totem stumbles momentarily as he takes a strong leg kick from Itoshiki.
Itoshiki closes the distance and clinches.
Itoshiki pushes off and circles away, back to the middle of the mat.
Itoshiki moves into the clinch successfully.
Totem fails to land with a short punch on the inside.

That's two minutes gone in the round.
Itoshiki lands with a right to the head.
Totem tries to land a shot to the body but it's blocked.
Itoshiki escapes the clinch and we're back to striking.
Totem takes a nice looking leg kick right on the meat of his thigh there.
Itoshiki tries to clinch but Totem is having none of it.
Rin Itoshiki is looking to keep the fight on the feet at all costs.
A shot to the body from Totem misses
letting Itoshiki counter with a right hand.
Itoshiki buckles his opponent's knee momentarily with a nice leg kick.
Donk. Itoshiki catches Totem right on the button with a cross.
Itoshiki fakes with an overhand right and moves in to clinch with Totem, pushing him back against the cage.
Totem looking for a takedown.
Itoshiki manages to get underhooks and slows down the pace for a moment.
Itoshiki breaks from the clinch.
Itoshiki gets in close and instigates a clinch.
Some stalling of biblical proportions here from Itoshiki.
Totem has Itoshiki pressed up against the cage and is working for takedown. Itoshiki manages to improve position though and keeps the fight standing.
Itoshiki leaning against his opponent.
Itoshiki landing some nice looking knees to the body.
Itoshiki lands an elbow that stopped Totem in his tracks for a moment.
Itoshiki pushes off and circles away, back to the middle of the mat.
Itoshiki scores with a leg kick.
Itoshiki scores with a nice one two combo and darts back out of range to avoid anything coming in the opposite direction.

That's three minutes gone in the round.
Itoshiki moves into the clinch.
Itoshiki presses Totem against the cage and delivers a mid-strength body shot.
Itoshiki pushes off and circles away, back to the middle of the mat.
Itoshiki defending well as Totem loads up on a big left hand.
Itoshiki is looking to clinch.
Itoshiki takes the fight into the clinch.
Itoshiki scores with a shot to the side of Totem's head.
Totem swings wildly with an uppercut but Itoshiki uses good head movement to avoid it.
A left hand lands to the body for Itoshiki.
Itoshiki manages to break the clinch.
Itoshiki instigates a clinch.
Itoshiki content to slow the pace in the clinch.
Itoshiki gets underhooks to prevent Totem's takedown attempt.
Rin Itoshiki has stuffed three takedown attempts in the round now. That's going to take a lot out of Garai Totem.

Totem ties up his opponent against the cage and manages to drag the fight down to the ground. Totem no doubt will be looking to work submissions from his guard.
Itoshiki not doing a lot at the moment. He'll have to show some more aggression or the fight will get stood up.
Totem wants to control but instead he gets his guard passed and Itoshiki is now in half guard.
Itoshiki takes a deep breath and rests his weight momentarily on top of his opponent, to control the position.

That's four minutes gone in the round.
Totem missing with punches from the bottom.
Totem is looking to regain full guard. Not this time though.
The fighters are pressed up against the cage, both looking to find a bit of space to work.
Totem trying to hold on to Itoshiki's head to control him but Itoshiki postures up.
Itoshiki seems content to maintain position for now, rather than mounting any offense.
The crowd are going absolutely nuts as the round comes to an end - what a fantastic round of action!
The referee is asking the fighters to pick up the pace.

Rin Itoshiki has forced the referee to step in and bring the fight back to the feet.
Itoshiki fakes with the hands and throws a leg kick but Totem is out of range.
Totem fails in his attempt to clinch.
And thats the end of the round the fighters go back to their corners.
Rin Itoshiki dominated that round.
The cut man is working on Garai Totem's cut.
That's time! Itoshiki's corner gives him a slap on the ass as he gets ready to fight.

Itoshiki tries to clinch but Totem moves out of range.
Totem moves out of range of the body kick.
Itoshiki tries to close the distance and clinch up against the cage but Totem paws at him with a jab and circles away.
Totem thows a body shot but no joy.
Itoshiki explodes with a nice body kick and back out of range. Nice work.
The sound of bone on bone echoes around the arena as Totem checks a leg kick.
Itoshiki keeps the fight standing with a nice sprawl.
Totem misses with a body shot. Nice footwork from Itoshiki.
Itoshiki rushes Totem and presses him up against the cage.
Itoshiki manages to break the clinch.
Totem misses with a body shot.
Itoshiki lands a straight punch to the body, keeping Totem at a distance.
Itoshiki lands the left hand.
Totem's leg has a nasty welt from taking a succession of leg kicks. That must be slowing him down.
Itoshiki fakes a jab and scores with a low kick.
Fantastic stuff here - a very entertaining period of action, which has drawn cheers from the crowd.
That kick from Itoshiki tenderised Totem's leg. Totem is trying to keep his angry face on.
Totem is breathing heavily.
Totem swats away the attempt to clinch by Itoshiki.
Itoshiki feints with a shoulder and throws a nice leg kick to Totem's calf.
That's one minute gone in the round.
Itoshiki connects with a looping right hand.
Itoshiki throws a combination. Totem tries to block but a couple of punches get through.
That has opened up Garai Totem's cut even more.
Itoshiki fakes low and throws an overhand right that catches Totem on the side of the head.
A looping hook to the body misses from Totem. Itoshiki does a little dance to reset his feet.
Itoshiki closes the distance and pushes Totem back into the cage.
Totem has Itoshiki pressed up against the cage and is working for takedown. Itoshiki manages to improve position though and keeps the fight standing.
Itoshiki breaks the clinch.
Itoshiki lands the left hand.
A cross from Itoshiki lands.
Totem avoids the clinch attempt nicely.
Totem swings away with a body shot that misses
letting Itoshiki counter with a right hand.
We've seen a great period of action over the last minute or so - credit to both fighters for going all out!
Itoshiki wants to clinch.
Totem throws a predictable looking body shot
and Itoshiki counters with an inside leg kick.
Totem takes a nice looking leg kick right on the meat of his thigh there.
Totem is throwing a lot of body shots here, looking to wear down Itoshiki rather than just go for the knockout.
Itoshiki fakes with an overhand right and moves in to clinch with Totem, pushing him back against the cage.
Itoshiki lands a good knee to the midsection. Totem won't want to take too many of those.
Itoshiki breaks from the clinch.
Itoshiki moves into the clinch.
That's two minutes gone in the round.
Itoshiki manages to break the clinch.
Totem tries for a takedown but Itoshiki sees it coming a mile off and avoids it easily.
Rin Itoshiki has stuffed three takedown attempts in the round now. That's going to take a lot out of Garai Totem.
Totem tries to clinch there but Itoshiki circles away.
Itoshiki fakes with an overhand right and moves in to clinch with Totem, pushing him back against the cage.
Good body shot from Itoshiki.
Itoshiki breaks the clinch and we're back to striking at distance.
Itoshiki scores with a jab.
Itoshiki fails in his attempt to clinch.
Itoshiki throws a good cross that connects.
The cut above Garai Totem's eye is starting to cause him problems now.
Nice straight punches there by Itoshiki. You know Roy Jones Jr respects the hands of Itoshiki.
Itoshiki misses with a jab and misses with a cross straight after too.
Itoshiki scores with a push kick.
Itoshiki clinches up with Totem and pushes him back against the cage.
Itoshiki breaks the clinch and we return to the middle of the mat.
Totem looks to score with a jab to the body but Itoshiki is just out of range.
Totem gets tackled into the cage by Itoshiki. Itoshiki maintains the clinch.
Totem goes for a takedown attempt but Itoshiki pushes him away and we're back to fighting at a distance.
Itoshiki ducks down and throws a hook to the body but Totem moves away.
That's three minutes gone in the round.
Itoshiki fails in his attempt to clinch.
Itoshiki wants to clinch up but Totem keeps it at a distance.
Totem shoots in and gets a takedown into half guard. Totem showed some decent athleticism there.

Itoshiki kicks Totem off and gets back to his feet.
Itoshiki pushes Totem up against the cage in a clinch.
Totem has hold of a leg and is looking for a trip takedown. Itoshiki avoids it nicely though and we remain in the clinch.
Itoshiki manages to break the clinch.
Itoshiki delivers a nice body kick.
Itoshiki looking to take his opponent's legs away with the low kicks.
Itoshiki closes the distance and clinches.
Itoshiki crunches a lovely knee into Totem's ribcage.
Itoshiki softening up his opponent with strikes, against the cage.
Rin Itoshiki has scored more points in the clinch so far.
Itoshiki breaks from the clinch.
That's four minutes gone in the round.
Itoshiki lands a nice shot to the body.
Itoshiki drives through and clinches with Totem against the cage.
Itoshiki breaks the clinch and we return to the middle of the mat.
This is a great period of action - very entertaining stuff!
Totem takes an uppercut right on the jaw but it doesn't phase him.
Itoshiki gets a clinch.
Totem misses with the head strike.
Itoshiki with the Thai clinch, lands a knee to the head.
Itoshiki using the Thai clinch to land knees to the body.
Still in the clinch, Itoshiki scores with a nice short uppercut.
Itoshiki taking a break, stalling in the clinch.
Totem tries a body shot but Itoshiki blocks it.
Totem takes a knee right on the jaw!
Totem tries to pull guard but can't drag his opponent to the mat. Itoshiki just stands there and leans against the cage.
Totem jumps guard but his hands slip and he falls flat on his back. Well, he's made himself look a right mug there, as Itoshiki walks away with a smile on his face. Totem gets slowly back to his feet and shakes his head.
Totem takes one on the chin but keeps coming.
Totem fails with the takedown.
The crowd are going absolutely nuts as the round comes to an end - what a fantastic round of action!
Itoshiki scoring well with a low kick there.
Totem with a lazy takedown attempt
and Itoshiki counters with a nice body kick.
Itoshiki takes the fight into the clinch.
And thats the end of the round the fighters go back to their corners.
Rin Itoshiki dominated that second round.
The cut man is working on Garai Totem's cut.
The minute break is over - no more time for sponges and pep talks - back to the action! So, we enter the final round. Let's see if either fighter can bring us a finish, or whether we're going to the judges scorecards.

Itoshiki closes the distance and pushes Totem back into the cage.
A short body shot lands from Itoshiki as the two fighters clinch.
Itoshiki breaks from the clinch.
Itoshiki clinches up with Totem and pushes him back against the cage.
Itoshiki is really dominating this fight. Is there anything that Totem can do to turn this around?
Totem misses with a shot to the kidneys.
Itoshiki stalling in the clinch.
Itoshiki's corner calls for him to break the clinch, which he does.
Totem keeps the fight on the outside.
Rin Itoshiki is winning the standup battle so far.
Totem doesn't succeed with the takedown
and Itoshiki counters by clinching up.
Itoshiki content to slow the pace in the clinch.
Itoshiki breaks the clinch.
Totem takes a swing at Itoshiki's ribcage but misses.
Itoshiki closes the distance and clinches.
Both fighters are breathing heavily.
Totem goes for a takedown in the clinch but Itoshiki prevents it.
Itoshiki connects with a nasty looking knee right to Totem's face.
Itoshiki pushes off and circles away, back to the middle of the mat.
Itoshiki lands an overhand right.
A looping hook to the body misses from Totem. Itoshiki does a little dance to reset his feet.
That's one minute gone in the round.
Totem shoots in looking for a takedown but Itoshiki manages to keep the fight standing, pushing Totem's face into the canvas for good measure before circling away.
Rin Itoshiki has stuffed three takedown attempts in the round now. That's going to take a lot out of Garai Totem.
Itoshiki fakes a jab and scores with a low kick.
Itoshiki throws a nice inside leg kick.
Itoshiki fakes a head shot and lands one to the body.
Itoshiki scores with a jab to the body.
Itoshiki scores with a body shot.
Itoshiki clinches up against the cage.
Itoshiki lands an uppercut.
Totem is trying to work for a single leg takedown but Itoshiki pulls him back up using the underhooks.
Totem letting Itoshiki take a breather here.
Itoshiki landing knees to the body.
Itoshiki lands an uppercut.
Itoshiki lands an elbow just above Totem 's eye.
Totem tries a body shot but Itoshiki blocks it.
Totem takes an elbow to the temple.
Itoshiki lands a good knee to the midsection. Totem won't want to take too many of those.
The fans in attendance giving it up for the two fighters, who have really let it all hang out in the last minute or so!
Itoshiki lands with a left to the head.
Itoshiki lands a nice knee to the body.
Itoshiki digs a right hand into Totem's ribs. Those have got to be taking their toll on Totem's gas tank.
A short body shot lands from Itoshiki as the two fighters clinch.
Itoshiki breaks the clinch and we're back to striking at distance.
That's two minutes gone in the round.
Totem has his front leg slapped to the side - a nice low kick landing there from Itoshiki.
Itoshiki throws a two punch combo that lands nicely.
Thud! ouch! good body kick from Itoshiki - that will leave a mark!
Good shot there by Itoshiki.
A solid leg kick lands there for Itoshiki.
Itoshiki dances in quickly and lands a nice inside leg kick on Totem. That did some damage!
Totem showing good head movement there, avoiding the strikes from Itoshiki.
Totem is the aggressor but that punch slipped nicely by Itoshiki.
Itoshiki throws a nice outside leg kick.
Totem circles away from the clinch attempt.
Itoshiki scores with a jab to the jaw of his opponent.
A telegraphed takedown attempt from Totem is defended easily by Itoshiki.
Itoshiki bobs and weaves and throws out a fast jab that snaps Totem's head backwards.
That's three minutes gone in the round.
Itoshiki clobbers Totem with an overhand right that has the crowd gasping. That made a horrendous noise.
Totem throws a lazy right hand but Itoshiki sees it coming a mile off and sidesteps it easily.
Totem gets his takedown attempt stuffed easily
and Itoshiki counters by clinching up.
Totem fails to pull guard.
Totem has developed a nice purple lump on his ribcage, as a result of some heavy body kicks from Itoshiki.
Itoshiki breaks from the clinch.
Itoshiki takes a punch right to his stomach. That took the wind out of him momentarily.
Itoshiki rushes Totem and pushes him back against the cage in a clinch.
Totem has a pretty nasty looking mouse under his right eye.
Itoshiki is pressed up against the cage. Totem has hold of a leg and is looking to drag Itoshiki down to the mat. Itoshiki avoids the attempt though and has circled away. We're back to striking at a distance.
Totem closes this distance looking for a takedown but Itoshiki circles away.
Itoshiki gets in close and instigates a clinch.
Stalling in the clinch from Itoshiki.
Totem tries to pull guard but Itoshiki won't allow it.
Totem takes a knee to the side of the body.
Itoshiki lands a good knee to the midsection. Totem won't want to take too many of those.
The pace really dropping off here, momentarily.
Itoshiki's corner calls for him to break the clinch, which he does.
Itoshiki tries to clinch but is not successful on this occasion.
Itoshiki tries to clinch but Totem is having none of it.
That's four minutes gone in the round.
Itoshiki lands a lovely overhand right.
Itoshiki has taken the fight to the clinch.
Totem tries a body shot but Itoshiki blocks it.
Itoshiki landing knees to the body. They look like they could hurt.
An uppercut on the inside fails to land for Totem.
Totem lands a body shot in the clinch.
Itoshiki is pushing Totem up against the cage, for a bit of lean and pray action. Action being used the in the loosest possible sense of the word.
Itoshiki blocks a body shot from Totem.
Totem tries to work over Itoshiki's body with a swooping hook but it only glances the target.
Totem can't find room to land a body shot as Itoshiki controls the action.
Itoshiki lands with a short head shot on the inside.
Itoshiki lands an elbow just above Totem 's eye.
Garai Totem's cut is absolute horrible now. This looks like something out of a horror film with blood covering both fighters.
Itoshiki putting his Muay Thai to good use. He has Totem in a tight clinch and is doing some damage with knees to the body.
The fans in attendance giving it up for the two fighters, who have really let it all hang out in the last minute or so!
Itoshiki breaks the clinch and we're back to striking at distance.
Itoshiki tries to clinch but Totem is having none of it.
Garai Totem has stepped it up - he knows he needs a finish here!
As the round comes to an end the crowd are showing their appreciation for a great round of action.
Totem has his head snapped back a nice jab. A little nod from Totem there as he acknowledges the shot.
Totem tries to clinch but fails miserably
and Itoshiki counters with a nice body kick.
Totem with a lazy takedown attempt
and Itoshiki counters with a shot to the ribs. That looked like it hurt.
Itoshiki gets in close and instigates a clinch.
And that's the end of the fight!
Rin Itoshiki showed his dominance in that final round.
Well Itoshiki has outscored his opponent in every aspect of the fight today. Only a scarily incompetent judge or two will keep him from a well deserved win... Over to the ring announcer for the scorecards.
Ladies and gentlemen, after 3 rounds of action, we go to the scorecards for a decision.
Judge Tiny Johnson scores the fight 30:24
Judge Stewart Dunkirk scores the fight 30:24
Judge Alan Glass scores the fight 30:24
In favor of your winner, by unanimous decision... Rin Itoshiki!
|
|
|
|
|
|
|
|
|
|
|
|
|
|
|
|
|
|
|
|
|
|
|
| S |
C
A |
G |
S |
C
B |
G |
|
S |
C |
G |
|
energy
A | B |
|
hype
A | B |
|
pop
A | B |
|
mgr
A | B |
|
FIGHT
RATING
100% |
|
|
|
|
|
|

