|
|
PBP Commentary |
Coming up we have a bantamweight MMA rules bout between Clockwork Abercrombie (ranked 0 p4p, 0 weight class) and Josh Marker (ranked 0 p4p, 0 weight class). Chooooooooon! I think Abercrombie might be my favorite fighter, now he's come out to In This City- Iglu & Hartly. Over to our ring announcer for the fighter introductions!
 |
|
 |
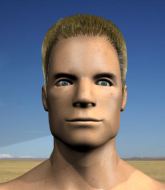
| 170 cm
25
141 lbs
8 - 6 - 0 |
|
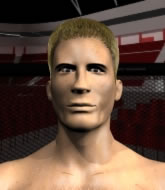
177 cm
27
145 lbs
9 - 4 - 0 |
Powerful takedowns
Excellent boxer
Very strong |
|
BJJ Blue Belt
Excellent boxer
Powerful |
|
| |
|
Ladies and gentlemen. This fight is 3 rounds, in the bantamweight division.
Introducing the fighter to my left, fighting out of the red corner.
With a record of
8 - 6 - 0, fighting out of New York, Clockwork Abercrombie!
And introducing the fighter to my right, fighting out of the blue corner.
With a record of
9 - 4 - 0, fighting out of New York, Josh Marker!
The judges for this bout are Jonathan Paton, Dean Styles and Joseph Jones.

The bell rings for round one and we are underway!
The fighters circling - Marker throws out the jab but it was never going to land.
Nice sprawl there from Marker as Abercrombie shoots in.
Abercrombie misses with a takedown attempt. He shot from a bit too far out.
Marker throws a two punch combo that lands nicely.
Marker scores with a nice right hand.
Abercrombie works over Marker's head and body with a nice combination.
Abercrombie falls off balance throwing a combination
and Marker cracks him with a counter punch right on the button.
Abercrombie shoots in for a takedown. "I don't think so" says Marker as he avoids it easily.
That's three failed takedown attempts in the round for Clockwork Abercrombie. That's going to take a lot out of him.
Abercrombie misses with a lunging right hand
and Marker counters with a lovely shot to the body.
Marker throws a jab to the body, straight down the pipe. Boom. That sent Abercrombie stumbling backwards but he manages to regain his composure quickly.
Abercrombie misses with a telegraphed body shot
and Marker counters with a stiff right hand.
Marker cracks Abercrombie with an open hand slap.
Abercrombie misses with a body punch
and Marker counters with a quick right hand to the jaw.

That's one minute gone in the round.
Marker displaying good standup as he scores with a three punch combination.
Marker lands a jab followed by a nice looking cross.
Abercrombie misses with a body punch
and Marker counters with a stiff right hand.
Marker throws a right and a left that Abercrombie avoids nicely.
No luck for Abercrombie with that takedown attempt.
Abercrombie stooping low to avoid any incoming strikes and then lunges in with an uppercut come cross that lands flush.
Abercrombie looks frustrated there after his takedown attempt is stuffed easily.
Clockwork Abercrombie seems to be the more aggressive standup fighter in this bout.
Abercrombie takes a jab on the nose there. A little bit of blood seems to be coming out. Hopefully that won't affect his breathing.
Marker bobbing and weaving, closes the distance and lands a hook to the side of Abercrombie's head.
Nice cross by Abercrombie.

That's two minutes gone in the round.
Abercrombie tries to clinch
and Marker counters with a nice jab to the body that keeps Abercrombie thinking.
Marker wings a very wild body shot but it does the job and lands to the midsection.
Abercrombie lands with a nice body punch.
Abercrombie is looking to score with low kicks.
Abercrombie misses with a lunging right hand
and Marker counters with a straight right hand.
Abercrombie swings and misses with a shot to the body
letting Marker counter with a right hand.
A shot to the body from Abercrombie misses
and Marker counters with a stiff right hand.
Marker misses with a double jab.
Abercrombie throws a poor cross that misses
and Marker cracks him with a counter punch right on the button.
Abercrombie throws a predictable looking body shot
and Marker cracks him with a counter punch right on the button.
Good standup being displayed there by Marker as he connects with a hook.
Abercrombie rushes in with a sloppy looking punch
and Marker counters with a left and a right that stings Abercrombie.
Abercrombie takes a really solid shot there but just smiles back and shrugs his shoulders.

That's three minutes gone in the round.

Abercrombie scores a takedown into full mount!
Abercrombie tries to control but Marker wriggling away.
Abercrombie throwing sloppy strikes, which aren't doing any damage.
Abercrombie avoids the attempt from Marker to control.

Abercrombie is thinking about an arm triangle here, looking to tighten it up before moving to side control. Marker can see it coming though and defends well with a couple of strikes to the head and some good arm positioning.

That's four minutes gone in the round.
Marker is desperately trying to get back to half guard.
Abercrombie thowing shots but they're missing.
Marker tries to lock up and control but Abercrombie gives him a forearm to the face and pushes him away.
Marker really doesn't want to stay on the ground with Abercrombie. If he can't get it back to his feet, it's only a matter of time before he'll be tapping out.
Abercrombie throws an elbow from mount that misses. Lucky escape for Marker because Abercrombie loaded up on that one.
Abercrombie goes for an armbar but Marker turns quickly into his guard - lovely anticipation from Marker.
And thats the end of the round the fighters go back to their corners.
Josh Marker dominated that round.
That's time! Back to the action!

Abercrombie misses with a lunging right hand
and Abercrombie takes a counter punch right on the button for his troubles.
Abercrombie throws a right hand that misses
and Marker counters with a nice body shot.
Abercrombie scores with a big left there. The judges will like that one.
Abercrombie fakes an overhand right and shoots for a takedown. Marker sprawls well initially but Abercrombie persists and gets the takedown into half guard.
Abercrombie throwing shots but Marker is blocking nicely.
Abercrombie is thinking about going for an arm triangle but he can't free his leg.
Abercrombie is just content to waste time from the top position. Marker takes advantage of the situation and regains full guard.
The ref warns both fighters not to hold the cage as they work up against the meshing.
Marker keeping full guard, as Abercrombie tries to pass.
That's one minute gone in the round.
Marker is trying to stand up but he's not managed so far.
Marker looking to hit a scissor sweep but Abercrombie is one step ahead there.
Abercrombie stays in close to Marker's body and controls the position.
Abercrombie postures up and scores with a shot to the body and a follow up elbow to the head.
Abercrombie working some ground and pound from guard but it's not doing any damage.
That's two minutes gone in the round.
A few boos can be heard. I'm sure they will multiply if the fighters don't pick up the pace.
Abercrombie missing there with some ground and pound from the guard.
Marker tries to land a sweep but no joy.
Abercrombie looking to control the position here, rather than advance.
Marker controlling the position.
Abercrombie throwing shots from guard but he's hitting more mat than opponent.
Abercrombie pressing down on his opponent's thigh, looking to pass guard. Marker is keeping the position for now.
Abercrombie wants to control from the top but Marker keeps moving.
The fighters are pressed up against the cage, both looking to find a bit of space to work.
That's three minutes gone in the round.

The referee has ruled that neither fighter is active enough on the ground and has stood them back up.
Abercrombie wants to clinch but Marker slips to the side
and Marker counters with a shot to the ribs. That looked like it hurt.
Abercrombie walks forward and throws out a flicking leg kick. Marker checks it nicely though, as he moves to the side.
Abercrombie swings and misses with a shot to the body
and Marker counters with a lovely straight right hand!
Abercrombie lands a jab to Marker's midsection.
Abercrombie looks like he's developed a pretty tasty lump over his left eye. He'll need to avoid taking much more damage to that.
Marker misses with a jab and misses with a cross straight after too.
Abercrombie throws a poor cross that misses
and Marker counters with a two punch combo.
Abercrombie takes a swing at Marker's ribcage but misses.
Abercrombie cracks Marker with a right hand to the side of the head.
Abercrombie throws a leg kick that misses.
Marker swats away the attempt to clinch by Abercrombie.
Abercrombie misses with a hook
and Marker counters with a nice uppercut.
That's four minutes gone in the round.
Abercrombie misses with a right hand
and Marker counters with a straight right hand.
A shot to the body from Abercrombie misses
and Marker counters with a quick right hand to the jaw.
Marker misses with the combination.
Marker dips to his left and cracks Abercrombie with an uppercut!
Abercrombie swings widly with a right hand
and Marker counters nicely by changing levels and landing a hook to the body.
A shot to the body from Abercrombie misses
and Marker counters with a lovely straight right hand!
Marker takes a shot right to the liver - Bas would have been proud of that punch.
Abercrombie fails with a takedown attempt from distance.
Josh Marker is looking to throw some combinations by the looks of things.
Abercrombie throws a right hand that misses
and Marker counters with a nice body shot.
Abercrombie displays some good footwork, moving neatly out of range as Marker throws out the jab.
Marker has used his reach advantage pretty well so far tonight.
Abercrombie tries for a takedown but Marker sees it coming a mile off and avoids it easily.
And thats the end of the round the fighters go back to their corners.
Clockwork Abercrombie dominated that second round.
That's time! Back to the action! So, we enter the final round. Let's see if either fighter can bring us a finish, or whether we're going to the judges scorecards.

Nice defenses there by Abercrombie.
Abercrombie misses with a takedown attempt. He shot from a bit too far out.
Abercrombie swings wildly with a couple of big hooks
and Marker counters with a straight right hand.
Abercrombie fails with a takedown attempt.
Abercrombie throws an off balance right hand
letting Marker counter with a right hand.
Abercrombie misses with a left hand
and Marker counters with a stiff right hand.
Abercrombie falls off balance throwing a combination
and Marker counters with a two punch combo.
We've had a slow start to the round here - hopefully the action picks up.
Abercrombie tries for a takedown but Marker sees it coming a mile off and avoids it easily.
That's three failed takedown attempts in the round for Clockwork Abercrombie. That's going to take a lot out of him.
Abercrombie misses with a lunging right hand
and Marker counters with a lovely straight right hand!
Abercrombie misses with a body shot
and Marker connects with a straight left hand counter down the middle.
Marker scores with a crisp jab that stopped Abercrombie in his tracks.
That's one minute gone in the round.
A combination from Marker does no damage.
Marker takes one on the chin but seems OK.
Marker throws a series of punches but Abercrombie moves out of range.
Abercrombie misses the body punch
enabling Marker to counter with a crisp jab.
Abercrombie rushes in with a sloppy looking punch
and Marker counters with a left and a right that stings Abercrombie.
Abercrombie throws a lazy uppercut
and Marker counters with a nice uppercut.
Abercrombie swings away with a body shot that misses
and Marker counters with a lovely straight right hand!
Abercrombie misses with a lunging right hand
and Abercrombie takes a counter punch right on the button for his troubles.
Abercrombie misses with a takedown attempt. He shot from a bit too far out.
Marker checks a low kick. Bone on bone - not my idea of a good time.
Abercrombie misses with a left hand
and Marker counters with a lovely shot to the body.
That's two minutes gone in the round.
A lazy left from Marker finds it's target.
Marker scores with a jab. Abercrombie acknowledges it with a nod of the head.
Abercrombie takes a punch to the jaw and another one to the bread basket.
Josh Marker seems to be getting the better of the standup.
Abercrombie is trying hard to land a takedown here. Marker sprawls well and keeps this one on the feet.
Abercrombie misses with a right hand
and Marker cracks him with a counter punch right on the button.
A shot to the body from Abercrombie misses
and Marker counters with a straight punch to the midsection.
Marker looks to land a right hand but Abercrombie moved out of range.
No luck with that takedown attempt from Abercrombie.
Abercrombie needs to keep his hands up - Marker had a free shot at his head there.
Abercrombie misses with an uppercut
and Marker counters with a good right hand that lands right on the jaw.
Abercrombie shoots in for a takedown. "Ole!" shouts Marker as he jumps to the side.
Marker might want to mix his strikes up a bit more. He's just going for head shots at the moment and that can become a bit predictable.
That's three minutes gone in the round.
Abercrombie misses with a hook
and Marker counters with a shot to the ribs. That looked like it hurt.
Marker throws a jab when Abercrombie was well out of range.
Abercrombie misses with a hook
and Marker counters with a straight punch to the midsection.
Marker throws a right hand that Abercrombie ducks under and follows up with a left that Abercrombie also avoids with ease.
Abercrombie swings widly with a right hand
and Marker counters with a right hand to the body.
Abercrombie throws a poor cross that misses
letting Marker counter with a right hand.
Josh Marker is looking to keep the fight on the feet at all costs.
Jab, cross, leg kick. Nice combination by Marker!
Abercrombie misses with an uppercut
letting Marker counter with a right hand.
Abercrombie misses with a hook
and Marker makes him pay by landing a nice hook to the body before moving out of range.
Abercrombie swings widly with a right hand
and Marker counters with a lovely straight right hand!
Abercrombie throws an off balance right hand
and Marker counters with a crisp hook to the side of the head.
Abercrombie throws a lazy uppercut
and Marker counters with a good right hand that lands right on the jaw.
That's four minutes gone in the round.
Abercrombie fails with a takedown attempt.

Marker gets tackled into the cage by Abercrombie. Abercrombie maintains the clinch.

Abercrombie escapes the clinch and we're back to striking.
Abercrombie misses with a right hand
letting Marker counter with a right hand.
Abercrombie tries to clinch up against the cage, rushing in the close the distance. Marker manages to break the clinch and circles back to the middle of the mat.
Marker digs a good body shot into Abercrombie's ribs.
Marker lands a nice hook to Abercrombie's body. Abercrombie takes it in his stride and looks to land his own strikes.
Abercrombie tries to shoot in for a takedown. He's got hold of a leg but Marker swivels and escapes.
The crowd cheers as Marker lands an impressive looking overhand right. Abercrombie doesn't seem phased though.
Marker dips to his left and cracks Abercrombie with an uppercut!
A left and a right from Marker both land. Nice combination.
And that's the end of the fight!
Josh Marker comfortably won the final round on my scorecard.
I think Marker has won this one but let's see whether the judges agree with me. Over to the ring announcer for the scorecards.
Ladies and gentlemen, after 3 rounds of action, we go to the scorecards for a decision.
Judge Jonathan Paton scores the fight 28:29
Judge Dean Styles scores the fight 28:29
Judge Joseph Jones scores the fight 28:29
In favor of your winner, by unanimous decision... Josh Marker!
|
|
|
|
|
|
|
|
|
|
|
|
|
|
|
|
|
|
|
|
|
|
|
| S |
C
A |
G |
S |
C
B |
G |
|
S |
C |
G |
|
energy
A | B |
|
hype
A | B |
|
pop
A | B |
|
mgr
A | B |
|
FIGHT
RATING
39% |
|
|
|
|
|
|

