|
|
PBP Commentary |
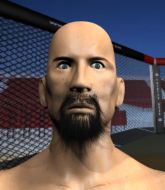
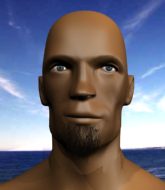
Coming up we have a middleweight MMA rules bout between Richard Wellington (ranked 0 p4p, 0 weight class) and Gron Hellscream (ranked 0 p4p, 0 weight class). Gron Hellscream has the better chin. Will he look to stand and bang today?
 |
|
 |
| 190 cm
28
190 lbs
4 - 6 - 1 |
|
190 cm
19
190 lbs
1 - 3 - 0 |
BJJ White Belt
Solid boxing
Experienced |
|
BJJ White Belt
Decent boxing
Determined |
|
| |
|
Ladies and gentlemen. This fight is 3 rounds, in the middleweight division.
Introducing the fighter to my left, fighting out of the red corner.
With a record of
4 - 6 - 1, fighting out of Hilo, Richard Wellington!
And introducing the fighter to my right, fighting out of the blue corner.
With a record of
1 - 3 - 0, fighting out of Hilo, Gron Hellscream!
The judges for this bout are , and .

The bell rings for round one and we are underway!
Hellscream tries to clinch up

and Wellington counters by moving into the clinch. Good anticipation by Wellington.
Wellington throws a hook to the body. More of an arm punch but it's all scoring with the judges.
Wellington lands a right uppercut that snaps the head of Hellscream backwards.
A quick uppercut on the inside from Wellington.
Wellington works for underhooks and lands a body shot in the process.
Still in the clinch, Wellington scores with a nice short uppercut.

Hellscream breaks from the clinch.
Jab, jab by Wellington - just one landing.
Hellscream tries to clinch
and Wellington makes him pay by landing a nice hook to the body before moving out of range.
Hellscream dodges the punch combination from Wellington.
Hellscream scores with a decent looking hook.
Wellington lands the left hand.
Wellington throws a right hand that misses
and Hellscream counters with a nice uppercut.
Wellington misses with an uppercut.
Hellscream moves out of range of the strikes.
Wellington closes the distance and pushes Hellscream back into the cage.
Wellington lands with a left to the head.

That's one minute gone in the round.
Wellington lands with a left to the head.
Wellington lands with a right to the head.
With the fighters clinched against the cage, Wellington creates a bit of distance for himself and scores with a nice uppercut.
Wellington lands a body shot.
Hellscream is trying to force a seperation but Wellington has the dominant position.
Nice body punch from Wellington - that landed with a thud.
A shot in the inside from Wellington.
Still in the clinch, Wellington scores with a nice short uppercut.
Wellington lands a nice shot to the body.
Hellscream looks gassed!
Wellington pushes Hellscream back against the cage and lands a hook to the side of the head.
Wellington keeps control of Hellscream as he tries to wriggle out of the double underhooks.
Wellington lands a body punch in the clinch.
Wellington lands a shoulder strike that jolts his opponent's head backwards.
A quick uppercut on the inside from Wellington.
Wellington digs a right hand into Hellscream's ribs. Those have got to be taking their toll on Hellscream's gas tank.
Wellington gets through Hellscream's defenses to land a nice punch to the side of the head.
A short right from Wellington on the inside.
Wellington lands an uppercut.
Hellscream breaks the clinch.
Wellington misses with a right hand
and Hellscream counters with a quick right hand to the jaw.
Sloppy strikes from Wellington. Those never looked like landing.
Hellscream closes the distance but Wellington moves to the side
and Wellington counters with a nice uppercut.

That's two minutes gone in the round.
Wellington swings widly with a right hand
and Hellscream counters with a three punch combination, finished off with a leg kick. Nice work.
Wellington circles away from the clinch attempt
and Wellington counters with a nice uppercut.
Hellscream darts in trying to clinch
and Wellington counters with a stiff right hand.
Hellscream tries to clinch up
and Wellington counters with a crisp hook to the side of the head.
Wellington misses with a straight left.
Hellscream scores with a punch to the head.
Decent striking displayed by Hellscream there.

That's three minutes gone in the round.
Hellscream fails with an attempt to clinch.
Hellscream throws a series of punches but Wellington avoids them all with ease.
Hellscream moves into range and connects with a jab.
Wellington misses with a hook
and Hellscream counters with a one-two to the body.
Wellington throws an off balance right hand
and Hellscream counters with a good right hand that lands right on the jaw.
Hellscream uses good footwork to avoid the strikes from Wellington.
Wellington throws an off balance right hand
and Hellscream counters with a nice uppercut.
Wellington circles away from the clinch attempt
and Wellington counters with a shot to the ribs. That looked like it hurt.
Wellington jabbing away but nothing is landing.
Hellscream scores with a jab. Wellington acknowledges it with a nod of the head.
Hellscream throws a jab, cross combination which is slipped
and Wellington counters with a quick right hand to the jaw.

That's four minutes gone in the round.
Neither fighter has done anything of merit for a good minute or two here and the crowd are not happy about it.
Wellington throws an overhand right that lands on Hellscream's shoulder, as Hellscream tries to avoid the shot.
Wellington closes the distance and takes a jab right on the nose as he does so.
Hellscream is landing a lot of head punches in this opening round! Wellington had better start moving his head a bit unless he wants his face to turn into pâté.
Wellington throws an ugly left hook that misses
and Wellington takes a counter punch right on the button for his troubles.
Wellington misses with a double jab
and Hellscream counters with a lovely shot to the body.
Hellscream with a body punch. A glancing blow.
Danga de danga de dang - Hellscream scores with a four punch combination!
Hellscream tries to clinch
and Wellington counters with a crisp hook to the side of the head.
Hellscream tries to grapple but his opponent circles
and Wellington counters into the clinch. Nicely done.
Wellington makes some space for himself and lands an uppercut.
Hellscream wants to break free. God knows he wants to breaaaak freeee.
And thats the end of the round the fighters go back to their corners.
Richard Wellington dominated that round.
That's time! Wellington's corner gives him a slap on the ass as he gets ready to fight.

Wellington swats away the attempt to clinch by Hellscream.
Wellington throws a lazy uppercut
and Hellscream counters with a stiff right hand.
Hellscream closes the distance but Wellington moves to the side
and Hellscream takes a counter punch right on the button for his troubles.
Wellington throws a poor cross that misses
and Hellscream cracks him with a counter punch right on the button.
Wellington is really head hunting here, hardly looking to strike to the body at all.
Wellington thows a body shot but no joy.
Wellington goes to the watering hole and comes back with a big thumbs up from the judges as he scores a three punch combo.
Hellscream darts in trying to clinch
and Wellington counters by moving into the clinch.
Wellington throws a hook to the body. More of an arm punch but it's all scoring with the judges.
Both fighters are absolutely exhausted here.
Wellington tries to throw a body punch but Hellscream avoids it by throwing Wellington back against the cage.
Hellscream trying to control the position but instead, Wellington has worked for underhooks and has pushed Hellscream into the cage.
Wellington has Hellscream pressed against the cage, preventing Hellscream from circling away and getting back to striking at range.
Wellington has not gone for a single takedown so far in this fight, which seems like a very strange tactic when you consider that he has the superior wrestling and BJJ.
That's one minute gone in the round.
Hellscream breaks the clinch and we return to the middle of the mat.
Hellscream lands a jab. Then a cross. Then finally a nice hook to the body. Good work there by Hellscream.
Hellscream will need to tighten up his combinations if he doesn't want to gas himself out, swinging at thin air.
Wellington looks to land a combination but Hellscream avoids it well.
Wellington misses with a combination
and Hellscream counters with a series of strikes. Wellington will be more careful next time no doubt.
Hellscream throws a right hand that Wellington ducks under and follows up with a left that Wellington also avoids with ease.
Hellscream throws a good cross that connects.
Hellscream scores with a nice looking left hook and follows it up with an uppercut!
Wellington swings for the body but Hellscream moves out of range.
Wellington throws a lazy uppercut
and Hellscream counters with a one-two to the body.

Hellscream clinches with his opponent.
That's two minutes gone in the round.
Wellington lands a right hand.
Wellington lands a nice looking hook to the body, against the cage.
Hellscream is trying to force a seperation but Wellington has the dominant position.
Wellington lands with a quick shot inside that doesn't really do much damage.
Wellington cracks Hellscream with a nice body shot.
Wellington lands a nice shot to the body.
A right hand to the body from Wellington.
Wellington digs a right hand underneath Hellscream's ribcage. Hellscream let out a lung full of air as it connected.
Wellington makes some space for himself and lands an uppercut.
Wellington scores with a shot to the side of Hellscream's head.
Wellington pushes Hellscream back against the cage and unloads with a body punch.
Hellscream has had enough of the clinch but Wellington keeps him there for the moment.
A hook to the body from Wellington.
A body shot lands from Wellington.
Nice body punch from Wellington - that landed with a thud.
Wellington scores with a hook to the body.
Wellington lands a body shot in the clinch.
Both guys are working to get underhooks.
Wellington lands on the inside with an uppercut.
Wellington lands a hook to the side of the head.
A left hand lands to the body for Wellington.
Wellington lands a right hand.
A right handed body shot lands from Wellington.
Wellington wants to break free but Hellscream has control.
That's three minutes gone in the round.
Wellington swings wildly with an uppercut but Hellscream uses good head movement to avoid it.
Hellscream breaks the clinch.
Gron Hellscream seems to be the more aggressive standup fighter in this bout.
Wellington with a hook.
Wellington tries to clinch but Hellscream is having none of it.
Hellscream punishes Wellington's body with a nice straight punch.
Gron Hellscream is looking to throw some combinations by the looks of things.
Hellscream throws a combination that misses
and Wellington counters with a lovely straight right hand!
Hellscream closes the distance looking to clinch
and Wellington counters with a nice uppercut.
Wellington lands a lovely overhand right.
Wellington keeps the fight on the outside.
Hellscream connects with a body shot.
Hellscream tries to clinch but Wellington moves away
and Wellington counters with a lovely shot to the body.
That's four minutes gone in the round.
The crowd are starting to boo a lack of action.
Wellington lands a jab to the head.
A big left from Wellington misses.
Wellington circles away from the clinch attempt.
Wellington throws an uppercut from half a mile away. Hellscream sees it coming and avoids it easily.
Hellscream moving in and out of range nicely, whilst landing the scoring shot.
Hellscream moves to clinch but Wellington breaks away
and Wellington counters with a shot to the ribs. That looked like it hurt.
Hellscream comes forward and lands a shot to the body, then darts back out of range.
Hellscream ducks under an overhand right and circles away with a smile on his face.
The crowd thankful this round is nearly over.
A looping hook to the body misses from Wellington. Hellscream does a little dance to reset his feet.
Nice body punch from Hellscream.
Hellscream connects with a nice looking jab.
And thats the end of the round the fighters go back to their corners.
Gron Hellscream showed his class in that round. I'd imagine he'll take it on all the scorecards.
The fighters' corners scream their final instructions, as the referee calls time. Here we go, back to the action! This is the final round!

Wellington throws a jab when Hellscream was well out of range.
Wellington lands a jab. Then a cross. Then finally a nice hook to the body. Good work there by Wellington.
Wellington thuds a left hand into Hellscream's body.
Wellington lands a nice shot that snaps Hellscream's head back.
Hellscream tries to clinch but Wellington moves away
and Wellington counters by clinching up.
Wellington looks like he's developed a pretty tasty lump over his left eye. He'll need to avoid taking much more damage to that.
A frustrated look appears on Hellscream's face as he tries to break the clinch.
Hellscream blocks a punch to the side of the head.
Wellington lands a body shot.
Wellington misses with the head strike.
Wellington misses with a hook from the clinch.
Wellington swings away with an uppercut that misses.
Hellscream is trying to maintain a safe position but Wellington gets an underhook and turns Hellscream into the cage.
Wellington tries to throw a body punch but Hellscream avoids it by throwing Wellington back against the cage.
Hellscream has had enough of the clinch and is looking to separate.
Wellington misses with the head strike.
Both fighters are breathing heavily.
Wellington misses with a shot to the kidneys.
Hellscream lands a right uppercut that snaps the head of Wellington backwards.
Hellscream looking to stall.
Hellscream pushes off and circles away, back to the middle of the mat.
That's one minute gone in the round.
Hellscream tries to clinch up against the cage, rushing in the close the distance. Wellington manages to break the clinch and circles back to the middle of the mat.
Gron Hellscream seems to be getting the better of the standup.
Hellscream tries to clinch but fails miserably
and Wellington counters with a straight right hand.
Hellscream tries to clinch
and Wellington cracks him with a counter punch right on the button.
Wellington throws a right hand that misses
and Hellscream counters with a shot to the ribs. That looked like it hurt.
Hellscream needs to keep his hands up - Wellington had a free shot at his head there.
A looping hook to the body misses from Wellington. Hellscream does a little dance to reset his feet.
Wellington on the wrong end of a vicious looking body shot.
Hellscream closes the distance looking to clinch
and Wellington counters with a one-two to the body.
Hellscream lands a really nice looking cross but Wellington seems unphased.
Wellington scores with a one two! Hellscream had his feet all tangled up there and couldn't avoid the strikes.
Left hook, right uppercut from Hellscream.
That's two minutes gone in the round.
The crowd are getting on the fighters' backs, as the pace has dropped off in the last minute or so.
Hellscream uses some good footwork to avoid the body shot by Wellington.
Wellington throws a good cross that connects.
Hellscream lands a nice hook to Wellington's body. Wellington takes it in his stride and looks to land his own strikes.
Hellscream tries to grapple but his opponent circles
and Wellington counters into the clinch. Nicely done.
Wellington scores with a shoulder strike.
Wellington stays in close to his opponent and throws a right hand to the body.
Wellington tries a shoulder strike but it doesn't do any damage.
Hellscream stalling the fight.
Wellington misses with the head strike.
A frustrated look appears on Hellscream's face as he tries to break the clinch.
A quick uppercut on the inside from Wellington.
A battle for position here, against the cage.
Wellington lands with a quick shot inside that doesn't really do much damage.
Wellington lands with a short shot to the head.
That's three minutes gone in the round.
Hellscream breaks the clinch.
Hellscream closes the distance looking to clinch
and Wellington counters with a stiff right hand.
Wellington throws an ugly left hook that misses
and Hellscream counters by clinching up.
Wellington misses with a short punch on the inside.
A head punch on the inside from Wellington fails to land.
Wellington throws a head punch that misses.
Hellscream tries to stall but Wellington uses the opportunity to gain a better position.
Hellscream is looking to break free of the clinch but Wellington has double underhooks.
Wellington is working Hellscream over against the cage.
Hellscream tries to break free but Wellington pushes him back against the cage.
Hellscream wants to strike at distance but he can't break free of the clinch.
Wellington working aggressively here.
Hellscream is trying to break the clinch but Wellington is controlling him.
Hellscream trying to stall but Wellington improves his position.
Hellscream lands a right hand that snaps the head of Wellington backwards.
Hellscream takes a shot to the head.
Hellscream can't break the clinch.
Hellscream has had enough of the clinch and is looking to separate.
That's four minutes gone in the round.
The crowd are hurling abuse towards the fighters... You can hardly blame them though because there isn't a lot going on in the fight.
Hellscream has had enough of the clinch and is looking to separate.
Wellington lands with a short shot to the head.
Wellington lands a shoulder strike.
Hellscream stalling here - the referee won't stand for too much of that.
Wellington lands a right uppercut that snaps the head of Hellscream backwards.
Wellington digs a right hand into Hellscream's ribs. Those have got to be taking their toll on Hellscream's gas tank.
Wellington lands with a right to the head.
Hellscream wants to push off and get back to the center of the mat but Wellington has him pressed against the cage.
Wellington is leaning against Hellscream and scores with a nice uppercut to the body.
A left hand lands to the body for Wellington.
Wellington lands an uppercut.
Wellington pushes Hellscream back against the cage and lands a hook to the side of the head.
Hellscream is trying to break the clinch but Wellington has him pressed against the cage.
Hellscream is trying to break the clinch but Wellington has him pressed against the cage.
Wellington pushes Hellscream back against the cage and lands a hook to the side of the head.
Wellington working aggressively here.
Wellington lands with a right to the head.
The crowd thankful this round is nearly over.
Wellington lands on the inside with an uppercut.
Wellington lands a body punch in the clinch.
Wellington misses with a punch on the inside.
Wellington lands a short shot on the inside that snaps the head of Hellscream backwards.
A short right hand to the side of the head by Wellington.
And that's the end of the fight!
Richard Wellington showed his dominance in that final round.
I think Wellington has won this one but let's see what the judges have to say. Over to the ring announcer for the scorecards.
Ladies and gentlemen, after 3 rounds of action, we go to the scorecards for a decision.
Judge Andi Peters scores the fight 29:28
Judge Gordon Ramsey scores the fight 29:28
Judge Frank Skinner scores the fight 29:28
In favor of your winner, by unanimous decision... Richard Wellington!
|
|
|
|
|
|
|
|
|
|
|
|
|
|
|
|
|
|
|
|
|
|
|
| S |
C
A |
G |
S |
C
B |
G |
|
S |
C |
G |
|
energy
A | B |
|
hype
A | B |
|
pop
A | B |
|
mgr
A | B |
|
FIGHT
RATING
37% |
|
|
|
|
|
|
