|
|
PBP Commentary |
Coming up we have a lightweight MMA rules bout between Noah Ward (ranked 0 p4p, 0 weight class) and Anthony Ryan Conger (ranked 0 p4p, 0 weight class). Conger has a pretty significant injury - he really shouldn't be fighting right now but he's a warrior and he's here none the less! Over to our ring announcer for the fighter introductions!
 |
|
 |
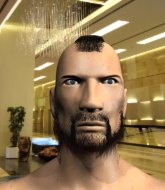
| 170 cm
22
160 lbs
0 - 0 - 0 |
|
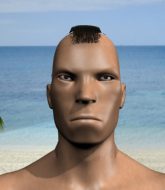
181 cm
18
155 lbs
0 - 4 - 0 |
BJJ Blue Belt
Brawler
KO power |
|
BJJ Blue Belt
Basic striking
Solid chin |
|
| |
|
Ladies and gentlemen. This fight is 3 rounds, in the lightweight division.
Introducing the fighter to my left, fighting out of the red corner.
With a record of
0 - 0 - 0, fighting out of Las Vegas, Noah Ward!
And introducing the fighter to my right, fighting out of the blue corner.
With a record of
0 - 4 - 0, fighting out of Las Vegas, Anthony Ryan Conger!
The judges for this bout are Robert Twigg, Alan Glass and Wesley Smith.

The bell rings for round one and we are underway!

Ward rushes Conger and presses him up against the cage.
Conger looks really tired already! That doesn't bode well for a good, competitive fight!

Ward breaks the clinch and we're back to striking at distance.
Ward moves into the clinch.
Ward escapes the clinch and we're back to striking.
Ward fails with an attempt to clinch.
Conger waving his hands out infront of him, looking to distract Ward.
Ward thuds a mid kick into his opponent's body. That will wear on Conger if he has to take too many more of those.
Ward is looking to clinch but Conger is avoiding it.
Ward fails to land with the punch combination there - jab, cross, hook, miss, miss, miss.
A head kick misses from Ward.
Ward has Conger up against the cage in a clinch.
Ward breaks the clinch and we return to the middle of the mat.
Ward wants to clinch.
Anthony Ryan Conger seems to be the more aggressive standup fighter in this bout.
Ward is looking to clinch but Conger is avoiding it.
Ward is looking to clinch.
Conger misses with a takedown attempt - Ward sprawls well and throws a nice strike on the way out which just misses.
Conger keeps the fight standing with a nice sprawl.
Ward wants to clinch.
Ward misses with a wild body shot.

That's one minute gone in the round.
Conger keeping a good distance there, avoiding the body shot.
Ward darts in and clinches Conger up against the cage.
Ward breaks the clinch.
Ward has taken the fight to the clinch.
Ward lands a glancing elbow in the clinch.
Ward breaks the clinch.
Ward moves into the clinch successfully.
Ward breaks the clinch and we return to the middle of the mat.
Ward fails in his attempt to clinch.
Ward is on the wrong end of a nice combination from Conger.
Conger takes a step back and watches a body kick go sailing past his mid section.
Ward misses with a head kick.
Ward tries to close the distance and clinch up but Conger swats him away and circles back towards the center.
Ward tries to clinch there but Conger circles away.
Conger throws a left and a right that both miss
and Ward counters by clinching up.
Ward manages to break the clinch.
Conger throws a combination but comes up with nothing but fresh air.
Ward rushes Conger and presses him up against the cage.
Ward misses the knee to the body. Nice hip positioning from Conger.
Ward breaks the clinch and we return to the middle of the mat.
Ward clinches up against the cage.
Ward escapes the clinch and we're back to striking.
Ward rushes Conger and presses him up against the cage.

That's two minutes gone in the round.
Ward landing some nice looking knees to the body.
Ward breaks the clinch and we return to the middle of the mat.
Conger circles away from the clinch attempt.
Ward showing good head movement there, avoiding the strikes from Conger.
Ward tries to close the distance and clinch but Conger swats him to one side with an open hand palm strike and circles away.
Ward rushes Conger and presses him up against the cage.
Ward breaks the clinch and we're back to striking at distance.
Ward looks to throw the jab but Conger is out of range.
Ward fakes with an overhand right and moves in to clinch with Conger, pushing him back against the cage.
Ward escapes the clinch and we're back to striking.
The fans in attendance giving it up for the two fighters, who have really let it all hang out in the last minute or so!
Ward closes the distance and clinches.
Ward scores a nice knee to the body.
Ward's corner are urging him to control the action in the clinch for a moment, rather than mount any serious offense. I'm sure the crowd appreciate those instructions... not.
Conger takes a knee right on the jaw!
Ward breaks from the clinch.
Ward clinches.
Ward breaks the clinch and we return to the middle of the mat.

Ward looking for a takedown here - he's got it.
Conger is looking to stand back up... there's a bit of a scramble and Ward dives into side control.

That's three minutes gone in the round.
Conger is looking to work his way out of this bad position but Ward is controlling him well.

Ward stands up and beckons Conger to his feet.
Conger throws a left and a right that both miss
and Ward counters with a body kick.
Ward doesn't manage to clinch there - Conger circles away.
Conger works over Ward's head and body with a nice combination.
Ward wants to clinch up but Conger keeps it at a distance.
Ward wants to clinch up but Conger keeps it at a distance.
Ward misses with a body shot.
Ward is looking to take this fight into the clinch.
Ward gets a clinch.
Ward manages to break the clinch.
Ward misses with a half-hearted attempt at a head kick.
Ward forces Conger back against the cage and clinches.
Ward breaks the clinch and we return to the middle of the mat.
Ward wants to clinch.
Ward takes the fight into the clinch.
Ward manages to break the clinch.

That's four minutes gone in the round.
Ward moves into the clinch.
The fighters are pressed against the cage, as the pace of the fight slows.
Ward lands a nice knee to the body.
Ward manages to break the clinch.
Ward is looking to take this fight into the clinch.
Ward closes the distance and clinches.
Ward crunches a lovely knee into Conger's ribcage.
Ward escapes the clinch and we're back to striking.
Ward tries to close the distance and clinch up but Conger swats him away and circles back towards the center.
Ward forces Conger back against the cage and clinches.
Ward using the Thai clinch to land knees to the body.
Ward landing some nice looking knees to the body.
Ward unloads a knee to the mid-section. Conger lets out a prehistoric sounding urrrrgh.
An uppercut to the body lands inside from Ward.
The crowd are loving this. Great action here.
Conger can't break the clinch.
As the round comes to an end the crowd are showing their appreciation for a great round of action.
Ward manages to break the clinch.
Ward doesn't manage to clinch there - Conger circles away.
Conger fails with the takedown.
Ward clinches.
Ward escapes the clinch and we're back to striking.
And thats the end of the round the fighters go back to their corners.
Noah Ward dominated that round.
That's time! Back to the action!

Ward fails with an attempt to clinch.
Conger keeps the fight on the outside.
Ward fails in his attempt to clinch.
The fight stays on the outside here - Ward looks like he's thinking about clinching though.
Nice takedown defense from Ward. No joy for Conger on that attempt.
Ward drives through and clinches with Conger against the cage.
Nice body punch from Ward - that landed with a thud.
Ward keeps control of Conger as he tries to wriggle out of the double underhooks.
Ward breaks the clinch and we return to the middle of the mat.
Conger misses with an uppercut
and Ward holds on and brings the fighters into a clinch.
Conger is trying to slow down the pace in the clinch, to catch his breath.
Ward breaks the clinch and we return to the middle of the mat.
Ward thuds his shin into the meat of Conger's side.
Ward throws a nice head kick!
Ward tries to clinch but is not successful on this occasion.
Conger fails with the takedown
and Ward holds on and brings the fighters into a clinch.
Noah Ward has scored more points in the clinch so far.
Ward breaks the clinch and we're back to striking at distance.
Ward tries to clinch up.
Conger is breathing heavily.
Ward tries a switch kick but it misses it's target.
Ward is looking to clinch.
The fight stays on the outside here - Ward looks like he's thinking about clinching though.
That's one minute gone in the round.
Ward throws a left and a right that both miss
and Conger counters with a quick right hand to the jaw.
Ward pulls out of a head kick attempt.
A decent looking body kick lands there for Ward.
Ward moves into the clinch successfully.
Ward breaks the clinch and we're back to striking at distance.
Ward rushes Conger and presses him up against the cage.
Ward manages to break the clinch.
Ward looking for a takedown here - he's got it.
Conger is working an open guard so Ward takes the opportunity to get back to his feet.
Nice takedown defense from Conger. No joy for Ward on that attempt.
Conger tries to clinch but Ward is having none of it.
Conger tries to keep at a distance but Ward has taken the fight into the clinch.
Come on Ward - let's have some action - none of this stalling nonsense.
Ward breaks the clinch and we return to the middle of the mat.
Ward tries to clinch up
and Conger counters with a three punch combination, finished off with a leg kick. Nice work.
Ward darts in and clinches Conger up against the cage.
The fans in attendance giving it up for the two fighters, who have really let it all hang out in the last minute or so!
Ward escapes the clinch and we're back to striking.
Conger keeps the fight on the outside.
That's two minutes gone in the round.
Ward fails with the takedown.
Ward takes a swing at Conger's ribcage but misses.
Ward rushes Conger and pushes him back against the cage in a clinch.
Ward breaks the clinch and we're back to striking at distance.
Ward is really dominating this fight. Is there anything that Conger can do to turn this around?
Ward tries to clinch but is not successful on this occasion.
Ward drives through and clinches with Conger against the cage.
Ward landing some nice looking knees to the body.
Ward escapes the clinch and we're back to striking.
Ward tries to clinch there but Conger circles away.
Ward throws a quick head kick that skims the top of Conger's head.
Conger tries to close the distance and clinch up but Ward swats him away and circles back towards the center.
Ward fails in his attempt to clinch.
Ward tries to clinch up but Conger circles away and keeps his distance.
Ward is looking to clinch.
Ward tries to clinch there but Conger circles away.
Conger shoots for a takedown but Ward saw that one coming a mile off and avoided it easily.
Noah Ward has stuffed three takedown attempts in the round now. That's going to take a lot out of Anthony Ryan Conger.
Ward tries to close the distance and clinch but Conger swats him to one side with an open hand palm strike and circles away.
Ward showing good head movement there, avoiding the strikes from Conger.
Ward clinches but Conger breaks the clinch
and Conger holds on and brings the fighters into a clinch.
Conger wants to get back to striking at distance but Ward won't allow it.
Conger takes a knee right on the jaw!
Conger is trying desperately to land a takedown but Ward is having absolutely none of it. This is turning into a bit of a nightmare for Conger.
That's three minutes gone in the round.
Ward landing some nice looking knees to the body.
Ward breaks the clinch and we return to the middle of the mat.
Conger swats away the attempt to clinch by Ward.
Ward throws a wild body kick that Conger sees coming a mile off.
Ouch! a nice leg kick from Ward, right into the meat.
Ward is looking to take this fight into the clinch.
Ward fails in his attempt to clinch.
Ward pushes Conger up against the cage in a clinch.
Ward breaks the clinch and we're back to striking at distance.
Ward tries to clinch there but Conger circles away.
Ward fails to land the takedown.
Ward fails miserably with a takedown attempt.
Noah Ward is winning the standup battle so far.
Ward fails with the takedown.
Ward tries to clinch there but Conger circles away.
Ward closes the distance and clinches.
Ward scores a nice knee to the body.
We've seen a great period of action over the last minute or so - credit to both fighters for leaving it all in the cage!
Ward landing some nice looking knees to the body.
Ward breaks from the clinch.
Noah Ward is looking to throw some combinations by the looks of things.
Ward wants to clinch up but Conger keeps it at a distance.
That's four minutes gone in the round.
Ward darts in and clinches Conger up against the cage.
Ward leaning against his opponent.
Ward breaks the clinch and we return to the middle of the mat.
Ward shoots in but no luck this time.
Ward closes the distance and presses his opponent up against the cage.
Ward holding his opponent close, against the cage.
Ward breaks the clinch and we return to the middle of the mat.
Ward tries to clinch up.
Conger swats away the attempt to clinch by Ward.
Some wild striking there from Conger.
Conger swats away the attempt to clinch by Ward.
Conger rushes Ward and presses him up against the cage.
Ward manages to break the clinch.
Ward scores with a nice body kick.
As the round comes to an end the crowd are showing their appreciation for a great round of action.
Ward tries to grapple but his opponent circles
and Conger counters with a nice double leg into guard.
Ward scrambles and gets back to his feet.
Ward darts in trying to clinch
and Conger counters by moving into the clinch. Good anticipation by Conger.
And thats the end of the round the fighters go back to their corners.
Noah Ward dominated that second round.
The referee calls time. The cornermen exit stage left and we're back to business. Let's hear some noise people - this is the final round!

Ward rushes Conger and pushes him back against the cage in a clinch.
Ward breaks from the clinch.
Ward tries to close the distance and clinch but Conger swats him to one side with an open hand palm strike and circles away.
Conger tries to keep at a distance but Ward has taken the fight into the clinch.
Ward breaks the clinch.
Conger is looking to clinch but Ward is avoiding it.
Ward forces Conger back against the cage and clinches.
Ward breaks from the clinch.
Ward scores with a body shot.
Conger stuffs the takedown attempt from Ward. Ward gets slowly back to his feet.
Nice takedown defense from Conger. No joy for Ward on that attempt.
Ward tries a head kick but it misses.
Ward moves in looking to clinch but Conger pushes him off.
Ward cracks the inside of Conger's front leg.
Ward wants to clinch.
Ward swings away but doesn't land with a series of punches.
Both fighters are breathing heavily.
Conger misses with a takedown attempt - Ward sprawls well and throws a nice strike on the way out which just misses.
Ward darts in and clinches Conger up against the cage.
Ward breaks the clinch.
That's one minute gone in the round.
Ward tries to close the distance and clinch up against the cage but Conger paws at him with a jab and circles away.
Ward misses with a body kick.
Ward fails in his attempt to clinch.
Ward tries to clinch but Conger is having none of it.
Conger tries to grapple but his opponent circles
and Ward counters by moving into the clinch.
Ward lands an elbow just above Conger 's eye.
Ward stalling against the cage.
Ward escapes the clinch and we're back to striking.
Ward wants to clinch.
Conger looks frustrated there after his takedown attempt is stuffed easily.
Conger keeping a good distance there, avoiding the body shot.
Ward rushes Conger and presses him up against the cage.
An uppercut to the body lands inside from Conger.
Ward breaks the clinch and we return to the middle of the mat.
Ward clinches with his opponent.
Ward lands a knee to the body.
Ward breaks the clinch and we're back to striking at distance.
Ward gets to the clinch - let's see what his plan is here.
That's two minutes gone in the round.
Ward breaks the clinch.
Ward is looking to clinch.
Ward closes the distance and clinches.
Ward escapes the clinch and we're back to striking.
Ward looks to score with a combo but nothing lands.
Ward circles away from the clinch attempt
and Ward moves into the clinch.
Ward landing some nice looking knees to the body.
Ward breaks the clinch and we're back to striking at distance.
Ward throws a sloppy head kick and Conger moves out of range easily.
Ward clinches up against the cage.
Conger holding his opponent close, against the cage.
Ward escapes the clinch and we're back to striking.
Conger wants to clinch up but Ward keeps it at a distance.
Ward throws a head kick that half lands.
The crowd are loving this. Great action here.
Ward looks to clinch
and Conger counters with a flying knee. Nice.
Ward tries to close the distance and clinch but Conger swats him to one side with an open hand palm strike and circles away.
Conger moves out of range as Ward throws a body kick.
Ward wants to clinch.
The fight moves into the clinch position.
That's three minutes gone in the round.
Ward manages to break the clinch.
Conger shoots in for a takedown but doesn't get it.
Noah Ward has stuffed three takedown attempts in the round now. That's going to take a lot out of Anthony Ryan Conger.
Ward lets loose with a powerful body kick. Conger will feel that in the morning.
Ward wants to clinch up but Conger keeps it at a distance.
Ward tries to clinch but is not successful on this occasion.
Ward rushes Conger and presses him up against the cage.
Conger fails to land with a short punch on the inside.
Ward breaks the clinch and we return to the middle of the mat.
Ward tries to close the distance and clinch but Conger swats him to one side with an open hand palm strike and circles away.
Ward gets to the clinch - let's see what his plan is here.
Ward breaks the clinch and we're back to striking at distance.
A head kick misses from Ward.
Ward tries to clinch up.
Ward tries to close the distance and clinch up but Conger swats him away and circles back towards the center.
Ward clinches up with Conger and pushes him back against the cage.
Ward breaks from the clinch.
Conger keeps the fight on the outside.
Crunch! Ward slams his shin into Conger's torso.
Conger avoids the clinch attempt nicely.
Ward looks for a takedown here. Will he get it? Conger is fending him off so far but Ward persists. Nope, Conger circles away and we're back to standing.
Ward forces Conger back against the cage and clinches.
Ward breaks the clinch and we're back to striking at distance.
Ward fails in his attempt to clinch.
That's four minutes gone in the round.
Ward pushes Conger up against the cage in a clinch.
Ward breaks from the clinch.
Ward tries to clinch but Conger moves out of range.
Conger keeps the fight on the outside.
Ward ducks down and throws a hook to the body but Conger moves away.
Ward has managed to clinch.
Ward escapes the clinch and we're back to striking.
Conger's corner calls for a 1,2 combination and Conger duly obliges.
Ward throws a head kick that half lands.
Wooooo! Give it up for these two warriors! They are putting on a show!
Ward misses with a half-hearted attempt at a head kick.
Ward tries to close the distance and clinch up but Conger swats him away and circles back towards the center.
A punch combination from Conger misses.
Ward pulls out of a head kick attempt.
Ward clinches up with Conger and pushes him back against the cage.
Ward scores with a hook to the body.
A left hand lands to the body for Ward.
Ward breaks the clinch.
Ward fails in his attempt to clinch.
As the round comes to an end the crowd are showing their appreciation for a great round of action.
Ward rushes Conger and presses him up against the cage.
Ward lands a nice knee to the body.
Ward breaks the clinch.
Conger keeps the fight on the outside.
Anthony Ryan Conger has stepped it up - he knows he needs a finish here!
Ward moves into the clinch successfully.
Nice body punch from Conger - that landed with a thud.
And that's the end of the fight!
Noah Ward showed his dominance in that final round.
Well Ward has outscored his opponent in every aspect of the fight today. Only a scarily incompetent judge or two will keep him from a well deserved win... Over to the ring announcer for the scorecards.
Ladies and gentlemen, after 3 rounds of action, we go to the scorecards for a decision.
Judge Robert Twigg scores the fight 30:26
Judge Alan Glass scores the fight 30:26
Judge Wesley Smith scores the fight 30:26
In favor of your winner, by unanimous decision... Noah Ward!
|
|
|
|
|
|
|
|
|
|
|
|
|
|
|
|
|
|
|
|
|
|
|
| S |
C
A |
G |
S |
C
B |
G |
|
S |
C |
G |
|
energy
A | B |
|
hype
A | B |
|
pop
A | B |
|
mgr
A | B |
|
FIGHT
RATING
100% |
|
|
|
|
|
|

